背景
TWaver HTML5支持栅格图片,颜色,颜色渐变,基本形状(矩形,星形…)以及图片与形状结合作背景的功能。TWaver HTML5的背景属性是设置在Model层上的,ElementBox和拓扑网元都可以设置自己的背景,因为拓扑图显示当前子网的网元,所以本章所说的Network背景实指ElementBox和Subnetwork的背景,前者是顶层子网背景,后者指各个子网的背景。背景属性设置在模型层,其目的是方便数据的序列化,因为我们认为背景也是数据的一部分,不应该丢失。当然用户也可以在View层上按CSS样式给Network设置背景色,如:network.getView().style.backgroundColor = 0x00ff00。TWaver HTML5背景图通过设置数据元素的样式来进行,
首先需要设置背景类型(颜色背景,图片背景,图形背景或图片和图形结合做背景…),再设置背景参数(图片注册名称,图形类型,颜色,渐变类型,渐变颜色,间隙,对齐方式…)。
背景类型
("background.type","none");//'none','image','vector','image.vector','vector.image'
背景样式属性
    ("background.image",null);
    ("background.type","none"); //'none','image','vector','image.vector','vector.image'
    ("background.outline.width",-1);
    ("background.outline.color",null);
    ("background.vector.padding",0);
    ("background.image.padding",0);
    ("background.image.stretch","fill");//"fill","tile","none"
    ("background.vector.fill",null);
    ("background.vector.fill.color",null);
    ("background.vector.gradient",false);
    ("background.vector.gradient.color",null);
    ("background.vector.shape","rectangle");
    ('background.outline.pattern', null, 'array.number');
背景图片
图片名字需要先注册
    box.setStyle('background.type', 'image');
    box.setStyle('background.image', 'twaver');
    box.setStyle('background.image.scope','viewport');//'viewsize','viewport','rootcanvas'
    box.setStyle('background.image.stretch', 'fill');//'tile','none','fill'
纯色背景
	  box.setStyle('background.type', 'vector');
      box.setStyle("background.vector.fill",true);
      box.setStyle("background.vector.fill.color",twaver.Util.randomColor());
      box.setStyle("background.vector.shape","roundrect");
      box.setStyle('background.outline.width', 10);
      box.setStyle('background.outline.color', 'red');
样例:
/*
* @Descripttion:
* @version:
* @Author: ZhangJunQing
* @Date: 2022-04-18 14:44:05
* @LastEditors: ZhangJunQing
* @LastEditTime: 2022-04-29 10:18:33
*/
import React, {
useEffect, useState } from 'react'
import {
returnElementBoxAndNetworkFun,
returnNodeFun,
returnLineFun,
returnRegisterImage,
returnGroupFun
} from './utils'
const twaver = require('twaver');
// const demo = require('demo');
const Demo = () => {
const [network, setnetwork] = useState({
})
const init = () => {
const [box, network] = returnElementBoxAndNetworkFun()
setnetwork(_ => network)
network.invalidateElementUIs();
document.getElementById("testID").appendChild(network.getView());
// 设置最初的大小
network.adjustBounds({
x: 0, y: 0, width: 800, height: 800 });
// network.getView().style.backgroundColor = "#fff"
network.getView().style.border = "2px solid #ccc"
// return
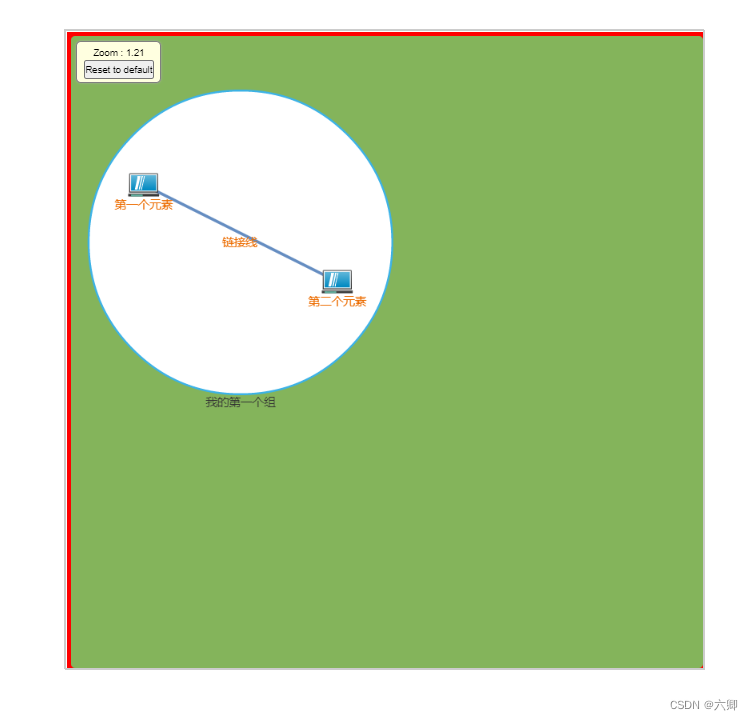
// 设置纯色背景
box.setStyle('background.type', 'vector');
box.setStyle("background.vector.fill", true);
box.setStyle("background.vector.fill.color", twaver.Util.randomColor());
box.setStyle("background.vector.shape", "roundrect");
box.setStyle('background.outline.width', 10);
box.setStyle('background.outline.color', 'red');
let node1 = returnNodeFun(box, {
name: "第一个元素", location: {
x: 100, y: 200 } })
let node2 = returnNodeFun(box, {
name: "第二个元素", location: {
x: 300, y: 300 } })
let group = returnGroupFun(box, {
name: "我的第一个组", location: {
x: 200, y: 300 } })
group.setExpanded(true)
group.s('group.shape', 'circle');//设置分组边框形状
group.s('group.fill.color', "#ffffff");//填充色FEF3E2 E0FFFF
group.s('group.outline.color', '#3cb2e6');//F8C374 #0099FF #99caea
group.s('group.outline.width', '2');
group.s('vector.outline.pattern', [10, 0]);//轮廓
group.s('group.deep', 0);
group.s('select.style', 'border');
group.s('select.width', 1);
group.s('select.join', 'round');
group.s('select.color', '#ffffff');
group.s('label.color', '#323232');
node1.setParent(group)
node2.setParent(group)
let link1 = returnLineFun(node1, node2)
link1.setName('链接线')
box.add(link1)
}
useEffect(init, [])
return (
<>
<p style={
{
fontSize: "20px", paddingLeft: "50px", poaddingTop: "50px" }}>tips: </p>
<ul style={
{
fontSize: "20px", paddingLeft: "50px" }}>
<li>背景</li>
</ul>
{
/* 画布元素需要开启定位 不然生成的图元坐标点会偏移 */}
<div id="testID" style={
{
width: "800px", height: "800px", border: "1px solid #ccc", position: "relative", margin: "0 auto" }}></div>
</>
)
}
export default Demo
学习参考:TWaver Documents