一、Spring Security简介
Spring Security是为基于Spring的应用程序提供声明式安全保护的安全性框架,它提供了完整的安全性解决方案,能够在web请求级别和方法调用级别处理身份证验证和授权。因为基于Spring框架,所以Spring Security充分利用了依赖注入和面向切面的技术。
Spring Security主要是从两个方面解决安全性问题:
-
web请求级别:使用Servlet规范中的过滤器(Filter)保护Web请求并限制URL级别的访问。
-
方法调用级别:使用Spring AOP保护方法调用,确保具有适当权限的用户才能访问安全保护的方法。
想深入了解Spring Security的相关概念与实现原理,可点击传送门 ==》Spring Security的基本原理
二、Spring Security之Web请求级别的安全性Demo
1、新建一个Spring项目,pom里添加springsecurity的依赖。
<dependency>
     <groupId>org.springframework.boot</groupId>
     <artifactId>spring-boot-starter-security</artifactId>
</dependency>
2、创建Spring Security的配置类
package com.spring.security.springsecurity.config;

import org.springframework.context.annotation.Configuration;
import org.springframework.security.config.annotation.authentication.builders.AuthenticationManagerBuilder;
import org.springframework.security.config.annotation.web.builders.HttpSecurity;
import org.springframework.security.config.annotation.web.configuration.EnableWebSecurity;
import org.springframework.security.config.annotation.web.configuration.WebSecurityConfigurerAdapter;
import org.springframework.security.crypto.bcrypt.BCryptPasswordEncoder;

@Configuration
@EnableWebSecurity  //启用Web安全功能
public class SecurityConfig extends WebSecurityConfigurerAdapter {
    @Override
    protected void configure(HttpSecurity http) throws Exception {
        http
                .authorizeRequests()
                //访问"/"和"/home"路径的请求都允许
                .antMatchers("/", "/home","/staff","/staff/*")
                .permitAll()
                //而其他的请求都需要认证
                .anyRequest()
                .authenticated()
                .and()
                //修改Spring Security默认的登陆界面
                .formLogin()
                .loginPage("/login")
                .permitAll()
                .and()
                .logout()
                .permitAll();
    }

    @Override
    protected void configure(AuthenticationManagerBuilder auth) throws Exception{
        //基于内存来存储用户信息
        auth.inMemoryAuthentication().passwordEncoder(new BCryptPasswordEncoder())
                .withUser("user").password(new BCryptPasswordEncoder().encode("123")).roles("USER").and()
                .withUser("admin").password(new BCryptPasswordEncoder().encode("456")).roles("USER","ADMIN");
    }
}
代码解析:
@EnableWebSecurity注解:启用Web安全功能(但其本身并没有什么用处,Spring Security的配置类还需实现WebSecurityConfigurer或继承WebSecurityConfigurerAdapter类,本Demo中采用后者,因为更简单去配置使用)。
@EnableWebMvcSecurity注解:在Spring 4.0中已弃用。
WebSecurityConfigurerAdapter类:可以通过重载该类的三个configure()方法来制定Web安全的细节。
1、configure(WebSecurity):通过重载该方法,可配置Spring Security的Filter链。
2、configure(HttpSecurity):通过重载该方法,可配置如何通过拦截器保护请求。
保护路径的配置方法
方法
能够做什么
access(String)
如果给定的SpEL表达式计算结果为true,就允许访问
anonymous()
允许匿名用户访问
authenticated()
允许认证过的用户访问
denyAll()
无条件拒绝所有访问
fullyAuthenticated()
如果用户是完整认证的话(不是通过Remember-me功能认证的),就允许访问
hasAnyAuthority(String…)
如果用户具备给定权限中的某一个的话,就允许访问
hasAnyRole(String…)
如果用户具备给定角色中的某一个的话,就允许访问
hasAuthority(String)
如果用户具备给定权限的话,就允许访问
hasIpAddress(String)
如果请求来自给定IP地址的话,就允许访问
hasRole(String)
如果用户具备给定角色的话,就允许访问
not()
对其他访问方法的结果求反
permitAll()
无条件允许访问
rememberMe()
如果用户是通过Remember-me功能认证的,就允许访问
Spring Security 支持的所有SpEL表达式如下:
安全表达式
计算结果
authentication
用户认证对象
denyAll
结果始终为false
hasAnyRole(list of roles)
如果用户被授权指定的任意权限,结果为true
hasRole(role)
如果用户被授予了指定的权限,结果 为true
hasIpAddress(IP Adress)
用户地址
isAnonymous()
是否为匿名用户
isAuthenticated()
不是匿名用户
isFullyAuthenticated
不是匿名也不是remember-me认证
isRemberMe()
remember-me认证
permitAll
始终true
principal
用户主要信息对象
3、configure(AuthenticationManagerBuilder):通过重载该方法,可配置user-detail(用户详细信息)服务。
配置用户详细信息的方法
方法
描述
accountExpired(boolean)
定义账号是否已经过期
accountLocked(boolean)
定义账号是否已经锁定
and()
用来连接配置
authorities(GrantedAuthority…)
授予某个用户一项或多项权限
authorities(List)
授予某个用户一项或多项权限
authorities(String…)
授予某个用户一项或多项权限
credentialsExpired(boolean)
定义凭证是否已经过期
disabled(boolean)
定义账号是否已被禁用
password(String)
定义用户的密码
roles(String…)
授予某个用户一项或多项角色
用户信息存储方式共有三种:
**1、使用基于内存的用户存储:**通过inMemoryAuthentication()方法,我们可以启用、配置并任意填充基于内存的用户存储。并且,我们可以调用withUser()方法为内存用户存储添加新的用户,这个方法的参数是username。withUser()方法返回的是UserDetailsManagerConfigurer.UserDetailsBuilder,这个对象提供了多个进一步配置用户的方法,包括设置用户密码的password()方法以及为给定用户授予一个或多个角色权限的roles()方法。需要注意的是,roles()方法是authorities()方法的简写形式。roles()方法所给定的值都会添加一个ROLE_前缀,并将其作为权限授予给用户。因此上诉代码用户具有的权限为:ROLE_USER,ROLE_ADMIN。而借助passwordEncoder()方法来指定一个密码转码器(encoder),我们可以对用户密码进行加密存储。
**2、基于数据库表进行认证:**用户数据通常会存储在关系型数据库中,并通过JDBC进行访问。为了配置Spring Security使用以JDBC为支撑的用户存储,我们可以使用jdbcAuthentication()方法,并配置他的DataSource,这样的话,就能访问关系型数据库了。
**3、基于LDAP进行认证:**为了让Spring Security使用基于LDAP的认证,我们可以使用ldapAuthentication()方法。
3、Controller层代码与前端代码
SecurityController代码如下:
package com.spring.security.springsecurity.controller;

import org.springframework.stereotype.Controller;
import org.springframework.web.bind.annotation.GetMapping;

@Controller
public class SecurityController {

    @GetMapping(value = {"/home","/"})
    public String home(){
        return "home";
    }

    @GetMapping(value = "/hello")
    public String hello(){
        return "hello";
    }

    @GetMapping(value = "/login")
    public String login(){
        return "login";
    }
}
home.html
<!DOCTYPE html>
<html xmlns="http://www.w3.org/1999/xhtml"
xmlns:th="http://www.thymeleaf.org"
xmlns:sec="http://www.thymeleaf.org/thymeleaf-extras-springsecurity3">
    <head>
        <title>Spring Security Example</title>
    </head>
    <body>
        <h1>Welcome!</h1>

        <p>Click <a th:href="@{/hello}">here</a> to see a greeting.</p>
    </body>
</html>
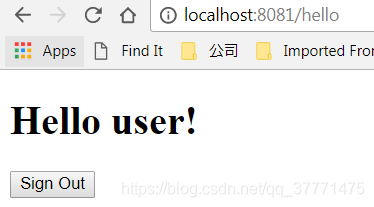
hello.html
<!DOCTYPE html>
<html xmlns="http://www.w3.org/1999/xhtml" xmlns:th="http://www.thymeleaf.org"
      xmlns:sec="http://www.thymeleaf.org/thymeleaf-extras-springsecurity3">
    <head>
        <title>Hello World!</title>
    </head>
    <body>
        <h1 th:inline="text">Hello [[${#httpServletRequest.remoteUser}]]!</h1>
        <form th:action="@{/logout}" method="post">
            <input type="submit" value="Sign Out"/>
        </form>
    </body>
</html>
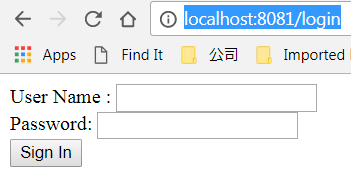
login.html
<!DOCTYPE html>
<html xmlns="http://www.w3.org/1999/xhtml" xmlns:th="http://www.thymeleaf.org"
      xmlns:sec="http://www.thymeleaf.org/thymeleaf-extras-springsecurity3">
    <head>
        <title>Spring Security Example </title>
    </head>
    <body>
        <div th:if="${param.error}">
            Invalid username and password.
        </div>
        <div th:if="${param.logout}">
            You have been logged out.
        </div>
        <form th:action="@{/login}" method="post">
            <div><label> User Name : <input type="text" name="username"/> </label></div>
            <div><label> Password: <input type="password" name="password"/> </label></div>
            <div><input type="submit" value="Sign In"/></div>
        </form>
    </body>
</html>
4、运行结果与分析
当我们直接访问localhost:8080/hello时,此时页面将跳转到http://localhost:8080/login,这是因为SecurityConfig类配置了仅对 “/” 和 "/home"路径的请求无须登陆即可访问,而其他的请求需要认证。(注:这里端口我因为做了调整,改为了8081,大家照常访问8080端口即可。)
此时我们在login界面输入,我们在SecurityConfig中配置基于内存存储的用户名及密码,将成功跳转到hello界面
三、Spring Security之方法调用级别的安全性Demo
Spring Security提供了三种不同的安全注解:
- Spring Security自带的@Secured注解;
- JSR-250的@RolesAllowed注解;
- 表达式驱动的注解,包括@PreAuthorize、@PostAuthorize、@PreFilter和@PostFilter。
注解
描述
@PreAuthorize
在方法调用之前,基于表达式的计算结果来限制对方法的访问
@PostAuthorize
允许方法调用,但是如果表达式计算结果为false,将抛出一个安全性异常
@PostFilter
允许方法调用,但必须按照表达式来过滤方法的结果
@PreFilter
允许方法调用,但必须在进入方法之前过滤输入值
1、启用基于注解的方法安全性
在Spring中,如果要启用基于注解的方法安全性,关键之处在于要在配置类上使用@EnableGlobalMethodSecurity,如:
package com.spring.security.springsecurity.config;

import org.springframework.context.annotation.Configuration;
import org.springframework.security.config.annotation.method.configuration.EnableGlobalMethodSecurity;
import org.springframework.security.config.annotation.method.configuration.GlobalMethodSecurityConfiguration;

@Configuration
@EnableGlobalMethodSecurity(securedEnabled = true,jsr250Enabled = true,prePostEnabled = true)
public class MethodSecurityConfig extends GlobalMethodSecurityConfiguration {

}
这里我们设置了securedEnabled = true,此时Spring将会创建一个切点,并将带有@Secured注解的方法防入切面中。同理,jsr250Enabled = true 与 prePostEnabled = true,分别表示启用@RolesAllowed与表达式驱动的注解。
此时配置好MethodSecurityConfig类后,我们可以在上诉代码的基础上,在SecurityController中添加一个方法:
    @GetMapping(value = "/admin")
    @Secured("ROLE_ADMIN")
    public String admin(){
        return "admin";
    }
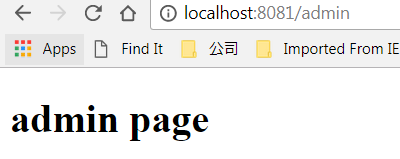
admin.html界面如下:
<!DOCTYPE html>
<html lang="en">
<head>
  <meta charset="UTF-8">
  <title>admin</title>
</head>
<body>
    <h1>admin page</h1>
</body>
</html>
此时我们如何以user用户去访问http://localhost:8081/admin路径,将发生403错误。

而如果以admin用户去访问http://localhost:8081/admin路径,将显示以下界面,表示成功访问。