目录
设置敌人的基本属性和状态
下载rpg monster包并导入,之后要更新一下材质。并写入代码。
using System.Collections;
using System.Collections.Generic;
using UnityEngine;
using UnityEngine.AI;

public enum EnemyStates { GUARD,PATROL,CHASE,DEAD}
[RequireComponent(typeof(NavMeshAgent))]
public class EnemyController : MonoBehaviour
{
    public EnemyStates enemyStates;
    private NavMeshAgent agent;
    // Start is called before the first frame update
    void Start()
    {
        agent = GetComponent<NavMeshAgent>();
    }

    // Update is called once per frame
    void Update()
    {
        SwitchState();
    }
    void SwitchState()//实现一个简单的状态切换
    {
        switch (enemyStates)
        {
            case EnemyStates.GUARD:
                break;
            case EnemyStates.PATROL:
                break;
            case EnemyStates.CHASE:
                break;
            case EnemyStates.DEAD:
                break;
        }
    }
}

添加tag和layer。
需要为敌人也实现遮挡剔除,因此在pipeline中设定的层除了player多一个enemy即可。
攻击敌人
再设定一个点击事件:
![]()

在playerController中注册该函数:

MoveToEnemy像这种函数可以使用alt+enter填充

可以使用alt+enter实现
给玩家添加攻击动画,注意从攻击到跑步的切换一定要将exit time设置为1,这样才能使得动画播放完毕。

StopAllCoroutines();//使得人物在走向目标的过程中也可以通过点击去往其他地方,打断操作
agent.isStopped = false;//加上这条语句,就解决了人物一旦攻击之后就无法行动的问题
随后在playercontroller中实现攻击后朝敌人移动的代码:
void EventAttack(GameObject target)
    {

        if (target != null)
        {
            attackTarget = target;
            StartCoroutine(MoveToAttackTarget());
        }
    }

    IEnumerator MoveToAttackTarget()
    {
        //为防止这次点击后下次agent无法行动了,在这次点击的开头使用复原
        agent.isStopped = false;
        transform.LookAt(attackTarget.transform);
        while (Vector3.Distance(transform.position, attackTarget.transform.position) > 1)
        {
            agent.destination = attackTarget.transform.position;
            yield return null;
        }
        //当到达指定地点时,命令agent停止
        agent.isStopped = true;

        //攻击具有cd时间
        if (lastAttackTime < 0)
        {
            animator.SetTrigger("Attack");
            lastAttackTime = 0.5f;
        }
    }

}
走向敌人的方式通过协程进行,加入lastAttackTime用于攻击cd的冷却。
由于导航系统自带的destination会不断移动,所以需要实现当距离为1时停止移动的话使用agent
isStopped为true来执行。相对应的,该协程的初始需要设定isStop为false。
bug:
执行以上的代码后会发现,人物一旦攻击敌人之后再也无法通过点击地面移动,这是因为isStopped设置为了false,所以需要在点击地面移动
效果:
 (鼠标指针显示不出来)
此时MouseManger
using System.Collections;
using System.Collections.Generic;
using UnityEngine;
using UnityEngine.Events;
using System;

//[System.Serializable]
//public class EventVector3 : UnityEvent<Vector3> { }//声明一个事件
public class MouseManager : MonoBehaviour
{
    //public EventVector3 OnMouseClicked;
    public event Action<Vector3> OnMouseClicked;
    public event Action<GameObject> OnEnemyClicked;

    RaycastHit hitInfo;

    public static MouseManager Instance;

    public Texture2D point, doorway, attack, target, arrow;
    private void Awake()
    {
        if (Instance != null) Destroy(gameObject);
        Instance = this;
    }
    private void Update()
    {
        SetCursorTexture();
        MouseControl();
    }
    void SetCursorTexture()
    {
        Ray ray = Camera.main.ScreenPointToRay(Input.mousePosition);//获取射线
        //将射线信息输出给hitInfo
        if (Physics.Raycast(ray, out hitInfo)) {
            switch (hitInfo.collider.gameObject.tag)
            {
                case "Ground":
                    Cursor.SetCursor(target, new Vector2(16,16), CursorMode.Auto);
                    break;
                case "Enemy":
                    Cursor.SetCursor(attack, new Vector2(16, 16), CursorMode.Auto);
                    break;
            }
        }
    }
    void MouseControl()
    {
        if (Input.GetMouseButtonDown(0) && hitInfo.collider != null)
        {
            if (hitInfo.collider.CompareTag("Ground"))
            {
                OnMouseClicked?.Invoke(hitInfo.point);
                //点击之后将该位置传给OnMouseClicked这个事件注册的函数并进行调用
            }
            if (hitInfo.collider.CompareTag("Enemy"))
            {
                OnEnemyClicked?.Invoke(hitInfo.collider.gameObject);
                //点击之后将该位置传给OnMouseClicked这个事件注册的函数并进行调用
            }
        }
    }
}
时设定isStopped为true。

除此之外还有一个bug,当进入走向攻击敌人的状态时无法移动,只能攻击完了才能移动,在此添加即可:

随后即可实现攻击敌人:
相机的Freelook
先将cvm关掉,启用cinemachine中的freelook

将人物拖拽进去,此时可以看到有三个红圈

有三个圈,代表摄像机可以在这三个维度中自由的旋转:


运行游戏即可实现场景的视角切换。
我们将y轴的移动用鼠标滚轮实现(这个名称是源于setting里面的input manager里的名称设定)


修改三个圈的大小
三个圈的实际使用起来的效果如下所示:
如果想在修改中保留数值:
如果想人物移动时相机跟着人物移动的方向可以修改bindingmode:
此处一个小细节,添加一些TODO: FIXME:作为待办事项

敌人的追击
为敌人添加检测玩家的代码:
    bool FoundPlayer()
    {
        var colliders = Physics.OverlapSphere(transform.position, sightRadius);

        foreach(var target in colliders)
        {
            if (target.CompareTag("Player"))
            {
                return true;
            }
        }

        return false;
    }
在切换状态时调用:

别忘了给玩家添加碰撞体
补充一点,我们在这里对hierarchy中的player和enemy进行了修改,想要使这些修改覆盖到project里面的可以使用override。

接下来实现chase,在写之前可以通过这样的方式记录要做的事情,方便整理逻辑。
接下来给敌人添加动画控制器,由于敌人有很多运动,运动的切换全看逻辑而不是像player那样的由用户输入,因此此处给enemy的动画添加层级,方便管理。
新建一个攻击层

weight代表权重,override代表覆盖,additive代表叠加。

在attack layer中的基础状态设置为空,因为这样只有在进入攻击状态时,攻击状态的动画才会覆盖普通状态的动画。
Chase和Follow分别作为上面那两个切换的条件。
到此就可以实现敌人的追击了。
加入画线代码使得监视范围可视化。
    private void OnDrawGizmosSelected()//有selected代表被选中才会有圆
    {
        Gizmos.color = Color.blue;
        Gizmos.DrawWireSphere(transform.position, sightRadius);
    }
接下来实现敌人的巡逻,写一个随即范围
    void GetNewWayPoint()
    {
        float RandomX = Random.Range(-patrolRange, patrolRange);
        float RandomZ = Random.Range(-patrolRange, patrolRange);
        wayPoint = new Vector3(RandomX, transform.position.y, RandomZ) + transformPos;
    }
书写巡逻的函数:
            case EnemyStates.PATROL:
                isChase = false;
                agent.speed = speed * 0.5f;//设置速度为0.5,用乘法的话运算效率比除法高
                if (Vector3.Distance(wayPoint, transform.position) <= agent.stoppingDistance)
                {
                    //如果到了一个新的地方则获取新的巡逻点
                    isWalk = false;
                    GetNewWayPoint();
                }
                else
                {
                    isWalk = true;
                    agent.destination = wayPoint;
                }
                break;
stopping distance是agent里面自带的:

初始化的时候设定巡逻状态:
    void Start()
    {
        if (isGuard)
        {
            enemyStates = EnemyStates.GUARD;
        }
        else
        {
            enemyStates = EnemyStates.PATROL;
            GetNewWayPoint();
        }
    }
这里运行的时候不小心出了一个bug,到最后发现是speed没有初始化。
接下来就可以实现怪物的移动,但是存在一个问题,如果因为障碍物的原因导致某个地方无法去到,

这个api可以看是否能到目标点,能到则返回true:

加入这段代码即可:

这样人物就不会撞墙了
接下来实现敌人到某个点后会停留,然后巡逻

(记得两个都需要初始化)
每到一个需要巡逻的点后会停留,停留时间够长则到新的点

由getNewWayPoint执行恢复初始化

效果如下:

但是我们注意到一点,敌人远离玩家的时候,脱战时只会停留在原地:

我们可以实现一个敌人此时会在原地站一会,如果时间到则回归到原来的状态:
此时即可实现脱战后回到巡逻点:
此时enemy controller完整代码如下:
using System.Collections;
using System.Collections.Generic;
using UnityEngine;
using UnityEngine.AI;

public enum EnemyStates { GUARD,PATROL,CHASE,DEAD}
[RequireComponent(typeof(NavMeshAgent))]
public class EnemyController : MonoBehaviour
{
    private EnemyStates enemyStates;
    private NavMeshAgent agent;
    private Animator anim;
    [Header("Basic Settings")]
    public float sightRadius;
    private GameObject attackTarget;
    private float speed;//物体追击速度,当非追击时速度减半
                        // Start is called before the first frame update

    bool isWalk;
    bool isChase;
    bool isFollow;
    bool isGuard;
    Vector3 wayPoint;
    Vector3 transformPos;

    public float lookAtTime=3;//敌人达到某个点后需要停留的时间
    private float remainLookAtTime;//敌人此时剩余需要停留的时间

    [Header("Patrol State")]
    public float patrolRange=8;

    void Awake()
    {
        agent = GetComponent<NavMeshAgent>();
        anim = GetComponent<Animator>();
        transformPos = transform.position;
        transformPos.y = 0;
        speed = agent.speed;
        remainLookAtTime = lookAtTime;
    }

    void Start()
    {
        if (isGuard)
        {
            enemyStates = EnemyStates.GUARD;
        }
        else
        {
            GetNewWayPoint();
            enemyStates = EnemyStates.PATROL;

        }
    }

    // Update is called once per frame
    void Update()
    {
        SwitchState();
        SwitchAnimation();
        //agent.destination = new Vector3(-10, 0, 0);
    }

    void SwitchAnimation()
    {
        anim.SetBool("Walk", isWalk);
        anim.SetBool("Chase", isChase);
        anim.SetBool("Follow", isFollow);

    }
    void SwitchState()//实现一个简单的状态切换
    {
        if (FoundPlayer())
        {
            enemyStates = EnemyStates.CHASE;
            Debug.Log("找到player");
        }
        switch (enemyStates)
        {
            case EnemyStates.GUARD:
                break;
            case EnemyStates.PATROL:
                Debug.Log("wayPoint is " + wayPoint.x + " " + wayPoint.y + " " + wayPoint.z);

                Debug.Log("enemy is patrol");
                isChase = false;
                agent.speed = speed * 0.5f;//设置速度为0.5,用乘法的话运算效率比除法高
                if (Vector3.Distance(wayPoint, transform.position) <= agent.stoppingDistance)
                {
                    //如果到了一个新的地方则获取新的巡逻点
                    isWalk = false;
                    if (remainLookAtTime > 0)//停留的时间是否还有剩余?
                        remainLookAtTime -= Time.deltaTime;
                    else
                        GetNewWayPoint();//没有剩余则执行到新的地方
                    Debug.Log("enemy reach");

                }
                else
                {
                    isWalk = true;
                    agent.destination = wayPoint;
                    Debug.Log("enemy patroling");
                }
                break;
            case EnemyStates.CHASE:
                //TODO:追击player
                //TODO:在攻击范围内则攻击
                //TODO:配合动画

                isWalk = false;
                isChase = true;
                if (FoundPlayer())
                {
                    isFollow = true;
                    agent.destination = attackTarget.transform.position;

                }
                else
                {
                    isFollow = false;
                    if (remainLookAtTime > 0)
                    {
                        agent.destination = transform.position;
                        remainLookAtTime -= Time.deltaTime;
                    }
                    else//等待时间结束后,根据玩家原来的状态,回归到原来的状态
                    {
                        if (isGuard)
                            enemyStates = EnemyStates.GUARD;
                        else
                            enemyStates = EnemyStates.PATROL;
                    }

                }
                break;
            case EnemyStates.DEAD:
                break;
        }
    }

    bool FoundPlayer()
    {
        var colliders = Physics.OverlapSphere(transform.position, sightRadius);

        foreach(var target in colliders)
        {
            if (target.CompareTag("Player"))
            {
                attackTarget = target.gameObject;
                return true;
            }
        }

        return false;
    }

    void GetNewWayPoint()
    {
        remainLookAtTime = lookAtTime;
        float RandomX = Random.Range(-patrolRange, patrolRange);
        float RandomZ = Random.Range(-patrolRange, patrolRange);
        Vector3 randomPoint = new Vector3(RandomX, transform.position.y, RandomZ) + transformPos;
        NavMeshHit hit;
        wayPoint = NavMesh.SamplePosition(randomPoint, out hit, patrolRange, 1) ? hit.position : transform.position;
    }

    private void OnDrawGizmosSelected()//有selected代表被选中才会有圆
    {
        Gizmos.color = Color.blue;
        Gizmos.DrawWireSphere(transform.position, sightRadius);
    }
}
playerController代码如下:
using System;
using System.Collections;
using System.Collections.Generic;
using UnityEngine;
using UnityEngine.AI;
public class PlayerController : MonoBehaviour
{
    private NavMeshAgent agent;
    private Animator animator;
    private GameObject attackTarget;
    private float lastAttackTime = 0f;
    // Start is called before the first frame update
    void Awake()
    {
        agent = GetComponent<NavMeshAgent>();
        animator = GetComponent<Animator>();
    }

    void Start()
    {
        MouseManager.Instance.OnMouseClicked += MoveToTarget;
        MouseManager.Instance.OnEnemyClicked += EventAttack;

    }


    void Update()
    {
        animator.SetFloat("Speed", agent.velocity.sqrMagnitude);
        lastAttackTime -= Time.deltaTime;
    }
    void MoveToTarget(Vector3 target)
    {
        agent.isStopped = false;//加上这条语句,就解决了人物一旦攻击之后就无法行动的问题
        agent.destination = target;
        StopAllCoroutines();//使得人物在走向目标的过程中也可以通过点击去往其他地方,打断操作
    }
    void EventAttack(GameObject target)
    {

        if (target != null)
        {
            attackTarget = target;
            StartCoroutine(MoveToAttackTarget());
        }
    }

    IEnumerator MoveToAttackTarget()
    {
        //为防止这次点击后下次agent无法行动了,在这次点击的开头使用复原
        agent.isStopped = false;
        transform.LookAt(attackTarget.transform);

        //TODO:此处还需将大于1的这个数值修改为根据武器而定
        while (Vector3.Distance(transform.position, attackTarget.transform.position) > 1)
        {
            agent.destination = attackTarget.transform.position;
            yield return null;
        }
        //当到达指定地点时,命令agent停止
        agent.isStopped = true;

        //攻击具有cd时间
        if (lastAttackTime < 0)
        {
            animator.SetTrigger("Attack");
            lastAttackTime = 0.5f;
        }
    }

}
人物基本属性和数值
接下来使用scripts objects实现人物数值的存储和调用。
这种类型的代码可以生成一个asset文件保存到项目当中,非常适合用来存储一系列模板。
创建文件夹以便分类,创建一个脚本以SO(scriptObject)可以让别人一眼就知道是SO文件。
using System.Collections;
using System.Collections.Generic;
using UnityEngine;

[CreateAssetMenu(fileName ="New Data",menuName ="Character Stats/Data")]
public class CharacterData_SO : ScriptableObject
{
    [Header("Stats Info")]
    public int maxHealth;
    public int currentHealth;
    public int basseDefence;
    public int currentDefence;
}

然后即可创建该类型文件:


然后就可以在这里改数据
playerdata是scriptobject类型不能挂接到物体身上,此处写一个脚本进行管理。
访问和更改数据的时候用脚本.物体.变量的名字太麻烦,此处用属性书写。
using System.Collections;
using System.Collections.Generic;
using UnityEngine;

public class CharacterStats : MonoBehaviour
{
    public CharacterData_SO characterData;

    #region Read from Data_SO

    public int MaxHealth//为间接可以将其写在一个片段里
    {
        get { if (characterData != null) return characterData.maxHealth; else return 0; }
        set { characterData.maxHealth = value; }
    }

    public int CurrrentHealth//为间接可以将其写在一个片段里
    {
        get { if (characterData != null) return characterData.currentHealth; else return 0; }
        set { characterData.maxHealth = value; }
    }

    public int BaseDefence//为间接可以将其写在一个片段里
    {
        get { if (characterData != null) return characterData.baseDefence; else return 0; }
        set { characterData.baseDefence = value; }
    }
    public int CurrentDefence//为间接可以将其写在一个片段里
    {
        get { if (characterData != null) return characterData.currentDefence; else return 0; }
        set { characterData.currentDefence = value; }
    }
    #endregion

}
在首尾添加region可以方便管理。

然后就可以添加脚本并把数据文件放入:


然后就可以在其他脚本里面这样用 ,修改的东西会被修改回数据。
 运行脚本时可以看到数据被修改了。
攻击范围数据
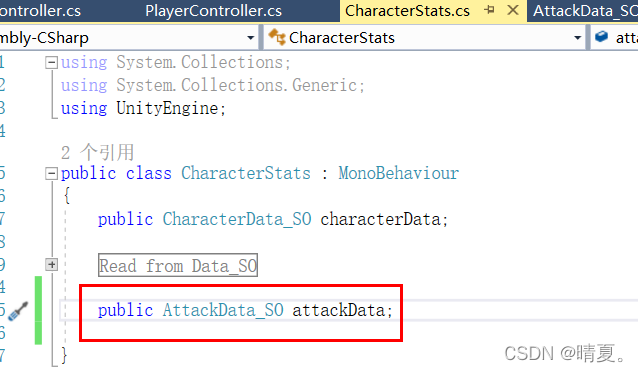
接下来引入攻击数据,创建一个attackdata的SO
using System.Collections;
using System.Collections.Generic;
using UnityEngine;

[CreateAssetMenu(fileName ="New Attack",menuName="Attack/Attack Data")]
public class AttackData_SO :ScriptableObject
{
    public float attackRange;
    public float skillRange;
    public float coolDown;
    public int minDamage;
    public int maxDamage;

    public float criticalMultipler;//暴击加伤百分比
    public float criticalChance;

}
随后在character stats中声明该变量并创建数据文件,然后赋值
在CharacterStats中加入isCritical的判断,但是不想显示在inspector中则加入该属性

在之前的文件中:

改成:

这样子就实现了玩家的攻击范围
接下来实现敌人的攻击范围:
首先在chase中加入攻击的代码:

创建一个变量用于攻击cd的冷却。
Random.Value会返回0到1里的值,可以用此来实现百分比的判断。

    void Attack()
    {
        transform.LookAt(attackTarget.transform.position);
        if (TargetInAttackRange())
        {
            //近身攻击动画
            anim.SetTrigger("Attack");
        }
        if (TargetInSkillRange())
        {
            //技能攻击动画
            anim.SetTrigger("Skill");
        }
    }
接下来在动画器里加入攻击动画,和判断条件,暴击时使用暴击动画
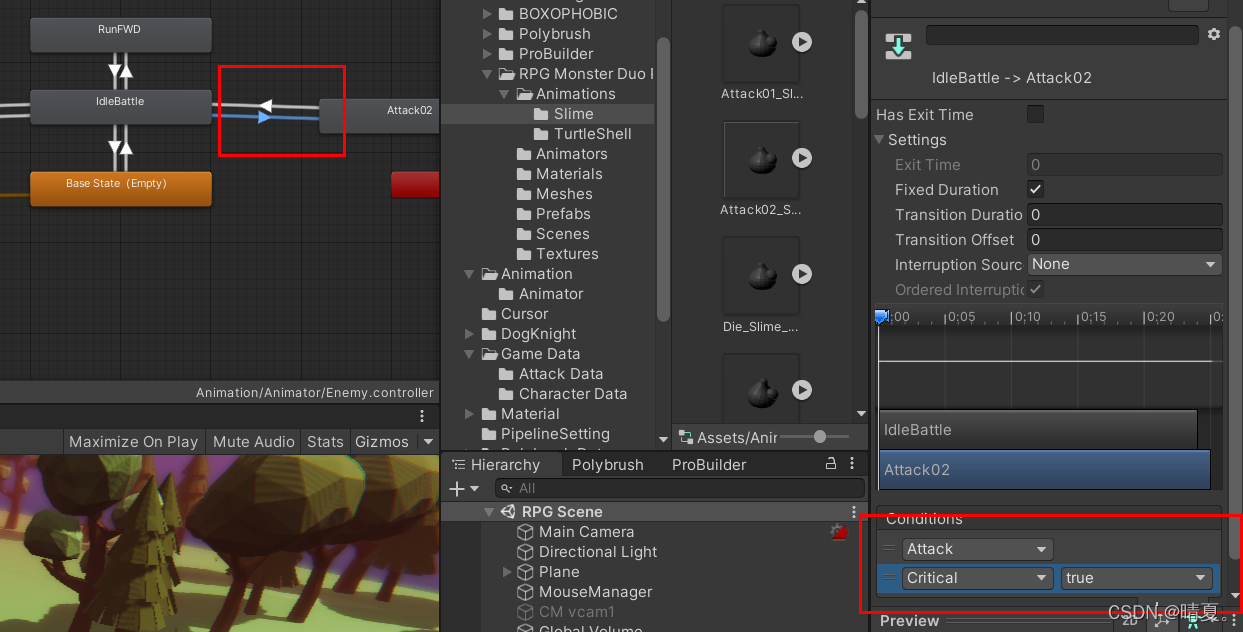
非暴击时使用非暴击动画:

(除此之外攻击动作一定要完成才能退出,因此这里exit time为1)
然后别忘了设定暴击的判定:


但是此处出现了一个问题,当怪物进入攻击时,是禁止移动的,还需要添加条件当怪物不攻击时,让它移动:
