之前在 Docker篇(五):容器之间该如何通讯?中,讲到了运行多个容器时的网络通信方式,但那些容器都是运行在同一台物理机的
在实际项目中,我们往往需要部署多套软件,比如组件需要使用集群化部署,或者一个项目程序本身就依赖了很多组件,为了存储与运行效率等方面,往往需要跨主机部署。那么,该如何实现跨主机容器之间的网络通讯呢?
哎,你想到的,Docker 也想到啦,或者说本来就存在着一种通用的方案吧
一、理论:Docker 如何实现跨主机网络?
1、认识 Docker Overlay
Overlay 网络是为特定目的在物理(底层)网络之上创建的逻辑网络。Docker 可以创建容器之间的 Overlay 网络,从而实现跨主机的容器之间的沟通
也就是说,只要几台物理机之间本身是可以通信的,那么只要在这些机器上建立好一个 Overlay 网络把需要相互通讯的容器,直接部署在这个网络之上,最终的效果就类似于将这些容器部署在同一台物理机一样,进行任意通信啦
比如说我们需要实现一个 Elasticsearch 集群,那么我们只需要把各个节点部署在预先创建好的一个 Overlay 网络上就可以实现通信啦
2、稍微具体一点
你可能还会有疑惑,为什么 Overlay 网络就可以实现多台物理机之间的网络互通呢?实际上它是在 Docker 集群节点间的加入了一层虚拟网络,它有独立的虚拟网段。Docker 容器发送的请求,会先发送到虚拟子网,再由虚拟子网包装为宿主机的真实网址进行发送
3、Swarm 是什么?
而今天要介绍的 Docker Swarm,则是 Docker Overlay 网络的一种简易实现方式,它是 Docker 开发的容器集群管理工具, 与 Docker API 兼容性很好
并且 Linux 中安装了 Docker,也默认会安装 Swarm。因此,在这里,我们采用 Swarm 实现 集群间的网络通信
接下来,让我们通过实战真正了解一下使用Docker Swarm 如何实现Docker 容器的跨主机通信吧
二、实战一:实现集群之间的通信
还是拿那个老例子来讲一下
在文章Docker篇(五):容器之间该如何通讯?中,我们分别将 Spring Boot 后端程序 druid_demo 和 mariadb 分别运行在不同容器中,成功实现了他们之间的通讯
那么,接下来,我们将他们分别部署在两台机器上
机器配置如下:
| 序号 | 节点角色 | ip地址 | 容器名称 |
|---|---|---|---|
| 1 | manager | 10.10.10.100 | druid_demo |
| 2 | worker | 10.10.10.88 | mariadb |
说明:使用 Swarm 建立跨主机的网络,实际上总共分为如下几步:
-
在 manager 创建一个
Swarm集群 -
将其他集群分别加进来
-
在 manager 创建一个
Overlay网络 -
启动各个容器时,指定这个
Overlay网络
具体,往下看
1、在 manager 节点创建 Swarm 集群
执行命令:
docker swarm init --advertise-addr=10.10.10.100
效果如下:
docker swarm init --advertise-addr=10.10.10.100

[root@localhost ~]# docker swarm init --advertise-addr=10.10.10.100
Swarm initialized: current node (maw28ll7mlxuwp47z5c5vo2v1) is now a manager.


To add a worker to this swarm, run the following command:

docker swarm join --token SWMTKN-1-2bdwwlo8xvdskil05itg66l63dpi931oqnt5gvehlnf1it1auo-2uvypbiu0hpcn1e06hrhctbe8 10.10.10.100:2377

To add a manager to this swarm, run 'docker swarm join-token manager' and follow the instructions.
显示了 worker节点加入到该集群的命令,只需要执行
docker swarm join --token SWMTKN-1-2bdwwlo8xvdskil05itg66l63dpi931oqnt5gvehlnf1it1auo-2uvypbiu0hpcn1e06hrhctbe8 10.10.10.100:2377
即可
2、在 worker 节点上执行命令,将自己加入集群
docker swarm join --token SWMTKN-1-2bdwwlo8xvdskil05itg66l63dpi931oqnt5gvehlnf1it1auo-2uvypbiu0hpcn1e06hrhctbe8 10.10.10.100:2377
![]()
image.png
3、在 manager 节点,查看当前网络集群的节点情况
执行 docker node ls
![]()
image.png
4、在 manager 节点,创建 overlay 网络
docker network create -d overlay --attachable demo
说明:
--attachable 声明当前创建的网络为:其他节点可以访问的网络
5、在 worker 节点的网络列表,是否多了这个网络
docker network ls
说明:正常情况,执行完第4步之后,这里就会在原来的基础上多一个 demo 网络
6、在 worker 节点启动 mariadb 容器,指定该 overlay 网络
sudo docker run -itd -v /usr/local/mysqldata:/var/lib/mysql -h mariadb --name=mariadb --net=demo --privileged=true mariadb:latest /sbin/init
说明:--net=demo :指定该集群间的网络(overlay ):demo
7、在 manager 节点,启动 durid_demo 程序
接下来,在 manager 节点,启动 Spring Boot 后端程序 druid_demo 的容器,并指定 demo 网络
docker run -it  -p 8888:8080
-h druid_demo
--name druid_demo
--net=demo
--privileged=true druid_demo:0.0.1-SNAPSHOT /sbin/init
此时,请求接口,验证网络是否互通
![]()
image.png
接口正常返回,说明我们已经实现了 druid_demo 应用程序容器与 mariadb 容器之间的通讯
8、退出集群
执行 docker swarm leave,即可实现各节点退出集群网络的操作
那么,现在你知道 Docker 实现跨主机通讯的步骤了
接下来,趁热打铁,我们再一起来进行 Elasticsearch (后续简称为 ES)集群搭建,真正实践一番
注意:
如果你之前没怎么使用过 ES ,也没有关系,我会推出相应的文章来介绍它。在这里,你只需要掌握 Docker 在多台机器部署项目的方式以及实现跨主机通信的思想,我们的目的就达到啦
三、实战二:Elasticsearch集群搭建
在进入集群搭建之前,我们先来看看如何启动一个单机 ES
1、单机方式
docker run -itd --name elastic -v /usr/local/es/data:/var/lib/elasticsearch -v /usr/local/es/logs:/var/log/elasticsearch -p 9200:9200 -p 9300:9300 -e "discovery.type=single-node" --restart=always elasticsearch:v7.9.1
说明:
1)-v :指定挂载目录(分别将 ES 的数据目录和日志目录映射到宿主机上,这样即使容器挂掉了再重启,日志也不会丢失)
其中,在容器目录的 /etc/elasticsearch/elasticsearch.yml 中分别配置了 path.data 和 path.logs 。分别为
/var/lib/elasticsearch

/usr/local/es/logs
2)-p:指定映射端口(将容器中的端口映射到了宿主机上)
3)-e:指定配置(指定es当前是以单个节点的方式启动)
4)--restart=alway:总是会自动重启
启动之后,登录 Es-Head ,发现可以连接上,那么表示启动成功
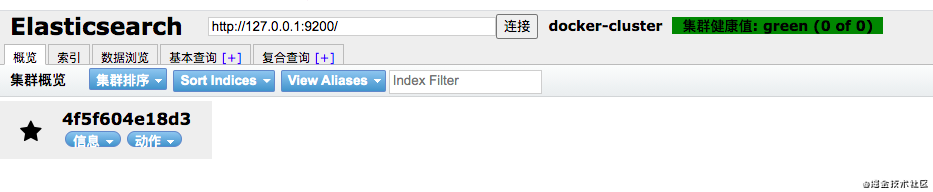
image.png
单机模式很简单,只要分别配置好挂载目录path.data 和 path.logs ,指定为单机模式启动就好了
集群模式相应的也不复杂,配置与单机模式基本一致。除了需要部署多台台物理机以外,再注意一下各节点之间的相互关联方式就好了。而这相互关联方式,则包括:网络的互通 和 确定集群的节点成员
2、集群方式
我们来搭建一个集群模式为 1 master + 3 data 节点,机器分配为:
| 序号 | 节点角色 | ip地址 |
|---|---|---|
| 1 | elastic-master | 10.10.10.88 |
| 2 | elastic-data01 | 10.10.10.76 |
| 3 | elastic-data02 | 10.10.10.77 |
| 4 | elastic-data03 | 10.10.10.78 |
1)配置集群网络 demo
对,就是参考第一步,为三台机器配置集群网络
其中,网络节点角色如下:
| 序号 | 节点角色 | ip地址 |
|---|---|---|
| 1 | manager | 10.10.10.88 |
| 2 | worker | 10.10.10.76 |
| 3 | worker | 10.10.10.77 |
| 4 | worker | 10.10.10.78 |
2)分别修改各节点的配置文件 elasticsearch.yml
a. elastic-master
vi /usr/local/es/config/elastic-master/elasticsearch.yml
# ======================== Elasticsearch Configuration =========================
#
# NOTE: Elasticsearch comes with reasonable defaults for most settings.
# Before you set out to tweak and tune the configuration, make sure you
# understand what are you trying to accomplish and the consequences.
#
# The primary way of configuring a node is via this file. This template lists
# the most important settings you may want to configure for a production cluster.
#
# Please consult the documentation for further information on configuration options:
# https://www.elastic.co/guide/en/elasticsearch/reference/index.html
#
# ---------------------------------- Cluster -----------------------------------
#
# Use a descriptive name for your cluster:
#
cluster.name: my-application
#
# ------------------------------------ Node ------------------------------------
#
# Use a descriptive name for the node:
#
node.name: elastic-master
node.master: true
node.data: fasle
#
# Add custom attributes to the node:
#
#node.attr.rack: r1
#
# ----------------------------------- Paths ------------------------------------
#
# Path to directory where to store the data (separate multiple locations by comma):
#
path.data: /var/lib/elasticsearch
#
# Path to log files:
#
path.logs: /var/log/elasticsearch
#
# ----------------------------------- Memory -----------------------------------
#
# Lock the memory on startup:
#
#bootstrap.memory_lock: true
#
# Make sure that the heap size is set to about half the memory available
# on the system and that the owner of the process is allowed to use this
# limit.
#
# Elasticsearch performs poorly when the system is swapping the memory.
#
# ---------------------------------- Network -----------------------------------
#
# Set the bind address to a specific IP (IPv4 or IPv6):
#
network.host: 0.0.0.0
#
# Set a custom port for HTTP:
#
#http.port: 9200
#
# For more information, consult the network module documentation.
#
# --------------------------------- Discovery ----------------------------------
#
# Pass an initial list of hosts to perform discovery when this node is started:
# The default list of hosts is ["127.0.0.1", "[::1]"]
#
discovery.seed_hosts: ["elastic-master", "elastic-data01","elastic-data02","elastic-data03"]
#
# Bootstrap the cluster using an initial set of master-eligible nodes:
#
cluster.initial_master_nodes: ["elastic-master"]
#
# For more information, consult the discovery and cluster formation module documentation.
#
# ---------------------------------- Gateway -----------------------------------
#
# Block initial recovery after a full cluster restart until N nodes are started:
#
#gateway.recover_after_nodes: 3
#
# For more information, consult the gateway module documentation.
#
# ---------------------------------- Various -----------------------------------
#
# Require explicit names when deleting indices:
#
#action.destructive_requi
http.cors.enabled: true
http.cors.allow-origin: "*"
说明:
-
cluster.name: my-application #集群名称,各个节点保持一致即可
-
node.name: elastic-master #节点名称,各个节点必须独一无二
-
node.master: demo #是master节点
-
node.data: demo #不是data节点
-
path.data: /var/lib/elasticsearch #data存储目录(无特殊需求,直接使用默认的即可)
-
path.logs: /var/log/elasticsearch #日志存储目录(无特殊需求,直接使用默认的即可)
-
discovery.seed_hosts: ["elastic-master", "elastic-data01","elastic-data02","elastic-data03"]
#可发现的节点(配置四个节点的主机名称或者ip即可,docker部署,建议直接配置主机名称)
-
cluster.initial_master_nodes: ["elastic-master"] #初始化集群节点,直接配置master节点的主机名即可
b.elastic-data01
vi /usr/local/es/config/elastic-data01/elasticsearch.yml
# ======================== Elasticsearch Configuration =========================
#
# NOTE: Elasticsearch comes with reasonable defaults for most settings.
# Before you set out to tweak and tune the configuration, make sure you
# understand what are you trying to accomplish and the consequences.
#
# The primary way of configuring a node is via this file. This template lists
# the most important settings you may want to configure for a production cluster.
#
# Please consult the documentation for further information on configuration options:
# https://www.elastic.co/guide/en/elasticsearch/reference/index.html
#
# ---------------------------------- Cluster -----------------------------------
#
# Use a descriptive name for your cluster:
#
cluster.name: my-application
#
# ------------------------------------ Node ------------------------------------
#
# Use a descriptive name for the node:
#
node.name: elastic-data01
node.master: false
node.data: true
#
# Add custom attributes to the node:
#
#node.attr.rack: r1
#
# ----------------------------------- Paths ------------------------------------
#
# Path to directory where to store the data (separate multiple locations by comma):
#
path.data: /var/lib/elasticsearch
#
# Path to log files:
#
path.logs: /var/log/elasticsearch
#
# ----------------------------------- Memory -----------------------------------
#
# Lock the memory on startup:
#
#bootstrap.memory_lock: true
#
# Make sure that the heap size is set to about half the memory available
# on the system and that the owner of the process is allowed to use this
# limit.
#
# Elasticsearch performs poorly when the system is swapping the memory.
#
# ---------------------------------- Network -----------------------------------
#
# Set the bind address to a specific IP (IPv4 or IPv6):
#
network.host: 0.0.0.0
#
# Set a custom port for HTTP:
#
#http.port: 9200
#
# For more information, consult the network module documentation.
#
# --------------------------------- Discovery ----------------------------------
#
# Pass an initial list of hosts to perform discovery when this node is started:
# The default list of hosts is ["127.0.0.1", "[::1]"]
#
discovery.seed_hosts: ["elastic-master", "elastic-data01","elastic-data02","elastic-data03"]
#
# Bootstrap the cluster using an initial set of master-eligible nodes:
#
cluster.initial_master_nodes: ["elastic-master"]
#
# For more information, consult the discovery and cluster formation module documentation.
#
# ---------------------------------- Gateway -----------------------------------
#
# Block initial recovery after a full cluster restart until N nodes are started:
#
#gateway.recover_after_nodes: 3
#
# For more information, consult the gateway module documentation.
#
# ---------------------------------- Various -----------------------------------
#
# Require explicit names when deleting indices:
#
#action.destructive_requi
http.cors.enabled: true
http.cors.allow-origin: "*"
说明:
a. elastic-data01 的配置文件,与 elastic-master 的配置文件中,只有以下三项内容不同,其余均相同
node.name: elastic-data01 #节点名称,各个节点必须独一无二
node.master: false #不是master节点
node.data: true #是data节点
b. elastic-data02、elastic-data03 的配置,与 elastic-data01 的配置,除了 node.name 的值不一致以外,其余均相同
3)启动
分别在各个主机上,执行 docker 启动命令,进行各个节点的启动
docker run -itd --name elastic-master -h elastic-master --net=demo -v /usr/local/es/data:/var/lib/elasticsearch -v /usr/local/es/logs:/var/log/elasticsearch -v /usr/local/es/plugins:/usr/share/elasticsearch/plugins -v /usr/local/es/config/elastic-master/elasticsearch.yml:/etc/elasticsearch/elasticsearch.yml:ro -p 9200:9200 -p 9300:9300 -e cluster.initial_master_nodes=elastic-master --restart=always elasticsearch:v7.9.1 /sbin/init
docker run -itd --name elastic-data01 -h elastic-data01 --net=demo -v /usr/local/es/data:/var/lib/elasticsearch -v /usr/local/es/logs:/var/log/elasticsearch -v /usr/local/es/plugins:/usr/share/elasticsearch/plugins -v /usr/local/es/config/elastic-data01/elasticsearch.yml:/etc/elasticsearch/elasticsearch.yml:ro -p 9200:9200 -p 9300:9300 -e cluster.initial_master_nodes=elastic-master --restart=always elasticsearch:v7.9.1 /sbin/init
docker run -itd --name elastic-data02 -h elastic-data02 --net=demo -v /usr/local/es/data:/var/lib/elasticsearch -v /usr/local/es/logs:/var/log/elasticsearch -v /usr/local/es/plugins:/usr/share/elasticsearch/plugins -v /usr/local/es/config/elastic-data02/elasticsearch.yml:/etc/elasticsearch/elasticsearch.yml:ro -p 9200:9200 -p 9300:9300 -e cluster.initial_master_nodes=elastic-master --restart=always elasticsearch:v7.9.1 /sbin/init
docker run -itd --name elastic-data03 -h elastic-data03 --net=demo -v /usr/local/es/data:/var/lib/elasticsearch -v /usr/local/es/logs:/var/log/elasticsearch -v /usr/local/es/plugins:/usr/share/elasticsearch/plugins -v /usr/local/es/config/elastic-data03/elasticsearch.yml:/etc/elasticsearch/elasticsearch.yml:ro -p 9200:9200 -p 9300:9300 -e cluster.initial_master_nodes=elastic-master --restart=always relasticsearch:v7.9.1 /sbin/init
4)验证
请求地址:http://10.10.10.88:9200/_cat/nodes 查看节点列表
![]()
image.png
可以看到,集群中,如期展示了 4 个节点,其中 1 个 master 节点和 3 个 data 节点(带 * 号的为 master 节点)
集群成功搭建完毕!可喜可贺!
5)项目中集成 ES 配置
经测试,只需要配置一个 master 节点的地址即可
spring.elasticsearch.rest.uris=http://10.10.10.88:9200
注:这里只是说明了如何搭建一个 ES 集群,实现集群间网络通信的方式。后面会专门有文章,介绍 ES 的理论知识,与具体实战知识,敬请期待
四、总结
好了,总得来说,Docker 是通过搭建 Overlay 网桥,然后把各个主机的容器都统一放在这个网桥上就实现了 Docker 容器的跨主机通讯
恭喜你又掌握了一个新技能。当然,如果想要真正掌握的话,也建议大家真正实战一次,毕竟实战与理解是不同阶段,对于知识的掌握程度也是不同级别的哦