一、微信小程序登录流程大致为:
第一步:前端调用wx.login()函数,获取返回的code值。(每次通过wx.login()得到的code值可能不一样)
第二步:传递获取到的code值到服务器端,在服务器端用小程序appid,appsecret等去请求微信服务器,获取openid和session_key。(注:每个微信账号,在每个小程序中获取到的openid是唯一的,它可以作为判断新用户和老用户的依据。)
第三步:将用户openid保存到数据库,并将用户id返回到前端,放到缓存中保持登录态。
二、前期准备:
在开始微信小程序SDK集成前 我们可以先阅读微信官方给出的接口文档 学习微信对接流程 和接口参数对接
微信官方链接:https://developers.weixin.qq.com/miniprogram/dev/framework/
微信官方给出的文档对初次接触微信小程序对接的小伙伴并不是很友好
给大家推荐一款基于微信SDK开发的。 WxJava - 微信开发 Java SDK
支持微信支付、开放平台、公众号、企业号/企业微信、小程序等的后端开发
码云源码链接:https://gitee.com/binary/weixin-java-tools?_from=gitee_search
三、正题 Java后台参数配置—相关:
 		<!--wx-->
        <dependency>
            <groupId>com.github.binarywang</groupId>
            <artifactId>weixin-java-miniapp</artifactId>
            <version>4.1.0</version>
        </dependency>
        <!--wx-pay-->
        <dependency>
            <groupId>com.github.binarywang</groupId>
            <artifactId>weixin-java-pay</artifactId>
            <version>4.1.0</version>
        </dependency>
        <!--spring-mock-->
        <dependency>
            <groupId>org.springframework</groupId>
            <artifactId>spring-mock</artifactId>
            <version>2.0.8</version>
        </dependency>
配置文件参数:
配置参数:
wx.app.id= 小程序Id
wx.secret= 小程序环境
wx.mch.id= 商户Id
wx.mch.key= 商户Key
wx.payNotifyUrl= 微信支付回调地址 公网地址一定是 例如 http:www.baidu.com/你的接口Url
wx.refundNotifyUrl= 微信退款回调地址 公网地址一定是
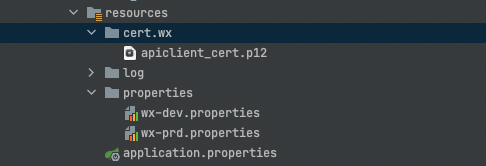
wx.pay.certPath=classpath:cert/wx/apiclient_cert.p12 加载微信提供的加密解密的文件
SpringBootConfig配置类:
import cn.binarywang.wx.miniapp.api.WxMaService;
import cn.binarywang.wx.miniapp.api.impl.WxMaServiceImpl;
import cn.binarywang.wx.miniapp.config.WxMaConfig;
import cn.binarywang.wx.miniapp.config.impl.WxMaDefaultConfigImpl;
import com.github.binarywang.wxpay.config.WxPayConfig;
import com.github.binarywang.wxpay.service.WxPayService;
import com.github.binarywang.wxpay.service.impl.WxPayServiceImpl;
import org.springframework.beans.factory.annotation.Qualifier;
import org.springframework.beans.factory.annotation.Value;
import org.springframework.context.annotation.Bean;
import org.springframework.context.annotation.Configuration;
import org.springframework.context.annotation.PropertySource;

@Configuration
@PropertySource("classpath:properties/wx-${spring.profiles.active}.properties")
public class WxConfig {


    @Value("${wx.app.id}")
    public String wxAppId;

    @Value("${wx.secret}")
    public String wxSecret;

    @Value("${wx.mch.id}")
    public String wxMchId;

    @Value("${wx.mch.key}")
    public String wxMchKey;

    @Value("${wx.payNotifyUrl}")
    public String payNotifyUrl;

    @Value("${wx.refundNotifyUrl}")
    public String refundNotifyUrl;

    @Value("${wx.pay.certPath}")
    public String wxPayCertPath;

    @Bean("wxMaConfig")
    public WxMaConfig WxMaConfig() {


        WxMaDefaultConfigImpl wxMaConfig = new WxMaDefaultConfigImpl();
        wxMaConfig.setAppid(wxAppId);
        wxMaConfig.setSecret(wxSecret);
        return wxMaConfig;
    }

    @Bean("wxMaService")
    public WxMaService wxMpService(@Qualifier("wxMaConfig") WxMaConfig wxMaConfig) {


        WxMaService wxMpService = new WxMaServiceImpl();
        wxMpService.setWxMaConfig(wxMaConfig);
        return wxMpService;
    }

    @Bean
    public WxPayConfig wxPayConfig() {


        WxPayConfig wxPayConfig = new WxPayConfig();
        wxPayConfig.setAppId(wxAppId);
        wxPayConfig.setMchId(wxMchId);
        wxPayConfig.setMchKey(wxMchKey);
        wxPayConfig.setNotifyUrl(payNotifyUrl);
        wxPayConfig.setTradeType("JSAPI");
        wxPayConfig.setKeyPath(wxPayCertPath);
        return wxPayConfig;
    }

    @Bean
    public WxPayService wxPayService(WxPayConfig wxPayConfig) {


        WxPayService wxPayService = new WxPayServiceImpl();
        wxPayService.setConfig(wxPayConfig);
        return wxPayService;
    }
}
四、登录代码案例:
	@Autowired
    private WxMaService wxMaService;

	@ApiOperation(value = "获取微信Session")
    @ApiOperationSupport(ignoreParameters = {

     "limit", "offset", "paramError" })
    @GetMapping("/getWxSession")
    public BaseResponse<WxSessionResponse> getWxSession(String code) {


        BaseResponse<WxSessionResponse> response = new BaseResponse<>();
        if (StringUtils.isBlank(code)) {


            log.info("[WxServiceImpl-login] 入参校验错误");
             response.fail("9999","入参校验错误");
            return response;
        }
        try {


            WxMaJscode2SessionResult sessionInfo = wxMaService.getUserService().getSessionInfo(code);
            WxSessionResponse result = WxSessionResponse.builder()
                    .sessionKey(sessionInfo.getSessionKey())
                    .openid(sessionInfo.getOpenid())
                    .unionid(sessionInfo.getUnionid())
                    .build();
            response.setData(new ResultData<>(result));
            return response;
        } catch (WxErrorException e) {


            log.info("[获取微信Session error -> ]" + e.getMessage());
          	response.fail("9998","获取微信Session错误");
            return response;

        }
返回值参数DTO:
/**
 * @author 柱子
 * @date 2021/9/24 4:39 下午
 */
@Data
@Builder
@ApiModel(value = "WxSessionResponse")
public class WxSessionResponse {


    @ApiModelProperty(value = "sessionKey")
    private String sessionKey;

    @ApiModelProperty(value = "openid")
    private String openid;

    @ApiModelProperty(value = "unionid")
    private String unionid;
参数解释:
BaseResponse 自定义的公司返回值 可根据自己项目来
接口解释: 前端传递Code过来 我去请求微信拿到用户的OpenId 相关参数
前端也可以调用云函数拿到这些参数
但是会造成懂行的人 通过抓包 获取小程序相关配置从而而已攻击你的项目造成不必要的损失
该接口只是获取微信用户相关信息 你应该还要提供一个创建用户的接口提供给前端 前端调用该接口 你可以拿这个OpenId去你的数据库里面找有没有该用户信息 有就返回完成登录 无就调用创建用户接口
这些业务代码相信大家都没问题了简简单单的CRUD哦!!!
关于Code是什么 下面图会解释的:

你点击允许 微信就将你的Code信息给你用来调接口
微信传递参数并不是Json 而是采用的XML方式
补充 微信用户创建接口:
    @ApiOperation(value = "登录")
    @ApiOperationSupport(ignoreParameters = {

     "limit", "offset", "paramError" })
    @PostMapping("login")
    public BaseResponse<WxLoginResponse> login(@RequestBody WxLoginRequest request) {


        BaseResponse<WxLoginResponse> response;
        try {


            response = wxService.login(request);
        } catch (Exception e) {


            response = new BaseResponse<>();
            response.fail(ResponseEnum.WX_USER_REGISTER_FAIL);
        }
        return response;
    }
请求参数DTO:
/**
 * @description:
 * @author: zhu
 * @time: 2021/6/22 15:24
 */
@Data
@ApiModel(value = "微信登录请求参数")
public class WxLoginRequest {


    @ApiModelProperty(value = "二维码校验key")
    private String key;

    @ApiModelProperty(value = "用户名", required = true)
    private String userName;

    @ApiModelProperty(value = "头像", required = true)
    private String icon;

    @ApiModelProperty(value = "性别 1 男 2女", required = true)
    private Integer gender;

    @ApiModelProperty(value = "电话", required = true)
    private String phone;

    @ApiModelProperty(value = "城市", required = true)
    private String city;

    @ApiModelProperty(value = "openId", required = true)
    private String openId;

    @ApiModelProperty(value = "uninoid", required = true)
    private String unionId;

    public boolean isParamError() {


        return StringUtils.isBlank(openId);
    }
Service代码:
 /**
     * 微信登录
     *
     * @param request 微信用户相关参数
     * @return WxLoginResponse 系统用户信息
     */
    @Override
    @Transactional(rollbackFor = Exception.class)
    public BaseResponse<WxLoginResponse> login(WxLoginRequest request) throws Exception {


        BaseResponse<WxLoginResponse> response = new BaseResponse<>();
        // 校验入参
        if (Objects.isNull(request) || request.isParamError()) {


            log.info("[WxServiceImpl-login] 入参校验错误");
            response.fail(ResponseEnum.PARAM_VALIDATE_ERROR);
            return response;
        }
        //查询OpenID信息
        UserDmo userDmo = lambdaQuery().eq(UserDmo::getOpenId, request.getOpenId()).one();
        //返回老用户信息
        if (Objects.nonNull(userDmo)) {


            WxLoginResponse vo = new WxLoginResponse();
            BeanUtil.copyProperties(userDmo, vo, true);
            vo.setIcon(fileUtil.queryFileUrl(userDmo.getInvitationUrl()));
            vo.setInvitationUrl(fileUtil.queryFileUrl(userDmo.getInvitationUrl()));
            response.setData(new ResultData<>(vo));
            return response;
        }

        //处理头像
        String icon = null;
        if (StringUtils.isNotBlank(request.getIcon())) {


            icon = wxCodeService.uploadAvatarUrl(wxCodeService.getImageStream(request.getIcon()));
        }
        //注册新用户信息
        UserDmo userDmo2 = UserDmo.builder()
                .userNumber(RandomUtil.randomNumbers(5))
                .userName(request.getUserName())
                .icon(fileUtil.addFileUrl(icon))
                .gender(request.getGender())
                .phone(request.getPhone())
                .city(request.getCity())
                .userType(NumberEnum.ONE.getValue())
                .openId(request.getOpenId())
                .build();
        if (!save(userDmo2)) {


            log.info("[WxServiceImpl-login] 注册新用户信息失败");
            throw new Exception("注册新用户信息失败");
        }
        //添加邀请关联信息
        if (StringUtils.isNotBlank(request.getKey())) {


            UserDmo userDto = lambdaQuery().eq(UserDmo::getOpenId, request.getKey()).one();
            InviteRelationDmo inviteRelationDmo = InviteRelationDmo.builder()
                    .invitationId(userDto.getId())
                    .beInvitationId(userDmo2.getId())
                    .build();
            if (inviteRelationMapper.insert(inviteRelationDmo) <= NumberEnum.ZERO.getValue()) {


                log.info("[WxServiceImpl-login] 新用户建立邀请关系失败");
                throw new Exception("新用户建立邀请关系失败");
            }
        }
        //返回登录成功信息
        WxLoginResponse result = new WxLoginResponse();
        BeanUtil.copyProperties(userDmo2, result, true);
        result.setInvitationUrl(fileUtil.queryFileUrl(userDmo2.getInvitationUrl()));
        result.setIcon(fileUtil.queryFileUrl(userDmo2.getIcon()));
        response.setData(new ResultData<>(result));
        return response;
上面代码被我修改了 可以根据自己的业务来实现 大概是这样的流程 具体开发阶段可以和你们前端商量怎么对接方便
PS:
Wx开发工具包 拿手机号没有更新 这个我是让前端调云函数拿到的
关于这个头像 大家肯定很好奇 为什么这样搞来搞去的
微信传过来的头像是一个流文文件 就是这样:
https://image.baidu.com/search/detail?ct=503316480&z=0&ipn=false&word=%E5%A4%B4%E5%83%8F&hs=0&pn=1&spn=0&di=33990&pi=0&rn=1&tn=baiduimagedetail&is=0%2C0&ie=utf-8&oe=utf-8&cl=2&lm=-1&cs=1340127580%2C1407454083&os=1206233956%2C2925991266&simid=3367982024%2C81674284&adpicid=0&lpn=0&ln=30&fr=ala&fm=&sme=&cg=head&bdtype=0&oriquery=%E5%A4%B4%E5%83%8F&objurl=https%3A%2F%2Fgimg2.baidu.com%2Fimage_search%2Fsrc%3Dhttp%3A%2F%2Fb-ssl.duitang.com%2Fuploads%2Fitem%2F201712%2F15%2F20171215221023_KiYWM.thumb.700_0.jpeg%26refer%3Dhttp%3A%2F%2Fb-ssl.duitang.com%26app%3D2002%26size%3Df9999%2C10000%26q%3Da80%26n%3D0%26g%3D0n%26fmt%3Djpeg%3Fsec%3D1637294680%26t%3Dba11f545383ba0afdb43d4e3175b16c4&fromurl=ippr_z2C%24qAzdH3FAzdH3Fooo_z%26e3B17tpwg2_z%26e3Bv54AzdH3Fks52AzdH3F%3Ft1%3Dll8mndan9&gsm=2&islist=&querylist=&dyTabStr=MCwzLDEsNSwyLDcsOCw0LDYsOQ%3D%3D
这个大家可以调我写的那个工具类 进行文件转换:
     /**
     * 头像保存路径
     */
    private static final String UPLOAD_AVATAR_URL_PATH = PathConstant.getInstance().getPath("file/avatar");
 /**
     * 获取微信头像 将流转换为图片
     *
     * @param inputStream inputStream流
     * @return url
     */
    public String uploadAvatarUrl(InputStream inputStream) {


        if (ObjectUtils.isEmpty(inputStream)) {


            return null;
        }
        String filePath = UPLOAD_AVATAR_URL_PATH
                + DateUtil.formatDateTime(LocalDateTime.now(), DateEnum.DATE) + "/";
        String fileName = filePath + UUIDUtil.generateUUID() + ".jpg";
        log.info("[avatar fileName]: {}", fileName);
        MultipartFile file = null;
        try {


            file = new MockMultipartFile(fileName, "avatar.png", ContentType.APPLICATION_OCTET_STREAM.toString(),
                    inputStream);
        } catch (IOException e) {


            log.info("[WxService-inputStream to multipartFile fail] inputStream转换为multipartFile失败");
            return null;
        }
        File dir = new File(filePath);
        if (!dir.exists()) {


            if (!dir.mkdir()) {


                log.info("[WxService-avatar fileUpload] 文件路径文件夹创建失败");
                return null;
            }
        }
        File localFile = new File(fileName);
        try {


            file.transferTo(localFile);
        } catch (IOException e) {


            log.error("[WxService-avatar fileUpload] 文件上传异常", e);
            return null;
        }
        return fileName;
    }

    /**
     * 获取微信头像
     *
     * @param url 微信加密字符url
     * @return inputStream流
     */
    public InputStream getImageStream(String url) {


        if (StringUtils.isBlank(url)) {


            log.info("[user avatarUrl is blank]");
            return null;
        }
        try {


            HttpURLConnection connection = (HttpURLConnection) new URL(url).openConnection();
            connection.setReadTimeout(5000);
            connection.setConnectTimeout(5000);
            connection.setRequestMethod("GET");
            if (connection.getResponseCode() == HttpURLConnection.HTTP_OK) {


                InputStream inputStream = connection.getInputStream();
                return inputStream;
            }
        } catch (IOException e) {


            log.info("获取微信头像异常, 图片路径为: {}, cause : {}", url, e.getMessage());
            return null;
        }
        return null;
    }
附加文件工具类:
import lombok.extern.slf4j.Slf4j;
import org.apache.commons.lang3.StringUtils;
import org.springframework.boot.system.ApplicationHome;

import java.io.File;

/**
 * @Name: PathConstant
 * @Author: zhu
 * @Date: 2020-02-19
 * @Description: 文件路径常量类
 */
@Slf4j
public class PathConstant {


    private static PathConstant instance;

    private static String rootPath;

    public synchronized static PathConstant getInstance() {


        if (instance == null) {


            instance = new PathConstant();
        }
        return instance;
    }

    public String getPath(String path) {


        if (StringUtils.isEmpty(rootPath)) {


            ApplicationHome home = new ApplicationHome(getClass());
            String homePath = home.getSource().getParent();
            if (StringUtils.isNotEmpty(homePath)) {


                if (homePath.contains("target")) {


                    rootPath = homePath;
                } else {


                    rootPath = homePath.substring(0, homePath.lastIndexOf(File.separator));
                }
            }
        }
        String result = rootPath + File.separator + path + File.separator;
        File file = new File(result);
        if (!file.exists()) {


            log.info("[PathConstant-getPath] 创建文件路径 {}", file.mkdirs());
        }
        return result;
    }
}
转换:
import org.apache.commons.collections4.CollectionUtils;
import org.apache.commons.lang3.StringUtils;
import org.springframework.stereotype.Component;

import java.util.Arrays;
import java.util.List;
import java.util.stream.Collectors;

/**
 * @Name: FileUtil
 * @Author: zhu
 * @Date: 2020-09-15
 * @Description: 文件操作工具类
 */
@Component
public class FileUtil {


    private final SystemConfig systemConfig;

    public FileUtil(SystemConfig systemConfig) {


        this.systemConfig = systemConfig;
    }

    public static String getFileSuffix(String filePath) {


        if (StringUtils.isEmpty(filePath) || !filePath.contains("/file")) {


            return null;
        }
        return filePath.substring(filePath.indexOf("/file"));
    }

    public static String getModifyFileName(String fileName, String addName) {


        if (StringUtils.isEmpty(fileName) || !fileName.contains(".")) {


            return fileName;
        }
        int index = fileName.lastIndexOf('.');
        return fileName.substring(0, index) + addName + fileName.substring(index);
    }

    /**
     * 处理前端文件地址Url 截取成文件路径
     *
     * @param url 文件
     * @return /www/home/1.jpg
     */
    public String addFileUrl(String url) {


        if (StringUtils.isBlank(url)) {


            return null;
        }
        return systemConfig.getFilePathPrefix() + FileUtil.getFileSuffix(url);
    }

    /**
     * 处理数据库返回文件Url
     *
     * @param url 文件
     * @return 192.168.0.1//www/home/1.jpg
     */
    public String queryFileUrl(String url) {


        if (StringUtils.isBlank(url)) {


            return null;
        }
        return systemConfig.getFileUrlPrefix() + FileUtil.getFileSuffix(url);
    }

    /**
     * @param url
     * @return java.util.List<java.lang.String>
     * @throws
     * @description: 将url以逗号分割
     * @author zhu
     * @date 2021/6/25 14:38
     */
    public List<String> getUrl(String url) {


        if (StringUtils.isBlank(url)) {


            return null;
        }
        return Arrays.stream(url.split(","))
                .map(s -> systemConfig.getFileUrlPrefix() + FileUtil.getFileSuffix(s))
                .collect(Collectors.toList());
    }

    public String getLink(List<String> linkList) {


        if (CollectionUtils.isEmpty(linkList)) {


            return null;
        }
        return linkList.stream()
                .map(s -> systemConfig.getFilePathPrefix() + FileUtil.getFileSuffix(s))
                .collect(Collectors.joining(","));
    }
}
SystemConfig:
/**
* @Name: SystemConfig
* @Author: zhu
* @Date: 2021-03-04
* @Description: 系统配置
*/
@Configuration
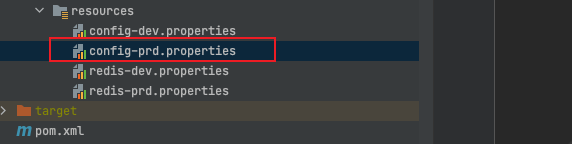
@PropertySource("classpath:config-${spring.profiles.active}.properties")
@Data
public class SystemConfig {
@Value("${file.url.prefix}")
private String fileUrlPrefix;
@Value("${file.path.prefix}")
private String filePathPrefix;
}
# 服务器Ip地址
file.url.prefix=https:/。。。。。
# 服务器文件路径
file.path.prefix=/www/server/apis/。。。
总结: 大家如果有什么问题可以直接滴滴我微信: zhu603076239