包装类型pojo的参数绑定
商品查询controller方法中实现商品查询条件传入。
实现方法
- 在形参中 添加HttpServletRequest request参数,通过request接收查询条件参数
- 在形参中让包装类型的pojo接收查询条件参数
页面传参数的特点:复杂,多样性。条件包括 :用户账号、商品编号、订单信息。。。
如果将用户账号、商品编号、订单信息等放在简单pojo(属性是简单类型)中,pojo类属性比较多,比较乱。
所以使用包装类型的pojo,pojo中属性是pojo
页面参数和controller方法形参定义
<tr>
	<td>
		商品名称:<input name="name">
	</td>
	<td><input type="submit" value="查询"></td>
</tr>
name和包装Items中的属性一致即可

package cn.itcast.ssm.controller;

import java.util.List;

import javax.servlet.http.HttpServletRequest;
import javax.servlet.http.HttpServletResponse;

import org.springframework.beans.factory.annotation.Autowired;
import org.springframework.stereotype.Controller;
import org.springframework.ui.Model;
import org.springframework.web.bind.annotation.RequestMapping;
import org.springframework.web.bind.annotation.RequestMethod;
import org.springframework.web.bind.annotation.RequestParam;
import org.springframework.web.servlet.ModelAndView;

import cn.itcast.ssm.po.Items;
import cn.itcast.ssm.service.ItemService;

@Controller
//对url进行分类管理,可以在这里定义根路径,最终访问url是根路径+子路径
//比如:商品列表:/items/queryItems
@RequestMapping("/items")
public class ItemsController {


	@Autowired
	ItemService ItemService;

	@RequestMapping("/queryItems")
	public ModelAndView queryItems(HttpServletRequest request, HttpServletResponse response,Items item) throws Exception {


		ModelAndView mav = new ModelAndView();
		List<Items> items = ItemService.findItemList(item.getName());
		mav.addObject("items", items);
		mav.setViewName("items/itemsList");
		return mav;
	}
}
集合类型绑定
商品批量删除,用户在页面选择多个商品,批量删除。
表现层实现
将页面选择(多选)的商品id,传到controller方法的形参,方法形参使用数组接收页面请求的多个商品id
实现步骤
1、页面
<%@ page contentType="text/html; charset=UTF-8" pageEncoding="UTF-8"%>
<%@ taglib uri="http://java.sun.com/jsp/jstl/core" prefix="c"%>
<%@ taglib uri="http://java.sun.com/jsp/jstl/fmt" prefix="fmt"%>
<!DOCTYPE html>
<html>
<head>
<meta charset="UTF-8">
<title>查询商品列表</title>
<script>
	function deleteItems(){


		//提交form
		document.itemsForm.action="${pageContext.request.contextPath }/items/deleteItems";
		document.itemsForm.submit();
	}
	function queryItems(){


		document.itemsForm.action="${pageContext.request.contextPath }/items/queryItems";
		document.itemsForm.submit();
	}
</script>
</head>
<body>
	<form  name="itemsForm" action="${pageContext.request.contextPath }/items/queryItems"
		method="post">
		<table width="100%" border="1">
			<tr>
				<td>
					商品名称:<input name="name">
				</td>
				<td><input type="button" value="查询" onclick="queryItems();"></td>
				<td><input type="button" value="批量删除" onclick="deleteItems();"></td>
			</tr>
		</table>
		商品列表:
		<table width="100%" border="1">
			<tr>
				<td><input type="checkbox"></td>
				<td>商品ID</td>
				<td>商品名称</td>
				<td>商品价格</td>
				<td>生产日期</td>
				<td>商品描述</td>
				<td>操作</td>
			</tr>
			<c:forEach items="${items }" var="items">
				<tr>
					<td><input type="checkbox" value="${items.id }" name="items_id"></td>
					<td>${items.id}</td>
					<td>${items.name }</td>
					<td>${items.price }</td>
					<td>
						<!-- fmt:formatDate:jstl表达式格式化日期 --> <fmt:formatDate
							value="${items.createtime }" pattern="yyyy-MM-dd HH:mm:ss" />
					</td>
					<td>${items.detail }</td>
					<td>
					<a href="${pageContext.request.contextPath }/items/editItems?id=${items.id}">修改</a>
					</td>
				</tr>
			</c:forEach>
		</table>
	</form>
</body>
</html>
2、pojo类,添加items_id
package cn.itcast.ssm.po;

import java.util.Date;

public class Items {


    private Integer id;

    private String name;

    private Float price;

    private String pic;

    private Date createtime;

    private String detail;

    private Integer[] items_id;


    public Integer[] getItems_id() {


		return items_id;
	}

	public void setItems_id(Integer[] items_id) {


		this.items_id = items_id;
	}

	public Integer getId() {


        return id;
    }

    public void setId(Integer id) {


        this.id = id;
    }

    public String getName() {


        return name;
    }

    public void setName(String name) {


        this.name = name == null ? null : name.trim();
    }

    public Float getPrice() {


        return price;
    }

    public void setPrice(Float price) {


        this.price = price;
    }

    public String getPic() {


        return pic;
    }

    public void setPic(String pic) {


        this.pic = pic == null ? null : pic.trim();
    }

    public Date getCreatetime() {


        return createtime;
    }

    public void setCreatetime(Date createtime) {


        this.createtime = createtime;
    }

    public String getDetail() {


        return detail;
    }

    public void setDetail(String detail) {


        this.detail = detail == null ? null : detail.trim();
    }
}
3、Mapper.xml添加批量删除语句
<?xml version="1.0" encoding="UTF-8"?>
<!DOCTYPE mapper PUBLIC "-//mybatis.org//DTD Mapper 3.0//EN" "http://mybatis.org/dtd/mybatis-3-mapper.dtd">
<mapper namespace="cn.itcast.ssm.mapper.ItemsMapperCustom">

	<!--定义商品查询的sql片段,就是商品查询条件 -->
	<sql id="query_items_where">
		<!--使用动态sql,通过if判断,满足条件进行sql拼接, -->
		<if test="name!=null and name!=''">
			items.name like concat('%',#{name},'%')
		</if>
	</sql>
	<!--商品列表查询 -->
	<select id="findItemList" parameterType="java.lang.String"
		resultType="Items">
		select * from items
		<where>
			<include refid="query_items_where"></include>
		</where>
	</select>
	<!-- 商品批量删除 -->
	<delete id="deleteItemIdIn" parameterType="java.lang.Integer">
		delete from items where id in
		<foreach collection="array" item="id" open="("
			separator="," close=")">
			#{id}
		</foreach>
	</delete>
</mapper>
4、接口的实现
package cn.itcast.ssm.mapper;

import java.util.List;

import cn.itcast.ssm.po.Items;

public interface ItemsMapperCustom {


	// 商品查询列表
	public List<Items> findItemList(String name) throws Exception;
	//删除商品信息
	public void deleteItemIdIn(Integer[] items_id) throws Exception;
}
5、业务层接口
package cn.itcast.ssm.service;

import java.util.List;

import cn.itcast.ssm.po.Items;

/**
 * 商品管理service
 *
 * @author 86182
 *
 */
public interface ItemService {


	// 商品查询列表
	public List<Items> findItemList(String name) throws Exception;

	/*
	 * 根据id查询商品信息
	 *
	 * @param id 查询商品的id
	 *
	 * @return
	 *
	 * @throws Exception
	 */
	public Items findItemsById(Integer id) throws Exception;

	/*
	 * 修改商品信息
	 *
	 * @param id 修改的商品的id
	 *
	 * @param items
	 *
	 * @throws Exception
	 */
	public void updateItems(Integer id, Items items) throws Exception;

	/*
	 * 删除商品信息
	 *
	 * @param id 的商品的id
	 */
	public void deleteItems(Integer[] items_id) throws Exception;
}
6、接口的实现类
package cn.itcast.ssm.service.impl;
import java.util.List;
import org.springframework.beans.factory.annotation.Autowired;
import org.springframework.stereotype.Service;
import cn.itcast.ssm.mapper.ItemsMapper;
import cn.itcast.ssm.mapper.ItemsMapperCustom;
import cn.itcast.ssm.po.Items;
import cn.itcast.ssm.service.ItemService;
@Service
public class ItemServiceImpl implements ItemService {
@Autowired
private ItemsMapperCustom itemsMapperCustom;
@Autowired
ItemsMapper itemsMapper;
/*
* 商品管理列表查询
*/
public List<Items> findItemList(String name) throws Exception {
return itemsMapperCustom.findItemList(name);
}
/*
*
*/
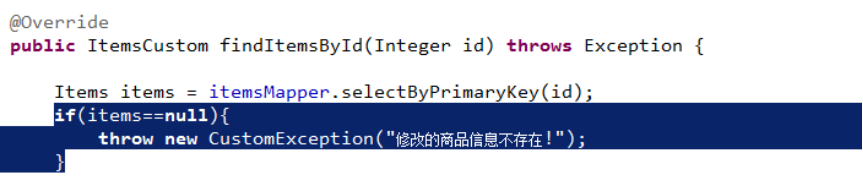
public Items findItemsById(Integer id) throws Exception {
Items items = itemsMapper.selectByPrimaryKey(id);
return items;
}
public void updateItems(Integer id, Items items) throws Exception {
/*
* 在service接口对关键参数进行校验 id是否为空,为空抛出异常
* 更新商品信息,使用updateByPrimaryKeyWithBLOBs根据id更新items表中所有字段 包括大文本类型,
* updateByPrimaryKeyWithBLOBs要求必须传入id
*/
items.setId(id);
itemsMapper.updateByPrimaryKeyWithBLOBs(items);
}
/*
*批量删除商品信息
*/
public void deleteItems(Integer[] items_id) throws Exception {
itemsMapperCustom.deleteItemIdIn(items_id);
}
}
7、控制层
package cn.itcast.ssm.controller;

import java.util.List;

import javax.servlet.http.HttpServletRequest;
import javax.servlet.http.HttpServletResponse;

import org.springframework.beans.factory.annotation.Autowired;
import org.springframework.stereotype.Controller;
import org.springframework.ui.Model;
import org.springframework.web.bind.annotation.RequestMapping;
import org.springframework.web.bind.annotation.RequestMethod;
import org.springframework.web.bind.annotation.RequestParam;
import org.springframework.web.servlet.ModelAndView;

import cn.itcast.ssm.po.Items;
import cn.itcast.ssm.service.ItemService;

@Controller
//对url进行分类管理,可以在这里定义根路径,最终访问url是根路径+子路径
//比如:商品列表:/items/queryItems
@RequestMapping("/items")
public class ItemsController {


	@Autowired
	ItemService ItemService;

	@RequestMapping("/queryItems")
	public ModelAndView queryItems(HttpServletRequest request, HttpServletResponse response, Items item)
			throws Exception {


		ModelAndView mav = new ModelAndView();
		List<Items> items = ItemService.findItemList(item.getName());
		mav.addObject("items", items);
		mav.setViewName("items/itemsList");
		return mav;
	}

	/*
	 * 修改商品信息
	 *
	 * @return
	 *
	 * @throws Exception
	 */
//	@RequestMapping("/editItems")
	// 限制http请求方法
	// value=请求地址
//	@RequestMapping(value = "/editItems",method = {RequestMethod.POST,RequestMethod.GET})
//	public ModelAndView editItems() throws Exception {


//		ModelAndView mav = new ModelAndView();
//		// 调用service根据id查询商品信息
//		Items items = ItemService.findItemsById(1);
//		// 将商品信息放到model
//		mav.addObject("items", items);
//		mav.setViewName("items/editItems");
//		return mav;
//	}
	@RequestMapping(value = "/editItems", method = {

     RequestMethod.POST, RequestMethod.GET })
	// @RequestParam里面指定request传入参数名称和形参进行绑定
	// 通过required属性指定参数是否必须要传入
	// value:参数名,name表示别名
	// 通过defaultValue可以设置默认值,如果id参数没有传入,将默认值和形参进行绑定
	public String editItems(Model model, @RequestParam(name = "id", required = true) Integer id) throws Exception {


		ModelAndView mav = new ModelAndView();
		// 调用service根据id查询商品信息
		Items items = ItemService.findItemsById(id);
		// 将商品信息放到model
		// 通过形参中的model把model数据传到页面
		// 相当于modelAndView.addObject方法
		model.addAttribute("items", items);
		return "items/editItems";
	}

	/*
	 * 商品信息修改的提交
	 */
	@RequestMapping("/editItemsSubmit")
	public String editItemsSubmit(Integer id, Items items) throws Exception {


		ItemService.updateItems(id, items);
		return "redirect:queryItems";
	}

	/*
	 * 删除商品信息
	 */
	@RequestMapping("/deleteItems")
	public String deleteItems(Integer[] items_id) throws Exception {


		ItemService.deleteItems(items_id);
		return "redirect:queryItems";
	}
}
list的参数绑定
通常在需要批量提交数据时,将提交的数据绑定到list中
页面的实现
controller方法的定义
- 进入批量商品修改页面
- 批量修改商品提交
- 使用List接收页面提交的批量数据,通过包装pojo接收,在包装pojo中定义list属性
服务端校验
校验的认识
项目中,通常使用较多是前端的校验,比如页面中js校验。对于安全要求较高点建议在服务端进行校验。
服务端校验:
控制层conroller:校验页面请求的参数的合法性。在服务端控制层conroller校验,不区分客户端类型(浏览器、手机客户端、远程调用)
业务层service(使用较多):主要校验关键业务参数,仅限于service接口中使用的参数。
持久层dao:一般是不校验的。
springmvc校验
- springmvc使用hibernate的校验框架validation(和hibernate没有任何关系)。
- 校验思路:
- 页面提交请求的参数,请求到controller方法中,使用validation进行校验。如果校验出错,将错误信息展示到页面。
- 需求:
- 商品修改,添加校验(校验商品名称长度,生产日期的非空校验),如果校验出错,在商品修改页面显示错误信息。
环境搭建
1、依赖的jar
<!-- 服务端数据校验依赖的jar包 -->
		<!-- https://mvnrepository.com/artifact/org.hibernate/hibernate-validator -->
		<dependency>
			<groupId>org.hibernate</groupId>
			<artifactId>hibernate-validator</artifactId>
			<version>5.1.0.Final</version>
		</dependency>
		<dependency>
			<groupId>javax.el</groupId>
			<artifactId>javax.el-api</artifactId>
			<version>3.0.0</version>
			<scope>provided</scope>
		</dependency>
2、在springmvc的配置文件中添加需要检验的Bean:
<!-- 校验器 -->
	<bean id="validator"
		class="org.springframework.validation.beanvalidation.LocalValidatorFactoryBean">
		<!-- hibernate校验器-->
		<property name="providerClass" value="org.hibernate.validator.HibernateValidator" />
		<!-- 指定校验使用的资源文件,在文件中配置校验错误信息,如果不指定则默认使用classpath下的ValidationMessages.properties -->
		<property name="validationMessageSource" ref="messageSource" />
	</bean>
<!-- 校验错误信息配置文件 -->
	<bean id="messageSource"
		class="org.springframework.context.support.ReloadableResourceBundleMessageSource">
		<!-- 资源文件名-->
		<property name="basenames">
       	 <list>
            <value>classpath:CustomValidationMessages</value>
       	 </list>
    	</property>
		<!-- 资源文件编码格式 -->
		<property name="fileEncodings" value="utf-8" />
		<!--解决spring使用validation 从配置文件中读取乱码的问题  -->
		<property name="defaultEncoding" value="utf-8"/>
		<!-- 对资源文件内容缓存时间,单位秒 -->
		<property name="cacheSeconds" value="120" />
	</bean>
配置时,提供一个 LocalValidatorFactoryBean 的实例,然后 Bean 的校验使用 HibernateValidator。
3、validator:将校验器注入到处理器适配器中
<mvc:annotation-driven
		conversion-service="conversionService" validator="validator"/>
到此,配置就算完成了。
4、在pojo中添加校验规则
package cn.itcast.ssm.po;

import java.util.Date;

import javax.validation.constraints.NotNull;
import javax.validation.constraints.Size;

public class Items {


    private Integer id;

    //校验名称在1到30字符中间
    //message是提示校验出错显示的信息
    @Size(min = 1,max = 30,message ="{items.name.length.error}" )
    private String name;

    private Float price;

    private String pic;
    //非空校验
    @NotNull(message = "{items.createtime.isNull}")
    private Date createtime;

    private String detail;

    private Integer[] items_id;


    public Integer[] getItems_id() {


		return items_id;
	}

	public void setItems_id(Integer[] items_id) {


		this.items_id = items_id;
	}

	public Integer getId() {


        return id;
    }

    public void setId(Integer id) {


        this.id = id;
    }

    public String getName() {


        return name;
    }

    public void setName(String name) {


        this.name = name == null ? null : name.trim();
    }

    public Float getPrice() {


        return price;
    }

    public void setPrice(Float price) {


        this.price = price;
    }

    public String getPic() {


        return pic;
    }

    public void setPic(String pic) {


        this.pic = pic == null ? null : pic.trim();
    }

    public Date getCreatetime() {


        return createtime;
    }

    public void setCreatetime(Date createtime) {


        this.createtime = createtime;
    }

    public String getDetail() {


        return detail;
    }

    public void setDetail(String detail) {


        this.detail = detail == null ? null : detail.trim();
    }

	public String toString() {


		return "Items [id=" + id + ", name=" + name + ", price=" + price + ", pic=" + pic + ", createtime=" + createtime
				+ ", detail=" + detail + "]";
	}

}
5、CustomValidationMessages.properties
在CustomValidationMessages.properties配置校验错误信息:
#添加校验错误提交信息
items.name.length.error=请输入1到30个字符的商品名称
items.createtime.isNull=请输入商品的生产日期
6、捕获校验错误信息
在需要校验的pojo前边添加@Validated,在需要校验的pojo后边添加BindingResult bindingResult接收校验出错信息
@Validated和BindingResult bindingResult是配对出现,并且形参顺序是固定的(一前一后)
出错提示java.lang.NoClassDefFoundError: javax/el/ELManager
解决方案
原因:
1、.tomcat提供的el-api 和项目里面的el-api.jar冲突;
2.tomcat7中的el-api2.2有些版本太低
maven把6.0版本的org.hibernate改成低版本的
<dependency>
      <groupId>org.hibernate</groupId>
      <artifactId>hibernate-validator</artifactId>
      <version>5.1.0.Final</version>
    </dependency>
增加一个依赖:
<dependency>
       <groupId>javax.el</groupId>
       <artifactId>javax.el-api</artifactId>
       <version>3.0.0</version>
       <scope>provided</scope>
</dependency>
7.页面显示校验的错误信息
在controller中将错误信息传到页面即可。
/*
	 * 商品信息修改的提交
	 *在需要校验的pojo前边添加@Validated,在需要校验的pojo后边添加BindingResult bindingResult接收校验出错信息。
	 *@Validated 和BindingResult bindingResult是配对出现,并且形参顺序是固定的(一前一后)。
	 */
	@RequestMapping("/editItemsSubmit")
	public String editItemsSubmit(Integer id, @Validated Items items, BindingResult bindingResult,Model model) throws Exception {


		// 获取校验错误信息
		if (bindingResult.hasErrors()) {


			List<ObjectError> allErrors = bindingResult.getAllErrors();
			for (ObjectError objectError : allErrors) {


				//输出错误信息
				System.out.println(objectError.getDefaultMessage());
			}
			//将错误信息传到页面
			model.addAttribute("allErrors",allErrors);
		}
		//出错重新到商品的修改页面
		return "items/editItems";
	}
页面显示错误信息:
<%@ page language="java" contentType="text/html; charset=UTF-8"
	pageEncoding="UTF-8"%>
<%@ taglib uri="http://java.sun.com/jsp/jstl/core" prefix="c"%>
<%@ taglib uri="http://java.sun.com/jsp/jstl/fmt" prefix="fmt"%>
<!DOCTYPE html >
<html>
<head>
<meta charset="UTF-8">
<title>修改商品信息</title>
</head>
<body>
<!--显示错误信息  -->
<c:if test="${allErrors!=null }">
	<c:forEach items="${allErrors }" var="error">
		${error.defaultMessage }<br>
	</c:forEach>
</c:if>
	<form id="itemForm"
		action="${pageContext.request.contextPath }/items/editItemsSubmit"
		method="post">
		<input type="hidden" name="id" value="${items.id }" /> 修改商品信息:
		<table width="100%" border=1>
			<tr>
				<td>商品名称</td>
				<td><input type="text" name="name" value="${items.name }" /></td>
			</tr>
			<tr>
				<td>商品价格</td>
				<td><input type="text" name="price"
					value="${items.price }" /></td>
			</tr>
			<tr>
				<td>商品生产日期</td>
				<td><input type="text" name="createtime"
					value="<fmt:formatDate value="${items.createtime}" pattern="yyyy-MM-dd HH:mm:ss"/>" /></td>
			</tr>
			<%-- <tr>
	<td>商品图片</td>
	<td>
		<c:if test="${item.pic !=null}">
			<img src="/pic/${item.pic}" width=100 height=100/>
			<br/>
		</c:if>
		<input type="file"  name="pictureFile"/>
	</td>
</tr> --%>
			<tr>
				<td>商品简介</td>
				<td><textarea rows="3" cols="30" name="detail">${items.detail }</textarea>
				</td>
			</tr>
			<tr>
				<td colspan="2" align="center"><input type="submit" value="提交" />
				</td>
			</tr>
		</table>

	</form>
</body>

</html>
分组校验
在pojo中定义校验规则,而pojo是被多个 controller所共用,当不同的controller方法对同一个pojo进行校验,但是每个controller方法需要不同的校验
定义多个校验分组(其实是一个java接口),分组中定义有哪些规则
每个controller方法使用不同的校验分组
定义校验组
所谓的校验组,其实就是空接口
package cn.itcast.ssm.controller.validation;
/**
 *
 * @author 86182
 *接口中不需要定义任何方法,仅是对不同的校验规则进行分组,
 *此分组只校验商品名称长度
 */
public interface ValidGroup1 {


}
在校验规则中添加分组
在实体类中,指定每一个校验规则所属的组
package cn.itcast.ssm.po;

import java.util.Date;

import javax.validation.constraints.NotNull;
import javax.validation.constraints.Size;

import cn.itcast.ssm.controller.validation.ValidGroup1;
import cn.itcast.ssm.controller.validation.ValidGroup2;

public class Items {


    private Integer id;

    //校验名称在1到30字符中间
    //message是提示校验出错显示的信息
    //groups:此校验属于哪个分组,groups可以定义多个分组
    @Size(min = 1,max = 30,message ="{items.name.length.error}",groups = ValidGroup1.class)
    private String name;

    private Float price;

    private String pic;
    //非空校验
    @NotNull(message = "{items.createtime.isNull}",groups = ValidGroup2.class)
    private Date createtime;

    private String detail;

    private Integer[] items_id;


    public Integer[] getItems_id() {


		return items_id;
	}

	public void setItems_id(Integer[] items_id) {


		this.items_id = items_id;
	}

	public Integer getId() {


        return id;
    }

    public void setId(Integer id) {


        this.id = id;
    }

    public String getName() {


        return name;
    }

    public void setName(String name) {


        this.name = name == null ? null : name.trim();
    }

    public Float getPrice() {


        return price;
    }

    public void setPrice(Float price) {


        this.price = price;
    }

    public String getPic() {


        return pic;
    }

    public void setPic(String pic) {


        this.pic = pic == null ? null : pic.trim();
    }

    public Date getCreatetime() {


        return createtime;
    }

    public void setCreatetime(Date createtime) {


        this.createtime = createtime;
    }

    public String getDetail() {


        return detail;
    }

    public void setDetail(String detail) {


        this.detail = detail == null ? null : detail.trim();
    }

	public String toString() {


		return "Items [id=" + id + ", name=" + name + ", price=" + price + ", pic=" + pic + ", createtime=" + createtime
				+ ", detail=" + detail + "]";
	}

}
在controller方法使用指定分组的校验
在接收参数的地方,指定校验组
/*
	 * 商品信息修改的提交
	 *在需要校验的pojo前边添加@Validated,在需要校验的pojo后边添加BindingResult bindingResult接收校验出错信息。
	 *@Validated 和BindingResult bindingResult是配对出现,并且形参顺序是固定的(一前一后)。
	 *value = {ValidGroup1.class}:指定使用ValidGroup1分组的校验
	 */
	@RequestMapping("/editItemsSubmit")
	public String editItemsSubmit(Integer id, @Validated(value = {

    ValidGroup1.class}) Items items, BindingResult bindingResult,Model model) throws Exception {


		// 获取校验错误信息
		if (bindingResult.hasErrors()) {


			List<ObjectError> allErrors = bindingResult.getAllErrors();
			for (ObjectError objectError : allErrors) {


				//输出错误信息
				System.out.println(objectError.getDefaultMessage());
			}
			//将错误信息传到页面
			model.addAttribute("allErrors",allErrors);
		}
		//出错重新到商品的修改页面
		return "items/editItems";
	}
数据回显
提交后,如果出现错误,将刚才提交的数据回显到刚才的提交页面。
pojo数据回显方法
1、springmvc默认对pojo数据进行回显
pojo数据传入controller方法后,springmvc自动将pojo数据放到request域,key等于pojo类型(首字母小写)
使用@ModelAttribute指定pojo回显到页面在request中的key
/*
	 * 商品信息修改的提交
	 *在需要校验的pojo前边添加@Validated,在需要校验的pojo后边添加BindingResult bindingResult接收校验出错信息。
	 *@Validated 和BindingResult bindingResult是配对出现,并且形参顺序是固定的(一前一后)。
	 *value = {ValidGroup1.class}:指定使用ValidGroup1分组的校验
	 *@ModelAttribute还可以将方法的返回值传到页面
	 */
	@RequestMapping("/editItemsSubmit")
	public String editItemsSubmit(Integer id,@ModelAttribute("items")
	@Validated(value = {

    ValidGroup1.class}) Items items,
	BindingResult bindingResult,Model model
			) throws Exception {


		// 获取校验错误信息
		if (bindingResult.hasErrors()) {


			List<ObjectError> allErrors = bindingResult.getAllErrors();
			for (ObjectError objectError : allErrors) {


				//输出错误信息
				System.out.println(objectError.getDefaultMessage());
			}
			//将错误信息传到页面
			model.addAttribute("allErrors",allErrors);
		}
//		ItemService.updateItems(id, items);
//		return "redirect:queryItems";
		//出错重新到商品的修改页面
		return "items/editItems";
	}
在商品查询列表页面,通过商品类型查询商品信息。
在controller中定义商品类型查询方法,最终将商品类型传到页面。
/*
	 *商品分类,
	 *itemTypes表示最终将方法返回值放在request中的key
	 */
	@ModelAttribute("itemTypes")
	public Map<String,String>getItemTypes(){


		Map<String,String>itemTypes=new HashMap<String, String>();
		itemTypes.put("101","数码");
		itemTypes.put("102","母婴");
		return itemTypes;
	}
页面上可以得到itemTypes数据
商品类型:
<select>
	<c:forEach items="${itemTypes }" var="itemType">
			<option value="${itemType.key }">${itemType.value }</option>
	</c:forEach>
</select>

页面显示

使用最简单方法使用model,可以不用@ModelAttribute

简单类型数据回显
使用最简单方法使用model。
model.addAttribute(“id”, id);
异常处理
异常处理思路
系统中异常包括两类:预期异常和运行时异常RuntimeException,前者通过捕获异常从而获取异常信息,后者主要通过规范代码开发、测试通过手段减少运行时异常的发生。
系统的dao、service、controller出现都通过throws Exception向上抛出,最后由springmvc前端控制器交由异常处理器进行异常处理,如下图:

springmvc提供全局异常处理器(一个系统只有一个异常处理器)进行统一异常处理。
自定义异常类
对不同的异常类型定义异常类,继承Exception。
package cn.itcast.ssm.exception;
/**
 * 自定义异常类
 * @author 86182
 *
 */
public class CustomException extends Exception{


	//异常信息
	public String message;
	public CustomException(String message) {


		super(message);
		this.message=message;
	}
	public String getMessage() {


		return message;
	}
	public void setMessage(String message) {


		this.message = message;
	}

}
全局异常处理器
思路:
系统遇到异常,在程序中手动抛出,dao抛给service、service给controller、controller抛给前端控制器,前端控制器调用全局异常处理器。
全局异常处理器处理思路:
- 解析出异常类型
- 如果该 异常类型是系统 自定义的异常,直接取出异常信息,在错误页面展示
- 如果该 异常类型不是系统 自定义的异常,构造一个自定义的异常类型(信息为“未知错误”)
springmvc提供一个HandlerExceptionResolver接口
@Override
	public ModelAndView resolveException(HttpServletRequest request,
			HttpServletResponse response, Object handler, Exception ex) {


		//handler就是处理器适配器要执行Handler对象(只有method)

//		解析出异常类型
//		如果该 异常类型是系统 自定义的异常,直接取出异常信息,在错误页面展示
//		String message = null;
//		if(ex instanceof CustomException){


//			message = ((CustomException)ex).getMessage();
//		}else{


			如果该 异常类型不是系统 自定义的异常,构造一个自定义的异常类型(信息为“未知错误”)
//			message="未知错误";
//		}
		//上边代码变为
		CustomException customException = null;
		if(ex instanceof CustomException){


			customException = (CustomException)ex;
		}else{


			customException = new CustomException("未知错误");
		}
		//错误信息
		String message = customException.getMessage();
		ModelAndView modelAndView = new ModelAndView();
		//将错误信息传到页面
		modelAndView.addObject("message", message);
		//指向错误页面
		modelAndView.setViewName("error");
		return modelAndView;
	}
错误页面
<%@ page language="java" contentType="text/html; charset=UTF-8"
    pageEncoding="UTF-8" isELIgnored="false"%>
<!DOCTYPE html>
<html>
<head>
<meta charset="UTF-8">
<title>错误提示</title>
</head>
<body>
${message }
</body>
</html>
在springmvc.xml配置全局异常处理器
<!--配置全局异常处理器,只要实现了HandlerExceptionResolver接口就是全局异常处理器  -->
	<bean class="cn.itcast.ssm.exception.CustomExceptionResolver"/>
异常处理思路
在controller、service、dao中任意一处需要手动抛出异常。
如果是程序中手动抛出的异常,在错误页面中显示自定义的异常信息,如果不是手动抛出异常说明是一个运行时异常,在错误页面只显示“未知错误”。
在商品修改的controller方法中抛出异常 .

在service接口中抛出异常:
如果与业务功能相关的异常,建议在service中抛出异常。
与业务功能没有关系的异常,建议在controller中抛出。
上边的功能,建议在service中抛出异常。
上传图片
需求
在修改商品页面,添加上传商品图片功能
springmvc中对多部文件类型进行解析
在页面form中提交ectype="multipart/form-data"的数据时,需要springmvc对multipart类型的数据进行解析
在springmvc.xml中配置multipart类型解析器
1、配置form表单

2、添加jar包依赖
<!-- 文件上传的jar包 -->
		<dependency>
			<groupId>commons-fileupload</groupId>
			<artifactId>commons-fileupload</artifactId>
			<version>1.4</version>
		</dependency>
3、创建图片虚拟 目录 存储图片
通过图形界面配置:

也可以直接修改tomcat的配置:
在conf/server.xml文件,添加虚拟 目录 :

在图片虚拟目录 中,图片按目录一定要分级创建(提高i/o性能),一般采用按日期(年、月、日)进行分级创建。
上传图片代码


json数据交互
json数据格式在接口调用中、html页面中较常用,json格式比较简单,解析还比较方便。
webservice接口,传输json数据.
springmvc进行json交互

- 请求json、输出json,要求请求的是json串,所以在前端页面中需要将请求的内容转成json,比较不方便
- 请求key/value、输出json。较简单
环境准备
加载json转的jar包
springmvc中使用jackson的包进行json转换(@requestBody和@responseBody使用下边的包进行json转),如下:

maven项目的pom文件中添加jackson依赖
<!-- json解析:jackson -->
		<!-- https://mvnrepository.com/artifact/com.fasterxml.jackson.core/jackson-databind -->
		<dependency>
			<groupId>com.fasterxml.jackson.core</groupId>
			<artifactId>jackson-databind</artifactId>
			<version>2.9.3</version>
		</dependency>
		<!-- https://mvnrepository.com/artifact/com.fasterxml.jackson.core/jackson-core -->
		<dependency>
			<groupId>com.fasterxml.jackson.core</groupId>
			<artifactId>jackson-core</artifactId>
			<version>2.9.3</version>
		</dependency>
		<!-- https://mvnrepository.com/artifact/com.fasterxml.jackson.core/jackson-annotations -->
		<dependency>
			<groupId>com.fasterxml.jackson.core</groupId>
			<artifactId>jackson-annotations</artifactId>
			<version>2.9.3</version>
		</dependency>
配置json转换器
在注解适配器中加入messageConverters
<!--注解适配器 -->
	<bean class="org.springframework.web.servlet.mvc.method.annotation.RequestMappingHandlerAdapter">
		<property name="messageConverters">
		<list>
		<bean class="org.springframework.http.converter.json.MappingJacksonHttpMessageConverter"></bean>
		</list>
		</property>
	</bean>
如果使用<mvc:annotation-driven /> 则不用定义上边的内容
json交互测试
输入json串,输出是json串
1、安装jquery
2、在jsp页面中引用jquery
<script src="${pageContext.request.contextPath}/static/jquery/jquery-3.4.1.min.js"></script>
jquery存放路径

3、使用jquery中ajax的post请求
// 请求json,输出也是json
function requestJson(){


	$.ajax({


		type:'post',
		url:'${pageContext.request.contextPath}/requestJson',
		contentType:'application/json;charset=utf-8',
		// 数据格式是json串,商品信息
		data:'{"name":"手机","price":999}',
		success:function(data){

     // 返回json结果
			alert(data)
		}
	})

}
4、controller
package cn.itcast.ssm.controller;

import org.springframework.stereotype.Controller;
import org.springframework.web.bind.annotation.RequestBody;
import org.springframework.web.bind.annotation.RequestMapping;
import org.springframework.web.bind.annotation.ResponseBody;

import cn.itcast.ssm.po.Items;

@Controller
public class TestController {


	@RequestMapping("/jsonTest")
	public String jsonTest() {


		return "jsonTest";
	}
	// 请求json,输出json(商品信息)
	// @RequestBody将json串转成java对象
	//@ResponseBody将java对象转成json串输出
	@RequestMapping("/requestJson")
	public @ResponseBody String requestJson(@RequestBody Items item) {


		System.out.println(item);
		return item.toString();
	}
}
5、jsp页面完整代码
<%@ page language="java" contentType="text/html; charset=UTF-8"
    pageEncoding="UTF-8" isELIgnored="false"%>
<!DOCTYPE html>
<html>
<head>
<meta charset="UTF-8">
<title>json交互测试</title>
<script src="${pageContext.request.contextPath}/static/jquery/jquery-3.4.1.min.js"></script>
<script>
// 请求json,输出也是json
function requestJson(){


	$.ajax({


		type:'post',
		url:'${pageContext.request.contextPath}/requestJson',
		contentType:'application/json;charset=utf-8',
		// 数据格式是json串,商品信息
		data:'{"name":"手机","price":999}',
		success:function(data){

      // 返回json结果
			alert(data)
		}
	})

}
</script>
</head>
<body>
<input type="button" onclick="requestJson()" value="请求json,输出json">
</body>
</html>
6、页面测试
点击按钮,弹窗显示返回的json字符串


输入key/value,输出是json串
1、安装jquery
2、在jsp页面中引用jquery
<script src="${pageContext.request.contextPath}/static/jquery/jquery-3.4.1.min.js"></script>
3、使用jquery中ajax的post请求方式提交post请求
// 请求是key/value,输出是json
function responseJson(){


	$.ajax({


		type:'post',
		url:'${pageContext.request.contextPath}/responseJson',
		//不需要指定contentType,默认就是key/value
		// 数据格式是json串,商品信息
		data:'name=手机&price=999',
		success:function(data){

     // 返回json结果
			alert(data)
		}
	})

}
4、Controller
package cn.itcast.ssm.controller;

import org.springframework.stereotype.Controller;
import org.springframework.web.bind.annotation.RequestBody;
import org.springframework.web.bind.annotation.RequestMapping;
import org.springframework.web.bind.annotation.ResponseBody;

import cn.itcast.ssm.po.Items;

@Controller
public class TestController {


	@RequestMapping("/jsonTest")
	public String jsonTest() {


		return "jsonTest";
	}
	// 请求json,输出json(商品信息)
	// @RequestBody将json串转成java对象
	//@ResponseBody将java对象转成json串输出
	@RequestMapping("/responseJson")
	public @ResponseBody String responseJson(Items item) {


		return item.toString();
	}
}
5、json页面完整代码
<%@ page language="java" contentType="text/html; charset=UTF-8"
    pageEncoding="UTF-8" isELIgnored="false"%>
<!DOCTYPE html>
<html>
<head>
<meta charset="UTF-8">
<title>json交互测试</title>
<script src="${pageContext.request.contextPath}/static/jquery/jquery-3.4.1.min.js"></script>
<script>
// 请求是key/value,输出是json
function responseJson(){


	$.ajax({


		type:'post',
		url:'${pageContext.request.contextPath}/responseJson',
		//不需要指定contentType,默认就是key/value,application/x-www-form-urlencoded
		// 数据格式是json串,商品信息
		data:'name=手机&price=999',
		success:function(data){

      // 返回json结果
			alert(data)
		}
	})

}
</script>
</head>
<body>
 <input type="button" onclick="responseJson()" value="请求是key/value,输出是json">
</body>
</html>
6、页面测试
点击按钮,弹窗显示返回的json字符串


Restful
Restful简介
RESTful架构,就是目前最流行的一种互联网软件架构。它结构清晰、符合标准、易于理解、扩展方便,所以正得到越来越多网站的采用。
RESTful(即Representational State Transfer的缩写)其实是一个开发理念,是对http的很好的诠释。
1、对url进行规范,写RESTful格式的url
非REST的url:http://…/queryItems.action?id=001&type=T01
REST的url风格:http://…/items/001
特点:url简洁,将参数通过url传到服务端
2、http的方法规范
不管是删除、添加、更新。。使用url是一致的,如果进行删除,需要设置http的方法为delete,同理添加。。。
后台controller方法:判断http方法,如果是delete执行删除,如果是post执行添加。
3、对http的contentType规范
请求时指定contentType,要json数据,设置成json格式的type。。
实例
定义方法,进行url映射使用REST风格的url,将查询商品信息的id传入controller .
输出json使用@ResponseBody将java对象输出json。
/*
	 * 查询商品信息,输出json
	 * /itemsView/{id}里的{id}表示将这个位置的参数传到@PathVariable指定名称中
	 */
	@RequestMapping("/itemsView/{id}")
	public @ResponseBody Items item(@PathVariable("id") Integer id)throws Exception{


		// 调用service查询商品新
		Items items=ItemService.findItemsById(id);
		return items;
	}
@RequestMapping(value="/ itemsView/{id}"):{

    ×××}占位符,请求的URL可以是“/viewItems/1”或“/viewItems/2”,通过在方法中使用@PathVariable获取{

    ×××}中的×××变量。
@PathVariable用于将请求URL中的模板变量映射到功能处理方法的参数上。
如果RequestMapping中表示为"/ itemsView /{id}",id和形参名称一致,@PathVariable不用指定名称。
REST方法的前端控制器配置
在web.xml配置:

页面访问
http://localhost:8080/ssm/items/itemsView/1

在springmvc.xml中添加静态资源解析方法。

拦截器
定义
定义拦截器,实现HandlerInterceptor接口。接口中提供三个方法。
public class HandlerInterceptor1 implements HandlerInterceptor {


	//进入 Handler方法之前执行
	//用于身份认证、身份授权
	//比如身份认证,如果认证通过表示当前用户没有登陆,需要此方法拦截不再向下执行
	@Override
	public boolean preHandle(HttpServletRequest request,
			HttpServletResponse response, Object handler) throws Exception {


		//return false表示拦截,不向下执行
		//return true表示放行
		return false;
	}

	//进入Handler方法之后,返回modelAndView之前执行
	//应用场景从modelAndView出发:将公用的模型数据(比如菜单导航)在这里传到视图,也可以在这里统一指定视图
	@Override
	public void postHandle(HttpServletRequest request,
			HttpServletResponse response, Object handler,
			ModelAndView modelAndView) throws Exception {


	}

	//执行Handler完成执行此方法
	//应用场景:统一异常处理,统一日志处理
	@Override
	public void afterCompletion(HttpServletRequest request,
			HttpServletResponse response, Object handler, Exception ex)
			throws Exception {


	}

}
配置
针对HandlerMapping配置
springmvc拦截器针对HandlerMapping进行拦截设置,如果在某个HandlerMapping中配置拦截,经过该 HandlerMapping映射成功的handler最终使用该 拦截器。
<bean
	class="org.springframework.web.servlet.handler.BeanNameUrlHandlerMapping">
	<property name="interceptors">
		<list>
			<ref bean="handlerInterceptor1"/>
			<ref bean="handlerInterceptor2"/>
		</list>
	</property>
</bean>
	<bean id="handlerInterceptor1" class="springmvc.intercapter.HandlerInterceptor1"/>
	<bean id="handlerInterceptor2" class="springmvc.intercapter.HandlerInterceptor2"/>
全局拦截器
springmvc配置类似全局的拦截器,springmvc框架将配置的类似全局的拦截器注入到每个HandlerMapping中。
在springmvc的配置文件springmvc.xml中配置如下:
<!-- 配置Springmvc全局拦截器 -->
	<mvc:interceptors>
		<!--多个拦截器,顺序执行 -->
		<!-- 登陆认证拦截器 -->
		<mvc:interceptor>
			<!--/**:拦截所有的,表示所有url包括子url路径   -->
			<mvc:mapping path="/**"/>
			<bean class="cn.itcast.ssm.interceptor.HandlerInterceptor1"></bean>
		</mvc:interceptor>
	</mvc:interceptors>