1.目的
- 学会 taro 组件的封装;
- 学习 【Stepper 进步器】的基础逻辑;
- 学会 react 组件调用值的传递!
2. 【Stepper 进步器】组件布局
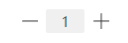
2.1 预览样式
2.2 布局结构代码
- 使用 flex 布局,作为进步器的盒子,注意由于个人习惯,基本采用的 flex 布局,rui-fa 是 flex: none 防止盒子发生错乱;
- 【rui-icon rui-icon-minus】减号;
- 【rui-icon rui-icon-plus】加号;
- 【rui-color4 rui-fs30 rui-ml15】图标的颜色大小和左边距;
- input 是 进步器 的输入盒子,可以编辑修改 value。
import React, { Component } from 'react'
import { View, Text, Input } from '@tarojs/components'
import './index.scss'


export default class RuiStepper extends Component {
  constructor(props) {
    super(props)
  }
  render () {
    return (
      <View className='rui-flex-ac rui-fa'>
        <Text className='rui-icon rui-icon-minus rui-color4 rui-fs30 rui-ml15'></Text>
        <Input className='rui-stepper-input'></Input>
        <Text className='rui-icon rui-icon-plus rui-color4 rui-fs30 rui-mr15'></Text>
      </View>
    )
  }
}
3. 【Stepper 进步器】传入参数赋值
- 传入的 默认 value 进行渲染显示;
- 传入的 min / max 需要事件触发进行判断处理。
export default class RuiStepper extends Component {
  constructor(props) {
    super(props)
  }
  render () {
    let { value = 1 } = this.props
    return (
      <View className='rui-flex-ac rui-fa'>
        <Text className='rui-icon rui-icon-minus rui-color4 rui-fs30 rui-ml15'></Text>
        <Input className='rui-stepper-input' value={value}></Input>
        <Text className='rui-icon rui-icon-plus rui-color4 rui-fs30 rui-mr15'></Text>
      </View>
    )
  }
}
4. 【Stepper 进步器】输入事件触发处理
- input 失去焦点获取输入的 value;
- 获取传入的 max 和 min 的值,如果没有,默认 1000 和 1;
- 对输入的 value 去掉非数字项【注意:此处没有考虑浮点数情况】;
- 三目表达式处理 value 的值,value 在 最大值 max 和 最小值 min 之间,就使用value本身,否则大于max使用max,小于min使用min;
- 将最后的 value 传递出去。
getValue(e){
   let { value } = e.detail
   let { max = 1000, min = 1 } = this.props
   value = value.replace(/[^\d]/g, '')
   value = value < min ? min : value > max ? max : value
   this.props.changeValue(value)
 }
5. 【Stepper 进步器】点击加减号触发处理
- 获取传入的 max 和 min 的值,如果没有,默认 1000 和 1;
- 判断点击的是加号还是减号;
- 加号,判断加1是否小于等于最大值,满足就加1;
- 减号,判断减1是否大于最小值,满足减1;
- 注意此处进步器的步长都是1;
- 最后使用value本身;
- 将最后的 value 传递出去。
handleStep(value, type){
  let { max = 1000, min = 1 } = this.props
  value = type == '+' && value + 1 <= max ? value + 1 : type == '-' && value - 1 > min ? value - 1 : value
  this.props.changeValue(value)
}
6. 【Stepper 进步器】阻止事件冒泡
<View className='rui-flex-ac rui-fa' onClick={(e) => e.stopPropagation()}></View>
7. 完整代码
import React, { Component } from 'react'
import { View, Text, Input } from '@tarojs/components'
import './index.scss'


export default class RuiStepper extends Component {
  constructor(props) {
    super(props)
  }
  // 操作对值的加减操作
  handleStep(value, type){
    let { max = 1000, min = 1 } = this.props
    value = type == '+' && value + 1 <= max ? value + 1 : type == '-' && value - 1 > min ? value - 1 : value
    this.props.changeValue(value)
  }
  // 获取输入值的操作
  getValue(e){
    let { value } = e.detail
    let { max = 1000, min = 1 } = this.props
    value = value.replace(/[^\d]/g, '')
    value = value < min ? min : value > max ? max : value
    this.props.changeValue(value)
  }
  render () {
    let { value } = this.props
    return (
      <View className='rui-flex-ac rui-fa' onClick={(e) => e.stopPropagation()}>
        <Text className='rui-icon rui-icon-minus rui-color4 rui-fs30 rui-ml15' onClick={this.handleStep.bind(this, value, '-')}></Text>
        <Input className='rui-stepper-input' value={value} onBlur={this.getValue.bind(this)}></Input>
        <Text className='rui-icon rui-icon-plus rui-color4 rui-fs30 rui-mr15' onClick={this.handleStep.bind(this, value, '+')}></Text>
      </View>
    )
  }
}
8. 组件使用
- 引入【Stepper 步进器】组件;
- 界面使用;
import React, { Component } from 'react'
import { View, Text, Input } from '@tarojs/components'
import RuiStepper from '../RuiStepper/RuiStepper'

export default class RuiGoodsLi extends Component {
  constructor(props) {
    super(props)
  }
  changeValue(value){
    let { index = 0, idx = 0, list } = this.state
    list[index].buy[idx].GoodsNum = value
    this.setState({list})
  }
  render () {
    let { value = 1 } = this.props
    return (
      <View>
        <RuiStepper changeValue={this.changeValue.bind(this)} value={goods.GoodsNum}/>
      </View>
    )
  }
}
9. 预览

WXRUI体验二维码

如果文章对你有帮助的话,请打开微信扫一下二维码,点击一下广告,支持一下作者!谢谢!
下载
扫描二维码关注公众号,回复:
13382337 查看本文章
