1 nginx反向代理接口跨域
1.1 正向代理与反向代理的区别:
- 正向代理:客户端向服务器请求数据时,服务器并不需要直到客户端的来源(即隐藏了客户端)
- 反向代理:客户端向服务器请求数据,直观请求到数据即可,不需要直到数据来源于哪个服务器(即隐藏了服务器)
1.2 如何使用nginx?
1)首先,由于nginx是一个web服务器,你需要到相应的官网进行下载,且进行相应的配置,下载地址:http://nginx.org/en/download.html
2)下载的相关教程参考此文章:
https://www.cnblogs.com/renjing/p/6126284.html
3)使用nginx的例子参考文章:https://zhuanlan.zhihu.com/p/94197713
1.3 配置nginx实现跨域的步骤
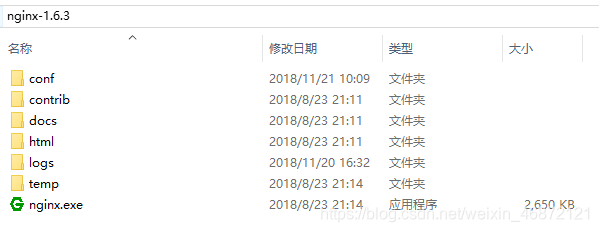
1.去nginx官网下载搭建nginx环境
2.修改nginx的配置文件,找到nginx.conf文件,修改相关的配置,配置举例如下:
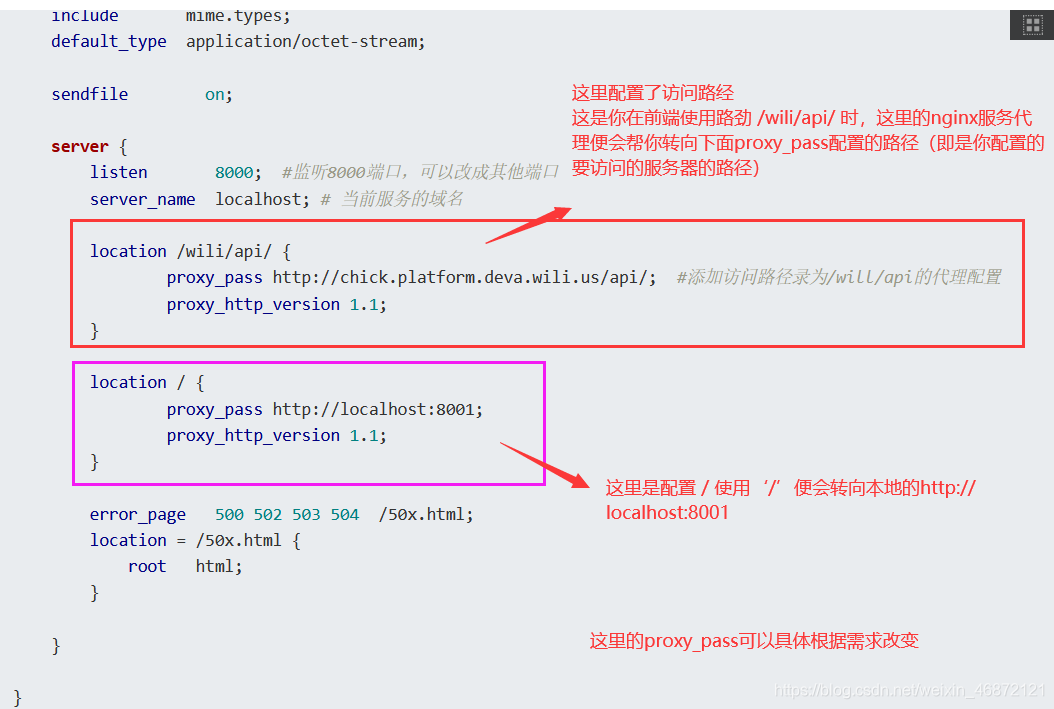
举例1)
举例2)
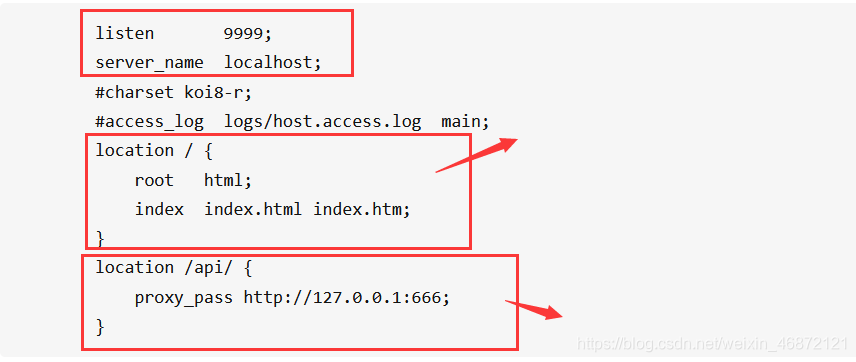
举例2配置说明:
- 然后我们配置一下代理,这个意思就是我们请求中有 api 这样的就会代理到 http://127.0.0.1:666,所以我们只要访问 http://localhost:9999/api/getList 这个不跨域的接口,然后就会由服务器反向代理到 http://localhost:666/api/getList。
- 因此在前端发送跨域请求时,改变如下:
// xhr.open('GET', 'http://localhost:666/api/getList', true);
//此时用/api,举例2所配置的nginx反向代理的作用就是将/api转向http://127.0.0.1:666
xhr.open('GET', '/api/getList', true);
- 因此,配置了nginx反向代理的
'/api/getList'等价于起始的'http://localhost:666/api/getList',且此时不会出现提示的跨域的错误信息;
1.4 这个实现流程
1.4.1在未配置nginx反向代理之前
- 服务接口
既然请求,肯定需要先写一个服务接口,我们用 node 起一个服务:
// index.js
const http = require('http');
const fs = require('fs');
const url = require('url');
const server = http.createServer(function (req, res) {
if (req.url === '/favicon.ico') {
return;
}
const parseUrl = url.parse(req.url, true);
console.log('parseUrl', parseUrl.pathname)
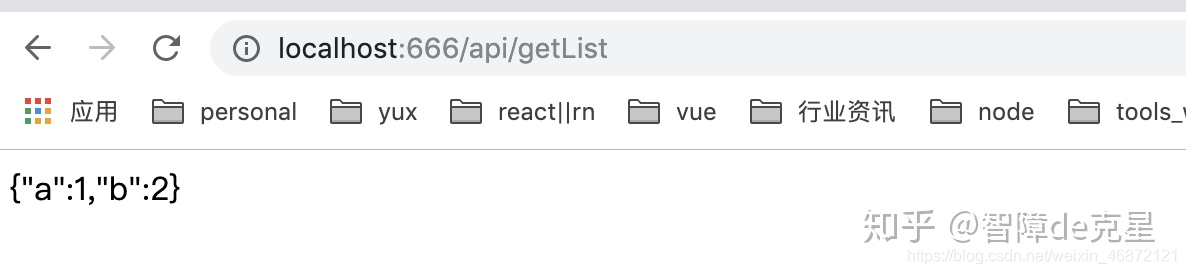
if (parseUrl.pathname === '/api/getList') {
const list = {
'a': 1, 'b': 2}
res.writeHead(200, {
'content-Type':'text/html;charset=UTF-8'})
res.end(JSON.stringify(list))
}else {
res.write(`
port: 666
`)
res.end()
}
});
server.listen(666, function () {
console.log('server is starting on port 666');
});
我们来访问一下,可以拿到数据了。
- 测试页面
然后,我们写一个简单的 ajax 请求页面。你可以本地用http-server启动访问下,可以发现请求跨域了:
<html>
<head>
  <title></title>
</head>
<body>
  <button onclick="sendAjax()">sendAjax</button>
<script type="text/javascript">
  var sendAjax = () => {


      var xhr = new XMLHttpRequest();
      xhr.open('GET', 'http://localhost:666/api/getList', true);
      xhr.send();
      xhr.onreadystatechange = function (e) {


        if (xhr.readyState == 4 && xhr.status == 200) {


          console.log(xhr.responseText);
        }
      };
  }
</script>
</body>
</html>

1.4.2 经过1.3的配置代理之后
html文件改变如下,主要时改变了xhr.open()的请求地址,如下:
// xhr.open('GET', 'http://localhost:666/api/getList', true);
xhr.open('GET', '/api/getList', true);
- 测试结果
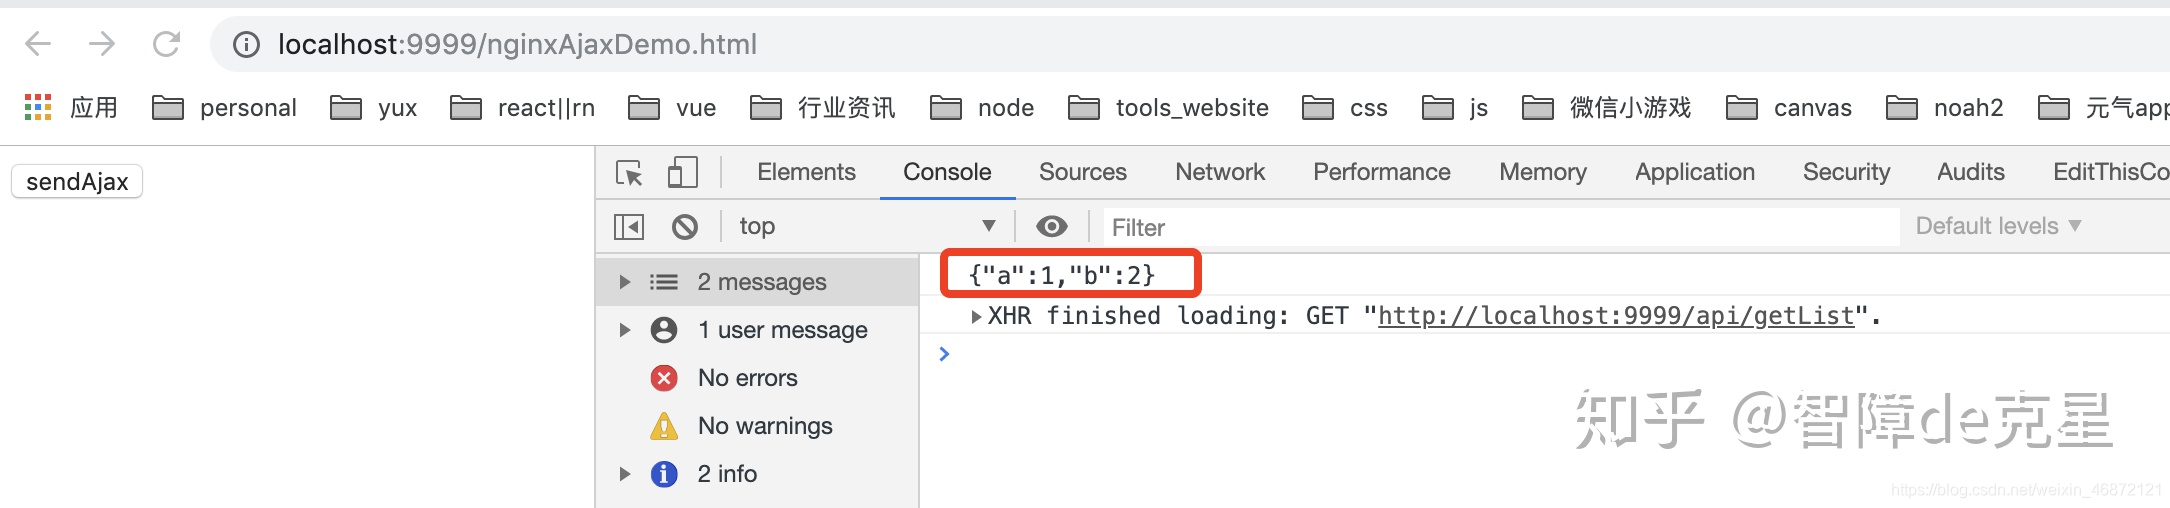
- 此时我们也可以随便用一个域名测试以下。Nginx 重新配置下:
    listen       80;
        server_name  yumingtest;
        #charset koi8-r;
        #access_log  logs/host.access.log  main;
        location / {


            root   html;
            index  index.html index.htm;
        }
        location /api/ {


            proxy_pass http://127.0.0.1:666;
        }
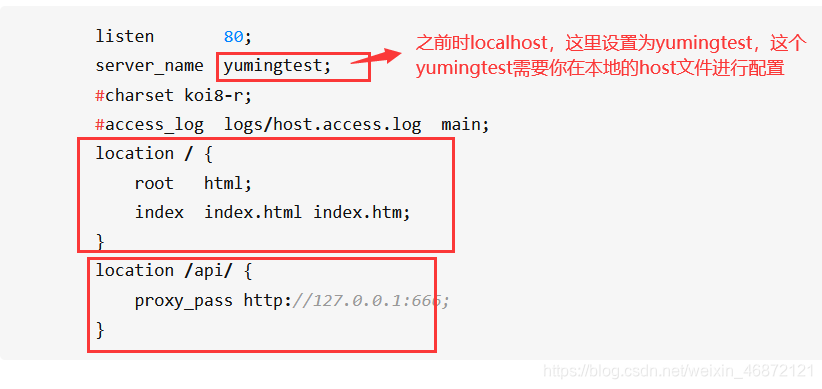
然后在C:\Windows\System32\drivers\etc的 hosts 文件里面添加这条:127.0.0.1 yumingtest.com,重启下 Nginx。

关于hosts 文件的作用,就是我们输入域名不是要需要经过DNS解析IP嘛,这个里面就存了一些;输入域名后并不是先自动从 Hosts 文件中寻找对应的 IP 地址。而是浏览器先从浏览器的dns缓存中找,找不到再去 hosts文件中找;