概念:为了方便服务配置文件统一管理,更易于部署、维护,就需要分布式配置中心组件了,在spring cloud中,有分布式配置中心组件spring cloud config,它支持配置文件放在在配置服务的内存中,也支持放在远程Git仓库里。
这里演示存放到远程Git仓库
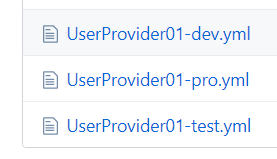
准备:先在git创建一个仓库和三个配置文件

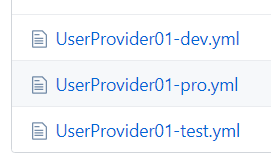
UserProvider01-dev.yml 其它两个略 更改成你想要的切换的配置就行

1.搭建Config Server模块
在父工程下

新建一个maven项目 名称为 Config Server01
2.引入相关依赖
 <dependency>
	  <groupId>org.springframework.cloud</groupId>
	  <artifactId>spring-cloud-config-server</artifactId>
</dependency>
3.写一个启动程序
注意:要添加@EnableConfigServer注解,开启Config Server
@SpringBootApplication
@EnableConfigServer
public class ConfigServer001Application {


	public static void main(String[] args) {


		SpringApplication.run(ConfigServer001Application.class, args);
	}
}
4.修改配置文件application.yml配置服务信息以及git信息
server:
  port: 7001
spring:
  application:
    name: CONFIGSERVER
  cloud:
    config:
      server:
        git:
          #git仓库地址
          uri: https://github.com/xuexi007/java1203-configserver/
          #配置文件在git仓库的存放文件夹路径
          search-paths: config
          username: xuexi007    #github账户名
          password: ********    #github密码
5.测试地址
http://localhost:7001/UserProvdier01/pro/
http://localhost:7001/UserProvdier01/test/
http://localhost:7001/UserProvdier01/dev/
如果显示下面内容就说明成功了,然后进行下面的操作

Config Client客户端调用配置中心配置
(服务提供方)
1.导入依赖
<dependency>
			<groupId>org.springframework.cloud</groupId>
			<artifactId>spring-cloud-starter-config</artifactId>
</dependency>
2.在resources文件夹下新建配置文件bootstrap.yml并进行配置

注意:application.yml不要删掉,内容清空就行,否则后面可能会读取不到
spring:
  application:
    name: CONFIGSERVER
  cloud:
    config:
      uri: http://localhost:7001
      profile: test   #指明是哪个环境
      label: master   #分支
3.启动测试就行
这里就有个问题,每次修改git上的配置信息后,都要重启服务器才能进行刷新,那么怎么实现动态刷新呢?
修改配置文件实现动态刷新
(在服务提供方)
1.导入依赖
<dependency>
            <groupId>org.springframework.boot</groupId>
            <artifactId>spring-boot-starter-actuator</artifactId>
 </dependency>
2.修改UserProvdier01的application.yml增加配置,打开refresh端点
management:
 endpoints:
   web:
     exposure:
       include: refresh,health,info
3.在要提取配置中信息的controller上增加注解:@RefreshScope
提取配置中的变量用以下方法
@Value("${ProviderVersion}")
private String ProviderVersion;
4.使用postMan发出post请求到如下地址:
http://localhost:9009/actuator/refresh (注意发出post请求)
5.刷新页面可以看到内容动态改变了
搭建Spring Cloud Config集群
图解思路:


git仓库
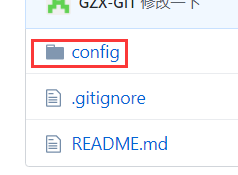
config下面
ConfigServer001
1.编写启动类
package com.offcn;
import org.springframework.boot.SpringApplication;
import org.springframework.boot.autoconfigure.SpringBootApplication;
import org.springframework.cloud.client.discovery.EnableDiscoveryClient;
import org.springframework.cloud.config.server.EnableConfigServer;
@SpringBootApplication
@EnableConfigServer
@EnableDiscoveryClient   //允许注册发现
public class configserver01Starter {


    public static void main(String[] args) {


        SpringApplication.run(configserver01Starter.class,args);
    }
}
2.配置application.yml 文件

3.pom依赖
    <dependencies>
        <!--引入spring-config-server所需的依赖包-->
        <dependency>
            <groupId>org.springframework.cloud</groupId>
            <artifactId>spring-cloud-config-server</artifactId>
        </dependency>

        <!--引入Eureka Client依赖包-->
        <dependency>
            <groupId>org.springframework.cloud</groupId>
            <artifactId>spring-cloud-starter-netflix-eureka-client</artifactId>
        </dependency>
    </dependencies>
ConfigServer002
1.启动类
package com.offcn;

import org.springframework.boot.SpringApplication;
import org.springframework.boot.autoconfigure.SpringBootApplication;
import org.springframework.cloud.client.discovery.EnableDiscoveryClient;
import org.springframework.cloud.config.server.EnableConfigServer;

@SpringBootApplication
@EnableConfigServer
@EnableDiscoveryClient
public class configserver02Starter {


    public static void main(String[] args) {


        SpringApplication.run(configserver02Starter.class,args);
    }
}
2.配置application.yml文件

3.pom.xml文件
<dependencies>
    <!--引入spring-config-server所需的依赖包-->
    <dependency>
        <groupId>org.springframework.cloud</groupId>
        <artifactId>spring-cloud-config-server</artifactId>
    </dependency>

    <!--引入Eureka Client依赖包-->
    <dependency>
        <groupId>org.springframework.cloud</groupId>
        <artifactId>spring-cloud-starter-netflix-eureka-client</artifactId>
    </dependency>
</dependencies>
到这Spring Cloud Config的集群就配置好了,启动检查一下
出现这个就说明启动成功了

Config Client客户端调用配置中心配置
创建bootstrap.yml文件并进行配置,application.yml文件保留,内容为空

启动测试
查看控制台 连接到了7002

重连后连接到了7001

可以发现,默认是轮询机制