最近需要做一个效果,所以记录一下实现原理。
主要使用GrabPass,这是个特殊的shader pass,作用是抓取即将被绘制到屏幕的纹理,让我们开发者用于开发一些着色效果,官方解释:Unity GrabPass
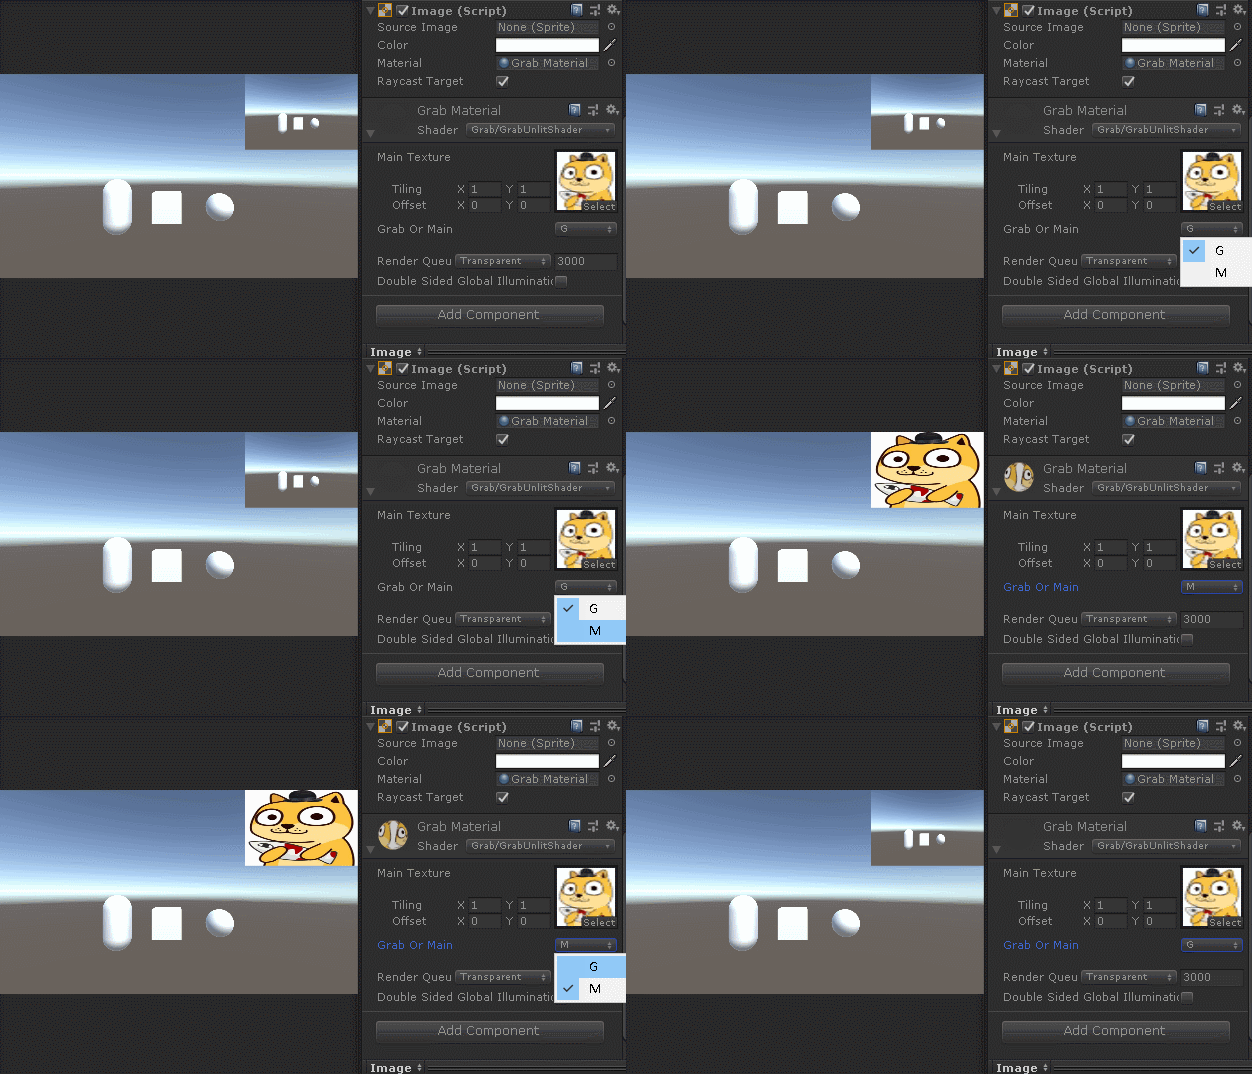
下面我们简单使用一下理解其作用:
Shader "Grab/GrabUnlitShader"
{
    Properties
    {
        _MainTex("Main Texture",2D) = "white" {}
        [Enum(G,0,M,1)]_GM("Grab Or Main",int) = 0
    }
    SubShader
    {
        Tags { "RenderType"="Opaque" }
        LOD 100

        GrabPass
        {
            "_GrabTexture"          //可以设置其他名称,也可以不设置名称直接使用_GrabTexture
        }

        Pass
        {
            CGPROGRAM
            #pragma vertex vert
            #pragma fragment frag
            #include "UnityCG.cginc"

            struct appdata
            {
                float2 uv : TEXCOORD0;
                float4 vertex : POSITION;
            };

            struct v2f
            {
                float2 uv : TEXCOORD0;
                float4 vertex : SV_POSITION;
            };

            sampler2D _MainTex;
            float4 _MainTex_ST;

            sampler2D _GrabTexture;

            int _GM;

            v2f vert (appdata v)
            {
                v2f o;
                o.vertex = UnityObjectToClipPos(v.vertex);
                o.uv = TRANSFORM_TEX(v.uv, _MainTex);
                return o;
            }

            fixed4 frag (v2f i) : SV_Target
            {
                fixed4 col;
                if(_GM == 0)
                {
                    //默认的grabTex uv.y使用从顶至底采样,所以需要定义宏做uv.y倒置计算
                    #if UNITY_UV_STARTS_AT_TOP
                    col = tex2D(_GrabTexture, float2(i.uv.x,1-i.uv.y));
                    #else
                    col = tex2D(_GrabTexture, i.uv);
                    #endif
                }
                else if(_GM == 1)
                    col = tex2D(_MainTex, float2(i.uv.x,i.uv.y));
                return col;
            }
            ENDCG
        }
    }
}
我们通过定义GrabPass获取_GrabTexture,然后在另外的pass中采样输出画面。这里特别注意一个问题,GrabTex的uv可能和我们平时使用的uv坐标系不太一样,一般情况下我们的uv(0,0)到(1,1)是由左下角到右上角,但此时可能是由左上角到右下角,所以需要使用UNITY_UV_STARTS_AT_TOP宏判断uv.y的方向,不然采样出来就是个倒置的。
效果如下:

其实这个GrabPass的作用和Camera.RenderTexture类似,就是省去了c#代码交互的过程,GrabPass默认采样Depth最高的Camera的画面。
好,既然了解了GrabPass的作用,接下来就要来看看我目前需要实现的一个效果了,我目前要做的一个类似ios的“毛玻璃”效果。主要应用在我的上帝视角场景中,用高斯模糊效果遮挡未“探索”区域,有点类似“战争迷雾”,当然效果不太一样。
首先要做的就是在“上帝视角”下通过GrabPass采样渲染出“遮罩片”,如下:
Shader "Grab/GrabMaskShader"
{
    SubShader
    {
        Tags { "RenderType"="Opaque" "Queue"="Transparent" }
        LOD 100

        GrabPass{}

        Pass
        {
            CGPROGRAM
            #pragma vertex vert
            #pragma fragment frag
            #include "UnityCG.cginc"

            struct appdata
            {
                float2 uv : TEXCOORD0;
                float4 vertex : POSITION;
            };

            struct v2f
            {
                float4 pos : TEXCOORD0;
                float4 vertex : SV_POSITION;
            };

            sampler2D _GrabTexture;

            v2f vert (appdata v)
            {
                v2f o;
                o.vertex = UnityObjectToClipPos(v.vertex);
                o.pos = ComputeGrabScreenPos(o.vertex);
                return o;
            }

            fixed4 frag (v2f i) : SV_Target
            {
                //fixed4 col = tex2Dproj(_GrabTexture,i.pos);
                fixed4 col = tex2D(_GrabTexture,float2(i.pos.x/i.pos.w,i.pos.y/i.pos.w));
                return col;
            }
            ENDCG
        }
    }
}
这里要解释一下这两个函数:
1.ComputeGrabScreenPos 计算grab屏幕坐标
inline float4 ComputeGrabScreenPos (float4 pos) {
    #if UNITY_UV_STARTS_AT_TOP
    float scale = -1.0;
    #else
    float scale = 1.0;
    #endif
    float4 o = pos * 0.5f;
    o.xy = float2(o.x, o.y*scale) + o.w;
#ifdef UNITY_SINGLE_PASS_STEREO
    o.xy = TransformStereoScreenSpaceTex(o.xy, pos.w);
#endif
    o.zw = pos.zw;
    return o;
}
通过函数源码和使用可以看出,v.vertex经过MVP变换后裁剪空间中(裁剪空间是一个2*2*2的立方体,同时范围[-1,1],而齐次坐标表示(x,y,z,w)[-w,w],如果不了解这些基本概念务必返回之前博客查看理解),但是屏幕坐标取值范围却是[0,1],所以CGSP函数实现中float4 o = pos * 0.5f; o.xy = float2(o.x, o.y*scale) + o.w;就将齐次坐标的分量范围[-w,w]映射到[0,w]。
2.tex2Dproj 投影纹理采样
接下来frag采样中,需要将[0,w]映射到[0,1],所以不能使用我们通常使用的tex2D采样,而需要使用tex2Dproj这个函数采样,这个函数处理了/w的计算(也可以称为做了透视除法)。当然我们也可以修改tex2D模拟tex2Dproj。
fixed4 frag (v2f i) : SV_Target
{
     //fixed4 col = tex2Dproj(_GrabTexture,i.pos);
     fixed4 col = tex2D(_GrabTexture,float2(i.pos.x/i.pos.w,i.pos.y/i.pos.w));
     return col;
}
shader得到的效果如下:

这个mask片可不是透明哟!而是一个实时投影采样渲染背景纹理的opaque材质。当然了我们继续往下写,为了实现“毛玻璃”,我们必须通过高斯模糊将纹理进行模糊渲染,如下:
Shader "Grab/GrabGaussMaskShader"
{
    Properties
    {
        _GaussSpread("Guass Spread",Range(0,10)) = 0
        _GaussLumin("Guass Luminance",Range(0.5,1.5)) = 1
    }
    SubShader
    {
        Tags { "RenderType"="Opaque" "Queue"="Transparent" }
        LOD 100

        GrabPass{}

        Pass
        {
            CGPROGRAM
            #pragma vertex vert
            #pragma fragment frag
            #include "UnityCG.cginc"

            struct appdata
            {
                float2 uv : TEXCOORD0;
                float4 vertex : POSITION;
            };

            struct v2f
            {
                float2 uv[9] : TEXCOORD0;
                float4 vertex : SV_POSITION;
            };

            int _GaussSpread;           //高斯扩散
            float _GaussLumin;          //亮度
            sampler2D _GrabTexture;
            float4 _GrabTexture_TexelSize;
            static float gaussMatrix[9] = {
				0.05854983,
				0.09653235,
				0.05854983,
				0.09653235,
				0.1591549,
				0.09653235,
				0.05854983,
				0.09653235,
				0.05854983
			};

            v2f vert (appdata v)
            {
                v2f o;
                o.vertex = UnityObjectToClipPos(v.vertex);
                float4 gvertex = ComputeGrabScreenPos(o.vertex);
                float2 guv = float2(gvertex.x/gvertex.w,gvertex.y/gvertex.w);
                int c = 1;
		for (int x = 0; x < 3; x++)
		{
		    for (int y = 0; y < 3; y++)
		    {
			o.uv[x * 3 + y] = guv + _GrabTexture_TexelSize.xy*float2((y - c)*_GaussSpread, (c - x)*_GaussSpread);
		    }
		}
                return o;
            }

            fixed4 frag (v2f i) : SV_Target
            {
                fixed4 col = fixed4(0,0,0,0);
				for (int k = 0; k < 9; k++)
				{
					col += tex2D(_GrabTexture, i.uv[k])*gaussMatrix[k]*_GaussLumin;
				}
                col.a = 1;
                return col;
            }
            ENDCG
        }
    }
}
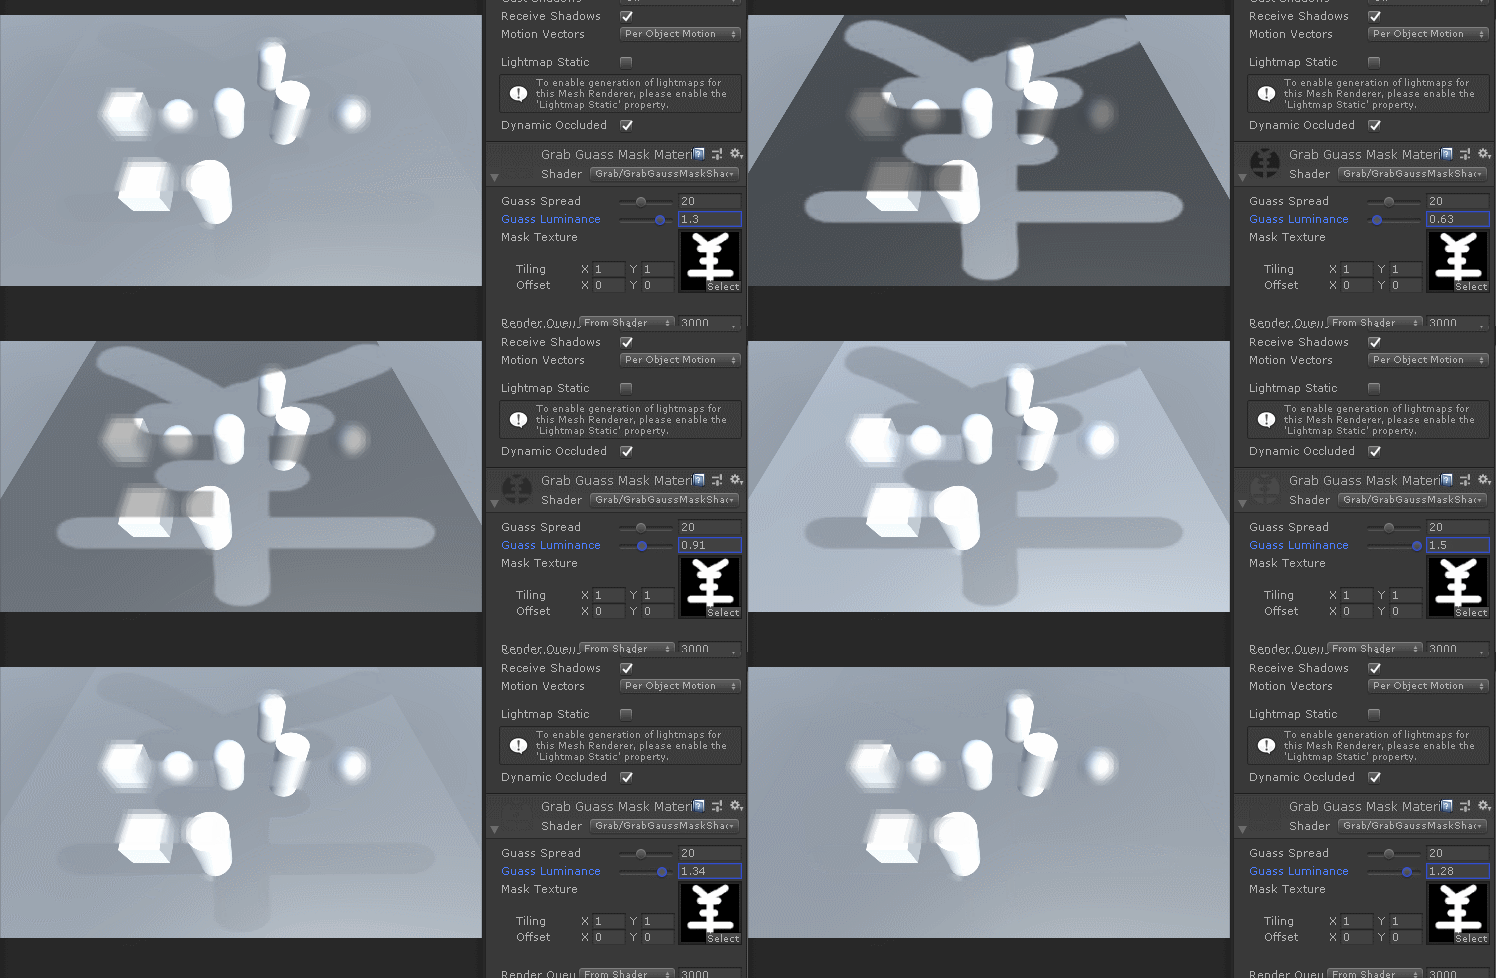
代码就是在vert函数中做uv计算,然后单次高斯处理,以前我们玩过很多次了,不细讲。效果如下:

最后就是通过额外一个单通道(R通道)贴图“标记”哪里需要模糊哪里不需要模糊,先用ps制作一个R通道贴图(当然如果有需求可以通过c#做成动态生成都行,原理无非就是新建texture2D,然后通过SetPixel和SetPixels修改纹理的颜色数据,可以实现一种大扫除擦玻璃的效果)

我们设定R=0表示“模糊”,R=1表示“透明”,修改代码如下:
Shader "Grab/GrabGaussMaskShader"
{
    Properties
    {
        _GaussSpread("Guass Spread",Range(0,50)) = 0
        _GaussLumin("Guass Luminance",Range(0.5,1.5)) = 1
        _MaskTex("Mask Texture",2D) = "white" {}
    }
        SubShader
    {
        Tags { "RenderType" = "Opaque" "Queue" = "Transparent" }
        LOD 100

        GrabPass{}

        Pass
        {
            CGPROGRAM
            #pragma vertex vert
            #pragma fragment frag
            #include "UnityCG.cginc"

            struct appdata
            {
                float2 uv : TEXCOORD0;
                float4 vertex : POSITION;
            };

            struct v2f
            {
                float2 uv[9] : TEXCOORD0;
                float2 guv : TEXCOORD9;
                float4 vertex : SV_POSITION;
            };

            int _GaussSpread;           //高斯扩散
            float _GaussLumin;          //亮度
            sampler2D _MaskTex;
            sampler2D _GrabTexture;
            float4 _GrabTexture_TexelSize;
            static float gaussMatrix[9] = {
                0.05854983,
                0.09653235,
                0.05854983,
                0.09653235,
                0.1591549,
                0.09653235,
                0.05854983,
                0.09653235,
                0.05854983
            };

            v2f vert(appdata v)
            {
                v2f o;
                o.vertex = UnityObjectToClipPos(v.vertex);
                float4 gvertex = ComputeGrabScreenPos(o.vertex);
                o.guv = float2(gvertex.x / gvertex.w,gvertex.y / gvertex.w);
                int c = 1;
                for (int x = 0; x < 3; x++)
                {
                    for (int y = 0; y < 3; y++)
                    {
                        o.uv[x * 3 + y] = o.guv + _GrabTexture_TexelSize.xy * float2((y - c) * _GaussSpread, (c - x) * _GaussSpread);
                    }
                }
                return o;
            }

            fixed4 frag(v2f i) : SV_Target
            {
                float mr = tex2D(_MaskTex, i.guv).r;
                fixed4 gcol = fixed4(0,0,0,0);
                for (int k = 0; k < 9; k++)
                {
                    gcol += tex2D(_GrabTexture, i.uv[k]) * gaussMatrix[k] * _GaussLumin;
                }
                fixed4 mcol = tex2D(_GrabTexture, i.guv);
                fixed4 bcol = lerp(gcol,mcol,mr);
                bcol.a = 1;
                return bcol;
            }
            ENDCG
        }
    }
}
修改原理也简单:通过MaskTex的R通道判断是否渲染模糊颜色或者原始颜色,最后效果:

so,继续我的科目二考试准备。