这里主要记录一下,调试CenterNet用来训练猫脸 关键点检测的过程。因为网上现在大多都是利用CenterNet进行目标检测,但是我觉得目标检测用CenterNet显然不是最好的,关于目标检测可以看mmdetection这个框架,可以参考我这篇博客:
mmdetection实战,训练扑克牌数据集(VOC格式)并测试计算mAP
争取按照本篇博客,都能跑成功!
论文地址: Objects as Points【 国内镜像】
代码地址: https://github.com/xingyizhou/CenterNet
博客参考: 扔掉anchor!真正的CenterNet——Objects as Points论文解读
一、本机配置
ubuntu18.04.3 + cuda10.0 + cudnn7.4.2 + PyTorch1.2 + torchvision0.4 + python3.6
二、环境搭建
- 其实官方文档INSTALL.md里面已经说的很详细了,虽然作者使用的是pytorch0.4,但是在pytorch1.x上是完全可以运行的。
- 在issues/7里面也非常详细了,我基本是安装都是参照这个问题来的,装好环境可以参照里面的test部分测试一下demo。
- 只是有一个注意的地方,就是编译DCNv2的时候得去这个tree下载下来,然后注意不是复制到
CenterNet/src/lib/models/networks去替换,而是需要删除整个DCNv2文件夹rm -rf DCNv2,然后把下载好的复制进去,否则编译会出错。 - 以下修改和用到的代码文件,官方预训练模型都打包在这里,无需下载比赛的优胜代码。
- 有问题欢迎评论区,这里不过多介绍。
三、数据准备
其实这是一个AI研习社的比赛,介绍和数据集可以里面下,这里用的也是优胜代码,但是他没有写任何的介绍和给出训练好的模型,甚至log日志也没有(只有一点他运行时留下的自己复制的内容,和json格式文件,害我硬着头皮看了好几天,这里就记录一下,只要按照我下面来就行):
- 数据集解压出来只有
train,test,train.csv,需要把train.csv放到刚刚创建环境中CenterNet/data下,运行generate_train_val_txt.py(也放在data下)生成train.txt,test.txt,这里放一下代码:generate_train_val_txt.py
import csv
import random

with open('train.csv','r') as csvfile:
    reader = csv.reader(csvfile)
    column = [row[0] for row in reader]

total_file = column[1:]

train_percent = 0.85
num = len(total_file)
print("total images numbers:", num)  # 10548

list = range(num)
tr = int(num * train_percent)
train = random.sample(list, tr)
print("train size:", tr)

ftrain = open('train.txt', 'w')
fval = open('val.txt', 'w')

for i in list:
    name = total_file[i] + '\n'
    if i in train:
        ftrain.write(name)
    else:
        fval.write(name)

ftrain.close()
fval.close()
print("write finished!")
- 然后运行
generate_coco_json.py把训练数据集生成COCO格式的文件train.json,test.json,代码参考了在目标检测和关键点检测任务中如何将自己的数据集转为coco格式,想了解COCO格式的可以看一下COCO数据集的标注格式,这里也放一下代码:generate_coco_json.py
# *_* : coding: utf-8 *_*

'''
datasets process for object detection project.
for convert customer dataset format to coco data format,
'''

import traceback
import argparse
import json
import cv2
import csv
import os

__CLASS__ = ['__background__', 'CatFace']   # class dictionary, background must be in first index.

def argparser():
    parser = argparse.ArgumentParser("define argument parser for pycococreator!")
    parser.add_argument("-r", "--image_root", default='D:\\catface\\train\\', help="path of root directory")
    parser.add_argument("-p", "--phase_folder", default=["train", "val"], help="datasets split")

    return parser.parse_args()

def MainProcessing(args):
    '''main process source code.'''
    annotations = {

    }    # annotations dictionary, which will dump to json format file.
    image_root = args.image_root
    phase_folder = args.phase_folder
    with open('train.csv', 'r') as f:
        reader = csv.reader(f)
        result = list(reader)
        result = result[1:]

    # coco annotations info.
    annotations["info"] = {


        "description": "customer dataset format convert to COCO format",
        "url": "http://cocodataset.org",
        "version": "1.0",
        "year": 2020,
        "contributor": "ezra",
        "date_created": "2020/03/15"
    }
    # coco annotations licenses.
    annotations["licenses"] = [{


        "url": "https://www.apache.org/licenses/LICENSE-2.0.html",
        "id": 1,
        "name": "Apache License 2.0"
    }]
    # coco annotations categories.
    annotations["categories"] = []
    for cls, clsname in enumerate(__CLASS__):
        if clsname == '__background__':
            continue
        annotations["categories"].append(
            {


                "id": cls,
                "name": clsname,
                "supercategory": "Cat",
            }
        )
        for catdict in annotations["categories"]:
            if "CatFace" == catdict["name"]:
                catdict["keypoints"] = [0, 1, 2, 3, 4, 5, 6, 7, 8]
                catdict["skeleton"] = [[0,1],[1,2],[0,2],[3,4],[4,5],[5,6],[6,7],[7,8],[8,3]]

    for phase in phase_folder:
        annotations["images"] = []
        annotations["annotations"] = []
        fphase = open(phase + '.txt', 'r')
        step = 0
        for id, line in enumerate(fphase.readlines()):
            line = line.strip("\n")
            file_name = line + '.jpg'
            images_id = int(line)
            height, width, _ = cv2.imread(image_root + file_name).shape
            v = [2, 2, 2, 2, 2, 2, 2, 2, 2]
            point_str = result[images_id][1:]
            point = [int(k) for k in point_str]
            for j in range(9):
                if min(point[2*j:2*j+2]) < 0:
                    v[j] = 1
            keypoint = [point[0],  point[1],  v[0], point[2],  point[3],  v[1],
                        point[4],  point[5],  v[2], point[6],  point[7],  v[3],
                        point[8],  point[9],  v[4], point[10], point[11], v[5],
                        point[12], point[13], v[6], point[14], point[15], v[7],
                        point[16], point[17], v[8]]
            bw = max(point[0::2]) - min(point[0::2]) + 10
            bh = max(point[1::2]) - min(point[1::2]) + 10
            if (min(point[0::2]) - 5) < 0:
                x1 = 0
            else:
                x1 = (min(point[0::2]) - 5)
            if (min(point[1::2]) - 5) < 0:
                y1 = 0
            else:
                y1 = (min(point[1::2]) - 5)
            annotations["images"].append(
                {


                    "file_name": file_name,
                    "height": height,
                    "width": width,
                    "id": images_id
                }
            )
            # coco annotations annotations.
            annotations["annotations"].append(
                {


                    "id": id + 1,
                    "num_keypoints": 9,
                    "keypoints": keypoint,
                    "area": bw * bh,
                    "iscrowd": 0,
                    "image_id": images_id,
                    "bbox": [x1, y1, bw, bh],
                    "category_id": 1,
                    "segmentation": [],
                }
            )
            step += 1
            if step % 100 == 0:
                print("processing {} ...".format(step))

        json_path = phase+".json"
        with open(json_path, "w") as f:
            json.dump(annotations, f)


if __name__ == "__main__":
    print("begining to convert customer format to coco format!")
    args = argparser()
    try:
        MainProcessing(args)
    except Exception as e:
        traceback.print_exc()
    print("successful to convert customer format to coco format")
注意一点,不要问我这里的bbox和area怎么会这样计算出来的,我是硬是看他的数据得到了规律,准确的计算方法是要用cocoapi的,因为下面的任务对这两个属性不要求,所以没关系。
3. 然后在data下创建coco文件夹,在其中创建两个文件夹:annotations和images,把生成的train.json和val.json放在annotations下,之前解压出来的数据文件夹train和test都放在images下,这样做好后的文件目录长这样:
├── CenterNet/data
│   ├── coco
│   │   ├── annotations
│   │   │   ├── train.json
│   │   │   ├── val.json
│   │   ├── images
│   │   │   ├── train
│   │   │   ├── test
四、开始训练
这里只要把打包文件里面的coco_hp.py和opts.py替换掉对应的CenterNet/src/lib/datasets/dataset/coco_hp.py和CenterNet/src/lib/opts.py,然后就可以运行下面的命令了【windows可能还需要设置–num_workers 0,batch_size看自己硬件】:
python main.py multi_pose --exp_id dla_1x_catface --dataset coco_hp --lr 5e-4 --lr_step '17,27' --num_epochs 37 --batch_size 16 --gpus 0 --load_model ../models/multi_pose_dla_3x.pth

五、测试
- 这里只要把打包文件里面的
post_process.py和multi_pose.py和demo.py替换掉对应的CenterNet/src/lib/utils/post_process.py和CenterNet/src/lib/detectors/multi_pose.py和CenterNet/src/demo.py - 把
coco_hp.py第31行改为:
self.img_dir = os.path.join(self.data_dir, 'images/test')
- 运行下面的命令:
python demo.py multi_pose --demo '/home/lsm/文档/CenterNet/data/coco/images/test' --exp_id dla_1x_catfacetest --dataset coco_hp --load_model /home/lsm/文档/CenterNet/exp/multi_pose/dla_1x_catface/model_best.pth
就会在/home/lsm/文档/CenterNet/exp/multi_pose/dla_1x_catfacetest下生成一个result.csv文件,在练习赛里面提交后可以看到成绩:
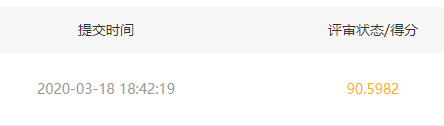
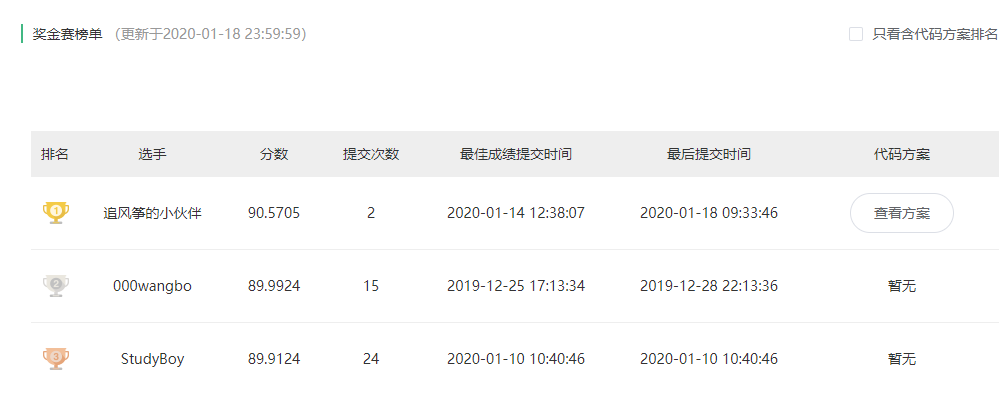
这个成绩比之前的奖金赛的第一名,也是这份代码的提供者还高了一点,说明我还train得好一点:
4. 在CenterNet/src/lib/utils/debugger.py里面改动下面两个属性:
self.num_joints = 9
self.edges = [[0, 1], [1, 2], [0, 2], [3, 4],
              [4, 5], [5, 6], [6, 7],[7, 8], [8, 3]]
然后运行下面的命令:
python demo.py multi_pose --demo /home/lsm/文档/CenterNet/data/coco/images/test/54.jpg --load_model /home/lsm/文档/CenterNet/exp/multi_pose/dla_1x_catface/model_best.pth --debug 4
就会得到下面的图:


六、references
做完的感觉就是我真的佩服自己硬着头皮看代码,之前没有调试过CenterNet代码,就是根据追风筝的小伙伴的代码凑出来的!
自己论文看的差不多,代码只是会跑通,不是特别深入,感谢下面博客的指引,也可以去他们里面看看一些loss曲线的绘制等其他功能:
CenterNet训练自己的数据集
(最新版本)如何在CenterNet上训练自己的数据集?
详解Centernet训练自己的数据集(win10 + cuda10 + pytorch1.0.1)