转载请标明原创:https://me.csdn.net/jxysgzs
最近看了一下新出的seata1.2.0,因为最早使用的是带配置文件的0.9.0版本,决定升级一下,本文会详细说明搭建步骤,其他代码自行发挥即可
环境介绍
Spingboot我用的是2.2.7,这个只要是2.0以上基本都可以
seata1.2.0就不用多说了,需要的小伙伴直接官网下载即可,如果下载很缓慢可以参考我分享的另一篇博客用百度网盘下载。点击这里下载
nacos1.2.0 本文还用到了nacos,点击这里下载
数据库使用的是MySQL5.7 安装教程
有需要的上面自行查看即可,接下来才是正文
配置数据库
seata主要的任务便是对数据库进行事务回滚,保证事务的一致性,所以我们需要先行配置数据库,seata需要一个进行事务管理的数据库用于自身使用。
我们在MySQL中创建一个名为seata的数据库,数据库引擎必须使用InnoDB
在该数据库中执行以下sql
-- the table to store GlobalSession data
drop table if exists `global_table`;
create table `global_table` (
  `xid` varchar(128)  not null,
  `transaction_id` bigint,
  `status` tinyint not null,
  `application_id` varchar(32),
  `transaction_service_group` varchar(32),
  `transaction_name` varchar(128),
  `timeout` int,
  `begin_time` bigint,
  `application_data` varchar(2000),
  `gmt_create` datetime,
  `gmt_modified` datetime,
  primary key (`xid`),
  key `idx_gmt_modified_status` (`gmt_modified`, `status`),
  key `idx_transaction_id` (`transaction_id`)
);

-- the table to store BranchSession data
drop table if exists `branch_table`;
create table `branch_table` (
  `branch_id` bigint not null,
  `xid` varchar(128) not null,
  `transaction_id` bigint ,
  `resource_group_id` varchar(32),
  `resource_id` varchar(256) ,
  `lock_key` varchar(128) ,
  `branch_type` varchar(8) ,
  `status` tinyint,
  `client_id` varchar(64),
  `application_data` varchar(2000),
  `gmt_create` datetime,
  `gmt_modified` datetime,
  primary key (`branch_id`),
  key `idx_xid` (`xid`)
);

-- the table to store lock data
drop table if exists `lock_table`;
create table `lock_table` (
  `row_key` varchar(128) not null,
  `xid` varchar(96),
  `transaction_id` long ,
  `branch_id` long,
  `resource_id` varchar(256) ,
  `table_name` varchar(32) ,
  `pk` varchar(36) ,
  `gmt_create` datetime ,
  `gmt_modified` datetime,
  primary key(`row_key`)
);
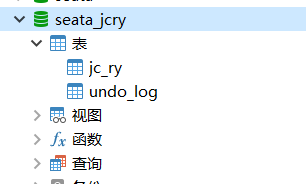
执行完毕之后会得到这样一个库

完成了seata的基本支持库,我们还要把其他我们业务使用的数据库中加入一个管理事务日志的表undo_log
-- the table to store seata xid data
-- 0.7.0+ add context
-- you must to init this sql for you business databese. the seata server not need it.
-- 此脚本必须初始化在你当前的业务数据库中,用于AT 模式XID记录。与server端无关(注:业务数据库)
-- 注意此处0.3.0+ 增加唯一索引 ux_undo_log
drop table `undo_log`;
CREATE TABLE `undo_log` (
  `id` bigint(20) NOT NULL AUTO_INCREMENT,
  `branch_id` bigint(20) NOT NULL,
  `xid` varchar(100) NOT NULL,
  `context` varchar(128) NOT NULL,
  `rollback_info` longblob NOT NULL,
  `log_status` int(11) NOT NULL,
  `log_created` datetime NOT NULL,
  `log_modified` datetime NOT NULL,
  `ext` varchar(100) DEFAULT NULL,
  PRIMARY KEY (`id`),
  UNIQUE KEY `ux_undo_log` (`xid`,`branch_id`)
) ENGINE=InnoDB AUTO_INCREMENT=1 DEFAULT CHARSET=utf8;
下面是个例子
到这里数据方面的配置基本就完成了
配置seata服务器
解压zip之后进入seata–>bin中可以看到如下目录,seata-server.bat文件便是启动文件

可以看到这里还有个seata-server-start.bat,这个是我新写的启动文件,目的是修改端口号为8091,内容如下:
seata-server.bat -p 8091 -h 172.16.156.201
进入seata—》conf文件夹中,找到,file.conf与registry.conf文件

修改file.conf (我用TODO标注修改位置的上方)
## seata-service
service {


  #交易服务组映射 的组名称必须要与客户端一致 my_test_tx_group  seata-server必须要与registrt.conf 一致
  #transaction service group mapping
  #TODO 修改 hxlh_tx_group为自己设置的事务组名称,seata-server不是事务组的名称,这里可以随便起名
  vgroupMapping.hxlh_tx_group = "seata-server"
  #only support when registry.type=file, please don't set multiple addresses
  #TODO 这里设置ip, 一般不用改 因为我是安装在内网了
  default.grouplist = "172.16.156.201:8091"
  #disable seata
  disableGlobalTransaction = false
}


## transaction log store, only used in seata-server
store {


  ## store mode: file、db
  ##TODO 修改为数据库类型
  mode = "db"

  ## file store property
  file {


    ## store location dir
    dir = "sessionStore"
    # branch session size , if exceeded first try compress lockkey, still exceeded throws exceptions
    maxBranchSessionSize = 16384
    # globe session size , if exceeded throws exceptions
    maxGlobalSessionSize = 512
    # file buffer size , if exceeded allocate new buffer
    fileWriteBufferCacheSize = 16384
    # when recover batch read size
    sessionReloadReadSize = 100
    # async, sync
    flushDiskMode = async
  }

  ## database store property
  #TODO 下面这一堆就安装自己MySQL去改就行了,使用的库便是我们上面创建的seata库
  db {


    ## the implement of javax.sql.DataSource, such as DruidDataSource(druid)/BasicDataSource(dbcp) etc.
    datasource = "druid"
    ## mysql/oracle/postgresql/h2/oceanbase etc.
    dbType = "mysql"
    driverClassName = "com.mysql.jdbc.Driver"
    url = "jdbc:mysql://172.16.156.201:3306/seata"
    user = "root"
    password = "hxlh2020"
    minConn = 5
    maxConn = 30
    globalTable = "global_table"
    branchTable = "branch_table"
    lockTable = "lock_table"
    queryLimit = 100
    maxWait = 5000
  }
}
修改registry.conf (我用TODO标注修改位置的上方)
registry {


  # file 、nacos 、eureka、redis、zk、consul、etcd3、sofa
  #TODO 配置为nacos
  type = "nacos"

#TODO 设置你自己的nacos即可
  nacos {


    application = "seata-server"
    serverAddr = "localhost:8848"
    namespace = "public"
    cluster = "default"
    username = ""
    password = ""
  }
  eureka {


    serviceUrl = "http://localhost:8761/eureka"
    application = "default"
    weight = "1"
  }
  redis {


    serverAddr = "localhost:6379"
    db = 0
    password = ""
    cluster = "default"
    timeout = 0
  }
  zk {


    cluster = "default"
    serverAddr = "127.0.0.1:2181"
    sessionTimeout = 6000
    connectTimeout = 2000
    username = ""
    password = ""
  }
  consul {


    cluster = "default"
    serverAddr = "127.0.0.1:8500"
  }
  etcd3 {


    cluster = "default"
    serverAddr = "http://localhost:2379"
  }
  sofa {


    serverAddr = "127.0.0.1:9603"
    application = "default"
    region = "DEFAULT_ZONE"
    datacenter = "DefaultDataCenter"
    cluster = "default"
    group = "SEATA_GROUP"
    addressWaitTime = "3000"
  }
  file {


    name = "file.conf"
  }
}

config {


  # file、nacos 、apollo、zk、consul、etcd3
  type = "nacos"

  nacos {


    serverAddr = "localhost:8848"
    namespace = ""
    group = "SEATA_GROUP"
    username = ""
    password = ""
  }
  consul {


    serverAddr = "127.0.0.1:8500"
  }
  apollo {


    appId = "seata-server"
    apolloMeta = "http://192.168.1.204:8801"
    namespace = "application"
  }
  zk {


    serverAddr = "127.0.0.1:2181"
    sessionTimeout = 6000
    connectTimeout = 2000
    username = ""
    password = ""
  }
  etcd3 {


    serverAddr = "http://localhost:2379"
  }
  file {


    name = "file.conf"
  }
}
至此,服务器端配置以及完成了,接下来先启动nacos之后在启动seata即可,如果你使用的不是nacos而且其他的配置中心,也要先启动其他配置中心在启动seata
配置springboot
pom.xml文件加入
<!--seata 分布式事务-->
        <dependency>
            <groupId>io.seata</groupId>
            <artifactId>seata-spring-boot-starter</artifactId>
            <version>1.2.0</version>
            <exclusions>
                <exclusion>
                    <groupId>io.seata</groupId>
                    <artifactId>seata-all</artifactId>
                </exclusion>
            </exclusions>
        </dependency>
        <dependency>
            <groupId>io.seata</groupId>
            <artifactId>seata-all</artifactId>
            <version>1.2.0</version>
        </dependency>
配置yml
##seata配置,相当于registry.conf
seata:
  enabled: true
  application-id: ${

    spring.application.name}
  tx-service-group: hxlh_tx_group
这里多说一句,hxlh_tx_group就是我们在seata服务器中设置的事务组名称。
springboot端的配置也就完成了,这时我们便可以使用@GlobalTransactional注解进行分布式事务管理里
如:

name需要设置一个当时事务的名称,随意即可
rollbackFor需要设置一个相应事务回滚的异常
喜欢的同学给个免费的点赞吧,Thanks♪(・ω・)ノ