1.图像坐标系
位于左上角,记住是左上角!!!

2.图像的变换过程
1.原图(1242,375)

2.原图及resize 后的图片

3. 网络输入图像的尺寸 (608,608) 用灰色作为背景(128,128,128)

4.把 2 粘贴在 3 的 dx,dy 位置上 ,放缩小和方法两版
放大

扫描二维码关注公众号,回复:
12911155 查看本文章

缩小

5.水平翻转
翻转了

没翻转

6.颜色扭曲


3.bbox变化
(这个是我自己用LabelImg标出的,懒得换新图片了,就是把原图(1330,1330)的框)
LabelImg标出的yolo形式的 标签是
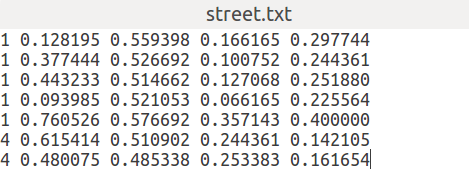
变成原尺寸的代码
import numpy as np
a=np.array([[0.128195,0.559398,0.166165,0.297744],
[0.377444,0.526692,0.100752,0.244361],
[0.443233,0.514662,0.127068,0.251880],
[0.093985,0.521053,0.066165,0.225564],
[0.760526,0.576692,0.357143,0.400000],
[0.615414,0.510902,0.244361,0.142105],
[0.480075,0.485338,0.253383,0.161654]])
c=[]
for i in range(a.shape[0]):
w=a[i][2]*1330
h=a[i][3]*1330
xmin=a[i][0]*1330-w/2
xmax=a[i][0]*1330+w/2
ymin=a[i][1]*1330-h/2
ymax=a[i][1]*1330+h/2
b=[xmin,ymin,xmax,ymax]
b=[round(i) for i in b]
c.append(b)
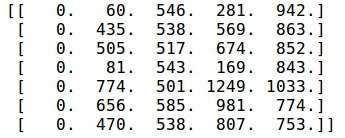
print(c)
zero=np.zeros((7,1))
print(zero)
d=np.concatenate((zero,c),-1)
print(d)
经过box变换后


4.代码部分
本文主要写generator 的内容 包括两部分函数,get_random_data() (把单张图片进行图像增强) 和 generate()(产生batch个数据,数据范围为(0-1 class,xywh)(rgb0-1)(input_w,input_h,3))
import numpy as np
from PIL import Image
from matplotlib.colors import rgb_to_hsv, hsv_to_rgb

# 返回(a,b)之间的任意数
def rand(a=0,b=1):
    return a+(b-a)*np.random.rand()


class Generator(object):
    def __init__(self,batch_size,train_lines,image_size):
        self.batch_size=batch_size
        self.train_lines=train_lines
        # (网络输入大小) 本文(618,618)
        self.image_size=image_size


    def get_random_data(self,train_line,input_shape,jitter=.1,hue=.1,sat=1.3,val=1.3):
        '''
          该函数的作用是将输入的单个annotation 分成图像和 gt_box,把原尺寸的图像resize成 网络
       输入图片大小,并进行缩放,宽高比微调,翻转,像素rgb微调,即普通图像增强。

        '''
        gt=train_line.split()
        image=Image.open(gt[0])
        # 1.image.show()
        iw,ih=image.shape()
        h,w=input_shape

        box=np.array([np.array(list(map(int,box.split(',') for box in gt[1:])))])

#—————————————————————————————————————————————————————————————————————————————————
        # 先处理图片

        # 改变宽高比
        new_ar=iw/ih*rand(1-jitter,1+jitter)/rand(1-jitter,1+jitter)
        # 改变尺度因子,进行缩放
        scale=rand(0.25,2)

        # 计算 图像被resize的 宽 高
        if new_ar>1:
            nw=int(w*scale)
            nh=int(w/new_ar*scale)
        else:
            nh=int(h*scale)
            nw=int(w*new_ar*scale)

        # 把原图像尺寸的图像 resize 成 nw nh 尺寸的图像
        image=image.resize((nw,nh),Image.BICUBIC)
        # 2.image.show()
        # 新的图像,灰色的图像背景
        new_image = Image.new('RGB', (w, h), (128, 128, 128))
        # 3.new_image.show()

        # 把图像贴在哪个位置呢?dx,dy 可能为负, 当scale>1即放大时。
        dx = int(rand(0, w - nw))
        dy = int(rand(0, h - nh))

        # 把image 贴在新图像的 dx,dy 位置处
        new_image=new_image.paste(image,(dx,dy))

        image=new_image
        # 4.image.show()

        # 是否进行水平翻转 ,因为设置的0.5 ,所以,有一半的概率进行水平翻转
        flip=rand()>0.5
        if flip: image = image.transpose(Image.FLIP_LEFT_RIGHT)
        # 5.image.show()

        # 颜色扭曲  h 色调 ,s 饱和度 ,v 明度
        hue = rand(-hue, hue)
        sat = rand(1, sat) if rand() < .5 else 1 / rand(1, sat)
        val = rand(1, val) if rand() < .5 else 1 / rand(1, val)
        x = rgb_to_hsv(np.array(image) / 255.)
        x[..., 0] += hue
        x[..., 0][x[..., 0] > 1] -= 1
        x[..., 0][x[..., 0] < 0] += 1
        x[..., 1] *= sat
        x[..., 2] *= val
        x[x > 1] = 1
        x[x < 0] = 0
        image_data = hsv_to_rgb(x) * 255  # numpy array
        # image=Image.fromarray(np.uint8(image_data))  #把矩阵转换成图像
        # 6.image.show()

#—————————————————————————————————————————————————————————————————————————————————
        # 根据图像变化处理bbox
        # 把原尺寸的bbox变成 (608,608)的图像上 ,resize的图像上

        box_data = np.zeros((len(box), 5))
        if len(box) > 0:
            np.random.shuffle(box)
            box[:, [0, 2]] = box[:, [0, 2]] * nw / iw + dx
            box[:, [1, 3]] = box[:, [1, 3]] * nh / ih + dy
            if flip: box[:, [0, 2]] = w - box[:, [2, 0]]
            box[:, 0:2][box[:, 0:2] < 0] = 0
            box[:, 2][box[:, 2] > w] = w
            box[:, 3][box[:, 3] > h] = h
            box_w = box[:, 2] - box[:, 0]
            box_h = box[:, 3] - box[:, 1]
            box = box[np.logical_and(box_w > 1, box_h > 1)]  # discard invalid box
            box_data = np.zeros((len(box), 5))
            box_data[:len(box)] = box
            print(box)
            print(image_data[255][255])
        if len(box) == 0:
             return image_data, []

        if (box_data[:, :4] > 0).any():
            return image_data, box_data
        else:
            return image_data, []


# 返回的是
# 1.array 的 rgb  的  图像  (618,618,3) (0-255)
# 2.bbox们,(-1,5)(x1,y1,x2,y2,class)   尺寸也是(0-618)
# 处理的是单张图片
# 进行的图像增强有,宽高比,尺度缩放,水平翻转,颜色扭曲


#---------------------------------------------------------------------------------
#---------------------------------------------------------------------------------
#---------------------------------------------------------------------------------

    def generate(self,training=True):
        '''
        产生batch个数据,
        数据的格式
        image_data(618,618,3) (0-1)
        gt_box(-1,5) xywhclass (0-1)
        '''
        while True:
            np.random.shuffle(self.train_lines)
            inputs=[]
            targets=[]

            for line in self.train_lines:
                image_data,box_data=self.get_random_data(line,self.image_size)

                # 判断box是否有
                if len(box_data)==0:
                    continue

                # 先把class 分出去
                boxes=np.array(box_data[:,:4],dtype=np.float32)

                # 把 x1y1x2y2 (0-255)   --->  xywh (0-1)
                # 1.先归一化,各自除以自己的宽度或者高度
                boxes[:,0]/=self.image_size[1]
                boxes[:,1]/=self.image_size[0]
                boxes[:,2]/=self.image_size[1]
                boxes[:,3]/=self.image_size[0]

                # 2.剔除 >1 的值
                box=np.maximum(np.minimum(box,1),0)

                # 3.变x1y1x2y2  --->  xywh
                boxes[:,2]=boxes[:,2]-boxes[:,0]
                boxes[:,3]=boxes[:,3]-boxes[:,1]
                boxes[:,0]=boxes[:,0]+boxes[:,2]/2
                boxes[:,1]=boxes[:,1]+boxes[:,3]/2

                # 把cls concat 回去
                # box_data[:,:4]=boxes
                box_data=np.concatenate([boxes,box_data[:,-1]],-1)

                # 图像像素归一化
                image_data=np.array(image_data,dtype=np.float32)
                inputs.append(np.transpose(image_data/255.0,(2,0,1)))

                targets.append(box_data)

                # 判断是否够batch个数据
                if len(targets)==self.batch_size:
                    tmp_inputs=np.array(inputs)
                    tmp_targets=np.array(targets)
                    inputs=[]
                    targets=[]
                    yield tmp_inputs,tmp_targets

# self.image_size=height,width
# image  (rgb,height,width)
# tmp_inputs (batch_size,channel(3),height,width)
# tmp_targets (batch_size,-1,5)
5. 迭代器的使用
# 设置迭代器
gen = Generator(Batch_size, lines[:num_train],
                        (Config["img_h"], Config["img_w"])).generate()
gen_val = Generator(Batch_size, lines[num_train:],
                            (Config["img_h"], Config["img_w"])).generate()
for i in range ():
      image_data,targets=next(gen)
      val_data,_=next(gen_val)