1.Sentinel简介

Sentinel 是面向云原生微服务的高可用流控防护组件。随着微服务的流行,服务和服务之间的稳定性变得越来越重要。Sentinel 以流量为切入点,从流量控制、熔断降级、系统负载保护等多个维度保护服务的稳定性。简单来说,就是之前学习过的 Hystrix的升级版。
官方给出的定义: Sentinel是分布式系统的流量防卫兵,可想而知,Sentinel对于分布式系统的重要性。
2.Sentinel特征
丰富的应用场景:Sentinel 承接了阿里巴巴近 10 年的双十一大促流量的核心场景,例如秒杀(即突发流量控制在系统容量可以承受的范围)、消息削峰填谷、集群流量控制、实时熔断下游不可用应用等。
完备的实时监控:Sentinel 同时提供实时的监控功能。您可以在控制台中看到接入应用的单台机器秒级数据,甚至 500 台以下规模的集群的汇总运行情况。
广泛的开源生态:Sentinel 提供开箱即用的与其它开源框架/库的整合模块,例如与 Spring Cloud、Dubbo、gRPC 的整合。您只需要引入相应的依赖并进行简单的配置即可快速地接入 Sentinel。
完善的 SPI 扩展点:Sentinel 提供简单易用、完善的 SPI 扩展接口。您可以通过实现扩展接口来快速地定制逻辑。例如定制规则管理、适配动态数据源等。
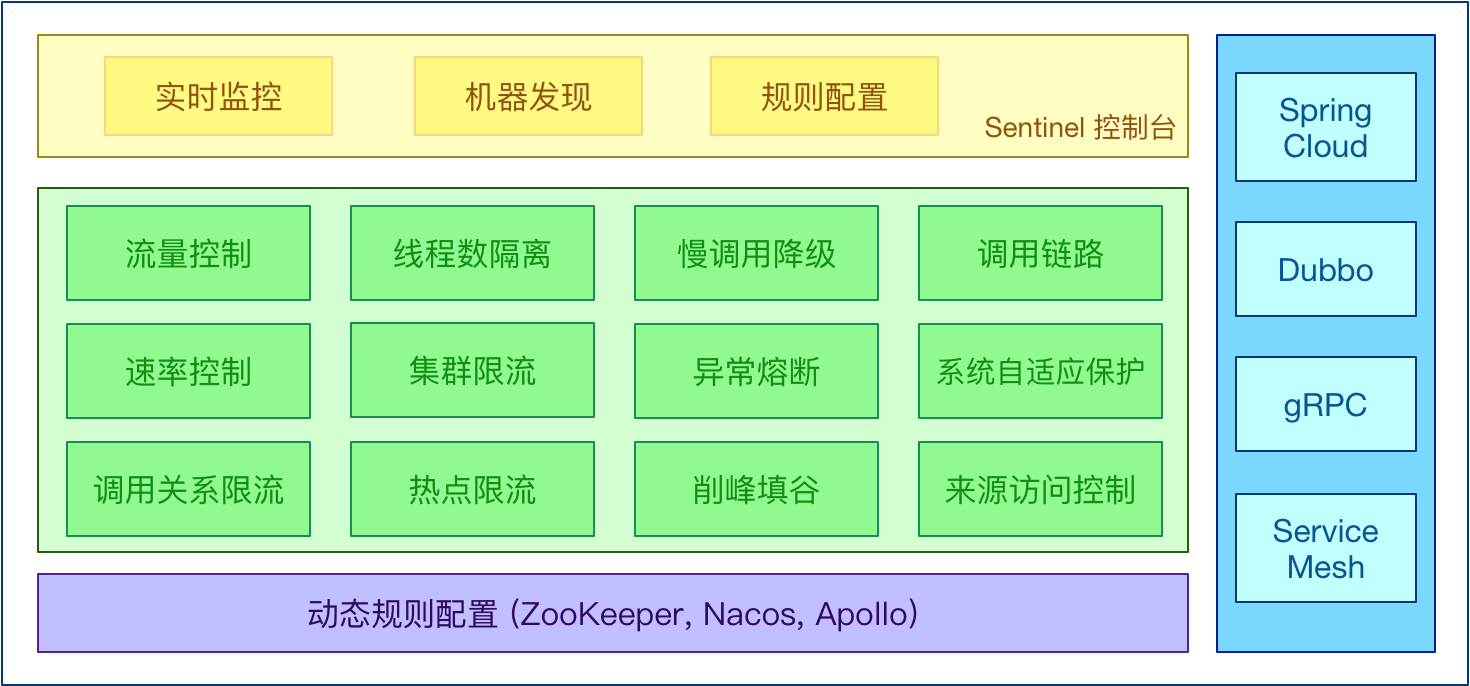
Sentinel 的开源生态图

由上图可以看到,Sentinel 提供开箱即用的与其它开源框架/库的整合模块 。
Sentinel官网地址:https://github.com/alibaba/Sentinel
3.Hystrix VS Sentinel
| Hystrix | Sentinel |
|---|---|
| 需要程序员手工搭建监控平台 | 单独一个组件、可以独立出来 |
| 没有一套Web界面可以给程序员进行更加细粒度化得配置,比如流控、速率控制、服务熔断、服务降级 | 直接界面化的细粒度统一配置 |
总的来说,Sentinel使用起来比较方便快捷,不需要程序员手动搭建监控平台,耦合度降低。
4.Sentinel下载安装运行
【a】下载地址:https://github.com/alibaba/Sentinel/releases
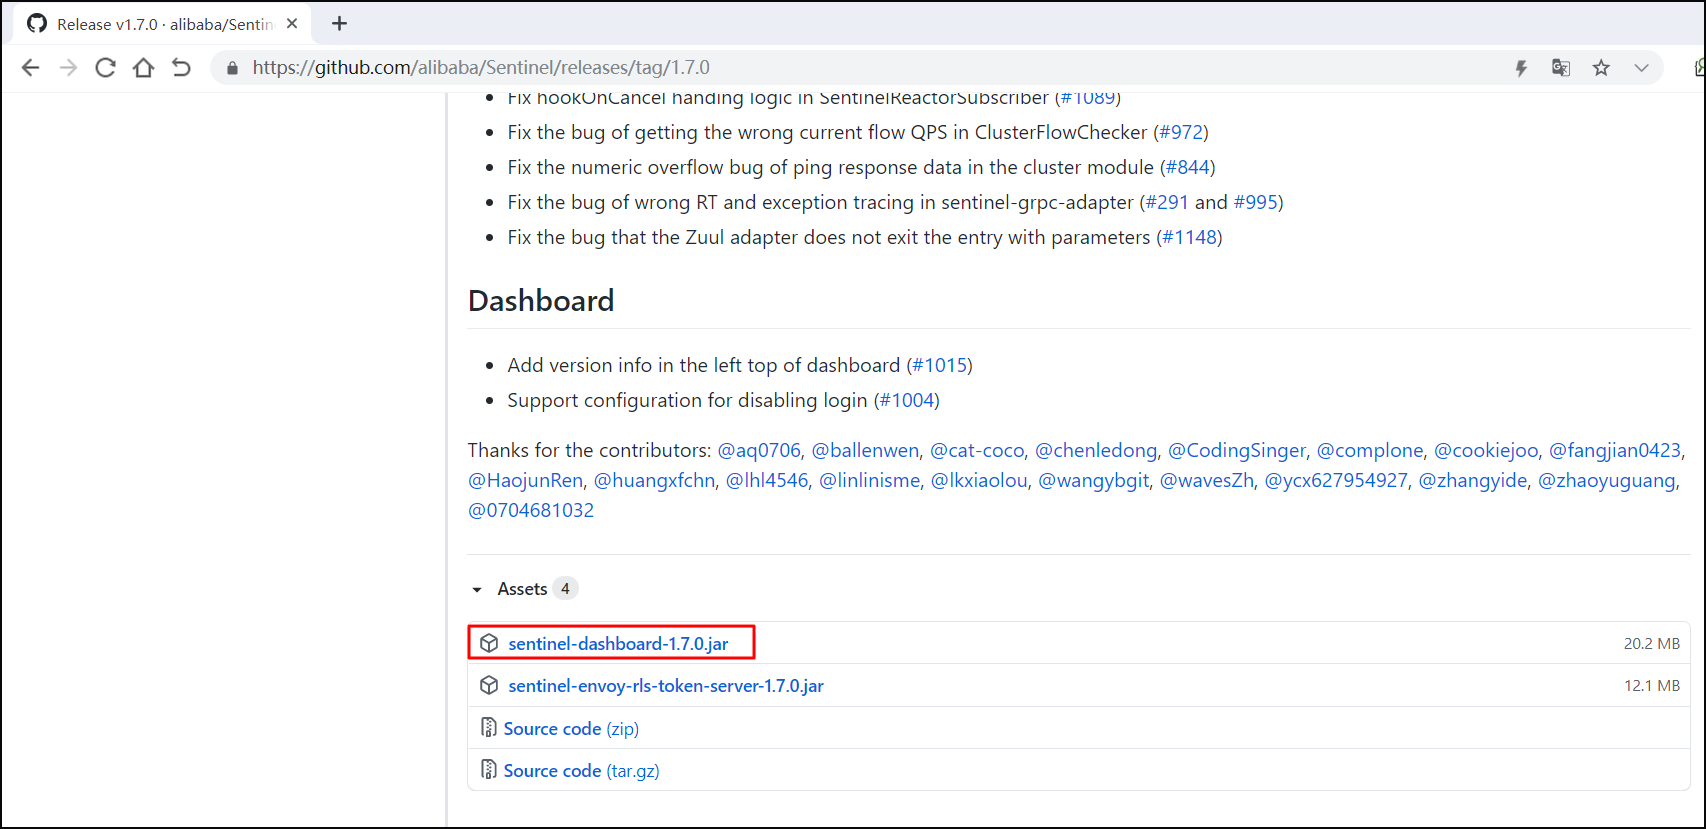
这里我们选择下载:sentinel-dashboard-1.7.0.jar作为本次演示所使用Sentinel版本。
【b】安装Sentinel控制台
Sentinel分为两个部分:
-
核心库(Java客户端) 不依赖任何框架/库,能够运行于所有Java运行时环境,同时对Dubbo/Spring Cloud等框架也有较好的支持。
-
控制台(Dashboard) 基于SpringBoot开发,打包后可以直接运行,不需要额外的Tomcat等应用容器。
【c】运行命令
运行前提:需要最低Java8 JDK环境OK,8080端口不能被占用。我们都知道8080端口是 Tomcat 默认的端口,不知道为什么,Sentinel 选择了8080作为端口号。
在自己下载的 Sentinel Jar包目录中打开CMD命令行窗口,输入如下命令进行启动:
java -jar sentinel-dashboard-1.7.0.jar
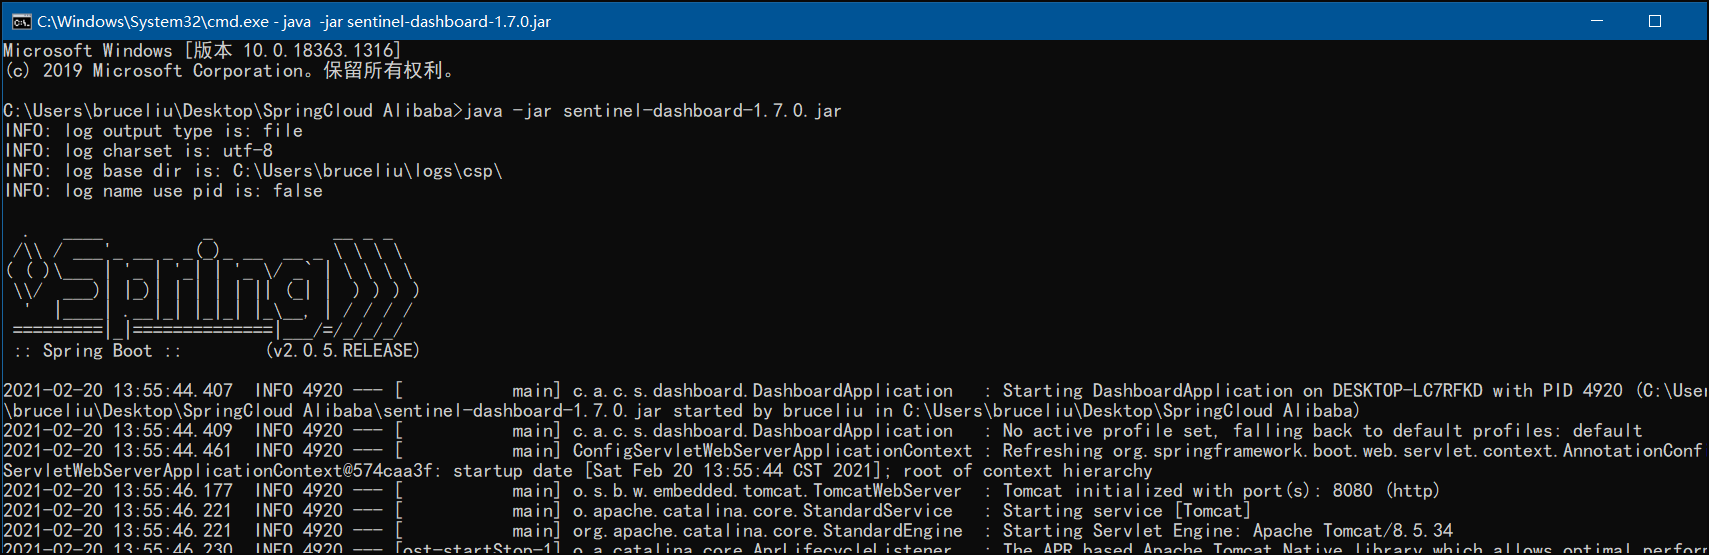
启动完成后,可以看到Sentinel监听的端口是8080。
【d】访问Sentinel管理界面
启动成功之后,我们浏览器访问:http://localhost:8080/#/dashboard/home

我们使用默认的用户名和密码(都是sentinel)进行登录,登录成功之后,如下图所示:

如果能看到此界面,说明我们的Sentinel下载安装配置成功。
5.Sentinel初始化监控
接下来,我们通过一个示例介绍如何将我们微服务与Sentinel监控平台整合起来,实现对微服务应用的监控、限流等操作。
我们新建一个module【springcloudalibaba-sentinel-service8401】,注意需要结合nacos实现服务注册功能。
【a】pom.xml添加sentinel依赖:spring-cloud-starter-alibaba-sentinel
<?xml version="1.0" encoding="UTF-8"?>
<project xmlns="http://maven.apache.org/POM/4.0.0"
         xmlns:xsi="http://www.w3.org/2001/XMLSchema-instance"
         xsi:schemaLocation="http://maven.apache.org/POM/4.0.0 http://maven.apache.org/xsd/maven-4.0.0.xsd">
    <parent>
        <artifactId>springcloud-alibaba-nacos</artifactId>
        <groupId>com.bruce.springcloud-alibaba-nacos</groupId>
        <version>1.0-SNAPSHOT</version>
    </parent>
    <modelVersion>4.0.0</modelVersion>

    <artifactId>spring-cloud-starter-alibaba-sentinel</artifactId>

    <dependencies>

        <!-- Alibaba-nacos服务发现-->
        <dependency>
            <groupId>com.alibaba.cloud</groupId>
            <artifactId>spring-cloud-starter-alibaba-nacos-discovery</artifactId>
            <exclusions>
                <exclusion>
                    <artifactId>nacos-client</artifactId>
                    <groupId>com.alibaba.nacos</groupId>
                </exclusion>
            </exclusions>
        </dependency>

        <!-- nacos-client -->
        <dependency>
            <groupId>com.alibaba.nacos</groupId>
            <artifactId>nacos-client</artifactId>
            <version>1.2.0</version>
        </dependency>

        <!-- hystrix断路器 -->
        <dependency>
            <groupId>org.springframework.cloud</groupId>
            <artifactId>spring-cloud-starter-netflix-hystrix</artifactId>
        </dependency>

        <!-- openfeign客户端 ,默认集成并开启了ribbon负载均衡-->
        <dependency>
            <groupId>org.springframework.cloud</groupId>
            <artifactId>spring-cloud-starter-openfeign</artifactId>
        </dependency>

        <!-- web组件 -->
        <dependency>
            <groupId>org.springframework.boot</groupId>
            <artifactId>spring-boot-starter-web</artifactId>
            <exclusions>
                <!--排除tomcat依赖 -->
                <exclusion>
                    <artifactId>spring-boot-starter-tomcat</artifactId>
                    <groupId>org.springframework.boot</groupId>
                </exclusion>
            </exclusions>
        </dependency>

        <!--undertow容器 -->
        <dependency>
            <groupId>org.springframework.boot</groupId>
            <artifactId>spring-boot-starter-undertow</artifactId>
        </dependency>

        <!-- lombok插件 -->
        <dependency>
            <groupId>org.projectlombok</groupId>
            <artifactId>lombok</artifactId>
        </dependency>

        <!--SpringCloud ailibaba sentinel -->
        <dependency>
            <groupId>com.alibaba.cloud</groupId>
            <artifactId>spring-cloud-starter-alibaba-sentinel</artifactId>
        </dependency>

        <!--SpringCloud ailibaba sentinel-datasource-nacos 后续做持久化用到-->
        <dependency>
            <groupId>com.alibaba.csp</groupId>
            <artifactId>sentinel-datasource-nacos</artifactId>
        </dependency>

        <dependency>
            <groupId>org.springframework.boot</groupId>
            <artifactId>spring-boot-starter-actuator</artifactId>
        </dependency>

        <dependency>
            <groupId>org.springframework.boot</groupId>
            <artifactId>spring-boot-starter-test</artifactId>
            <scope>test</scope>
        </dependency>

    </dependencies>

    <build>
        <plugins>
            <plugin>
                <groupId>org.springframework.boot</groupId>
                <artifactId>spring-boot-maven-plugin</artifactId>
            </plugin>
            <plugin>
                <groupId>org.apache.maven.plugins</groupId>
                <artifactId>maven-compiler-plugin</artifactId>
                <configuration>
                    <source>6</source>
                    <target>6</target>
                </configuration>
            </plugin>
        </plugins>
    </build>

</project>
【b】aplication.yml:配置sentinel监控平台的地址
server:
  port: 8401
spring:
  application:
    name: springcloudalibaba-sentinel-service
  cloud:
    nacos:
      discovery:
        server-addr: localhost:8848   #指定nacos服务器地址
    sentinel:
      transport:
        dashboard: localhost:8080   #指定sentinel控制台的地址
        port: 8719  #sentinel api端口, 默认8719端口,假如被占用会自动从8719开始依次+1扫描,直至找到未被占用的端口
management:
  endpoints:
    web:
      exposure:
        include: '*'   #配置对外暴露端口
【c】启动类
package com.bruce;

import org.springframework.boot.SpringApplication;
import org.springframework.boot.autoconfigure.SpringBootApplication;
import org.springframework.cloud.client.discovery.EnableDiscoveryClient;

@EnableDiscoveryClient
@SpringBootApplication
public class SentinelServiceApplicaiton8401 {


    public static void main(String[] args) {


        SpringApplication.run(SentinelServiceApplicaiton8401.class, args);
    }
}
【d】测试Controller
package com.bruce.controller;

import org.springframework.web.bind.annotation.GetMapping;
import org.springframework.web.bind.annotation.RestController;

@RestController
public class SentinelController {


    @GetMapping("/sentinel")
    public String sentinel() {


        return "hello, sentinel dashboard....";
    }
}
【e】测试
Step1:启动 Nacos 服务器;
Step2:启动 Sentinel Dashboard 服务器;
Step3:运行【springcloudalibaba-sentinel-service8401】启动类,端口为8401;
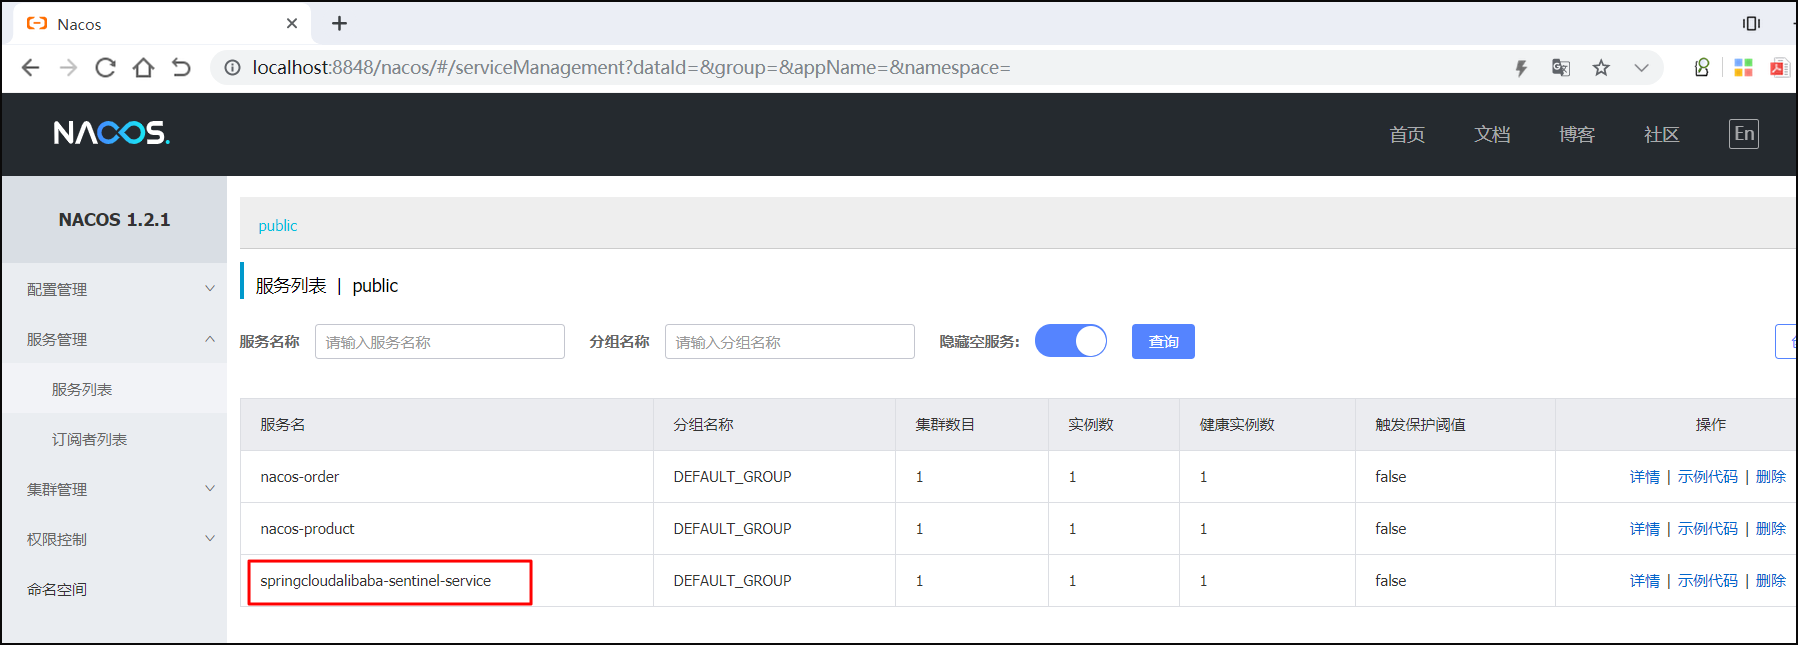
Step4:然后访问http://localhost:8848/nacos,找到服务管理下的服务列表,能够看到一个服务名为 “springcloudalibaba-sentinel-service” 的应用程序注册至 Nacos 服务管理页面,如下图所示:
Step5:接着访问http://localhost:8080请求,切换到 Sentinel 登录页面进入到 Dashboard 首页。此时 Sentinel 控制台并没有监控任何微服务。

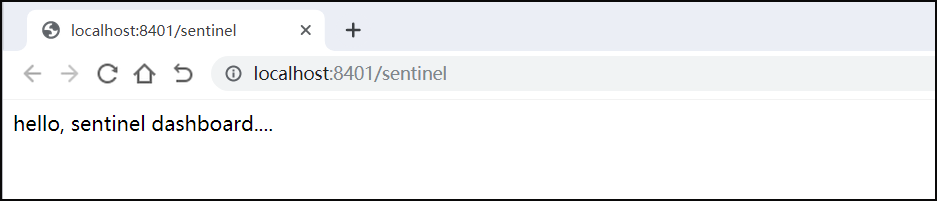
原因是 Sentinel 是采用了懒加载的机制,微服务【springcloudalibaba-sentinel-service8401】目前还没有流量信息可以监控,我们需要手动触发一个请求:http://localhost:8401/sentinel:
然后再次回到Sentinel Dashboard界面, 就可以看到【springcloudalibaba-sentinel-service8401】服务的监控流量信息等,如下图所示:
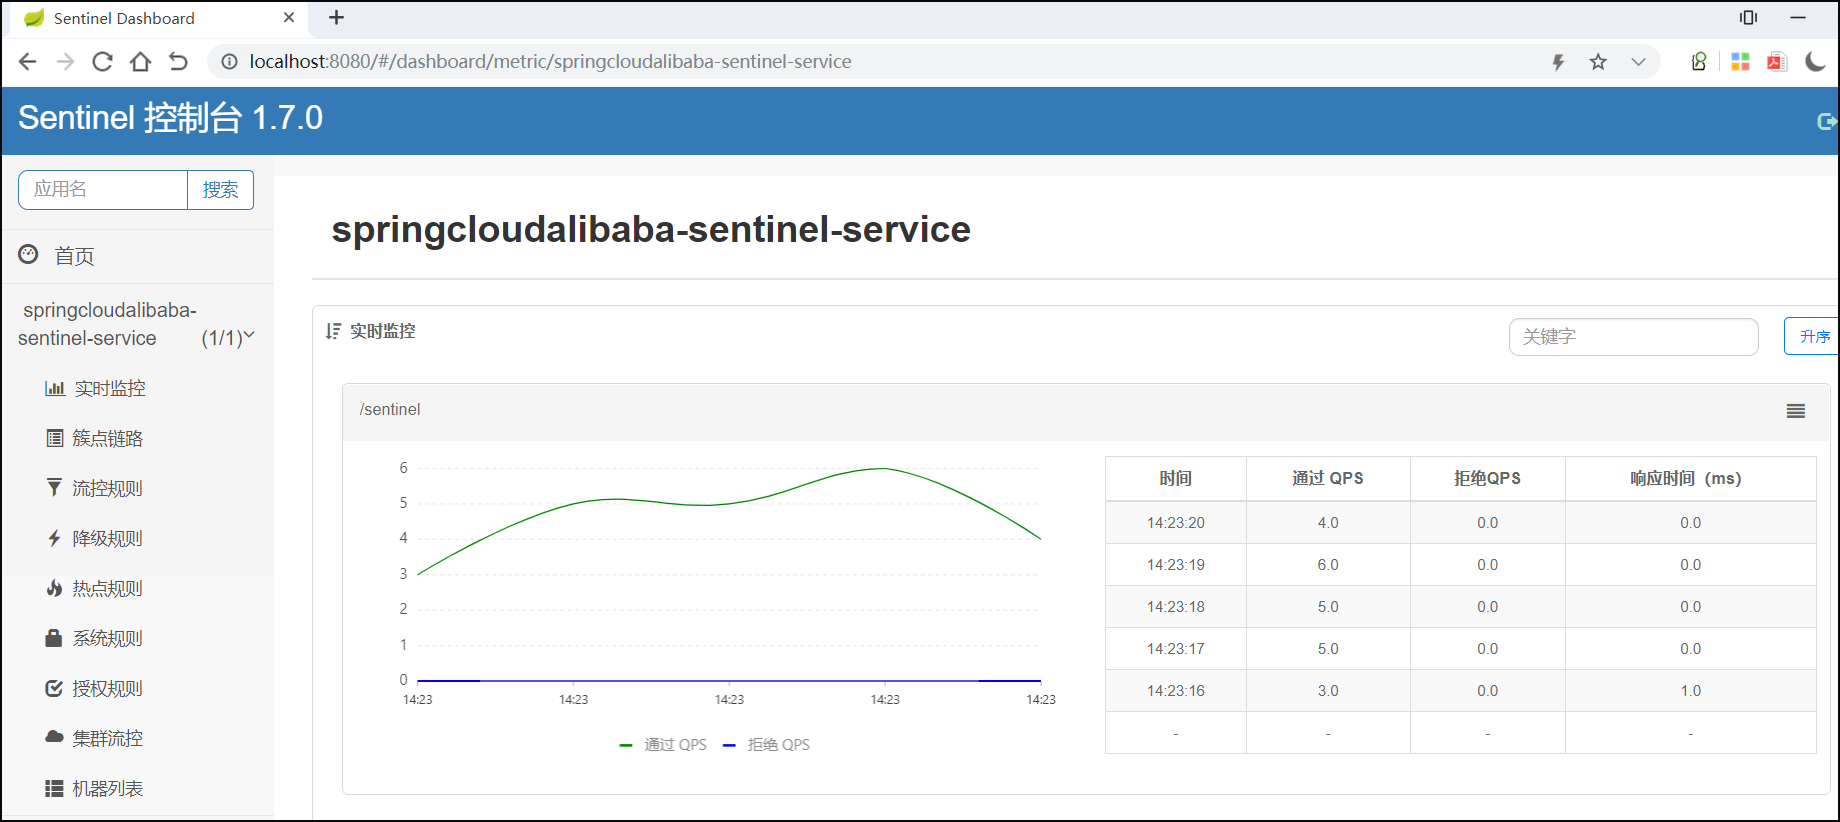
通过实时监控,可以看到波峰流量的流动效果,绿线代表通过,蓝线代表拒绝 。
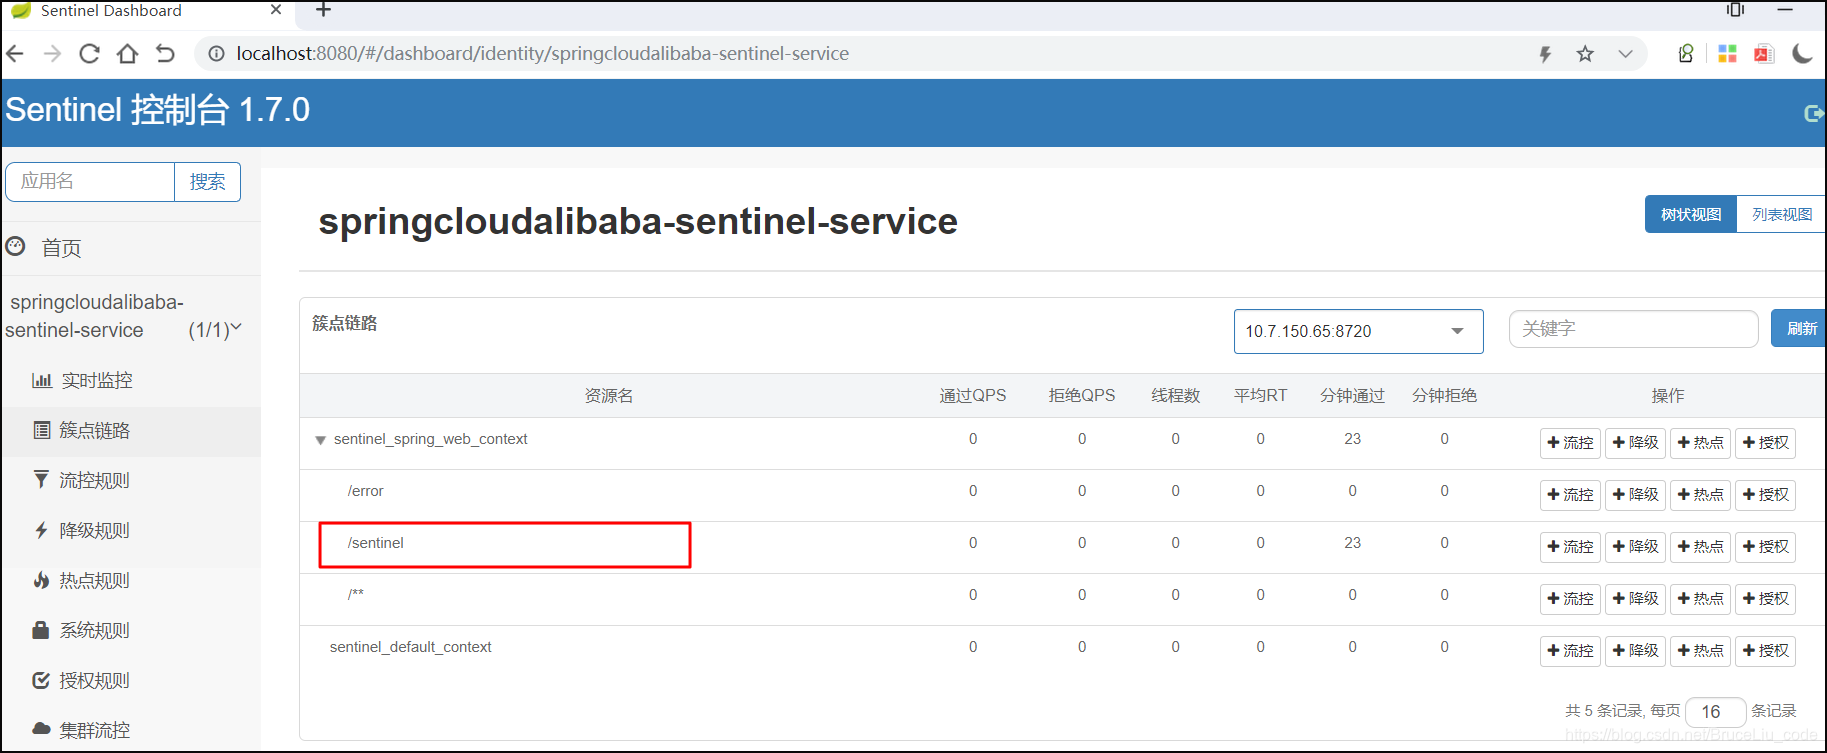
此时 Sentinel 控制台正在监控微服务 【springcloudalibaba-sentinel-service8401】,也就是说Sentinel Dashboard 代替了 Hystrix Dashboard 功能。
6.小结
本篇文章主要总结了Sentinel的主要特征以及通过示例介绍了如何将Sentinel作为我们微服务的流量监控、限流平台。总的来说,比起我们之前学习的Hystrix,简化了使用方式,至少不需要我们自己手动去搭建Hystrix Dashboard监控仪表盘。