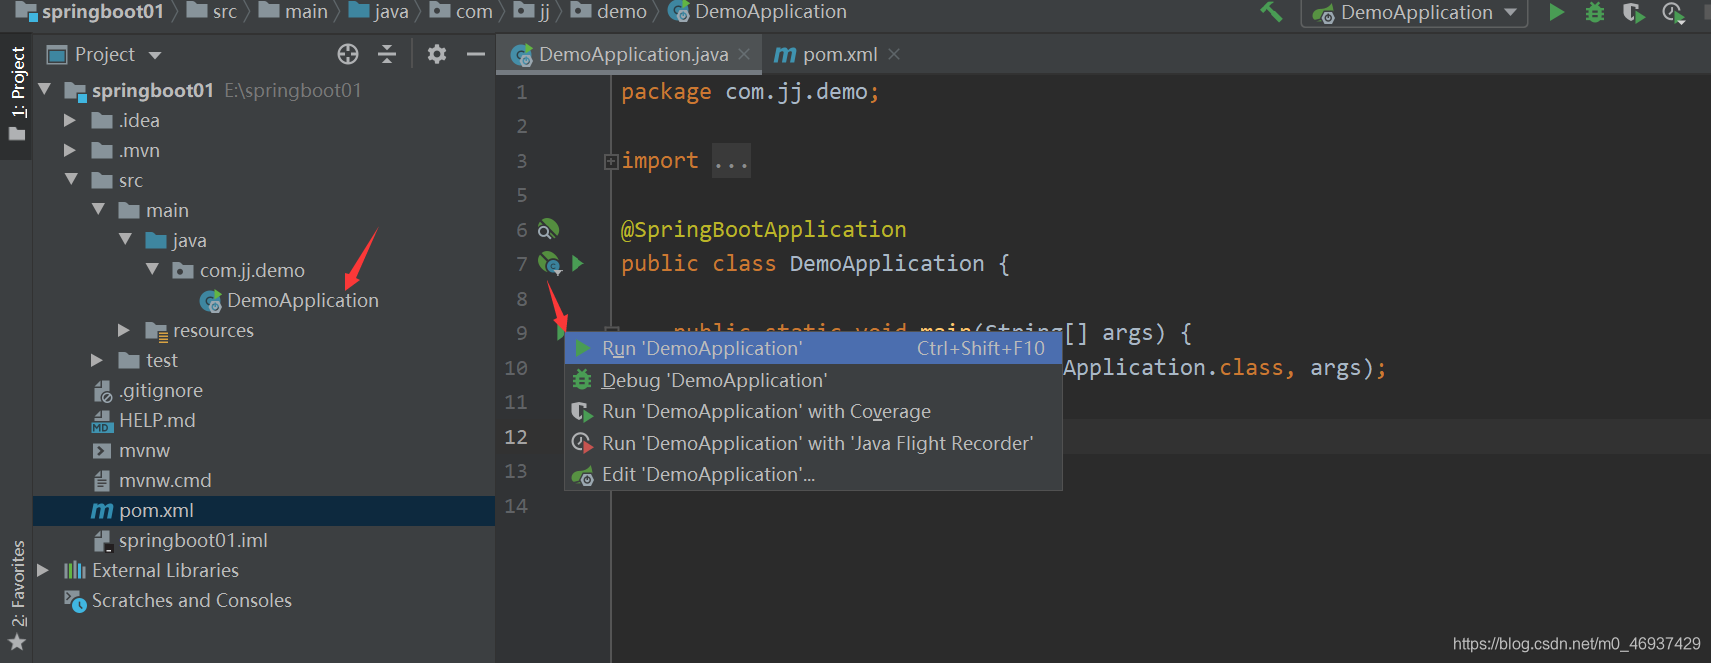
Spring boot 项目的搭建
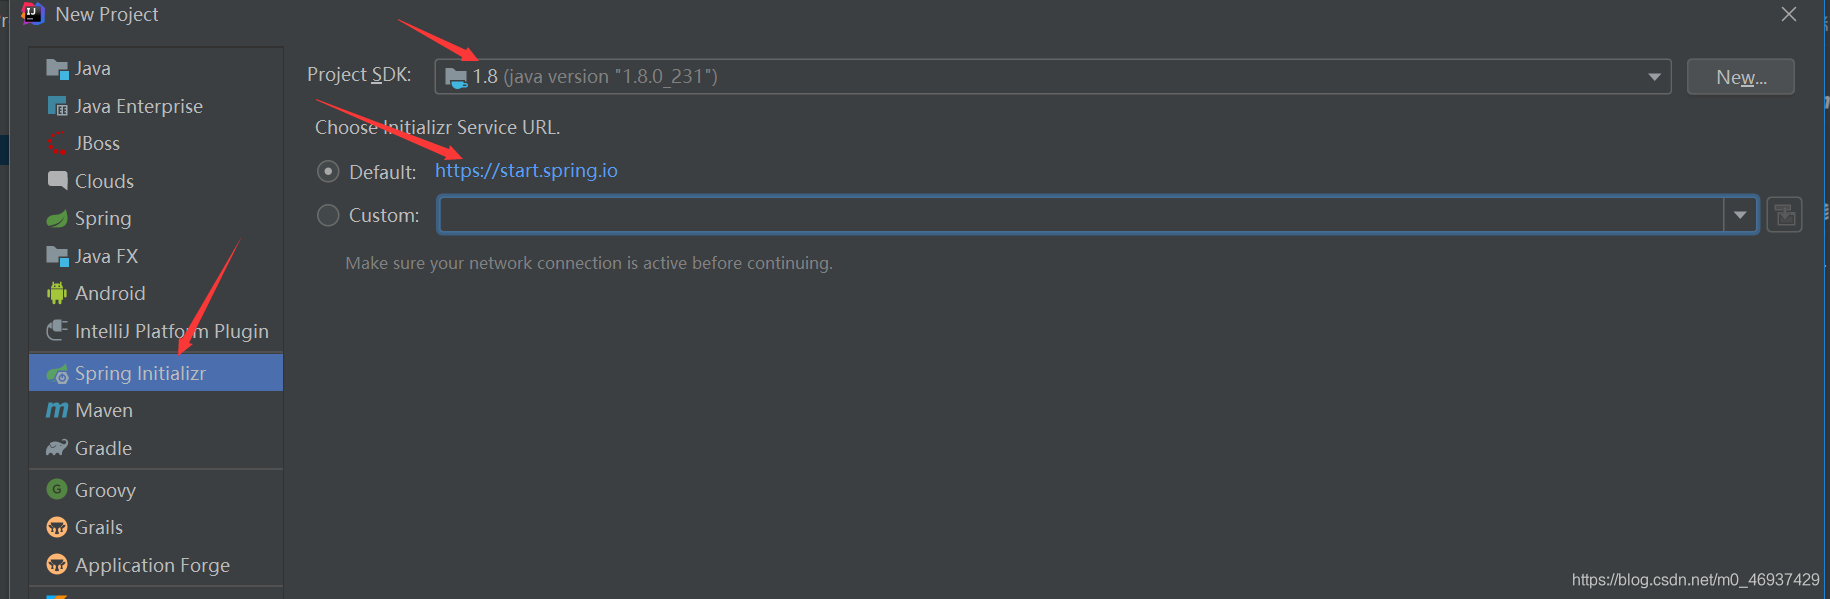
第一步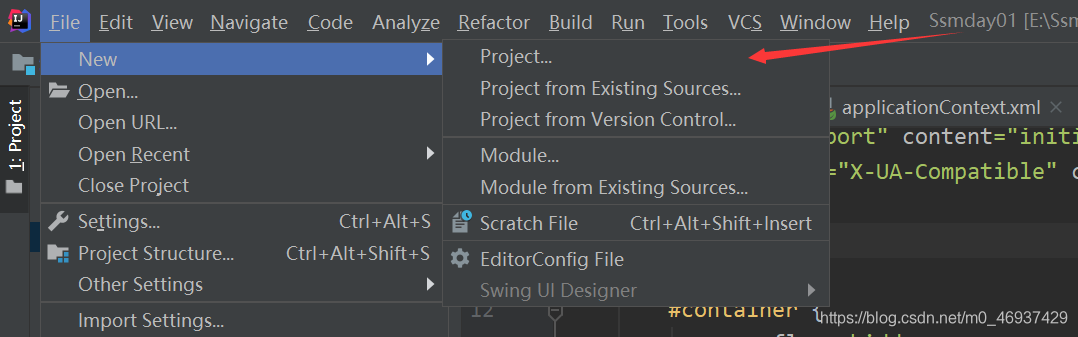
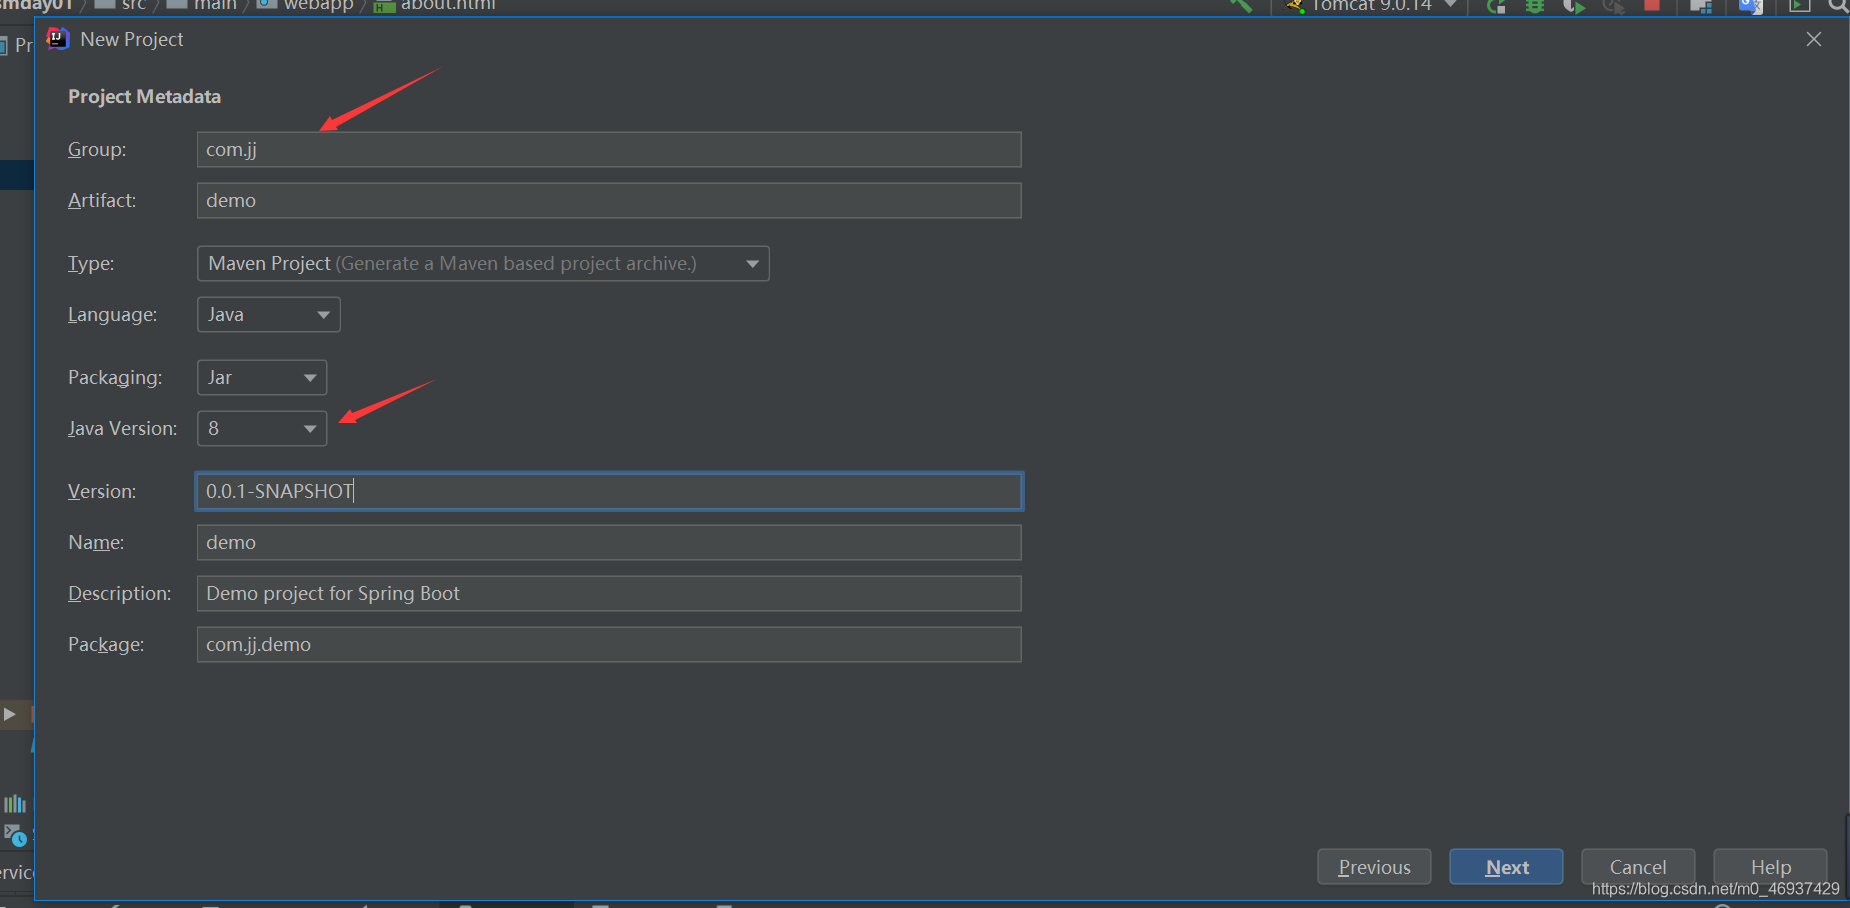
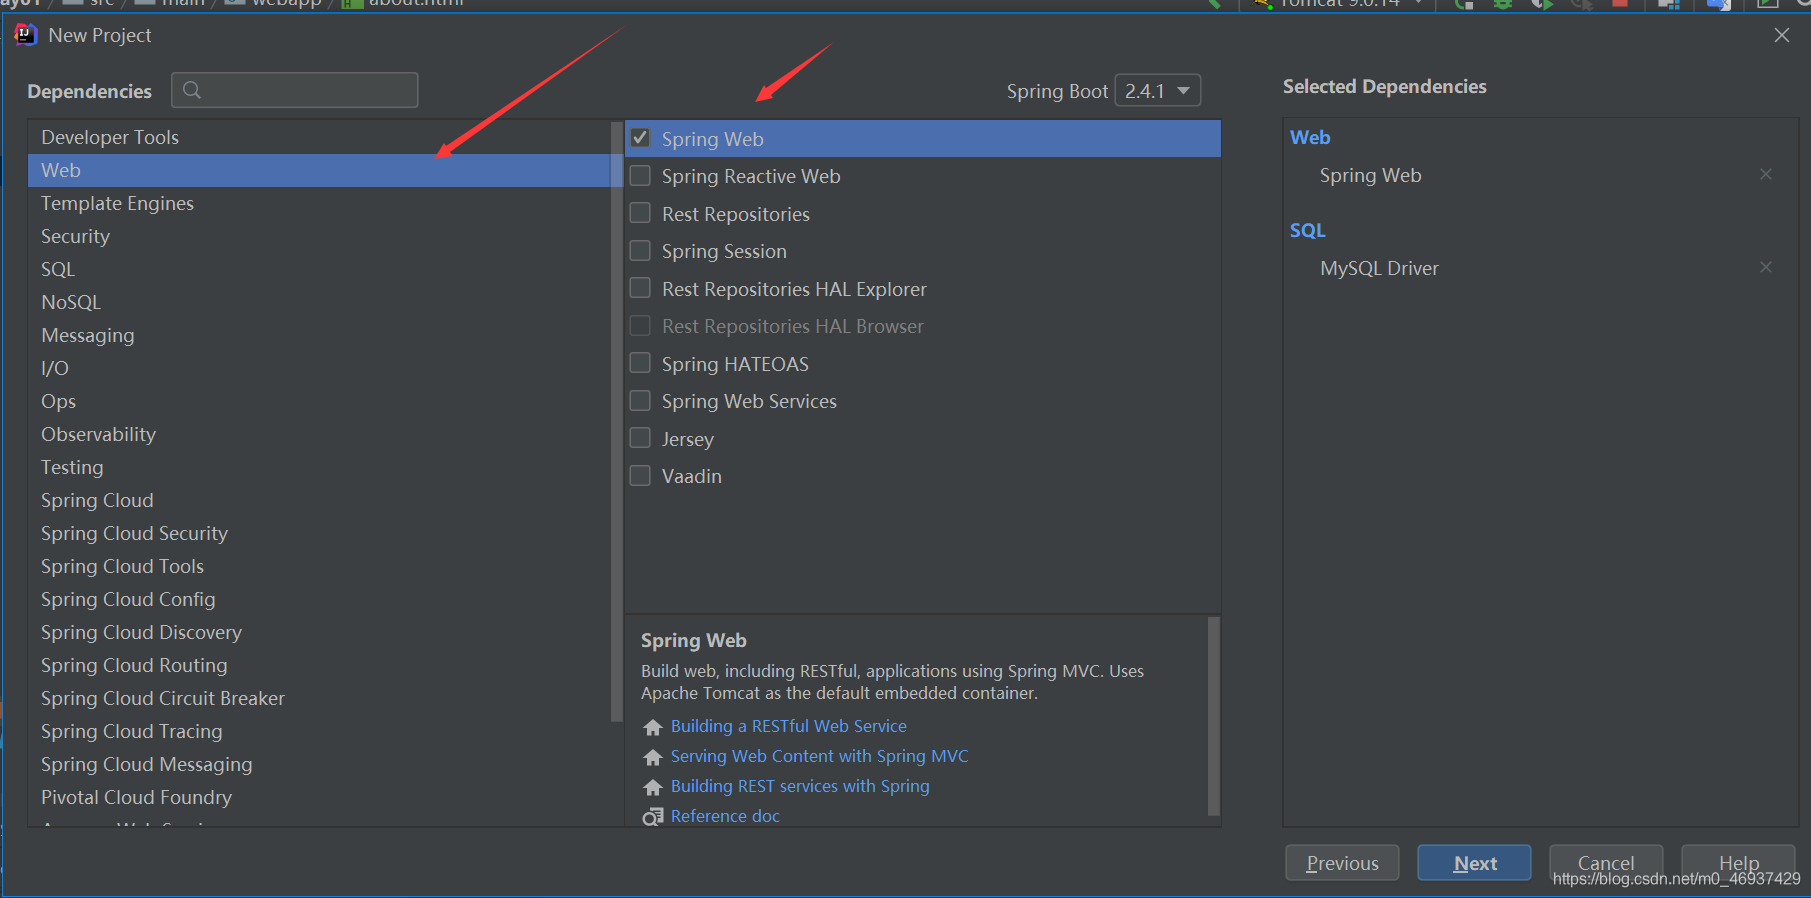
第二步 (选下一步)
第三步
第四步
ok了
  .   ____          _            __ _ _
 /\\ / ___'_ __ _ _(_)_ __  __ _ \ \ \ \
( ( )\___ | '_ | '_| | '_ \/ _` | \ \ \ \
 \\/  ___)| |_)| | | | | || (_| |  ) ) ) )
  '  |____| .__|_| |_|_| |_\__, | / / / /
 =========|_|==============|___/=/_/_/_/
 :: Spring Boot ::                (v2.4.1)

2020-12-15 15:32:37.984  INFO 17024 --- [           main] com.jj.demo.DemoApplication              : Starting DemoApplication using Java 1.8.0_231 on 小可爱的电脑 with PID 17024 (E:\springboot01\target\classes started by 可爱的小仙女 in E:\springboot01)
2020-12-15 15:32:37.992  INFO 17024 --- [           main] com.jj.demo.DemoApplication              : No active profile set, falling back to default profiles: default
2020-12-15 15:32:39.612  INFO 17024 --- [           main] o.s.b.w.embedded.tomcat.TomcatWebServer  : Tomcat initialized with port(s): 8080 (http)
2020-12-15 15:32:39.629  INFO 17024 --- [           main] o.apache.catalina.core.StandardService   : Starting service [Tomcat]
2020-12-15 15:32:39.629  INFO 17024 --- [           main] org.apache.catalina.core.StandardEngine  : Starting Servlet engine: [Apache Tomcat/9.0.41]
2020-12-15 15:32:39.781  INFO 17024 --- [           main] o.a.c.c.C.[Tomcat].[localhost].[/]       : Initializing Spring embedded WebApplicationContext
2020-12-15 15:32:39.781  INFO 17024 --- [           main] w.s.c.ServletWebServerApplicationContext : Root WebApplicationContext: initialization completed in 1652 ms
2020-12-15 15:32:40.047  INFO 17024 --- [           main] o.s.s.concurrent.ThreadPoolTaskExecutor  : Initializing ExecutorService 'applicationTaskExecutor'
2020-12-15 15:32:40.281  INFO 17024 --- [           main] o.s.b.w.embedded.tomcat.TomcatWebServer  : Tomcat started on port(s): 8080 (http) with context path ''
2020-12-15 15:32:40.298  INFO 17024 --- [           main] com.jj.demo.DemoApplication              : Started DemoApplication in 3.063 seconds (JVM running for 5.706)
写一个简单的小demo
package com.jj.demo.Controller;

import org.springframework.web.bind.annotation.RequestMapping;
import org.springframework.web.bind.annotation.ResponseBody;
import org.springframework.web.bind.annotation.RestController;

@RestController
public class HelloController {


    @RequestMapping("/")
    @ResponseBody
    public String demo(){


        return "hello fjj!!";
    }
}
 Springboot 优点
为所有Spring 开发者更块的入门
开箱即用,提供各种默认的配置来简化项目配置
内嵌式容器简化web 项目
没有冗余代码生成和xml 配置的要求
Springboot 自动配置的原理
1,pom.xml
所有的都在父容器中
<parent>
        <groupId>org.springframework.boot</groupId>
        <artifactId>spring-boot-starter-parent</artifactId>
        <version>2.4.1</version>
        <relativePath/> <!-- lookup parent from repository -->
    </parent>
点进去之后可以看到 里面有好多的版本号,所以我们在导入依赖的时候就不用写版本号了。
 <activemq.version>5.16.0</activemq.version>
    <antlr2.version>2.7.7</antlr2.version>
    <appengine-sdk.version>1.9.83</appengine-sdk.version>
    <artemis.version>2.15.0</artemis.version>
    <aspectj.version>1.9.6</aspectj.version>
    <assertj.version>3.18.1</assertj.version>
    <atomikos.version>4.0.6</atomikos.version>
    <awaitility.version>4.0.3</awaitility.version>
    <bitronix.version>2.1.4</bitronix.version>
    <build-helper-maven-plugin.version>3.2.0</build-helper-maven-plugin.version>
    <byte-buddy.version>1.10.18</byte-buddy.version>
    <caffeine.version>2.8.8</caffeine.version>
    <cassandra-driver.version>4.9.0</cassandra-driver.version>
放了部分的xml 版本
2,启动器
  <dependency>
            <groupId>org.springframework.boot</groupId>
            <artifactId>spring-boot-starter</artifactId>
        </dependency>
有好多的启动器,我们需要那个就在starter 后加上就可以,比如需要 web 的就写
  <dependency>
            <groupId>org.springframework.boot</groupId>
            <artifactId>spring-boot-starter-web</artifactId>
        </dependency>
sring boot 会自动把他们变成一个一个的启动器
3,主程序
@SpringBootApplication 注解 (点进去发现有以下混合注解)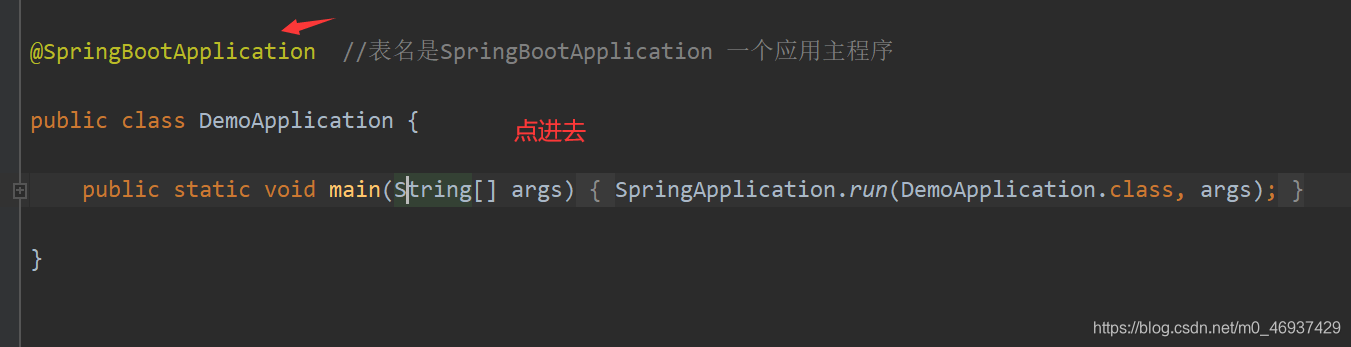
@Target({

    ElementType.TYPE})
@Retention(RetentionPolicy.RUNTIME)
@Documented
@Inherited
@SpringBootConfiguration
@EnableAutoConfiguration
//扫描的注解
@ComponentScan(
    excludeFilters = {

    @Filter(
    type = FilterType.CUSTOM,
    classes = {

    TypeExcludeFilter.class}
), @Filter(
    type = FilterType.CUSTOM,
    classes = {

    AutoConfigurationExcludeFilter.class}
)}
)
这里着重的说下面的两个注解
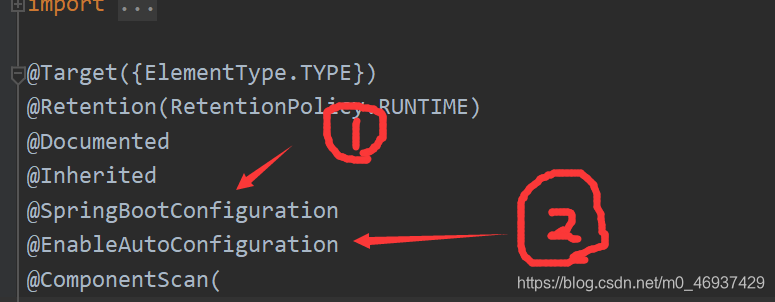
第一个注解!!!重点的注解
@SpringBootConfiguration //spring boot 配置的注解 (点进去,又是混合注解)
@Target({

    ElementType.TYPE})
@Retention(RetentionPolicy.RUNTIME)
@Documented
@Configuration  //spring 的配置类  (点进去发现还是个混合注解)
点进去@Configuration后看到以下的
@Target({

    ElementType.TYPE})
	@Retention(RetentionPolicy.RUNTIME)
	@Documented
	@Component  // spring 的组件扫描。 spring boot 本质其实还是一 spring
第二个注解!!!重点的注解
@EnableAutoConfiguration //自动导入配置,(点进去看以下内容)
@Target({

    ElementType.TYPE})
@Retention(RetentionPolicy.RUNTIME)
@Documented
@Inherited
@AutoConfigurationPackage  (自动配置包)(点进去)
@Import({

    AutoConfigurationImportSelector.class})  //自动配置到入选择的(点入进去里面有一些扫描组件,应该是用来扫描那些我们呢maven 里的东西的,我是这样想的)
@AutoConfigurationPackage (自动配置包)(点进去)
@Target({

    ElementType.TYPE})
	@Retention(RetentionPolicy.RUNTIME)
	@Documented
	@Inherited
	@Import({

    Registrar.class})  //自动配置包 注册 (点进去 ,看到有一些注册的 ,数据源)
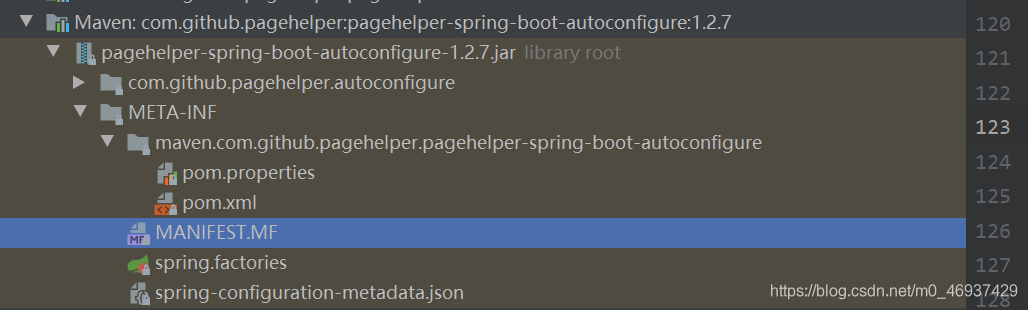
@Import({AutoConfigurationImportSelector.class}) (点入后)
里有一个重要的类 //获取候选的配置
   protected List<String> getCandidateConfigurations(AnnotationMetadata metadata, AnnotationAttributes attributes) {


        List<String> configurations = SpringFactoriesLoader.loadFactoryNames(this.getSpringFactoriesLoaderFactoryClass(), this.getBeanClassLoader());
        Assert.notEmpty(configurations, "No auto configuration classes found in META-INF/spring.factories. If you are using a custom packaging, make sure that file is correct.");
        return configurations;
    }


小结论
springboot 所有的配置都在自动配置类里卖弄,导入对应的start 就有对应的启动器了,自动配置就成功了。最后就生效了。
流程主要分为三个部分
1,SpringApplication 的初始化模块,配置基本的环境变量,资源,构造器,监听器.
2,应用具体的启动方案,包括启动的监听模块,加载配置核心,及核心的创建上下文环境模块
3,自动化模块,是Springboot 自动配置核心。
run启动
main 方法 调用SpringApplication.run()启动整个spring-boot程序,需要使用
@SpringBootApplication 以及 @ImportResource
@EnableAutoConfiguration:Springboot 根据应用所声明的依赖对spring 框架自动进行配置
package com.jj.demo;

import org.springframework.boot.SpringApplication;
import org.springframework.boot.autoconfigure.SpringBootApplication;

@SpringBootApplication

public class DemoApplication {


    public static void main(String[] args) {


        SpringApplication.run(DemoApplication.class, args);
    }

}
这个类主要做了一下四件事情
1,推断应用的类型时普通的项目还是WEB项目
2,查找并加载所有可用初始化器,设置到initializers 属性中
3,找出所有的应用程序监听器,设置到listeners 属性中
4,推断并设置main 方法 的定义类,找到运行的主类
进入run 方法
    public static ConfigurableApplicationContext run(Class<?>[] primarySources, String[] args) {


        return (new SpringApplication(primarySources)).run(args);
    }
run 创建了SpringApplication 实例,经去后发现
    public SpringApplication(Class<?>... primarySources) {


        this((ResourceLoader)null, primarySources);
    }

    public SpringApplication(ResourceLoader resourceLoader, Class<?>... primarySources) {


        this.sources = new LinkedHashSet();
        this.bannerMode = Mode.CONSOLE;
        this.logStartupInfo = true;
        this.addCommandLineProperties = true;
        this.addConversionService = true;
        this.headless = true;
        this.registerShutdownHook = true;
        this.additionalProfiles = Collections.emptySet();
        this.isCustomEnvironment = false;
        this.lazyInitialization = false;
        this.applicationContextFactory = ApplicationContextFactory.DEFAULT;
        this.applicationStartup = ApplicationStartup.DEFAULT;
        this.resourceLoader = resourceLoader;
        Assert.notNull(primarySources, "PrimarySources must not be null");
        this.primarySources = new LinkedHashSet(Arrays.asList(primarySources));
        this.webApplicationType = WebApplicationType.deduceFromClasspath();
        this.bootstrappers = new ArrayList(this.getSpringFactoriesInstances(Bootstrapper.class));
        this.setInitializers(this.getSpringFactoriesInstances(ApplicationContextInitializer.class));
        this.setListeners(this.getSpringFactoriesInstances(ApplicationListener.class));
        this.mainApplicationClass = this.deduceMainApplicationClass();
    }
关键步骤
1 创建应用监听器SpringApplicationRunListeners 并开始监听
2 加载SpringBoot 配置环境(ConfigurableEnvironment),如果是web 容器发布,会加载
StandardEnvironment,其最终也是继承了ConfigurableEnvironment,类图如下
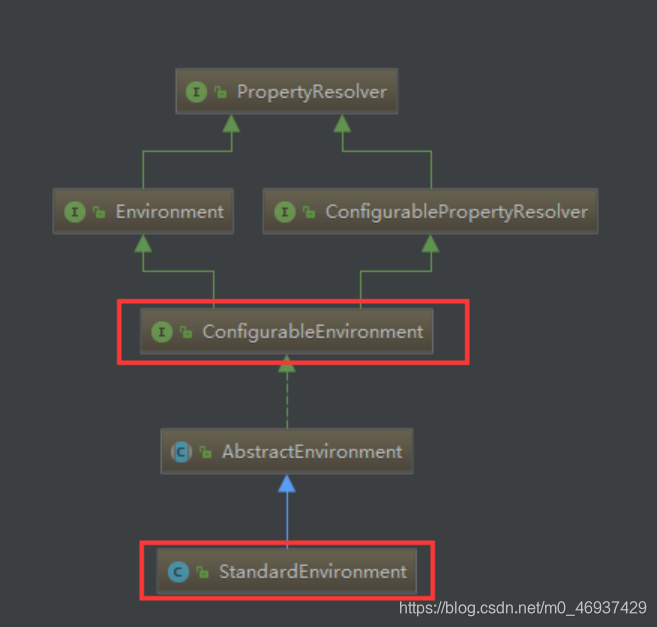
最终都实现lPropertyResolver接口我们平时通过environment 对象获取配置文件的key
得到对应的value 时就调用了propertyResolver接口的getProperty方法
3配置环境加入到监听器中
4 创建run 方法的返回对象:ConfigurableApplicaton(应用配置上下文)
    protected ConfigurableApplicationContext createApplicationContext() {


        return this.applicationContextFactory.create(this.webApplicationType);
    }
方法会先获取显示设置的应用上下文(ApplicationCotextClass) ,如果不存在,在加载默认环境配置
默认选择的时AnnotationConfigApplicationContext注解上下文(通过扫描所有注解类来加载bean),最后通过BeanUtils实例化上下文对象,并返回
ConfigurableApplicationContext类图如下:
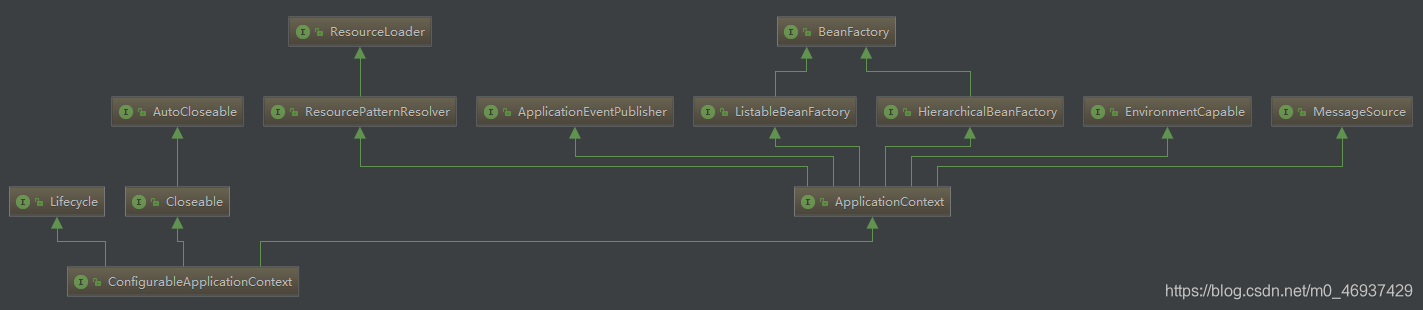
ApplicationContext:应用上下文类,主要继承了beanFactory(bean 的工厂类)
5,回到run 方法内,prepareContext方法将listeners、environment、applicationArguments、banner等重要组件与上下文对象关联
6.接下来的refreshContext(context)方法(初始化方法如下)将是实现spring-boot-starter-*(mybatis、redis等)自动化配置的关键,包括spring.factories的加载,bean的实例化等核心工作。
  public ConfigurableApplicationContext run(String... args) {


        StopWatch stopWatch = new StopWatch();
        stopWatch.start();
        DefaultBootstrapContext bootstrapContext = this.createBootstrapContext();
        ConfigurableApplicationContext context = null;
        this.configureHeadlessProperty();
        SpringApplicationRunListeners listeners = this.getRunListeners(args);
        listeners.starting(bootstrapContext, this.mainApplicationClass);

        try {


            ApplicationArguments applicationArguments = new DefaultApplicationArguments(args);
            ConfigurableEnvironment environment = this.prepareEnvironment(listeners, bootstrapContext, applicationArguments);
            this.configureIgnoreBeanInfo(environment);
            Banner printedBanner = this.printBanner(environment);
            context = this.createApplicationContext();
            context.setApplicationStartup(this.applicationStartup);
            this.prepareContext(bootstrapContext, context, environment, listeners, applicationArguments, printedBanner);
            this.refreshContext(context);
            this.afterRefresh(context, applicationArguments);
            stopWatch.stop();
            if (this.logStartupInfo) {


                (new StartupInfoLogger(this.mainApplicationClass)).logStarted(this.getApplicationLog(), stopWatch);
            }

            listeners.started(context);
            this.callRunners(context, applicationArguments);
        } catch (Throwable var10) {


            this.handleRunFailure(context, var10, listeners);
            throw new IllegalStateException(var10);
        }

        try {


            listeners.running(context);
            return context;
        } catch (Throwable var9) {


            this.handleRunFailure(context, var9, (SpringApplicationRunListeners)null);
            throw new IllegalStateException(var9);
        }
    }
refresh 方法
配置结束后,就只剩下收尾了,返回应用环境的上下文,主要创建了配置环境,事件监听,应用上下文,并基于以上条件,在容器中开始实例化我们需要的bean .
总结
1、新建module,在主程序类加入断点,启动springboot
2、首先进入SpringAplication类run方法
3、run方法新建SpringApplication对象
4、SpringApplication对象的run方法,首先创建并启动计时监控类
5、接着通过configureHeadlessProperty设置java.awt.headless的值
6、接着调用getRunListeners创建所有spring监听器
7、接着DefaultApplicationArguments初始化应用应用参数
8、接着prepareEnvironment根据运行监听器和参数准备spring环境
9、接着调用createApplicationContext方法创建应用上下文
10、通过prepareContext准备应用上下文
11、refreshContext方法刷新上下文
12、调用stop方法停止计时监控器类
13、调用started发布应用上下文启动完成事件
14、callRunners方法执行所有runner运行器
15、调用running发布应用上下文就绪事件
16、最后返回应用上下文