需要使用到的包
npm install express --save
npm install --save-dev http-proxy-middleware
以及对应的使用说明文档链接:
https://www.expressjs.com.cn/
https://www.npmjs.com/package/http-proxy-middleware
使用express创建一个本地服务器
默认为3000,可将其改成其他的端口,我这里使用的是9000端口
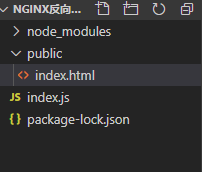
项目目录如下:
index.js如下:
// include dependencies
const express = require('express');
const {

     createProxyMiddleware } = require('http-proxy-middleware');
const app = express();
//app.get('/',(req,res)=>res.send('hello world'))
// proxy middleware options
const options = {


  target: 'https://www.xxx.com', // target host
  changeOrigin: true, // needed for virtual hosted sites
  ws: true, // proxy websockets
  pathRewrite: {


    /* '^/api/old-path': '/api/new-path', // rewrite path
    '^/api/remove/path': '/path', // remove base path */
    '^api':'',
  },
  /* router: {
    // when request.headers.host == 'dev.localhost:3000',
    // override target 'http://www.example.org' to 'http://localhost:8000'
    'dev.localhost:3000': 'http://localhost:8000',
  }, */
};

// create the proxy (without context)
const exampleProxy = createProxyMiddleware(options);

// mount `exampleProxy` in web server

app.use('/api', exampleProxy);
//使用express服务器托管静态文件,在目录创建一个public文件夹,并将index.html放入public
app.use(express.static('public'))
app.listen(9000);
index.html如下:
<!DOCTYPE html>
<html lang="en">
<head>
    <meta charset="UTF-8">
    <meta name="viewport" content="width=device-width, initial-scale=1.0">
    <title>Document</title>
</head>
<body>
    <div onclick="aa()">
    hello world
    </div>
    <script>
        function aa(){


        	//使用fetch发送xhr请求
        	//这里是识别标志,我这里写/api作为识别,以后请求只需要/api,不需要再写全部
            fetch('/api/rand.tbimg.php?format=jpg').then(res=>{


                console.log('hi')
            })
        }
    </script>
</body>
</html>
在终端敲 node index.js 会出现如下提示,但并不影响最终的运行

运行结果如下:

解决了跨域问题
记得端口要输入localhost:9000/index.html
第一次访问 200
按F5刷新(第二次访问) 304
按Ctrl+F5强制刷新 200
还有一种方法是在nginx的安装包内修改conf的配置,如下图所示
