- 使用轮廓来构建移动文档扫描仪。
- 使用轮廓来检测图像中的条形码。
- 利用轮廓来找到从相机到物体或标记的距离。
这一篇博客依然与轮廓相关,将介绍如何从左到右,从右到左,从上到下以及从下到上对轮廓进行排序。
1. 效果图
面积倒序 VS 自下而上排序 效果图如下:
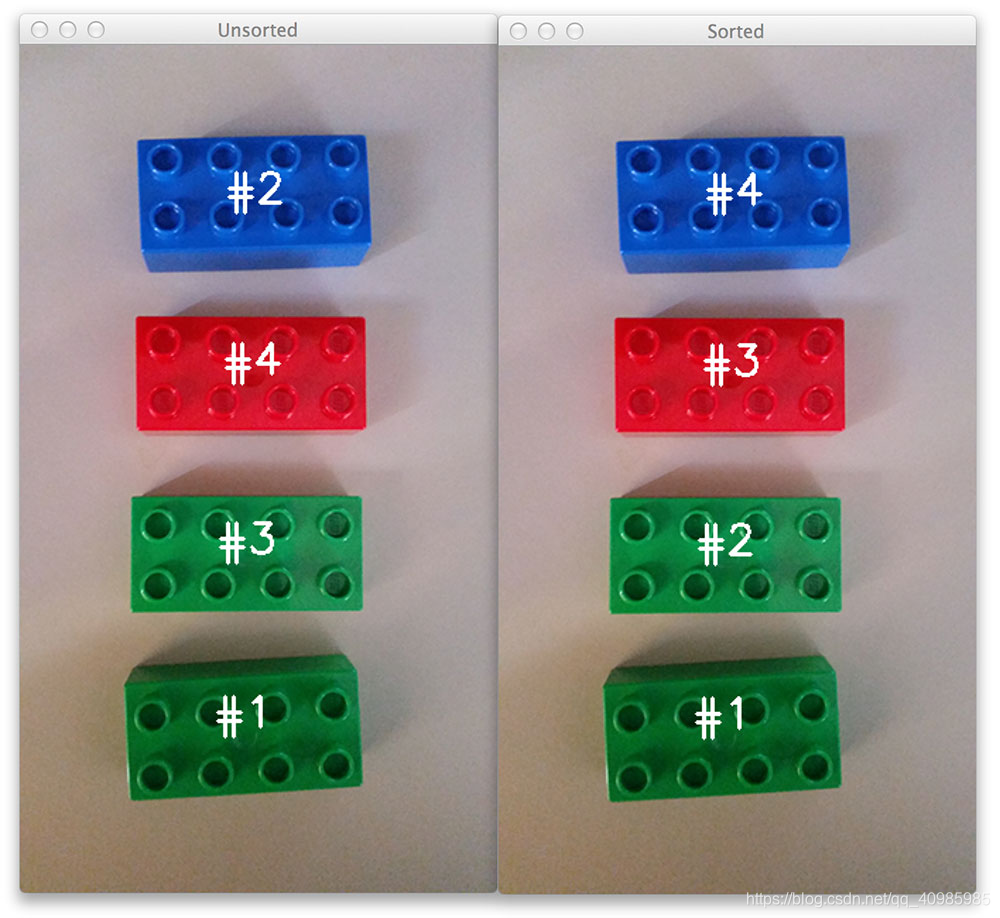
**面积倒序 VS 自右向左效果图如下: **

2. 原理
-
cv2.boundingRect 计算轮廓的边界框区域
-
python魔法进行排序
-
根据轮廓的大小/面积对轮廓进行排序
-
仅使用一个功能即可从左到右,从右到左,从上到下以及从下到上对轮廓区域进行排序。
3. 源码
# USAGE
# python sorting_contours.py --image images/image_02.png --method "right-to-left"

# 导入必要的类
import numpy as np
import argparse
import imutils
import cv2


# 轮廓排序 默认从左到右
# --cnts 待排序的轮廓列表
# --method 排序方法 自上而下,从左到右等
def sort_contours(cnts, method="left-to-right"):
    # 初始化反向标志和排序索引
    reverse = False
    i = 0

    # 处理是否需要逆向排序
    if method == "right-to-left" or method == "bottom-to-top":
        reverse = True

    # 处理时根据边界框的x坐标排序还是y坐标排序,如果是自上而下或者自下而上则需要根据y坐标排序而不是x坐标
    if method == "top-to-bottom" or method == "bottom-to-top":
        i = 1

    # 构建边界框list 并使用python魔术lambda表达式进行排序
    boundingBoxes = [cv2.boundingRect(c) for c in cnts]
    (cnts, boundingBoxes) = zip(*sorted(zip(cnts, boundingBoxes),
                                        key=lambda b: b[1][i], reverse=reverse))

    # 返回排序后的轮廓和边界框
    return (cnts, boundingBoxes)


# 绘制轮廓ID号
def draw_contour(image, c, i):
    # 计算轮廓区域的中心,并绘制⭕代表中心
    M = cv2.moments(c)
    cX = int(M["m10"] / M["m00"])
    cY = int(M["m01"] / M["m00"])

    # 在图像上绘制轮廓数
    cv2.putText(image, "#{}".format(i + 1), (cX - 20, cY), cv2.FONT_HERSHEY_SIMPLEX,
                1.0, (255, 255, 255), 2)

    # 返回绘制了轮廓数的图像
    return image


# 构建命令行参数及解析
ap = argparse.ArgumentParser()
ap.add_argument("-i", "--image", required=True, help="Path to the input image")
ap.add_argument("-m", "--method", required=True, help="Sorting method")
args = vars(ap.parse_args())

# 加载图像 并初始化累积的边缘图像
image = cv2.imread(args["image"])
accumEdged = np.zeros(image.shape[:2], dtype="uint8")

# 相应的遍历图像的蓝色、绿色、红色通道
for chan in cv2.split(image):
    # 对每个通道略微中值模糊以消除高频噪声,执行边缘检测,然后更新累积的边缘贴图。
    chan = cv2.medianBlur(chan, 11)
    edged = cv2.Canny(chan, 50, 200)
    accumEdged = cv2.bitwise_or(accumEdged, edged)

# 展示累积的图像边缘map
cv2.imshow("Edge Map", accumEdged)

# 从图像种找到轮廓,保持最大的一个
cnts = cv2.findContours(accumEdged.copy(), cv2.RETR_EXTERNAL,
                        cv2.CHAIN_APPROX_SIMPLE)
cnts = imutils.grab_contours(cnts)
cnts = sorted(cnts, key=cv2.contourArea, reverse=True)[:5]
orig = image.copy()

# 遍历未排序的轮廓,并绘制在图像上
for (i, c) in enumerate(cnts):
    orig = draw_contour(orig, c, i)

# 展示原始的,未排序的图
cv2.imshow("Unsorted", orig)
cv2.waitKey(0)

# 根据提供的方法对轮廓进行排序
(cnts, boundingBoxes) = sort_contours(cnts, method=args["method"])

# 遍历排序后的轮廓,并绘制在图像上
for (i, c) in enumerate(cnts):
    draw_contour(image, c, i)

# 展示输出图像
cv2.imshow("Sorted", image)
cv2.waitKey(0)