文章目录
一、ansible简介
ansible是新出现的自动化运维工具,基于Python开发,集合了众多运维工具(puppet、cfengine、chef、func、fabric)的优点,实现了批量系统配置、批量程序部署、批量运行命令等功能。
ansible是基于模块工作的,本身没有批量部署的能力。真正具有批量部署的是ansible所运行的模块,ansible只是提供一种框架。
1.1 ansible的工作模块
- 连接插件connection plugins:负责和被监控端实现通信;
- host inventory:指定操作的主机,是一个配置文件里面定义监控的主机;
- 各种模块核心模块、command模块、自定义模块;
- 借助于插件完成记录日志邮件等功能;
- playbook:剧本执行多个任务时,非必需可以让节点一次性运行多个任务。
1.2 ansible架构

1.3 ansible工作原理
- 管理端支持local 、ssh、zeromq 三种方式连接被管理端,默认使用基于ssh的连接---这部分对应基本架构图中的连接模块;
- 可以按应用类型等方式进行Host Inventory(主机群)分类,管理节点通过各类模块实现相应的操作---单个模块,单条命令的批量执行,我们可以称之为ad-hoc;
- 管理节点可以通过playbooks 实现多个task的集合实现一类功能,如web服务的安装部署、数据库服务器的批量备份等。playbooks我们可以简单的理解为,系统通过组合多条ad-hoc操作的配置文件 。
1.4 ansible的配置文件
/etc/ansible/ansible.cfg 主配置文件,配置ansible工作特性

/etc/ansible/hosts 主机清单

/etc/ansible/roles/ 存放角色的目录
二、ansible的安装
1、安装epel仓库及ansible
yum -y install epel-release
yum -y install ansible
2、通过安装tree软件来查看此时安装的ansible的目录结构
yum -y install tree
tree /etc/ansible

3、配置主机清单
vi /etc/ansible/hosts
[webserver]	# 两个标签名称随便配置
192.168.10.12
[mysql]
192.168.10.13
4、配置免交互登录
在管理端进行密钥对的生成以及公钥的复制,最终实现免交互登录。
ssh-keygen -t rsa
ssh-copy-id [email protected]
ssh-copy-id [email protected]
若设置的时候为设置密码,此时可以实现免交互代理,若设置的时候设置密码,还要进行免交互代理的设置,方可以实现免交互的功能。
ssh-agent bash
ssh-add
三、ansible命令行模块
3.1 ansible的命令工具
ansible-doc 模块			# 查看模块帮助
ansible-doc -s 模块		# 查看模块的简单说明
ansible all -m ping 		# 匹配所有主机
3.2 ansible的常用模块功能
command模块
在远程主机执行命令,默认模块,可忽略-m选项
扫描二维码关注公众号,回复:
12651250 查看本文章

	## 查看日期
	ansible mysql -m command -a "date"
	192.168.10.13 | CHANGED | rc=0 >>
	2021年 01月 12日 星期二 09:23:48 CST
cron模块
计划任务
支持时间:minute,hour,day,month,weekday
	## 通过ansible管理器制定计划任务
	[root@server1 ~]# ansible mysql -m cron -a 'minute=*/1 job="/usr/bin/echo hello >> /opt/info.txt" name="cron_hello"'
	192.168.10.13 | CHANGED => {
	 "ansible_facts": {
 		   "discovered_interpreter_python": "/usr/bin/python"
	  },
	  "changed": true,
	  "envs": [],
	   "jobs": [
   	 "cron_hello"
	  ]
	}

## 查看计划任务,其实使用的是command模块
[root@server1 ~]# ansible mysql -a 'crontab -l'
192.168.10.13 | CHANGED | rc=0 >>
#Ansible: cron_hello
*/1 * * * * /usr/bin/echo hello >> /opt/info.txt

## 删除之前创建的计划任务
[root@server1 ~]# ansible mysql -m cron -a 'name="cron_hello" state=absent'
192.168.10.13 | CHANGED => {
 "ansible_facts": {
  	  "discovered_interpreter_python": "/usr/bin/python"
   },
  "changed": true,
   "envs": [],
   "jobs": []
}

user模块
管理用户
	## 创建新用户
	[root@server1 ~]# ansible mysql -m user -a 'name="zhangsan"'
	192.168.10.13 | CHANGED => {
	  "ansible_facts": {
		    "discovered_interpreter_python": "/usr/bin/python"
	    },
	  "changed": true,
	 "comment": "",
	   "create_home": true,
	    "group": 1002,
	  "home": "/home/zhangsan",
	   "name": "zhangsan",
	   "shell": "/bin/bash",
	   "state": "present",
	    "system": false,
	    "uid": 1002
	}

## 删除用户
[root@server1 ~]# ansible mysql -m user -a 'name=lisi state=absent'
192.168.10.13 | CHANGED => {
  "ansible_facts": {
    "discovered_interpreter_python": "/usr/bin/python"
  },
  "changed": true,
 "force": false,
 "name": "lisi",
  "remove": false,
 "state": "absent"
}

group模块
管理组
	## 创建组
	[root@server1 ~]# ansible webserver -m group -a "name=gaosan system=yes"
	192.168.10.12 | CHANGED => {
	    "ansible_facts": {
 		   "discovered_interpreter_python": "/usr/bin/python"
	    },
	  "changed": true,
	  "gid": 985,
	  "name": "gaosan",
	    "state": "present",
	  "system": true
	}
	## 查看是否存在刚新建的组
	[root@server1 ~]# ansible webserver -a "getent group | grep gaosan"
	192.168.10.12 | FAILED | rc=2 >>
	gaosan:x:985:non-zero return code

## 删除一个组
[root@server1 ~]# ansible webserver -m group -a 'name=gaosan state=absent'
192.168.10.12 | CHANGED => {
	  "ansible_facts": {
  	  "discovered_interpreter_python": "/usr/bin/python"
   },
	"changed": true,
  "name": "gaosan",
   "state": "absent"
}
[root@server1 ~]# ansible webserver -a "getent group | grep gaosan"
192.168.10.12 | FAILED | rc=2 >>
non-zero return code

copy模块
## 通过ansible远程备份文件
[root@server1 ~]# ansible mysql -m copy -a 'src=/etc/fstab dest=/etc/fstab.bak owner=zhangsan mode=644'
192.168.10.13 | CHANGED => {
   "ansible_facts": {
    "discovered_interpreter_python": "/usr/bin/python"
},
"changed": true,
"checksum": "1a803c3243b9ed1724884255fb4f986aa4bdd09f",
"dest": "/etc/fstab.bak",
"gid": 0,
"group": "root",
"md5sum": "2b49c74fd0f1a90a56ee66f7d75ae527",
"mode": "0644",
"owner": "zhangsan",
"secontext": "system_u:object_r:etc_t:s0",
"size": 689,
"src": "/root/.ansible/tmp/ansible-tmp-1610419854.97-67910-24522368264970/source",
"state": "file",
"uid": 1002
}


## 生成带有内容的文件
[root@server1 ~]# ansible mysql -m copy -a 'content="this is abc" dest=/opt/abc.txt'
192.168.10.13 | CHANGED => {
"ansible_facts": {
    "discovered_interpreter_python": "/usr/bin/python"
},
"changed": true,
"checksum": "823ed673fc85cb39b8e86c2c544545e28969561c",
"dest": "/opt/abc.txt",
"gid": 0,
"group": "root",
"md5sum": "71e0b65cef47466b1c7a48b563660c62",
"mode": "0644",
"owner": "root",
"secontext": "system_u:object_r:usr_t:s0",
"size": 11,
"src": "/root/.ansible/tmp/ansible-tmp-1610427011.33-69044-239483418150691/source",
"state": "file",
"uid": 0
}

file模块
设置文件属性
新建文件
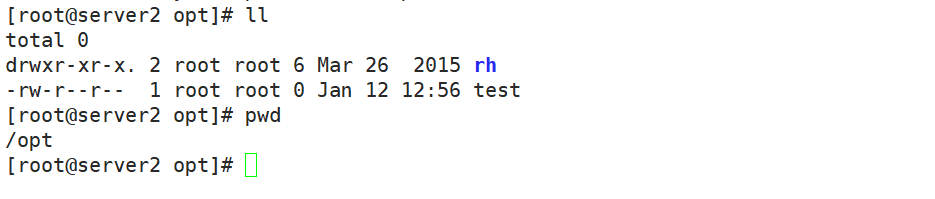
[root@server1 ~]# ansible all -m file -a 'name=/opt/test state=touch'
192.168.10.12 | CHANGED => {
"ansible_facts": {
    "discovered_interpreter_python": "/usr/bin/python"
    },
   "changed": true,
"dest": "/opt/test",
"gid": 0,
"group": "root",
"mode": "0644",
"owner": "root",
"size": 0,
"state": "file",
"uid": 0
}
192.168.10.13 | CHANGED => {
"ansible_facts": {
    "discovered_interpreter_python": "/usr/bin/python"
},
"changed": true,
"dest": "/opt/test",
"gid": 0,
"group": "root",
"mode": "0644",
"owner": "root",
"secontext": "unconfined_u:object_r:usr_t:s0",
"size": 0,
"state": "file",
"uid": 0
}
删除文件
[root@server1 ~]# ansible mysql -m file -a 'name=/opt/test state=absent'
192.168.10.13 | CHANGED => {
"ansible_facts": {
    "discovered_interpreter_python": "/usr/bin/python"
},
"changed": true,
"path": "/opt/test",
"state": "absent"
}
创建目录
[root@server1 ~]# ansible mysql -m file -a 'name=/opt/group1 state=directory'
192.168.10.13 | CHANGED => {
"ansible_facts": {
    "discovered_interpreter_python": "/usr/bin/python"
},
"changed": true,
"gid": 0,
"group": "root",
"mode": "0755",
"owner": "root",
"path": "/opt/group1",
"secontext": "unconfined_u:object_r:usr_t:s0",
"size": 6,
"state": "directory",
"uid": 0
}
删除目录
[root@server1 ~]# ansible mysql -m file  -a 'name=/opt/group1 state=absent'
192.168.10.13 | CHANGED => {
"ansible_facts": {
    "discovered_interpreter_python": "/usr/bin/python"
},
"changed": true,
"path": "/opt/group1",
"state": "absent"
}
创建软链接
[root@server1 ~]# ansible mysql -m file -a 'src=/etc/fstab dest=/opt/fstab.link state=link'
192.168.10.13 | CHANGED => {
"ansible_facts": {
    "discovered_interpreter_python": "/usr/bin/python"
},
"changed": true,
"dest": "/opt/fstab.link",
"gid": 0,
"group": "root",
"mode": "0777",
"owner": "root",
"secontext": "unconfined_u:object_r:usr_t:s0",
"size": 10,
"src": "/etc/fstab",
"state": "link",
"uid": 0
}

删除软链接
[root@server1 ~]# ansible mysql -m file -a 'dest=/opt/fstab.link state=absent'
192.168.10.13 | CHANGED => {
"ansible_facts": {
    "discovered_interpreter_python": "/usr/bin/python"
},
"changed": true,
"path": "/opt/fstab.link",
"state": "absent"
}
 修改文章权限,属主,属组等
[root@server1 ~]# ansible mysql -m file -a 'owner=zhangsan group=ngi mode=755 path=/opt/abc.txt'
192.168.10.13 | CHANGED => {
"ansible_facts": {
    "discovered_interpreter_python": "/usr/bin/python"
},
"changed": true,
"gid": 1050,
"group": "ngi",
"mode": "0755",
"owner": "zhangsan",
"path": "/opt/abc.txt",
"secontext": "system_u:object_r:usr_t:s0",
"size": 11,
"state": "file",
"uid": 1002
}

yum模块
管理程序包
## yum安装软件包
ansible mysql -m yum -a 'name=httpd'

## 显示所有已安装的包
ansible mysql -m yum -a 'name=httpd state=removed'

service模块
作用:管理服务
开启httpd服务
ansible mysql -m service -a 'name=httpd state=started'
ansible mysql -a 'systemctl start httpd'
上下两条命令作用都能达到开启服务的功能

关闭httpd服务
ansible mysql -m service -a 'name=httpd state=stopped'
ansible mysql -a 'systemctl stop httpd'
上下两条也都能达到关闭服务的功能

重新加载httpd服务
ansible mysql -m service -a 'name=httpd state=reloaded'
ansible mysql -a 'systemctl reload httpd'

重启httpd服务
nsible mysql -m service -a 'name=httpd state=restarted'

开启ftp服务,同时设置开机自动启动
ansible mysql -m service -a 'name=httpd state=started enabled=yes'
shell模块
作用:和command相似,用shell来执行命令,但是可以进行多条命令的执行,并且可以进行重写以及追加操作,但是command没有这两项功能。
chdir:指定工作目录,在执行对应的命令之前,会先进入打了chdir参数指定的目录中。
creates:指定一个文件,当指定的文件存在是,就不执行对应的命令。
removes:使用此参数指定一个文件,当制定的文件不存在时,就不执行对应命令。
## 进入指定的目录下,创建指定的文件及信息
[root@server1 ~]# ansible mysql -m shell -a 'chdir=/opt/ echo hello > hello.txt'
192.168.10.13 | CHANGED | rc=0 >>

[root@server1 ~]# ansible mysql -m shell -a 'chdir=/opt/ ls'
192.168.10.13 | CHANGED | rc=0 >>
abc.txt
hello.txt
info.txt
rh
script模块
作用:运行脚本,不需要将脚本复制到被控端
ansible all -m script -a 'share.sh'

setup模块
ansible mysql -m setup	# 查看目录节点的各种信息

[root@server1 opt]#  ansible mysql -m setup -a 'filter=ansible_default_ipv4'		# 查看目标节点过滤ansible_default_ipv4的信息
192.168.10.13 | SUCCESS => {
"ansible_facts": {
    "ansible_default_ipv4": {
        "address": "192.168.10.13",
        "alias": "ens33",
        "broadcast": "192.168.10.255",
        "gateway": "192.168.10.2",
        "interface": "ens33",
        "macaddress": "00:0c:29:e2:15:37",
        "mtu": 1500,
        "netmask": "255.255.255.0",
        "network": "192.168.10.0",
        "type": "ether"
    },
    "discovered_interpreter_python": "/usr/bin/python"
},
"changed": false
}

## 查看节点过滤可用信息的状态,搭配可以做巡检
[root@server1 opt]#  ansible mysql -m setup -a 'filter=ansible_memory_mb'
192.168.10.13 | SUCCESS => {
"ansible_facts": {
    "ansible_memory_mb": {
        "nocache": {
            "free": 811,
            "used": 1012
        },
        "real": {
            "free": 199,
            "total": 1823,
            "used": 1624
        },
        "swap": {
            "cached": 0,
            "free": 2046,
            "total": 2048,
            "used": 2
        }
    },
    "discovered_interpreter_python": "/usr/bin/python"
},
"changed": false
}