文章目录
- 一、OpenStack-Glance组件部署
- 二、OpenStack-Placement组件部署
- 三、OpenStack-nova组件部署
- 四、OpenStack-neutron组件部署
-
- 4.1 创建数据库neutron,并进行授权
- 4.2 安装提供者网络(桥接)
- 4.3 更改主配置文件
- 4.4 修改 ML2 plugin 配置文件 ml2_conf.ini
- 4.5 修改 linux bridge network provider 配置文件
- 4.6 修改内核参数
- 4.7 配置Linuxbridge接口驱动和外部网络网桥
- 4.8 修改dhcp_agent 配置文件及内容
- 4.8 配置元数据代理、用于配置桥接与自服务网络的通用配置
- 4.9 修改nova配置文件,用于neutron交互
- 4.10 创建ML2插件文件符号连接
- 4.11 c1 节点操作
- 4.12 C2节点部署neutron服务(与C1节点相同)
- 4.13 小结
- 五、OpenStack-Dashboard组件部署
- 六、OpenStack-cinder 组件部署
一、OpenStack-Glance组件部署
1.1 创建数据库实例和数据库用户
[root@ct ~]# mysql -u root -p
MariaDB [(none)]> CREATE DATABASE glance;
MariaDB [(none)]> GRANT ALL PRIVILEGES ON glance.* TO 'glance'@'localhost' IDENTIFIED BY 'GLANCE_DBPASS';
MariaDB [(none)]> GRANT ALL PRIVILEGES ON glance.* TO 'glance'@'%' IDENTIFIED BY 'GLANCE_DBPASS';
MariaDB [(none)]> flush privileges;
MariaDB [(none)]> exit
1.2 创建用户、修改配置文件
创建OpenStack的Glance用户
#创建用户前,需要首先执行管理员环境变量脚本(此处已经在~/.bashrc 中定义过了)
[root@ct ~]# openstack user create --domain default --password GLANCE_PASS glance			###创建glance用户
[root@ct ~]# openstack role add --project service --user glance admin					#将glance用户添加到service项目中,并且针对这个项目拥有admin权限;注册glance的API,需要对service项目有admin权限
[root@ct ~]# openstack service create --name glance --description "OpenStack Image" image		创建一个service服务,service名称为glance,类型为image;创建完成后可以通过 openstack service list 查看
● 创建镜像服务 API 端点,OpenStack使用三种API端点代表三种服务:admin、internal、public
[root@ct ~]# openstack endpoint create --region RegionOne image public http://ct:9292
[root@ct ~]# openstack endpoint create --region RegionOne image internal http://ct:9292
[root@ct ~]# openstack endpoint create --region RegionOne image admin http://ct:9292
● 安装 openstack-glance 软件包。
[root@ct ~]# yum -y install openstack-glance
● 修改glance配置文件,glance有两个配置文件:/etc/glance/glance-api.conf
/etc/glance/glance-registry.conf
[root@ct ~]# cp -a /etc/glance/glance-api.conf{,.bak}

[root@ct ~]# grep -Ev '^$|#' /etc/glance/glance-api.conf.bak > /etc/glance/glance-api.conf
● 添加glance-api.conf配置
#传入修改的参数	# 可以通过shell脚本来一起传入参数,减小出错的可能性
openstack-config --set /etc/glance/glance-api.conf database connection mysql+pymysql://glance:GLANCE_DBPASS@ct/glance
openstack-config --set /etc/glance/glance-api.conf keystone_authtoken www_authenticate_uri http://ct:5000
openstack-config --set /etc/glance/glance-api.conf keystone_authtoken auth_url http://ct:5000
openstack-config --set /etc/glance/glance-api.conf keystone_authtoken memcached_servers ct:11211
openstack-config --set /etc/glance/glance-api.conf keystone_authtoken auth_type password
openstack-config --set /etc/glance/glance-api.conf keystone_authtoken project_domain_name Default
openstack-config --set /etc/glance/glance-api.conf keystone_authtoken user_domain_name Default
openstack-config --set /etc/glance/glance-api.conf keystone_authtoken project_name service
openstack-config --set /etc/glance/glance-api.conf keystone_authtoken username glance
openstack-config --set /etc/glance/glance-api.conf keystone_authtoken password GLANCE_PASS
openstack-config --set /etc/glance/glance-api.conf paste_deploy flavor keystone
openstack-config --set /etc/glance/glance-api.conf glance_store stores file,http
openstack-config --set /etc/glance/glance-api.conf glance_store default_store file
openstack-config --set /etc/glance/glance-api.conf glance_store filesystem_store_datadir /var/lib/glance/images/
- 通过cat命令来查看配置文件,查看传入的参数是否有错
[root@ct glance]# cat glance-api.conf
[DEFAULT]
[cinder]
[cors]
[database]
connection = mysql+pymysql://glance:GLANCE_DBPASS@ct/glance
[file]
[glance.store.http.store]
[glance.store.rbd.store]
[glance.store.sheepdog.store]
[glance.store.swift.store]
[glance.store.vmware_datastore.store]

[glance_store]
stores = file,http					#存储类型,file:文件,http:基于api调用的方式,把镜像放到其他存储上
default_store = file					#默认存储方式
filesystem_store_datadir = /var/lib/glance/images/	##指定镜像存放的本地目录

[image_format]
[keystone_authtoken]
www_authenticate_uri = http://ct:5000			##指定认证的keystone的URI
auth_url = http://ct:5000
memcached_servers = ct:11211
auth_type = password
project_domain_name = Default
user_domain_name = Default
project_name = service				#glance用户针对service项目拥有admin权限
username = glance
password = GLANCE_PASS

[oslo_concurrency]
[oslo_messaging_amqp]
[oslo_messaging_kafka]
[oslo_messaging_notifications]
[oslo_messaging_rabbit]
[oslo_middleware]
[oslo_policy]

[paste_deploy]
flavor = keystone					#指定提供认证的服务器为keystone

[profiler]
[store_type_location_strategy]
[task]
[taskflow_executor]
● 修改glance-registry.conf 配置文件
#备份、过滤注释信息
cp -a /etc/glance/glance-registry.conf{,.bak}
grep -Ev '^$|#' /etc/glance/glance-registry.conf.bak > /etc/glance/glance-registry.conf
#修改配置文件参数,同样可以用shell脚本来传参
openstack-config --set /etc/glance/glance-api.conf database connection mysql+pymysql://glance:GLANCE_DBPASS@ct/glance
openstack-config --set /etc/glance/glance-api.conf keystone_authtoken www_authenticate_uri http://ct:5000
openstack-config --set /etc/glance/glance-api.conf keystone_authtoken auth_url http://ct:5000
openstack-config --set /etc/glance/glance-api.conf keystone_authtoken memcached_servers ct:11211
openstack-config --set /etc/glance/glance-api.conf keystone_authtoken auth_type password
openstack-config --set /etc/glance/glance-api.conf keystone_authtoken project_domain_name Default
openstack-config --set /etc/glance/glance-api.conf keystone_authtoken user_domain_name Default
openstack-config --set /etc/glance/glance-api.conf keystone_authtoken project_name service
openstack-config --set /etc/glance/glance-api.conf keystone_authtoken username glance
openstack-config --set /etc/glance/glance-api.conf keystone_authtoken password GLANCE_PASS
openstack-config --set /etc/glance/glance-api.conf paste_deploy flavor keystone
openstack-config --set /etc/glance/glance-api.conf glance_store stores file,http
openstack-config --set /etc/glance/glance-api.conf glance_store default_store file
openstack-config --set /etc/glance/glance-api.conf glance_store filesystem_store_datadir /var/lib/glance/images/


#修改参数(配置与glance-api.conf相同)

openstack-config --set /etc/glance/glance-registry.conf database connection  mysql+pymysql://glance:GLANCE_DBPASS@t/glance
openstack-config --set /etc/glance/glance-registry.conf keystone_authtoken www_authenticate_uri   http://ct:5000
openstack-config --set /etc/glance/glance-registry.conf keystone_authtoken auth_url  http://ct:5000
openstack-config --set /etc/glance/glance-registry.conf keystone_authtoken memcached_servers  ct:11211
openstack-config --set /etc/glance/glance-registry.conf keystone_authtoken auth_type  password
openstack-config --set /etc/glance/glance-registry.conf keystone_authtoken project_domain_name  Default
openstack-config --set /etc/glance/glance-registry.conf keystone_authtoken user_domain_name  Default
openstack-config --set /etc/glance/glance-registry.conf keystone_authtoken project_name  service
openstack-config --set /etc/glance/glance-registry.conf keystone_authtoken username  glance
openstack-config --set /etc/glance/glance-registry.conf keystone_authtoken password  GLANCE_PASS
openstack-config --set /etc/glance/glance-registry.conf paste_deploy flavor  keystone
- 通过cat命令来查看参数传入的情况
[root@ct glance]# cat glance-registry.conf
[DEFAULT]
[database]
connection = mysql+pymysql://glance:GLANCE_DBPASS@ct/glance
[keystone_authtoken]
www_authenticate_uri = http://ct:5000
auth_url = http://ct:5000
memcached_servers = ct:11211
auth_type = password
project_domain_name = Default
user_domain_name = Default
project_name = service
username = glance
password = GLANCE_PASS
[oslo_messaging_amqp]
[oslo_messaging_kafka]
[oslo_messaging_notifications]
[oslo_messaging_rabbit]
[oslo_policy]
[paste_deploy]
flavor = keystone
[profiler]
1.3 数据库及服务的配置
● 初始化glance数据库,生成相关表结构;(不管有多少个controler,只需要初始化一次即可)
su -s /bin/sh -c "glance-manage db_sync" glance
● 开启glance服务(此处开启之后会生成存放镜像的目录/var/lib/glance/image)
[root@ct ~]# systemctl enable openstack-glance-api.service
[root@ct ~]# systemctl start openstack-glance-api.service
● 查看端口(也可以使用lsof -i:9292 )
[root@ct glance]# netstat -natp | grep 9292
tcp        0      0 0.0.0.0:9292            0.0.0.0:*               LISTEN      62334/python2
● 赋予openstack-glance-api.service服务对存储设备的可写权限(-h:值对符号连接/软链接的文件修改)
[root@ct ~]# chown -hR glance:glance /var/lib/glance/
1.4 镜像的导入及查看
① 导入镜像
● 先上传cirros镜像到控制节点的/root,然后导入glance,最后查看是否创建成功
[root@ct ~]# openstack image create --file cirros-0.3.5-x86_64-disk.img --disk-format qcow2 --container-format bare --public cirros
② 查看镜像
● 方式一:
[root@ct ~]# openstack image list
+--------------------------------------+--------+--------+
| ID                                   | Name   | Status |
+--------------------------------------+--------+--------+
| 1c66ff1c-25a3-4a5c-8202-1040b62cc156 | cirros | active |
+--------------------------------------+--------+--------+
● 方式二:
[root@ct ~]# glance image-list
+--------------------------------------+--------+
| ID                                   | Name   |
+--------------------------------------+--------+
| 1c66ff1c-25a3-4a5c-8202-1040b62cc156 | cirros |
+--------------------------------------+--------+
1.5 小结
因为OpenStack上创建虚拟机需要镜像支持,所以先行进行部署
部署思路:
1、创建数据库、授权
2、创建openstack用户、授权、管理
3、修改配置文件(glance-api.conf、glance-registry.conf)
4、初始化数据库、上传实例镜像
二、OpenStack-Placement组件部署
2.1 创建数据库实例和数据库用户
[root@ct ~]# mysql -uroot -p
MariaDB [(none)]> CREATE DATABASE placement;
MariaDB [(none)]> GRANT ALL PRIVILEGES ON placement.* TO 'placement'@'localhost' IDENTIFIED BY 'PLACEMENT_DBPASS';
MariaDB [(none)]> GRANT ALL PRIVILEGES ON placement.* TO 'placement'@'%' IDENTIFIED BY 'PLACEMENT_DBPASS';
MariaDB [(none)]> flush privileges;
MariaDB [(none)]> exit;
2.2 创建Placement服务用户和API的endpoint
● 创建placement用户
[root@ct ~]# openstack user create --domain default --password PLACEMENT_PASS placement
+---------------------+----------------------------------+
| Field               | Value                            |
+---------------------+----------------------------------+
| domain_id           | default                          |
| enabled             | True                             |
| id                  | 78fb711680be495e90cfdff48beadd13 |
| name                | placement                        |
| options             | {}                               |
| password_expires_at | None                             |
+---------------------+----------------------------------+
● 给与placement用户对service项目拥有admin权限
[root@ct ~]# openstack role add --project service --user placement admin
● 创建一个placement服务,服务类型为placement
[root@ct ~]# openstack service create --name placement --description "Placement API" placement
+-------------+----------------------------------+
| Field       | Value                            |
+-------------+----------------------------------+
| description | Placement API                    |
| enabled     | True                             |
| id          | a02747cae70c4c7b9a8996b176ab04e3 |
| name        | placement                        |
| type        | placement                        |
+-------------+----------------------------------+
● 注册API端口到placement的service中;注册的信息会写入到mysql中
[root@ct ~]# openstack endpoint create --region RegionOne placement public http://ct:8778
+--------------+----------------------------------+
| Field        | Value                            |
+--------------+----------------------------------+
| enabled      | True                             |
| id           | e9523ccc3ae74c7c815ad61477abd254 |
| interface    | public                           |
| region       | RegionOne                        |
| region_id    | RegionOne                        |
| service_id   | a02747cae70c4c7b9a8996b176ab04e3 |
| service_name | placement                        |
| service_type | placement                        |
| url          | http://ct:8778                   |
+--------------+----------------------------------+

[root@ct ~]# openstack endpoint create --region RegionOne placement internal http://ct:8778
+--------------+----------------------------------+
| Field        | Value                            |
+--------------+----------------------------------+
| enabled      | True                             |
| id           | d70cdec5113f4a30a1d0ef97359e6c38 |
| interface    | internal                         |
| region       | RegionOne                        |
| region_id    | RegionOne                        |
| service_id   | a02747cae70c4c7b9a8996b176ab04e3 |
| service_name | placement                        |
| service_type | placement                        |
| url          | http://ct:8778                   |
+--------------+----------------------------------+

[root@ct~]# openstack endpoint create --region RegionOne placement admin http://ct:8778
+--------------+----------------------------------+
| Field        | Value                            |
+--------------+----------------------------------+
| enabled      | True                             |
| id           | 26d77b720e904dc392215b6cad78e2a5 |
| interface    | admin                            |
| region       | RegionOne                        |
| region_id    | RegionOne                        |
| service_id   | a02747cae70c4c7b9a8996b176ab04e3 |
| service_name | placement                        |
| service_type | placement                        |
| url          | http://ct:8778                   |
+--------------+----------------------------------+
● 安装placement服务
[root@controller ~]# yum -y install openstack-placement-api
2.3 修改 placement配置文件
#修改配置文件,可以使用shell脚本进行参数的传入
cp /etc/placement/placement.conf{,.bak}
grep -Ev '^$|#' /etc/placement/placement.conf.bak > /etc/placement/placement.conf
openstack-config --set /etc/placement/placement.conf placement_database connection mysql+pymysql://placement:PLACEMENT_DBPASS@ct/placement
openstack-config --set /etc/placement/placement.conf api auth_strategy keystone
openstack-config --set /etc/placement/placement.conf keystone_authtoken auth_url  http://ct:5000/v3
openstack-config --set /etc/placement/placement.conf keystone_authtoken memcached_servers ct:11211
openstack-config --set /etc/placement/placement.conf keystone_authtoken auth_type password
openstack-config --set /etc/placement/placement.conf keystone_authtoken project_domain_name Default
openstack-config --set /etc/placement/placement.conf keystone_authtoken user_domain_name Default
openstack-config --set /etc/placement/placement.conf keystone_authtoken project_name service
openstack-config --set /etc/placement/placement.conf keystone_authtoken username placement
openstack-config --set /etc/placement/placement.conf keystone_authtoken password PLACEMENT_PASS
- 通过cat命令查看placement配置文件
[root@ct placement]# cat /etc/placement/placement.conf
[DEFAULT]
[api]
auth_strategy = keystone
[cors]
[keystone_authtoken]
auth_url = http://ct:5000/v3				#指定keystone地址
memcached_servers = ct:11211			#session信息是缓存放到了memcached中
auth_type = password
project_domain_name = Default
user_domain_name = Default
project_name = service
username = placement
password = PLACEMENT_PASS
[oslo_policy]
[placement]
[placement_database]
connection = mysql+pymysql://placement:PLACEMENT_DBPASS@ct/placement
[profiler]
2.4 导入数据库及修改Apache配置
① 导入数据库
su -s /bin/sh -c "placement-manage db sync" placement
/usr/lib/python2.7/site-packages/pymysql/cursors.py:170: Warning: (1280, u"Name 'alembic_version_pkc' ignored for PRIMARY key.")
  result = self._query(query)
② 修改Apache配置文件
00-placemenct-api.conf(安装完placement服务后会自动创建该文件-虚拟主机配置 )
#虚拟主机配置文件
[root@ct ~]# cd /etc/httpd/conf.d/
[root@ct ~]# vim 00-placement-api.conf		#修改配置文件,在末尾添加
<Directory /usr/bin>
<IfVersion >= 2.4>
	Require all granted
</IfVersion>
<IfVersion < 2.4>
	Order allow,deny
	Allow from all
</IfVersion>
</Directory>

[root@ct conf.d]# cat 00-placement-api.conf		# 查看配置文件
Listen 8778

<VirtualHost *:8778>
  WSGIProcessGroup placement-api
  WSGIApplicationGroup %{GLOBAL}
  WSGIPassAuthorization On
  WSGIDaemonProcess placement-api processes=3 threads=1 user=placement group=placement
  WSGIScriptAlias / /usr/bin/placement-api
  <IfVersion >= 2.4>
    ErrorLogFormat "%M"
  </IfVersion>
  ErrorLog /var/log/placement/placement-api.log
  #SSLEngine On
  #SSLCertificateFile ...
  #SSLCertificateKeyFile ...
</VirtualHost>

Alias /placement-api /usr/bin/placement-api
<Location /placement-api>
  SetHandler wsgi-script
  Options +ExecCGI
  WSGIProcessGroup placement-api
  WSGIApplicationGroup %{GLOBAL}
  WSGIPassAuthorization On
</Location>
<Directory /usr/bin>			#此处是bug,必须添加下面的配置来启用对placement api的访问,否则在访问apache的
<IfVersion >= 2.4>				#api时会报403;添加在文件的最后即可
	Require all granted
</IfVersion>
<IfVersion < 2.4>				#apache版本;允许apache访问/usr/bin目录;否则/usr/bin/placement-api将不允许被访问
	Order allow,deny
	Allow from all			#允许apache访问
</IfVersion>
</Directory>
③ 重新启动apache并测试
[root@ct placement]# systemctl restart httpd
[root@ct placement]# curl ct:8778		# curl 测试访问
{"versions": [{"status": "CURRENT", "min_version": "1.0", "max_version": "1.36", "id": "v1.0", "links": [{"href": "", "rel": "self"}]}]}[root@ct conf.d]

[root@ct placement]# netstat -natp | grep 8778		# 查看端口占用(netstat、lsof)
tcp6       0      0 :::8778                 :::*                    LISTEN      53541/httpd

[root@ct placement]# placement-status upgrade check		# 检查placement状态
+----------------------------------+
| Upgrade Check Results            |
+----------------------------------+
| Check: Missing Root Provider IDs |
| Result: Success                  |
| Details: None                    |
+----------------------------------+
| Check: Incomplete Consumers      |
| Result: Success                  |
| Details: None                    |
+----------------------------------+
1.5 小结
-
Placement提供了placement-apiWSGI脚本,用于与Apache,nginx或其他支持WSGI的Web服务器一起运行服务(通过nginx或apache实现python入口代理)。
-
根据用于部署OpenStack的打包解决方案,WSGI脚本可能位于/usr/bin 或中/usr/local/bin
Placement服务是从 S 版本,从nova服务中拆分出来的组件,作用是收集各个node节点的可用资源,把node节点的资源统计写入到mysql,Placement服务会被nova scheduler服务进行调用 Placement服务的监听端口是8778 -
需修改的配置文件:
① placement.conf
主要修改思路:
Keystone认证相关(url、HOST:PORT、域、账号密码等)
对接数据库(位置)
② 00-placement-api.conf
主要修改思路:
Apache权限、访问控制
三、OpenStack-nova组件部署
3.1 nova组件部署位置
【控制节点ct】
nova-api(nova主服务)
nova-scheduler(nova调度服务)
nova-conductor(nova数据库服务,提供数据库访问)
nova-novncproxy(nova的vnc服务,提供实例的控制台)
【计算节点c1、c2】
nova-compute(nova计算服务)
3.2 计算节点Nova服务配置
① 创建nova数据库,并执行授权操作
[root@ct ~]# mysql -uroot -p123456
MariaDB [(none)]> CREATE DATABASE nova_api;
MariaDB [(none)]> CREATE DATABASE nova;
MariaDB [(none)]> CREATE DATABASE nova_cell0;
MariaDB [(none)]> GRANT ALL PRIVILEGES ON nova_api.* TO 'nova'@'localhost' IDENTIFIED BY 'NOVA_DBPASS';
MariaDB [(none)]> GRANT ALL PRIVILEGES ON nova_api.* TO 'nova'@'%' IDENTIFIED BY 'NOVA_DBPASS';
MariaDB [(none)]> GRANT ALL PRIVILEGES ON nova.* TO 'nova'@'localhost' IDENTIFIED BY 'NOVA_DBPASS';
MariaDB [(none)]> GRANT ALL PRIVILEGES ON nova.* TO 'nova'@'%' IDENTIFIED BY 'NOVA_DBPASS';
MariaDB [(none)]> GRANT ALL PRIVILEGES ON nova_cell0.* TO 'nova'@'localhost' IDENTIFIED BY 'NOVA_DBPASS';
MariaDB [(none)]> GRANT ALL PRIVILEGES ON nova_cell0.* TO 'nova'@'%' IDENTIFIED BY 'NOVA_DBPASS';
MariaDB [(none)]> flush privileges;
MariaDB [(none)]> exit
② 管理Nova用户及服务
- 创建nova用户
[root@ct ~]# openstack user create --domain default --password NOVA_PASS nova
+---------------------+----------------------------------+
| Field               | Value                            |
+---------------------+----------------------------------+
| domain_id           | default                          |
| enabled             | True                             |
| id                  | 2870506680594cc7b0a88dab6cc06781 |
| name                | nova                             |
| options             | {}                               |
| password_expires_at | None                             |
+---------------------+----------------------------------+

#把nova用户添加到service项目,拥有admin权限
[root@ct ~]# openstack role add --project service --user nova admin
- 创建nova服务
[root@ct ~]# openstack service create --name nova --description "OpenStack Compute" compute
+-------------+----------------------------------+
| Field       | Value                            |
+-------------+----------------------------------+
| description | OpenStack Compute                |
| enabled     | True                             |
| id          | f158930218d7421ca98e4d552b55e7e8 |
| name        | nova                             |
| type        | compute                          |
+-------------+----------------------------------+
- 给Nova服务关联endpoint(端点)
[root@ct ~]# openstack endpoint create --region RegionOne compute public http://ct:8774/v2.1
+--------------+----------------------------------+
| Field        | Value                            |
+--------------+----------------------------------+
| enabled      | True                             |
| id           | 29ec4c2f90b74f8b8eaab482103b159c |
| interface    | public                           |
| region       | RegionOne                        |
| region_id    | RegionOne                        |
| service_id   | f158930218d7421ca98e4d552b55e7e8 |
| service_name | nova                             |
| service_type | compute                          |
| url          | http://ct:8774/v2.1              |
+--------------+----------------------------------+

[root@ct ~]# openstack endpoint create --region RegionOne compute internal http://ct:8774/v2.1
+--------------+----------------------------------+
| Field        | Value                            |
+--------------+----------------------------------+
| enabled      | True                             |
| id           | c37dc4eb0b334683a4fd0a39110616b1 |
| interface    | internal                         |
| region       | RegionOne                        |
| region_id    | RegionOne                        |
| service_id   | f158930218d7421ca98e4d552b55e7e8 |
| service_name | nova                             |
| service_type | compute                          |
| url          | http://ct:8774/v2.1              |
+--------------+----------------------------------+

[root@ct ~]# openstack endpoint create --region RegionOne compute admin http://ct:8774/v2.1
+--------------+----------------------------------+
| Field        | Value                            |
+--------------+----------------------------------+
| enabled      | True                             |
| id           | f52c025190e745f1b8b3b6631ebd1ce6 |
| interface    | admin                            |
| region       | RegionOne                        |
| region_id    | RegionOne                        |
| service_id   | f158930218d7421ca98e4d552b55e7e8 |
| service_name | nova                             |
| service_type | compute                          |
| url          | http://ct:8774/v2.1              |
+--------------+----------------------------------+
- 安装nova组件(nova-api、nova-conductor、nova-novncproxy、nova-scheduler)
[root@ct ~]# yum -y install openstack-nova-api openstack-nova-conductor openstack-nova-novncproxy openstack-nova-scheduler
3.3 修改nova配置文件(nova.conf)
- 修改nova.conf
[root@ct ~]# cp -a /etc/nova/nova.conf{,.bak}
[root@ct ~]# grep -Ev '^$|#' /etc/nova/nova.conf.bak > /etc/nova/nova.conf
#修改nova.conf,通过shell脚本来修改更加方便
openstack-config --set /etc/nova/nova.conf DEFAULT enabled_apis osapi_compute,metadata
openstack-config --set /etc/nova/nova.conf DEFAULT my_ip 192.168.20.10 			####修改为 ct的IP(内部IP)
openstack-config --set /etc/nova/nova.conf DEFAULT use_neutron true
openstack-config --set /etc/nova/nova.conf DEFAULT firewall_driver nova.virt.firewall.NoopFirewallDriver
openstack-config --set /etc/nova/nova.conf DEFAULT transport_url rabbit://openstack:RABBIT_PASS@ct
openstack-config --set /etc/nova/nova.conf api_database connection mysql+pymysql://nova:NOVA_DBPASS@ct/nova_api
openstack-config --set /etc/nova/nova.conf database connection mysql+pymysql://nova:NOVA_DBPASS@ct/nova
openstack-config --set /etc/nova/nova.conf placement_database connection mysql+pymysql://placement:PLACEMENT_DBPASS@ct/placement
openstack-config --set /etc/nova/nova.conf api auth_strategy keystone
openstack-config --set /etc/nova/nova.conf keystone_authtoken auth_url http://ct:5000/v3
openstack-config --set /etc/nova/nova.conf keystone_authtoken memcached_servers ct:11211
openstack-config --set /etc/nova/nova.conf keystone_authtoken auth_type password
openstack-config --set /etc/nova/nova.conf keystone_authtoken project_domain_name Default
openstack-config --set /etc/nova/nova.conf keystone_authtoken user_domain_name Default
openstack-config --set /etc/nova/nova.conf keystone_authtoken project_name service
openstack-config --set /etc/nova/nova.conf keystone_authtoken username nova
openstack-config --set /etc/nova/nova.conf keystone_authtoken password NOVA_PASS
openstack-config --set /etc/nova/nova.conf vnc enabled true
openstack-config --set /etc/nova/nova.conf vnc server_listen ' $my_ip'
openstack-config --set /etc/nova/nova.conf vnc server_proxyclient_address ' $my_ip'
openstack-config --set /etc/nova/nova.conf glance api_servers http://ct:9292
openstack-config --set /etc/nova/nova.conf oslo_concurrency lock_path /var/lib/nova/tmp
openstack-config --set /etc/nova/nova.conf placement region_name RegionOne
openstack-config --set /etc/nova/nova.conf placement project_domain_name Default
openstack-config --set /etc/nova/nova.conf placement project_name service
openstack-config --set /etc/nova/nova.conf placement auth_type password
openstack-config --set /etc/nova/nova.conf placement user_domain_name Default
openstack-config --set /etc/nova/nova.conf placement auth_url http://ct:5000/v3
openstack-config --set /etc/nova/nova.conf placement username placement
openstack-config --set /etc/nova/nova.conf placement password PLACEMENT_PASS
- 通过cat命令查看nova.conf配置文件
[root@ct ~]# cat /etc/nova/nova.conf

[DEFAULT]
enabled_apis = osapi_compute,metadata		#指定支持的api类型
my_ip = 192.168.20.10			#定义本地IP
use_neutron = true					#通过neutron获取IP地址
firewall_driver = nova.virt.firewall.NoopFirewallDriver
transport_url = rabbit://openstack:RABBIT_PASS@ct	#指定连接的rabbitmq

[api]
auth_strategy = keystone				#指定使用keystone认证

[api_database]
connection = mysql+pymysql://nova:NOVA_DBPASS@ct/nova_api

[barbican]
[cache]
[cinder]
[compute]
[conductor]
[console]
[consoleauth]
[cors]

[database]
connection = mysql+pymysql://nova:NOVA_DBPASS@ct/nova

[devices]
[ephemeral_storage_encryption]
[filter_scheduler]

[glance]
api_servers = http://ct:9292

[guestfs]
[healthcheck]
[hyperv]
[ironic]
[key_manager]
[keystone]

[keystone_authtoken]				#配置keystone的认证信息
auth_url = http://ct:5000/v3				#到此url去认证
memcached_servers = ct:11211			#memcache数据库地址:端口
auth_type = password
project_domain_name = Default
user_domain_name = Default
project_name = service
username = nova
password = NOVA_PASS

[libvirt]
[metrics]
[mks]
[neutron]
[notifications]
[osapi_v21]

[oslo_concurrency]					#指定锁路径
lock_path = /var/lib/nova/tmp			#锁的作用是创建虚拟机时,在执行某个操作的时候,需要等此步骤执行完后才能执行下一个步骤,不能并行执行,保证操作是一步一步的执行

[oslo_messaging_amqp]
[oslo_messaging_kafka]
[oslo_messaging_notifications]
[oslo_messaging_rabbit]
[oslo_middleware]
[oslo_policy]

[pci]
[placement]
region_name = RegionOne
project_domain_name = Default
project_name = service
auth_type = password
user_domain_name = Default
auth_url = http://ct:5000/v3
username = placement
password = PLACEMENT_PASS

[powervm]
[privsep]
[profiler]
[quota]
[rdp]
[remote_debug]
[scheduler]
[serial_console]
[service_user]
[spice]
[upgrade_levels]
[vault]
[vendordata_dynamic_auth]
[vmware]
[vnc]						#此处如果配置不正确,则连接不上虚拟机的控制台
enabled = true
server_listen =  $my_ip				#指定vnc的监听地址
server_proxyclient_address =  $my_ip			#server的客户端地址为本机地址;此地址是管理网的地址

[workarounds]
[wsgi]
[xenserver]
[xvp]
[zvm]

[placement_database]
connection = mysql+pymysql://placement:PLACEMENT_DBPASS@ct/placement
3.4 初始化数据库
# 初始化nova_api数据库
[root@ct ~]# su -s /bin/sh -c "nova-manage api_db sync" nova

# 注册cell0数据库;nova服务内部把资源划分到不同的cell中,把计算节点划分到不同的cell中;openstack内部基于cell把计算节点进行逻辑上的分组
[root@ct ~]# su -s /bin/sh -c "nova-manage cell_v2 map_cell0" nova

# 创建cell1单元格;
[root@ct ~]# su -s /bin/sh -c "nova-manage cell_v2 create_cell --name=cell1 --verbose" nova
53368ac2-6bc2-45dc-859d-f2cd0cb88fb5


# 初始化nova数据库;可以通过 /var/log/nova/nova-manage.log 日志判断是否初始化成功
[root@ct ~]# su -s /bin/sh -c "nova-manage db sync" nova
/usr/lib/python2.7/site-packages/pymysql/cursors.py:170: Warning: (1831, u'Duplicate index `block_device_mapping_instance_uuid_virtual_name_device_name_idx`. This is deprecated and will be disallowed in a future release')
  result = self._query(query)
/usr/lib/python2.7/site-packages/pymysql/cursors.py:170: Warning: (1831, u'Duplicate index `uniq_instances0uuid`. This is deprecated and will be disallowed in a future release')
  result = self._query(query)

# 可使用以下命令验证cell0和cell1是否注册成功
su -s /bin/sh -c "nova-manage cell_v2 list_cells" nova #验证cell0和cell1组件是否注册成功
+-------+--------------------------------------+----------------------------+-----------------------------------------+----------+
|  名称 |                 UUID                 |       Transport URL        |                数据库连接               | Disabled |
+-------+--------------------------------------+----------------------------+-----------------------------------------+----------+
| cell0 | 00000000-0000-0000-0000-000000000000 |           none:/           | mysql+pymysql://nova:****@ct/nova_cell0 |  False   |
| cell1 | 53368ac2-6bc2-45dc-859d-f2cd0cb88fb5 | rabbit://openstack:****@ct |    mysql+pymysql://nova:****@ct/nova    |  False   |
+-------+--------------------------------------+----------------------------+-----------------------------------------+----------+
3.5 启动Nova服务
# 设置开机自启动
[root@ct ~]# systemctl enable openstack-nova-api.service openstack-nova-scheduler.service openstack-nova-conductor.service openstack-nova-novncproxy.service

# 开启服务
[root@ct ~]# systemctl start openstack-nova-api.service openstack-nova-scheduler.service openstack-nova-conductor.service openstack-nova-novncproxy.service

# 检查nova服务端口
[root@ct ~]# netstat -tnlup|egrep '8774|8775'
tcp        0      0 0.0.0.0:8775            0.0.0.0:*               LISTEN      62613/python2
tcp        0      0 0.0.0.0:8774            0.0.0.0:*               LISTEN      62613/python2

[root@ct ~]# curl http://ct:8774
{"versions": [{"status": "SUPPORTED", "updated": "2011-01-21T11:33:21Z", "links": [{"href": "http://ct:8774/v2/", "rel": "self"}], "min_version": "", "version": "", "id": "v2.0"}, {"status": "CURRENT", "updated": "2013-07-23T11:33:21Z", "links": [{"href": "http://ct:8774/v2.1/", "rel": "self"}], "min_version": "2.1", "version": "2.79", "id": "v2.1"}]}
3.6 计算节点配置Nova服务-c1节点
① 安装nova-compute组件
yum -y install openstack-nova-compute
② 修改配置文件
- 修改配置文件
cp -a /etc/nova/nova.conf{,.bak}
grep -Ev '^$|#' /etc/nova/nova.conf.bak > /etc/nova/nova.conf
openstack-config --set /etc/nova/nova.conf DEFAULT enabled_apis osapi_compute,metadata
openstack-config --set /etc/nova/nova.conf DEFAULT transport_url rabbit://openstack:RABBIT_PASS@ct
openstack-config --set /etc/nova/nova.conf DEFAULT my_ip 192.168.20.20 				#修改为对应节点的内部IP
openstack-config --set /etc/nova/nova.conf DEFAULT use_neutron true
openstack-config --set /etc/nova/nova.conf DEFAULT firewall_driver nova.virt.firewall.NoopFirewallDriver
openstack-config --set /etc/nova/nova.conf api auth_strategy keystone
openstack-config --set /etc/nova/nova.conf keystone_authtoken auth_url http://ct:5000/v3
openstack-config --set /etc/nova/nova.conf keystone_authtoken memcached_servers ct:11211
openstack-config --set /etc/nova/nova.conf keystone_authtoken auth_type password
openstack-config --set /etc/nova/nova.conf keystone_authtoken project_domain_name Default
openstack-config --set /etc/nova/nova.conf keystone_authtoken user_domain_name Default
openstack-config --set /etc/nova/nova.conf keystone_authtoken project_name service
openstack-config --set /etc/nova/nova.conf keystone_authtoken username nova
openstack-config --set /etc/nova/nova.conf keystone_authtoken password NOVA_PASS
openstack-config --set /etc/nova/nova.conf vnc enabled true
openstack-config --set /etc/nova/nova.conf vnc server_listen 0.0.0.0
openstack-config --set /etc/nova/nova.conf vnc server_proxyclient_address ' $my_ip'
openstack-config --set /etc/nova/nova.conf vnc novncproxy_base_url http://192.168.20.10:6080/vnc_auto.html
openstack-config --set /etc/nova/nova.conf glance api_servers http://ct:9292
openstack-config --set /etc/nova/nova.conf oslo_concurrency lock_path /var/lib/nova/tmp
openstack-config --set /etc/nova/nova.conf placement region_name RegionOne
openstack-config --set /etc/nova/nova.conf placement project_domain_name Default
openstack-config --set /etc/nova/nova.conf placement project_name service
openstack-config --set /etc/nova/nova.conf placement auth_type password
openstack-config --set /etc/nova/nova.conf placement user_domain_name Default
openstack-config --set /etc/nova/nova.conf placement auth_url http://ct:5000/v3
openstack-config --set /etc/nova/nova.conf placement username placement
openstack-config --set /etc/nova/nova.conf placement password PLACEMENT_PASS
openstack-config --set /etc/nova/nova.conf libvirt virt_type qemu
- 查看配置文件
[root@c1 nova]# cat /etc/nova/nova.conf

[DEFAULT]
enabled_apis = osapi_compute,metadata
transport_url = rabbit://openstack:RABBIT_PASS@ct
my_ip = 192.168.20.20
use_neutron = true
firewall_driver = nova.virt.firewall.NoopFirewallDriver

[api]
auth_strategy = keystone

[api_database]
[barbican]
[cache]
[cinder]
[compute]
[conductor]
[console]
[consoleauth]
[cors]
[database]
[devices]
[ephemeral_storage_encryption]
[filter_scheduler]

[glance]
api_servers = http://ct:9292

[guestfs]
[healthcheck]
[hyperv]
[ironic]
[key_manager]
[keystone]

[keystone_authtoken]
auth_url = http://ct:5000/v3
memcached_servers = ct:11211
auth_type = password
project_domain_name = Default
user_domain_name = Default
project_name = service
username = nova
password = NOVA_PASS

[libvirt]
virt_type = qemu

[metrics]
[mks]
[neutron]
[notifications]
[osapi_v21]

[oslo_concurrency]
lock_path = /var/lib/nova/tmp

[oslo_messaging_amqp]
[oslo_messaging_kafka]
[oslo_messaging_notifications]
[oslo_messaging_rabbit]
[oslo_middleware]
[oslo_policy]
[pci]

[placement]
region_name = RegionOne
project_domain_name = Default
project_name = service
auth_type = password
user_domain_name = Default
auth_url = http://ct:5000/v3
username = placement
password = PLACEMENT_PASS

[powervm]
[privsep]
[profiler]
[quota]
[rdp]
[remote_debug]
[scheduler]
[serial_console]
[service_user]
[spice]
[upgrade_levels]
[vault]
[vendordata_dynamic_auth]
[vmware]

[vnc]
enabled = true
server_listen = 0.0.0.0
server_proxyclient_address =  $my_ip
novncproxy_base_url = http://192.168.20.10:6080/vnc_auto.html			#比较特殊的地方,需要手动添加IP地址,否则之后搭建成功后,无法通过UI控制台访问到内部虚拟机

[workarounds]
[wsgi]
[xenserver]
[xvp]
[zvm]
③ 开启服务
 systemctl enable libvirtd.service openstack-nova-compute.service
 systemctl start libvirtd.service openstack-nova-compute.service
④ 计算节点-C2配置
除IP地址外,其余的配置与C1相同
⑤ ct节点操作
● 查看compute节点是否注册到controller上,通过消息队列;需要在controller节点执行
[root@ct ~]# openstack compute service list --service nova-compute
+----+--------------+------+------+---------+-------+----------------------------+
| ID | Binary       | Host | Zone | Status  | State | Updated At                 |
+----+--------------+------+------+---------+-------+----------------------------+
|  8 | nova-compute | c2   | nova | enabled | up    | 2021-02-16T12:42:20.000000 |
|  9 | nova-compute | c1   | nova | enabled | up    | 2021-02-16T12:42:21.000000 |
+----+--------------+------+------+---------+-------+----------------------------+
● 扫描当前openstack中有哪些计算节点可用,发现后会把计算节点创建到cell中,后面就可以在cell中创建虚拟机;相当于openstack内部对计算节点进行分组,把计算节点分配到不同的cell中
[root@ct ~]# su -s /bin/sh -c "nova-manage cell_v2 discover_hosts --verbose" nova
Found 2 cell mappings.
Skipping cell0 since it does not contain hosts.
Getting computes from cell 'cell1': 53368ac2-6bc2-45dc-859d-f2cd0cb88fb5
Checking host mapping for compute host 'c2': 06404ede-d63d-488c-9cf0-7d6a48cc962c
Creating host mapping for compute host 'c2': 06404ede-d63d-488c-9cf0-7d6a48cc962c
Checking host mapping for compute host 'c1': b04544a9-c617-4848-beb9-f79f0b1f39e2
Creating host mapping for compute host 'c1': b04544a9-c617-4848-beb9-f79f0b1f39e2
Found 2 unmapped computes in cell: 53368ac2-6bc2-45dc-859d-f2cd0cb88fb5
● 默认每次添加个计算节点,在控制端就需要执行一次扫描,这样会很麻烦,所以可以修改控制端nova的主配置文件:
[root@ct ~]# vim /etc/nova/nova.conf
[scheduler]
discover_hosts_in_cells_interval = 300			#每300秒扫描一次

[root@ct ~]# systemctl restart openstack-nova-api.service
● 验证计算节点服务
##检查 nova 的各个服务是否都是正常,以及 compute 服务是否注册成功
[root@ct ~]# openstack compute service list
Unable to establish connection to http://ct:8774/v2.1/os-services: HTTPConnectionPool(host='ct', port=8774): Max retries exceeded with url: /v2.1/os-services (Caused by NewConnectionError('<urllib3.connection.HTTPConnection object at 0x7f27a2288310>: Failed to establish a new connection: [Errno 111] \xe6\x8b\x92\xe7\xbb\x9d\xe8\xbf\x9e\xe6\x8e\xa5',))
#查看各个组件的 api 是否正常
[root@ct ~]# openstack catalog list
+-----------+-----------+---------------------------------+
| Name      | Type      | Endpoints                       |
+-----------+-----------+---------------------------------+
| glance    | image     | RegionOne                       |
|           |           |   internal: http://ct:9292      |
|           |           | RegionOne                       |
|           |           |   admin: http://ct:9292         |
|           |           | RegionOne                       |
|           |           |   public: http://ct:9292        |
|           |           |                                 |
| keystone  | identity  | RegionOne                       |
|           |           |   admin: http://ct:5000/v3/     |
|           |           | RegionOne                       |
|           |           |   internal: http://ct:5000/v3/  |
|           |           | RegionOne                       |
|           |           |   public: http://ct:5000/v3/    |
|           |           |                                 |
| placement | placement | RegionOne                       |
|           |           |   admin: http://ct:8778         |
|           |           | RegionOne                       |
|           |           |   internal: http://ct:8778      |
|           |           | RegionOne                       |
|           |           |   public: http://ct:8778        |
|           |           |                                 |
| nova      | compute   | RegionOne                       |
|           |           |   public: http://ct:8774/v2.1   |
|           |           | RegionOne                       |
|           |           |   internal: http://ct:8774/v2.1 |
|           |           | RegionOne                       |
|           |           |   admin: http://ct:8774/v2.1    |
|           |           |                                 |
+-----------+-----------+---------------------------------+
#查看是否能够拿到镜像
[root@ct ~]# openstack image list
+--------------------------------------+--------+--------+
| ID                                   | Name   | Status |
+--------------------------------------+--------+--------+
| 1c66ff1c-25a3-4a5c-8202-1040b62cc156 | cirros | active |
+--------------------------------------+--------+--------+
#查看cell的api和placement的api是否正常,只要其中一个有误,后期无法创建虚拟机
[root@ct ~]# nova-status upgrade check
+--------------------------------+
| Upgrade Check Results          |
+--------------------------------+
| Check: Cells v2                |
| Result: Success                |
| Details: None                  |
+--------------------------------+
| Check: Placement API           |
| Result: Success                |
| Details: None                  |
+--------------------------------+
| Check: Ironic Flavor Migration |
| Result: Success                |
| Details: None                  |
+--------------------------------+
| Check: Cinder API              |
| Result: Success                |
| Details: None                  |
+--------------------------------+
3.7 小结
-
Nova分为控制节点、计算节点
-
Nova组件核心功能是调度资源,在配置文件中需要体现的部分:指向认证节点位置(URL、ENDPOINT)、调用服务、注册、提供支持等,配置文件中的所有配置参数基本都是围绕此范围(对实例生命周期管理)进行设置
四、OpenStack-neutron组件部署
4.1 创建数据库neutron,并进行授权
● 创建数据库neutron
mysql -u root -p123456
MariaDB [(none)]> CREATE DATABASE neutron;
MariaDB [(none)]> GRANT ALL PRIVILEGES ON neutron.* TO 'neutron'@'localhost' IDENTIFIED BY 'NEUTRON_DBPASS';
MariaDB [(none)]> GRANT ALL PRIVILEGES ON neutron.* TO 'neutron'@'%' IDENTIFIED BY 'NEUTRON_DBPASS';
MariaDB [(none)]> flush privileges;
MariaDB [(none)]> exit
● 创建neutron用户,用于在keystone做认证
openstack user create --domain default --password NEUTRON_PASS neutron
+---------------------+----------------------------------+
| Field               | Value                            |
+---------------------+----------------------------------+
| domain_id           | default                          |
| enabled             | True                             |
| id                  | d96f0150256d40e3b6e86cf74dabfb26 |
| name                | neutron                          |
| options             | {}                               |
| password_expires_at | None                             |
+---------------------+----------------------------------+
● 将neutron用户添加到service项目中拥有管理员权限
openstack role add --project service --user neutron admin
● 创建network服务,服务类型为network
openstack service create --name neutron --description "OpenStack Networking" network
+-------------+----------------------------------+
| Field       | Value                            |
+-------------+----------------------------------+
| description | OpenStack Networking             |
| enabled     | True                             |
| id          | a5266fa29d654e3db9d605c940c30b72 |
| name        | neutron                          |
| type        | network                          |
+-------------+----------------------------------+
● 注册API到neutron服务,给neutron服务关联端口,即添加endpoint
 openstack endpoint create --region RegionOne network public http://ct:9696
 +--------------+----------------------------------+
| Field        | Value                            |
+--------------+----------------------------------+
| enabled      | True                             |
| id           | 88419dcf74bc42fe87a7598291081228 |
| interface    | public                           |
| region       | RegionOne                        |
| region_id    | RegionOne                        |
| service_id   | a5266fa29d654e3db9d605c940c30b72 |
| service_name | neutron                          |
| service_type | network                          |
| url          | http://ct:9696                   |
+--------------+----------------------------------+

 openstack endpoint create --region RegionOne network internal http://ct:9696
 +--------------+----------------------------------+
| Field        | Value                            |
+--------------+----------------------------------+
| enabled      | True                             |
| id           | fab5b32d2c2f46cbbc6543eb831335fb |
| interface    | internal                         |
| region       | RegionOne                        |
| region_id    | RegionOne                        |
| service_id   | a5266fa29d654e3db9d605c940c30b72 |
| service_name | neutron                          |
| service_type | network                          |
| url          | http://ct:9696                   |
+--------------+----------------------------------+

 openstack endpoint create --region RegionOne network admin http://ct:9696
 +--------------+----------------------------------+
| Field        | Value                            |
+--------------+----------------------------------+
| enabled      | True                             |
| id           | 04f61bb450134cdcac7f364bee11bff2 |
| interface    | admin                            |
| region       | RegionOne                        |
| region_id    | RegionOne                        |
| service_id   | a5266fa29d654e3db9d605c940c30b72 |
| service_name | neutron                          |
| service_type | network                          |
| url          | http://ct:9696                   |
+--------------+----------------------------------+
4.2 安装提供者网络(桥接)
● ebtables包是用来管理iptables规则的
yum -y install openstack-neutron openstack-neutron-ml2 openstack-neutron-linuxbridge ebtables conntrack-tools
4.3 更改主配置文件
cp -a /etc/neutron/neutron.conf{,.bak}
grep -Ev '^$|#' /etc/neutron/neutron.conf.bak > /etc/neutron/neutron.conf
openstack-config --set /etc/neutron/neutron.conf database connection mysql+pymysql://neutron:NEUTRON_DBPASS@ct/neutron
openstack-config --set /etc/neutron/neutron.conf DEFAULT core_plugin ml2
openstack-config --set /etc/neutron/neutron.conf DEFAULT service_plugins router
openstack-config --set  /etc/neutron/neutron.conf DEFAULT allow_overlapping_ips true
openstack-config --set /etc/neutron/neutron.conf DEFAULT transport_url rabbit://openstack:RABBIT_PASS@ct
openstack-config --set /etc/neutron/neutron.conf DEFAULT auth_strategy keystone
openstack-config --set /etc/neutron/neutron.conf DEFAULT notify_nova_on_port_status_changes true
openstack-config --set /etc/neutron/neutron.conf DEFAULT notify_nova_on_port_data_changes true
openstack-config --set /etc/neutron/neutron.conf keystone_authtoken www_authenticate_uri http://ct:5000
openstack-config --set /etc/neutron/neutron.conf keystone_authtoken auth_url http://ct:5000
openstack-config --set /etc/neutron/neutron.conf keystone_authtoken memcached_servers ct:11211
openstack-config --set /etc/neutron/neutron.conf keystone_authtoken auth_type password
openstack-config --set /etc/neutron/neutron.conf keystone_authtoken project_domain_name default
openstack-config --set /etc/neutron/neutron.conf keystone_authtoken user_domain_name default
openstack-config --set /etc/neutron/neutron.conf keystone_authtoken project_name service
openstack-config --set /etc/neutron/neutron.conf keystone_authtoken username neutron
openstack-config --set /etc/neutron/neutron.conf keystone_authtoken password NEUTRON_PASS
openstack-config --set /etc/neutron/neutron.conf oslo_concurrency lock_path /var/lib/neutron/tmp
openstack-config --set  /etc/neutron/neutron.conf nova  auth_url http://ct:5000
openstack-config --set  /etc/neutron/neutron.conf nova  auth_type password
openstack-config --set  /etc/neutron/neutron.conf nova  project_domain_name default
openstack-config --set  /etc/neutron/neutron.conf nova  user_domain_name default
openstack-config --set  /etc/neutron/neutron.conf nova  region_name RegionOne
openstack-config --set  /etc/neutron/neutron.conf nova  project_name service
openstack-config --set  /etc/neutron/neutron.conf nova  username nova
openstack-config --set  /etc/neutron/neutron.conf nova  password NOVA_PASS
- 查看配置文件
[root@ct neutron]# cat neutron.conf
[DEFAULT]
core_plugin = ml2						#启用二层网络插件
service_plugins = router					#启用三层网络插件
allow_overlapping_ips = true
transport_url = rabbit://openstack:RABBIT_PASS@ct		#配置rabbitmq连接
auth_strategy = keystone					#认证的方式:keystone
notify_nova_on_port_status_changes = true			#当网络接口发生变化时,通知给计算节点
notify_nova_on_port_data_changes = true			#当端口数据发生变化,通知计算节点
[cors]
[database]						#配置数据库连接
connection = mysql+pymysql://neutron:NEUTRON_DBPASS@ct/neutron
[keystone_authtoken]					#配置keystone认证信息
www_authenticate_uri = http://ct:5000
auth_url = http://ct:5000
memcached_servers = ct:11211
auth_type = password
project_domain_name = default
user_domain_name = default
project_name = service
username = neutron
password = NEUTRON_PASS
[oslo_concurrency]						#配置锁路径
lock_path = /var/lib/neutron/tmp
[oslo_messaging_amqp]
[oslo_messaging_kafka]
[oslo_messaging_notifications]
[oslo_messaging_rabbit]
[oslo_middleware]
[oslo_policy]
[privsep]
[ssl]
[nova]							#neutron需要给nova返回数据
auth_url = http://ct:5000					#到keystone认证nova
auth_type = password
project_domain_name = default
user_domain_name = default
region_name = RegionOne
project_name = service
username = nova						#通过nova的用户名和密码到keystone验证nova的token
password = NOVA_PASS
4.4 修改 ML2 plugin 配置文件 ml2_conf.ini
cp -a /etc/neutron/plugins/ml2/ml2_conf.ini{,.bak}
grep -Ev '^$|#' /etc/neutron/plugins/ml2/ml2_conf.ini.bak > /etc/neutron/plugins/ml2/ml2_conf.ini
openstack-config --set /etc/neutron/plugins/ml2/ml2_conf.ini ml2 type_drivers  flat,vlan,vxlan
openstack-config --set /etc/neutron/plugins/ml2/ml2_conf.ini ml2 tenant_network_types vxlan
openstack-config --set /etc/neutron/plugins/ml2/ml2_conf.ini ml2 mechanism_drivers  linuxbridge,l2population
openstack-config --set /etc/neutron/plugins/ml2/ml2_conf.ini ml2 extension_drivers  port_security
openstack-config --set /etc/neutron/plugins/ml2/ml2_conf.ini ml2_type_flat flat_networks  provider
openstack-config --set /etc/neutron/plugins/ml2/ml2_conf.ini ml2_type_vxlan vni_ranges 1:1000
openstack-config --set /etc/neutron/plugins/ml2/ml2_conf.ini securitygroup enable_ipset  true
- 查看配置文件
[root@ct ~]# cat /etc/neutron/plugins/ml2/ml2_conf.ini
[DEFAULT]

[ml2]
type_drivers = flat,vlan,vxlan				#配置驱动类型;单一扁平网络(桥接)和vlan;让二层网络支持桥接,支持基于vlan做子网划分
tenant_network_types = vxlan				#租户网络类型(vxlan)
mechanism_drivers = linuxbridge,l2population		#启用Linuxbridge和l2机制,(l2population机制是为了简化网络通信拓扑,减少网络广播):
extension_drivers = port_security			#启用端口安全扩展驱动程序,基于iptables实现访问控制;但配置了扩展安全组会导致一些端口限制,造成一些服务无法启动

[ml2_type_flat]
flat_networks = provider				#配置公共虚拟网络为flat网络

[ml2_type_vxlan]
vni_ranges = 1:1000				#为私有网络配置VXLAN网络识别的网络范围

[securitygroup]
enable_ipset = true					#启用 ipset 增加安全组的方便性
4.5 修改 linux bridge network provider 配置文件
cp -a /etc/neutron/plugins/ml2/linuxbridge_agent.ini{,.bak}
grep -Ev '^$|#' /etc/neutron/plugins/ml2/linuxbridge_agent.ini.bak > /etc/neutron/plugins/ml2/linuxbridge_agent.ini
openstack-config --set /etc/neutron/plugins/ml2/linuxbridge_agent.ini linux_bridge physical_interface_mappings  provider:eth1		###eth1网卡名称
openstack-config --set /etc/neutron/plugins/ml2/linuxbridge_agent.ini vxlan enable_vxlan  true
openstack-config --set /etc/neutron/plugins/ml2/linuxbridge_agent.ini vxlan local_ip 192.168.20.10 ##控制节点IP地址
openstack-config --set /etc/neutron/plugins/ml2/linuxbridge_agent.ini vxlan l2_population true
openstack-config --set /etc/neutron/plugins/ml2/linuxbridge_agent.ini securitygroup enable_security_group  true
openstack-config --set /etc/neutron/plugins/ml2/linuxbridge_agent.ini securitygroup firewall_driver  neutron.agent.linux.iptables_firewall.IptablesFirewallDriver
- 查看配置文件
[DEFAULT]

[linux_bridge]
physical_interface_mappings = provider:eth1			#指定上个文件中的桥接网络名称,与eth0物理网卡做关联,后期给虚拟机分配external网络,就可以通过eth0上外网;物理网卡有可能是bind0、br0等

[vxlan]							#启用VXLAN覆盖网络,配置覆盖网络的物理网络接口的IP地址,启用layer-2 population
enable_vxlan = true						#允许用户创建自定义网络(3层网络)
local_ip = 192.168.20.10
l2_population = true

[securitygroup]						#启用安全组并配置 Linux 桥接 iptables 防火墙驱动
enable_security_group = true
firewall_driver = neutron.agent.linux.iptables_firewall.IptablesFirewallDriver
4.6 修改内核参数
echo 'net.bridge.bridge-nf-call-iptables=1' >> /etc/sysctl.conf
echo 'echnet.bridge.bridge-nf-call-ip6tables=1' >> /etc/sysctl.conf
modprobe br_netfilter	#表示向内核加入参数
sysctl -p
net.bridge.bridge-nf-call-iptables = 1
4.7 配置Linuxbridge接口驱动和外部网络网桥
cp -a /etc/neutron/l3_agent.ini{,.bak}
grep -Ev '^$|#' /etc/neutron/l3_agent.ini.bak > /etc/neutron/l3_agent.ini
openstack-config --set /etc/neutron/l3_agent.ini DEFAULT interface_driver linuxbridge

cat /etc/neutron/l3_agent.ini
[DEFAULT]
interface_driver = linuxbridge
4.8 修改dhcp_agent 配置文件及内容
cp -a /etc/neutron/dhcp_agent.ini{,.bak}
 grep -Ev '^$|#' /etc/neutron/dhcp_agent.ini.bak > /etc/neutron/dhcp_agent.ini
 openstack-config --set /etc/neutron/dhcp_agent.ini DEFAULT interface_driver linuxbridge
 openstack-config --set /etc/neutron/dhcp_agent.ini DEFAULT dhcp_driver neutron.agent.linux.dhcp.Dnsmasq
 openstack-config --set /etc/neutron/dhcp_agent.ini DEFAULT enable_isolated_metadata true

[root@ct neutron]# cat dhcp_agent.ini
[DEFAULT]
interface_driver = linuxbridge	#指定默认接口驱动为linux网桥
dhcp_driver = neutron.agent.linux.dhcp.Dnsmasq	#指定DHCP驱动
enable_isolated_metadata = true			#开启iso元数据
4.8 配置元数据代理、用于配置桥接与自服务网络的通用配置
cp -a /etc/neutron/metadata_agent.ini{,.bak}
 grep -Ev '^$|#' /etc/neutron/metadata_agent.ini.bak > /etc/neutron/metadata_agent.ini
 openstack-config --set /etc/neutron/metadata_agent.ini DEFAULT nova_metadata_host ct
 openstack-config --set /etc/neutron/metadata_agent.ini DEFAULT metadata_proxy_shared_secret METADATA_SECRET

# 配置文件内容
[root@ct neutron]# cat metadata_agent.ini
[DEFAULT]
nova_metadata_host = ct
metadata_proxy_shared_secret = METADATA_SECRET
[cache]
4.9 修改nova配置文件,用于neutron交互
#修改CT配置文件
openstack-config --set /etc/nova/nova.conf neutron url http://ct:9696
openstack-config --set /etc/nova/nova.conf neutron auth_url http://ct:5000
openstack-config --set /etc/nova/nova.conf neutron auth_type password
openstack-config --set /etc/nova/nova.conf neutron project_domain_name default
openstack-config --set /etc/nova/nova.conf neutron user_domain_name default
openstack-config --set /etc/nova/nova.conf neutron region_name RegionOne
openstack-config --set /etc/nova/nova.conf neutron project_name service
openstack-config --set /etc/nova/nova.conf neutron username neutron
openstack-config --set /etc/nova/nova.conf neutron password NEUTRON_PASS
openstack-config --set /etc/nova/nova.conf neutron service_metadata_proxy true
openstack-config --set /etc/nova/nova.conf neutron metadata_proxy_shared_secret METADATA_SECRET
4.10 创建ML2插件文件符号连接
● 网络服务初始化脚本需要/etc/neutron/plugin.ini指向ML2插件配置文件的符号链接
ln -s /etc/neutron/plugins/ml2/ml2_conf.ini /etc/neutron/plugin.ini
● 初始化数据库
 su -s /bin/sh -c "neutron-db-manage --config-file /etc/neutron/neutron.conf \
--config-file /etc/neutron/plugins/ml2/ml2_conf.ini upgrade head" neutron
● 重启计算节点nova-api服务
systemctl restart openstack-nova-api.service
● 开启neutron服务、设置开机自启动
[root@ct ~]# systemctl enable neutron-server.service \
neutron-linuxbridge-agent.service neutron-dhcp-agent.service \
neutron-metadata-agent.service
[root@ct ~]# systemctl start neutron-server.service \
neutron-linuxbridge-agent.service neutron-dhcp-agent.service \
neutron-metadata-agent.service
[root@ct ~]# netstat -anutp |grep 9696
tcp        0      0 0.0.0.0:9696            0.0.0.0:*               LISTEN      102591/server.log
● 因为配置了第三层L3网络服务、所以需要启动第三层服务
[root@ct ~]# systemctl enable neutron-l3-agent.service
[root@ct ~]# systemctl restart neutron-l3-agent.service
4.11 c1 节点操作
yum -y install openstack-neutron-linuxbridge ebtables ipset conntrack-tools
#ipset:iptables的扩展,允许匹配规则的集合而不仅仅是一个IP
● 修改neutron.conf文件
cp -a /etc/neutron/neutron.conf{,.bak}
grep -Ev '^$|#' /etc/neutron/neutron.conf.bak > /etc/neutron/neutron.conf
openstack-config --set /etc/neutron/neutron.conf DEFAULT transport_url rabbit://openstack:RABBIT_PASS@ct
openstack-config --set /etc/neutron/neutron.conf DEFAULT auth_strategy keystone
openstack-config --set /etc/neutron/neutron.conf keystone_authtoken www_authenticate_uri http://ct:5000
openstack-config --set /etc/neutron/neutron.conf keystone_authtoken auth_url http://ct:5000
openstack-config --set /etc/neutron/neutron.conf keystone_authtoken memcached_servers ct:11211
openstack-config --set /etc/neutron/neutron.conf keystone_authtoken auth_type password
openstack-config --set /etc/neutron/neutron.conf keystone_authtoken project_domain_name default
openstack-config --set /etc/neutron/neutron.conf keystone_authtoken user_domain_name default
openstack-config --set /etc/neutron/neutron.conf keystone_authtoken project_name service
openstack-config --set /etc/neutron/neutron.conf keystone_authtoken username neutron
openstack-config --set /etc/neutron/neutron.conf keystone_authtoken password NEUTRON_PASS
openstack-config --set /etc/neutron/neutron.conf oslo_concurrency lock_path /var/lib/neutron/tmp
- 查看配置文件
[root@c1 neutron]# cat neutron.conf

[DEFAULT]					#neutron的server端与agent端通讯也是通过rabbitmq进行通讯的
transport_url = rabbit://openstack:RABBIT_PASS@ct
auth_strategy = keystone				#认证策略:keystone
[cors]
[database]

[keystone_authtoken]				#指定keystone认证的信息
www_authenticate_uri = http://ct:5000
auth_url = http://ct:5000
memcached_servers = ct:11211
auth_type = password
project_domain_name = default
user_domain_name = default
project_name = service
username = neutron
password = NEUTRON_PASS

[oslo_concurrency]					#配置锁路径(管理线程库)
lock_path = /var/lib/neutron/tmp

[oslo_messaging_amqp]
[oslo_messaging_kafka]
[oslo_messaging_notifications]
[oslo_messaging_rabbit]
[oslo_middleware]
[oslo_policy]
[privsep]
[ssl]
● 配置Linux网桥代理
cp -a /etc/neutron/plugins/ml2/linuxbridge_agent.ini{,.bak}
grep -Ev '^$|#' /etc/neutron/plugins/ml2/linuxbridge_agent.ini.bak > /etc/neutron/plugins/ml2/linuxbridge_agent.ini
openstack-config --set /etc/neutron/plugins/ml2/linuxbridge_agent.ini linux_bridge physical_interface_mappings  provider:eth1
openstack-config --set /etc/neutron/plugins/ml2/linuxbridge_agent.ini vxlan enable_vxlan  true
openstack-config --set /etc/neutron/plugins/ml2/linuxbridge_agent.ini vxlan local_ip 192.168.20.20
openstack-config --set /etc/neutron/plugins/ml2/linuxbridge_agent.ini vxlan l2_population true
openstack-config --set /etc/neutron/plugins/ml2/linuxbridge_agent.ini securitygroup enable_security_group  true
openstack-config --set /etc/neutron/plugins/ml2/linuxbridge_agent.ini securitygroup firewall_driver  neutron.agent.linux.iptables_firewall.IptablesFirewallDriver
- 查看配置文件
[root@c1 ml2]# cat linuxbridge_agent.ini
[DEFAULT]
[linux_bridge]
physical_interface_mappings = provider:eth1
# 直接将node节点external网络绑定在当前节点的指定的物理网卡,不需要node节点配置网络名称,node节点只需要接收controller节点指令即可;controller节点上配置的external网络名称是针对整个openstack环境生效的,所以指定external网络绑定在当前node节点的eth0物理网卡上(也可能是bind0或br0)

[vxlan]
enable_vxlan = true							#开启Vxlan网络
local_ip = 192.168.20.20
l2_population = true						#L2 Population 是用来提高 VXLAN 网络扩展能力的组件

[securitygroup]
enable_security_group = true						#开启安全组
firewall_driver = neutron.agent.linux.iptables_firewall.IptablesFirewallDriver	#指定安全组驱动文件
● 修改内核
echo 'net.bridge.bridge-nf-call-iptables=1' >> /etc/sysctl.conf		#允许虚拟机的数据通过物理机出去
echo 'echnet.bridge.bridge-nf-call-ip6tables=1' >> /etc/sysctl.conf
modprobe br_netfilter		#modprobe:用于向内核中加载模块或者从内核中移除模块。modprobe -r 表示移除
sysctl -p
● 修改nova.conf配置文件
openstack-config --set /etc/nova/nova.conf neutron auth_url http://ct:5000
openstack-config --set /etc/nova/nova.conf neutron auth_type password
openstack-config --set /etc/nova/nova.conf neutron project_domain_name default
openstack-config --set /etc/nova/nova.conf neutron user_domain_name default
openstack-config --set /etc/nova/nova.conf neutron region_name RegionOne
openstack-config --set /etc/nova/nova.conf neutron project_name service
openstack-config --set /etc/nova/nova.conf neutron username neutron
openstack-config --set /etc/nova/nova.conf neutron password NEUTRON_PASS
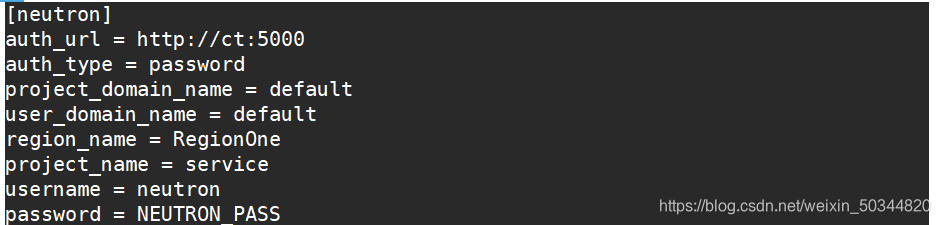
#以下为修改字段内容
[neutron]
auth_url = http://ct:5000
auth_type = password
project_domain_name = default
user_domain_name = default
region_name = RegionOne
project_name = service
username = neutron
password = NEUTRON_PASS
 ● 验证服务组件【ct节点】
[root@ct ~]# openstack extension list --network
[root@ct ~]# openstack network agent list
+--------------------------------------+--------------------+------+---------
| ID                                   | Agent Type         | Host | Availabi
+--------------------------------------+--------------------+------+---------
| 6ef7204b-76e5-4017-ad7c-bdc964bf2487 | L3 agent           | ct   | nova
| 72a410ce-79bd-467c-b7e5-4d1b140a11c2 | DHCP agent         | ct   | nova
| a7b1704b-84c9-446a-94f8-55c239f860cb | Linux bridge agent | ct   | None
| bd78ead6-a465-4291-b8f0-d762ffb54d07 | Metadata agent     | ct   | None
+--------------------------------------+--------------------+------+---------
4.12 C2节点部署neutron服务(与C1节点相同)
4.13 小结
- 三个节点都需要配置neutron网络,以下为部署思路:
- 配置neutron组件的用户、认证、endpoint
设置提供者provider网络(这里是桥接模式)
① 配置二层网络
② 配置网桥(插件)
③ 优化内核
④ 配置网桥接口与外部对接
⑤ 修改DHCP配置(修改配置文件、代理)
⑥ 配置网桥与内部组件的配置(修改配置文件、代理) - 设置neutron与nova对接的配置
其中C1、C2节点配置相同
五、OpenStack-Dashboard组件部署
因为在CT控制节点已安装httpd服务,而Dashboard控制台也需要httpd支持,所以此处可以在C1节点进行安装httpd
[root@c1 ~]# yum -y install openstack-dashboard httpd
5.1 修改local_setting本地控制台的配置文件
[root@c1 ml2]# cd /etc/openstack-dashboard/
[root@c1 openstack-dashboard]# ls
cinder_policy.json  keystone_policy.json  neutron_policy.json  nova_policy.json
glance_policy.json  local_settings        nova_policy.d
[root@c1 openstack-dashboard]# cat local_settings
#修改的内容如下:
#修改local_setting本地控制台的配置文件
import os								#使用Python导入一个模块
from django.utils.translation import ugettext_lazy as _
from openstack_dashboard.settings import HORIZON_CONFIG
DEBUG = False							#不开启调式
ALLOWED_HOSTS = ['*']						#只允许通过列表中指定的域名访问dashboard;允许通过指定的IP地址及域名访问dahsboard;
								['*']表示允许所有域名
LOCAL_PATH = '/tmp'
SECRET_KEY='f8ac039815265a99b64f'
SESSION_ENGINE = 'django.contrib.sessions.backends.cache'		#指定session引擎
CACHES = {							#95-100行取消"#"注释
    'default': {
         'BACKEND': 'django.core.cache.backends.memcached.MemcachedCache',
         'LOCATION': 'ct:11211',	#指定memcache地址及端口
    }
}
#以下配置session信息存放到memcache中;session信息不仅可以存放到memcache中,也可以存放到其他地方
EMAIL_BACKEND = 'django.core.mail.backends.console.EmailBackend'		#108行修改
OPENSTACK_HOST = "ct"						#118-127行修改
OPENSTACK_KEYSTONE_URL = "http://%s:5000/v3" % OPENSTACK_HOST
OPENSTACK_KEYSTONE_MULTIDOMAIN_SUPPORT = True			#让dashboard支持域
OPENSTACK_API_VERSIONS = {
    "identity": 3,
    "image": 2,
    "volume": 3,
}
#配置openstack的API版本
OPENSTACK_KEYSTONE_DEFAULT_DOMAIN = "Default"
OPENSTACK_KEYSTONE_DEFAULT_ROLE = "user"


OPENSTACK_NEUTRON_NETWORK = {					#132行到152行修改
    'enable_auto_allocated_network': False,
    'enable_distributed_router': False,
    'enable_fip_topology_check': False,
    'enable_ha_router': False,
    'enable_lb': False,
    'enable_firewall': False,
    'enable_vpn': False,
    'enable_ipv6': True,
    'enable_quotas': True,
    'enable_rbac_policy': True,
    'enable_router': True,
    'default_dns_nameservers': [],
    'supported_provider_types': ['*'],
    'segmentation_id_range': {},
    'extra_provider_types': {},
    'supported_vnic_types': ['*'],
    'physical_networks': [],
}
#定义使用的网络类型,[*]表示

TIME_ZONE = "Asia/Shanghai"					#156行修改
5.2 重启服务
重新生成openstack-dashboard.conf并重启Apache服务
(由于dashborad会重新复制代码文件,重启apache会比较慢)
[root@c1 ~]# cd /usr/share/openstack-dashboard
[root@c1 openstack-dashboard]# python manage.py make_web_conf --apache > /etc/httpd/conf.d/openstack-dashboard.conf
[root@c1 ~]# systemctl enable httpd.service
[root@c1 ~]# systemctl restart httpd.service
● 重启 ct 节点的 memcache 服务
[root@ct ~]# systemctl restart memcached.service
5.3 验证操作
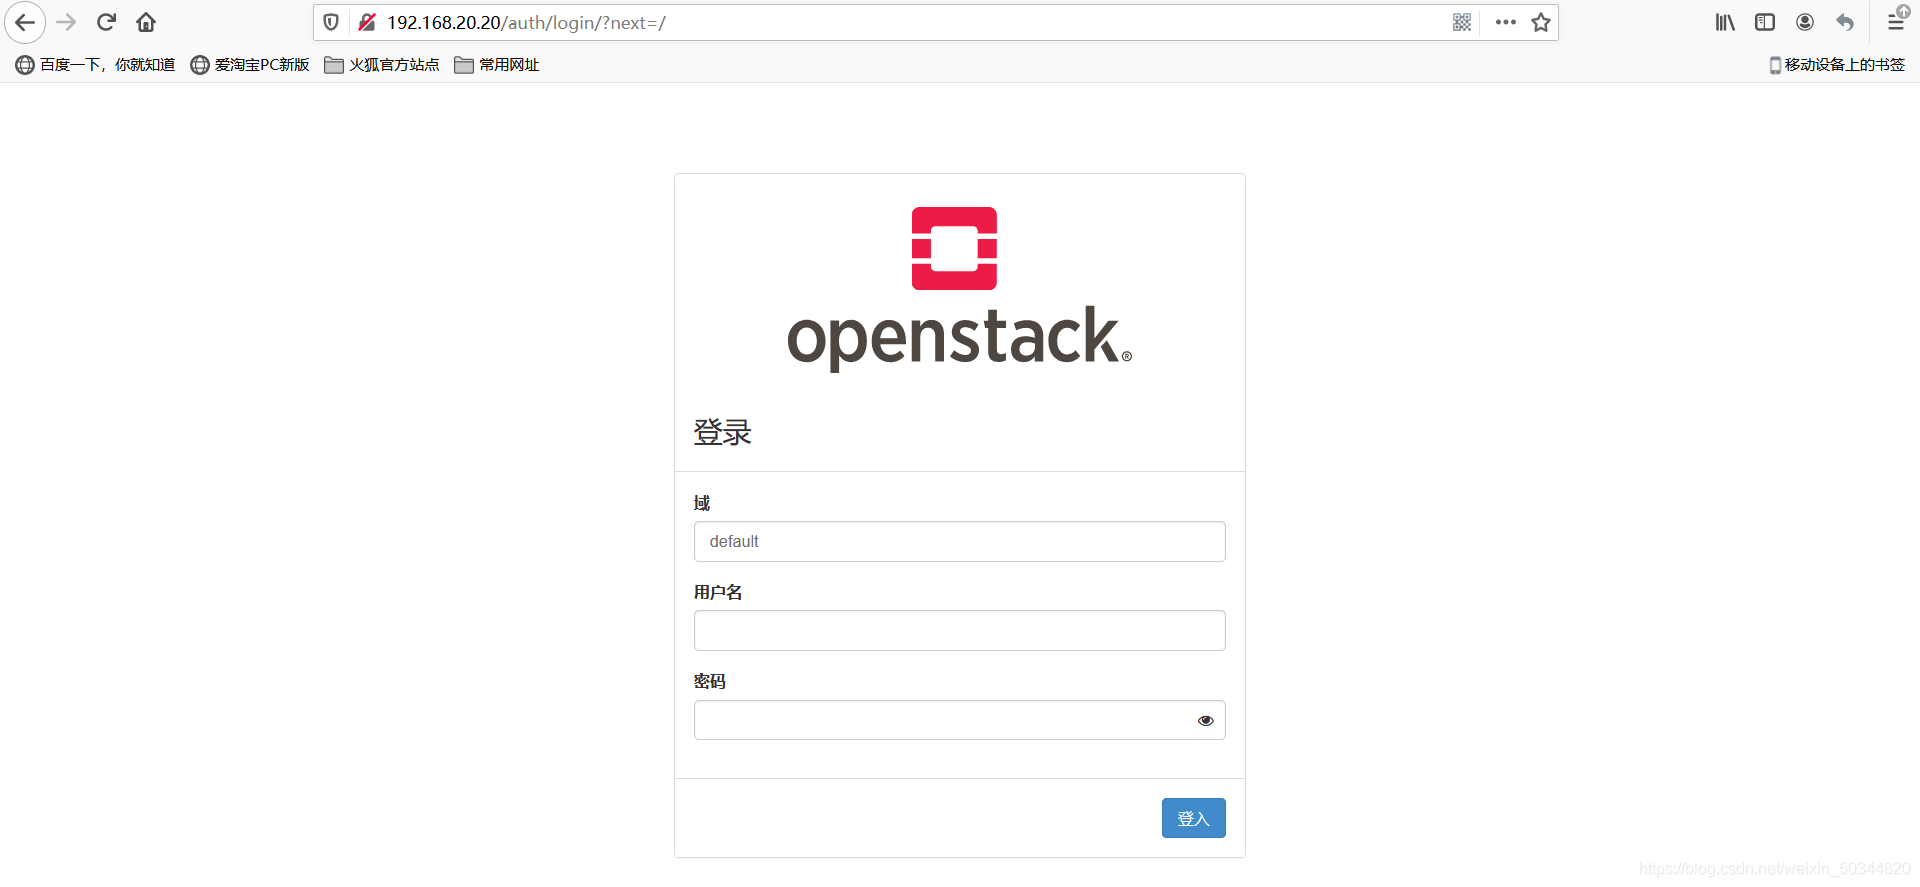
打开浏览器,在地址栏中输入“http://192.168.20.20”,进入Dashboard登录页面。
在登录页面依次填写:“域:default、用户名:admin、密码:ADMIN_PASS”(在~.bashrc中已定义)
完成后,进行登陆
六、OpenStack-cinder 组件部署
6.1 创建数据库实例和角色
[root@controller ~]# mysql -uroot -p
MariaDB [(none)]> CREATE DATABASE cinder;
MariaDB [(none)]> GRANT ALL PRIVILEGES ON cinder.* TO 'cinder'@'localhost' IDENTIFIED BY 'CINDER_DBPASS';
MariaDB [(none)]> GRANT ALL PRIVILEGES ON cinder.* TO 'cinder'@'%' IDENTIFIED BY 'CINDER_DBPASS';
MariaDB [(none)]> flush privileges;
MariaDB [(none)]> exit
6.2 创建用户、修改配置文件
- 创建cinder用户,密码设置为CINDER_PASS
[root@ct ~]# openstack user create --domain default --password CINDER_PASS cinder
+---------------------+----------------------------------+
| Field               | Value                            |
+---------------------+----------------------------------+
| domain_id           | default                          |
| enabled             | True                             |
| id                  | 99e325f54ae04a58b9f8ba5b0cfa75ef |
| name                | cinder                           |
| options             | {}                               |
| password_expires_at | None                             |
+---------------------+----------------------------------+
- 把cinder用户添加到service服务中,并授予admin权限
openstack role add --project service --user cinder admin
- cinder有v2和v3两个并存版本的API,所以需要创建两个版本的service实例
[root@ct ~]# openstack service create --name cinderv2 --description "OpenStack Block Storage" volumev2
+-------------+----------------------------------+
| Field       | Value                            |
+-------------+----------------------------------+
| description | OpenStack Block Storage          |
| enabled     | True                             |
| id          | 799389200ced425eb1d02b2d77e61bfe |
| name        | cinderv2                         |
| type        | volumev2                         |
+-------------+----------------------------------+
[root@ct ~]# openstack service create --name cinderv3 --description "OpenStack Block Storage" volumev3
+-------------+----------------------------------+
| Field       | Value                            |
+-------------+----------------------------------+
| description | OpenStack Block Storage          |
| enabled     | True                             |
| id          | e8927664753e40129d2d736586e4b790 |
| name        | cinderv3                         |
| type        | volumev3                         |
+-------------+----------------------------------+
- 给v2和v3版本的api创建endpoint
### 给v2的api创建endpoint
[root@ct ~]#  openstack endpoint create --region RegionOne volumev2 public http://ct:8776/v2/%\(project_id\)s
+--------------+----------------------------------+
| Field        | Value                            |
+--------------+----------------------------------+
| enabled      | True                             |
| id           | a6621ec4d2cd4f79971d1985e4e6eef2 |
| interface    | public                           |
| region       | RegionOne                        |
| region_id    | RegionOne                        |
| service_id   | 799389200ced425eb1d02b2d77e61bfe |
| service_name | cinderv2                         |
| service_type | volumev2                         |
| url          | http://ct:8776/v2/%(project_id)s |
+--------------+----------------------------------+
[root@ct ~]# openstack endpoint create --region RegionOne volumev2 internal http://ct:8776/v2/%\(project_id\)s
+--------------+----------------------------------+
| Field        | Value                            |
+--------------+----------------------------------+
| enabled      | True                             |
| id           | 55e17800928d4311a29891ae577b7df5 |
| interface    | internal                         |
| region       | RegionOne                        |
| region_id    | RegionOne                        |
| service_id   | 799389200ced425eb1d02b2d77e61bfe |
| service_name | cinderv2                         |
| service_type | volumev2                         |
| url          | http://ct:8776/v2/%(project_id)s |
+--------------+----------------------------------+
[root@ct ~]#  openstack endpoint create --region RegionOne volumev2 admin http://ct:8776/v2/%\(project_id\)s
+--------------+----------------------------------+
| Field        | Value                            |
+--------------+----------------------------------+
| enabled      | True                             |
| id           | 397234c661794e71a576b701110e4910 |
| interface    | admin                            |
| region       | RegionOne                        |
| region_id    | RegionOne                        |
| service_id   | 799389200ced425eb1d02b2d77e61bfe |
| service_name | cinderv2                         |
| service_type | volumev2                         |
| url          | http://ct:8776/v2/%(project_id)s |
+--------------+----------------------------------+

### 给v3的api创建endpoint
[root@ct ~]#  openstack endpoint create --region RegionOne volumev3 public http://ct:8776/v3/%\(project_id\)s
+--------------+----------------------------------+
| Field        | Value                            |
+--------------+----------------------------------+
| enabled      | True                             |
| id           | 53c083cf1b1d45a8aaf0a7a9523b8c13 |
| interface    | public                           |
| region       | RegionOne                        |
| region_id    | RegionOne                        |
| service_id   | e8927664753e40129d2d736586e4b790 |
| service_name | cinderv3                         |
| service_type | volumev3                         |
| url          | http://ct:8776/v3/%(project_id)s |
+--------------+----------------------------------+
[root@ct ~]#  openstack endpoint create --region RegionOne volumev3 internal http://ct:8776/v3/%\(project_id\)s
+--------------+----------------------------------+
| Field        | Value                            |
+--------------+----------------------------------+
| enabled      | True                             |
| id           | 40da8d5ba50e451389c43984028dae51 |
| interface    | internal                         |
| region       | RegionOne                        |
| region_id    | RegionOne                        |
| service_id   | e8927664753e40129d2d736586e4b790 |
| service_name | cinderv3                         |
| service_type | volumev3                         |
| url          | http://ct:8776/v3/%(project_id)s |
+--------------+----------------------------------+
[root@ct ~]# openstack endpoint create --region RegionOne volumev3 admin http://ct:8776/v3/%\(project_id\)s
+--------------+----------------------------------+
| Field        | Value                            |
+--------------+----------------------------------+
| enabled      | True                             |
| id           | 9956f357a6cc4985a11713f9ec34af83 |
| interface    | admin                            |
| region       | RegionOne                        |
| region_id    | RegionOne                        |
| service_id   | e8927664753e40129d2d736586e4b790 |
| service_name | cinderv3                         |
| service_type | volumev3                         |
| url          | http://ct:8776/v3/%(project_id)s |
+--------------+----------------------------------+
6.3 安装及配置cinder服务
yum -y install openstack-cinder
- 修改cinder 配置文件
cp /etc/cinder/cinder.conf{,.bak}
grep -Ev '#|^$' /etc/cinder/cinder.conf.bak>/etc/cinder/cinder.conf
openstack-config --set /etc/cinder/cinder.conf database connection mysql+pymysql://cinder:CINDER_DBPASS@ct/cinder
openstack-config --set /etc/cinder/cinder.conf DEFAULT transport_url rabbit://openstack:RABBIT_PASS@ct
openstack-config --set /etc/cinder/cinder.conf DEFAULT auth_strategy keystone
openstack-config --set /etc/cinder/cinder.conf keystone_authtoken www_authenticate_uri http://ct:5000
openstack-config --set /etc/cinder/cinder.conf keystone_authtoken auth_url http://ct:5000
openstack-config --set /etc/cinder/cinder.conf keystone_authtoken memcached_servers ct:11211
openstack-config --set /etc/cinder/cinder.conf keystone_authtoken auth_type password
openstack-config --set /etc/cinder/cinder.conf keystone_authtoken project_domain_name default
openstack-config --set /etc/cinder/cinder.conf keystone_authtoken user_domain_name default
openstack-config --set /etc/cinder/cinder.conf keystone_authtoken project_name service
openstack-config --set /etc/cinder/cinder.conf keystone_authtoken username cinder
openstack-config --set /etc/cinder/cinder.conf keystone_authtoken password CINDER_PASS
openstack-config --set /etc/cinder/cinder.conf DEFAULT my_ip 192.168.20.10 			#修改为 ct_IP地址
openstack-config --set /etc/cinder/cinder.conf oslo_concurrency lock_path /var/lib/cinder/tmp


#查看配置文件
[root@ct cinder]# cat /etc/cinder/cinder.conf

[DEFAULT]
transport_url = rabbit://openstack:RABBIT_PASS@ct			#配置rabbitmq连接
auth_strategy = keystone						#认证方式
my_ip = 192.168.20.10					#内网IP

[backend]
[backend_defaults]
[barbican]
[brcd_fabric_example]
[cisco_fabric_example]
[coordination]
[cors]

[database]							#对接数据库
connection = mysql+pymysql://cinder:CINDER_DBPASS@ct/cinder

[fc-zone-manager]
[healthcheck]
[key_manager]

[keystone_authtoken]						#配置keystone认证信息
www_authenticate_uri = http://ct:5000					#keystone地址
auth_url = http://ct:5000
memcached_servers = ct:11211
auth_type = password
project_domain_name = default
user_domain_name = default
project_name = service
username = cinder							#指定通过cinder账号到keystone做认证(用户名、密码)
password = CINDER_PASS

[nova]

[oslo_concurrency]
lock_path = /var/lib/cinder/tmp					#配置锁路径

[oslo_messaging_amqp]
[oslo_messaging_kafka]
[oslo_messaging_notifications]
[oslo_messaging_rabbit]
[oslo_middleware]
[oslo_policy]
[oslo_reports]
[oslo_versionedobjects]
[privsep]
[profiler]
[sample_castellan_source]
[sample_remote_file_source]
[service_user]
[ssl]
[vault]
● 同步cinder数据库(填充块存储数据库)
su -s /bin/sh -c "cinder-manage db sync" cinder
● 修改 Nova 配置文件,并重启服务。
openstack-config --set /etc/nova/nova.conf cinder os_region_name RegionOne

systemctl restart openstack-nova-api.service
● 配置Cinder服务
systemctl enable openstack-cinder-api.service openstack-cinder-scheduler.service
systemctl start openstack-cinder-api.service openstack-cinder-scheduler.service
● 配置控制节点验证
[root@ct ~]#  cinder service-list
+------------------+------+------+---------+-------+----------------------------+---------+-----------------+---------------+
| Binary           | Host | Zone | Status  | State | Updated_at                 | Cluster | Disabled Reason | Backend State |
+------------------+------+------+---------+-------+----------------------------+---------+-----------------+---------------+
| cinder-scheduler | ct   | nova | enabled | up    | 2021-02-17T03:42:13.000000 | -       | -               |               |
+------------------+------+------+---------+-------+----------------------------+---------+-----------------+---------------+
6.4 在计算节点c2配置Cinder(存储节点)
- 安装并开启lvm服务
yum -y install openstack-cinder targetcli python-keystone
yum -y install lvm2 device-mapper-persistent-data
systemctl enable lvm2-lvmetad.service
systemctl start lvm2-lvmetad.service
- 创建lvm物理卷和卷组
新加一张sdc的物理卷,然后对c2节点重启
pvcreate /dev/sdc
vgcreate cinder-volumes /dev/sdc
- 修改lvm配置文件(指定使用sdc磁盘)
vim /etc/lvm/lvm.conf
filter = [ "a/sdc/","r/.*/" ]	#141行,取消注释,修改filter规则
#a表示允许,r表示拒绝
#只允许lvm服务访问sdc中的数据,不允许lvm服务访问其他磁盘,这也间接实现了openstack创建的虚拟机只能访问sdb中的数据,不能访问其他磁盘
#设置只允许实例访问sdc逻辑卷中的数据;如果不配置的话,本机的其他服务也有可能会访问sdc逻辑卷中的数据
- 重启lvm服务
systemctl restart lvm2-lvmetad.service
- 配置cinder模块
cp /etc/cinder/cinder.conf{,.bak}
grep -Ev '#|^$' /etc/cinder/cinder.conf.bak>/etc/cinder/cinder.conf

openstack-config --set /etc/cinder/cinder.conf  database  connection mysql+pymysql://cinder:CINDER_DBPASS@ct/cinder
openstack-config --set /etc/cinder/cinder.conf  DEFAULT transport_url rabbit://openstack:RABBIT_PASS@ct
openstack-config --set /etc/cinder/cinder.conf  DEFAULT auth_strategy keystone
openstack-config --set /etc/cinder/cinder.conf  DEFAULT my_ip 192.168.100.13
openstack-config --set /etc/cinder/cinder.conf  DEFAULT enabled_backends lvm
openstack-config --set /etc/cinder/cinder.conf  DEFAULT glance_api_servers http://ct:9292
openstack-config --set /etc/cinder/cinder.conf  keystone_authtoken www_authenticate_uri http://ct:5000
openstack-config --set /etc/cinder/cinder.conf  keystone_authtoken auth_url http://ct:5000
openstack-config --set /etc/cinder/cinder.conf  keystone_authtoken memcached_servers ct:11211
openstack-config --set /etc/cinder/cinder.conf  keystone_authtoken auth_type password
openstack-config --set /etc/cinder/cinder.conf  keystone_authtoken project_domain_name default
openstack-config --set /etc/cinder/cinder.conf  keystone_authtoken user_domain_name default
openstack-config --set /etc/cinder/cinder.conf  keystone_authtoken project_name service
openstack-config --set /etc/cinder/cinder.conf  keystone_authtoken username cinder
openstack-config --set /etc/cinder/cinder.conf  keystone_authtoken password CINDER_PASS
openstack-config --set /etc/cinder/cinder.conf  lvm volume_driver cinder.volume.drivers.lvm.LVMVolumeDriver
openstack-config --set /etc/cinder/cinder.conf  lvm volume_group cinder-volumes
openstack-config --set /etc/cinder/cinder.conf  lvm target_protocol iscsi
openstack-config --set /etc/cinder/cinder.conf  lvm target_helper lioadm
openstack-config --set /etc/cinder/cinder.conf  oslo_concurrency lock_path /var/lib/cinder/tmp


【修改如下】
[DEFAULT]
transport_url = rabbit://openstack:RABBIT_PASS@ct
auth_strategy = keystone
my_ip = 192.168.20.30
enabled_backends = lvm
glance_api_servers = http://ct:9292

[backend]
[backend_defaults]
[barbican]
[brcd_fabric_example]
[cisco_fabric_example]
[coordination]
[cors]

[database]
connection = mysql+pymysql://cinder:CINDER_DBPASS@ct/cinder

[fc-zone-manager]
[healthcheck]
[key_manager]

[keystone_authtoken]
www_authenticate_uri = http://ct:5000
auth_url = http://ct:5000
memcached_servers = ct:11211
auth_type = password
project_domain_name = default
user_domain_name = default
project_name = service
username = cinder
password = CINDER_PASS

[nova]

[oslo_concurrency]						#配置锁路径
lock_path = /var/lib/cinder/tmp

[oslo_messaging_amqp]
[oslo_messaging_kafka]
[oslo_messaging_notifications]
[oslo_messaging_rabbit]
[oslo_middleware]
[oslo_policy]
[oslo_reports]
[oslo_versionedobjects]
[privsep]
[profiler]
[sample_castellan_source]
[sample_remote_file_source]
[service_user]
[ssl]
[vault]

[lvm]							 #为LVM后端配置LVM驱动程序
volume_driver = cinder.volume.drivers.lvm.LVMVolumeDriver	#指定LVM驱动程序;即通过指定的驱动创建LVM
volume_group = cinder-volumes				#指定卷组(vg)
target_protocol = iscsi					#pv使用的是iscsi协议,可以提供块存储服务
target_helper = lioadm					#iscsi管理工具

#volume_backend_name=Openstack-lvm   			#选择:当后端有多个不同类型的存储时,可以在openstack中调用指定的存储;
给当前存储指定个名称,用于后期区分多个不同的存储
- 开启cinder卷服务
[root@c2 ~]# systemctl enable openstack-cinder-volume.service target.service
[root@c2 ~]# systemctl start openstack-cinder-volume.service target.service
6.5 查看卷列表(ct节点)
[root@ct ~]# openstack volume service list
+------------------+--------+------+---------+-------+----------------------------+
| Binary           | Host   | Zone | Status  | State | Updated At                 |
+------------------+--------+------+---------+-------+----------------------------+
| cinder-scheduler | ct     | nova | enabled | up    | 2021-02-17T04:08:33.000000 |
| cinder-volume    | c2@lvm | nova | enabled | up    | 2021-02-17T04:08:34.000000 |
+------------------+--------+------+---------+-------+----------------------------+
6.6 小结
Cinder配置思路:
创建管理、对接的用户、密码、服务和endpoint
修改配置文件:
主要内容为 向keystone对接认证授权、组件之间通讯模块、配置所在的域等
配置计算节点中虚拟机所用的卷