Java学习笔记-Day69 SpringMVC 框架(一)
一、SpringMVC的简介
编写Servlet需要继承HttpServlet,在里面只能写doGet()、doPost()等方法,无法采用面向对象编程,还有参数传递、解析等问题。因此,针对JavaEE传统实现的MVC框架纷纷诞生,如Struts2、WebWorks等,当前最流行的就是SpringMVC,它们最大的特点是 控制器面向对象开发。
SpringMVC框架围绕 DispatcherServlet(前端控制器)设计而成。DispatcherServlet的主要作用是分发请求到不同的Action、根据Action返回的结果转向不同的视图。Action的处理,基于@Controller和@RequestMapping等注解。
SpringMVC框架设计的核心理念,是著名的OCP原则:Open for extension, closed for modification(对于扩展是开发的,对于修改是关闭的)。SpringMVC框架的很多核心类的重要方法,都被标记了final,即不允许你通过重写的方式改变其行为,这也是满足OCP原则的体现。
SpringMVC的视图解决方案,非常的灵活。视图名字和Action返回的Model数据,被组成ModelAndView对象。一个ModelAndView 实例包含一个视图名字和一个类型为Map的model对象。视图名字的解析,由可配置的视图解析器处理。
二、SpringMVC的优势
(1)清晰的角色划分:前端控制器(DispatcherServlet)、处理器映射(HandlerMapping)、处理器适配器(HandlerAdapter)、视图解析器(ViewResolver)、处理器或页面控制器(Controller)、验证器(Validator)、命令对象(Command 请求参数绑定到的对象就叫命令对象)、表单对象(Form Object 提供给表单展示和提交到的对象就叫表单对象)。
(2)分工明细,拓展相当灵活。
(3)和Spring无缝集成,这个是其他框架不具备的,本身spring中包含了springMVC。
(4)功能强大的数据验证、格式化。
(5)支持REST风格(所有的url都可当成资源)。
(6)基于注解的零配置。以前Struts2中需要配置大量的xml文件,后来struts2也支持注解。
三、操作步骤
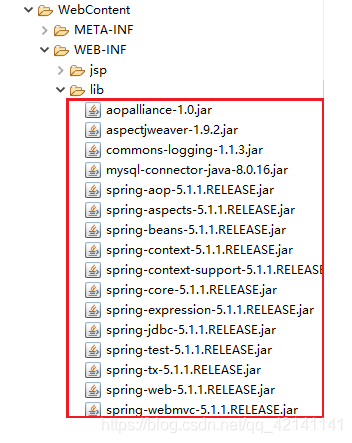
1、创建Web项目(要生成web.xml文件),加入jar包到 WebContent\WEB-INF\lib 目录下。
2、在web.xml中添加前端控制器(DispatcherServlet)有关的配置。
<?xml version="1.0" encoding="UTF-8"?>
<web-app xmlns:xsi="http://www.w3.org/2001/XMLSchema-instance" xmlns="http://java.sun.com/xml/ns/javaee" xsi:schemaLocation="http://java.sun.com/xml/ns/javaee http://java.sun.com/xml/ns/javaee/web-app_3_0.xsd" id="WebApp_ID" version="3.0">
  <display-name>springmvc01</display-name>
  <welcome-file-list>
    <welcome-file>index.html</welcome-file>
    <welcome-file>index.htm</welcome-file>
    <welcome-file>index.jsp</welcome-file>
    <welcome-file>default.html</welcome-file>
    <welcome-file>default.htm</welcome-file>
    <welcome-file>default.jsp</welcome-file>
  </welcome-file-list>

  <!-- 前端控制器(DispatcherServlet)的配置 -->
  <servlet>
  	<servlet-name>springDispatcherServlet</servlet-name>
  	<servlet-class>org.springframework.web.servlet.DispatcherServlet</servlet-class>
  	<!-- 初始化参数 -->
  	<init-param>
  		<param-name>contextConfigLocation</param-name>
  		<param-value>classpath:springmvc.xml</param-value>
  	</init-param>
  	<load-on-startup>1</load-on-startup>
  </servlet>
  <!-- 前端控制器(DispatcherServlet)的映射配置 -->
  <servlet-mapping>
  	<servlet-name>springDispatcherServlet</servlet-name>
  	<url-pattern>/</url-pattern>
  </servlet-mapping>
</web-app>
注意:
(1)classpath是指Tomcat的webapps\项目文件\WEB-INF文件夹下的classes目录,这里存放的的部署后的文件。
classpath 和 classpath* 区别:
classpath:只会到class路径中查找文件。
classpath*:不仅包含class路径,还会到jar文件中的class路径进行查找.。
(2)<load-on-startup>1</load-on-startup> :
load-on-startup元素 标记 容器 是否在启动的时候就加载这个servlet(实例化并调用其init()方法)。它的值必须是一个整数,表示servlet应该被载入的顺序。当值为0或者大于0时,表示容器在应用启动时就加载并初始化这个servlet。当值小于0或者没有指定时,则表示容器在该servlet被选择时才会去加载。正数的值越小,该servlet的优先级越高,应用启动时就越先加载。当值相同时,容器就会自己选择顺序来加载。所以,<load-on-startup>x</load-on-startup>,中x的取值1、2、3、4、5,代表的是优先级,而非启动延迟时间。
3、在src目录下创建springmvc.xml文件(New -> Spring Bean Configuration File -> Next -> 输入文件名 -> Next -> mvc打钩 -> Finish )。
<?xml version="1.0" encoding="UTF-8"?>
<beans xmlns="http://www.springframework.org/schema/beans"
	xmlns:xsi="http://www.w3.org/2001/XMLSchema-instance"
	xmlns:mvc="http://www.springframework.org/schema/mvc"
	xmlns:context="http://www.springframework.org/schema/context"
	xsi:schemaLocation="http://www.springframework.org/schema/mvc http://www.springframework.org/schema/mvc/spring-mvc-4.3.xsd
		http://www.springframework.org/schema/beans http://www.springframework.org/schema/beans/spring-beans.xsd
		http://www.springframework.org/schema/context http://www.springframework.org/schema/context/spring-context-4.3.xsd">

	<!-- 组件扫描的路径,指定控制器的扫描包 -->
	<context:component-scan base-package="com.etc.controller"></context:component-scan>

</beans>
4、创建控制器类(后端控制器)。
在类前:@Controller 转发请求、@RestController ajax请求
在方法前:@GetMapping、@PostMapping、@RequestMapping、@PutMapping、@DeleteMapping
(1)ajax请求
在com.etc.controller包中创建 QuestionController.java。
package com.etc.controller;

import org.springframework.web.bind.annotation.GetMapping;
import org.springframework.web.bind.annotation.RestController;

@RestController // ajax请求
public class QuestionController {


	// 访问地址:ip地址:端口/工程名/hello
	@GetMapping(value="hello")
	public String sayHello(String name) {


		return "Hello"+name;
	}
}
- 中文乱码处理: RestController中的请求,响应数据出现了中文乱码,需要在@GetMapping中 添加
produces="application/json;charset=utf-8"。
package com.etc.controller;

import org.springframework.web.bind.annotation.GetMapping;
import org.springframework.web.bind.annotation.RestController;

@RestController // ajax请求
public class QuestionController {


	@GetMapping(value="hello",produces="application/json;charset=utf-8")
	public String sayHello(String name) {


		return "Hello"+name;
	}
}
访问 http://127.0.0.1:8080/springmvc01/hello?name=Tom 。

(2)页面转发的请求
在com.etc.controller包中创建 HelloController.java。
package com.etc.controller;

import org.springframework.stereotype.Controller;
import org.springframework.web.bind.annotation.GetMapping;

@Controller // 转发请求
public class HelloController {


	@GetMapping(value="shello")
	public String sayHi() {


		// 返回的字符串是一个视图名
		return "shello";
	}
}
项目的src目录中的 springmvc.xml
<?xml version="1.0" encoding="UTF-8"?>
<beans xmlns="http://www.springframework.org/schema/beans"
	xmlns:xsi="http://www.w3.org/2001/XMLSchema-instance"
	xmlns:mvc="http://www.springframework.org/schema/mvc"
	xmlns:context="http://www.springframework.org/schema/context"
	xsi:schemaLocation="http://www.springframework.org/schema/mvc http://www.springframework.org/schema/mvc/spring-mvc-4.3.xsd
		http://www.springframework.org/schema/beans http://www.springframework.org/schema/beans/spring-beans.xsd
		http://www.springframework.org/schema/context http://www.springframework.org/schema/context/spring-context-4.3.xsd">

	<!-- 组件扫描的路径,指定控制器的扫描包 -->
	<context:component-scan base-package="com.etc.controller"></context:component-scan>

	<!-- 视图解析器的配置 -->
	<bean class="org.springframework.web.servlet.view.InternalResourceViewResolver">
  		<!-- 注入 -->
  		<property name="viewClass" value="org.springframework.web.servlet.view.JstlView"></property>
  		<!-- 视图的前缀 -->
  		<property name="prefix" value="/WEB-INF/jsp/"></property>
  		<!-- 视图的后缀 -->
  		<property name="suffix" value=".jsp"></property>
	</bean>
</beans>
注意:
- InternalResourceViewResolver:支持Servlet、JSP视图解析。
- viewClass:JstlView表示JSP模板页面需要使用JSTL标签库。
- prefix和suffix:查找视图页面的前缀和后缀(前缀[逻辑视图名]后缀),比如传进来的逻辑视图名为shello,则该该jsp视图页面应该存放在
/WEB-INF/jsp/shello.jsp
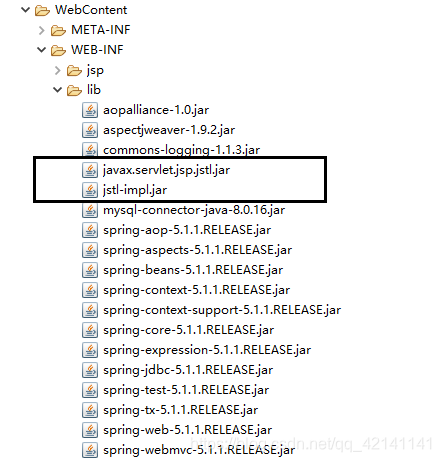
由于使用了jstlview,要在构建路径(WebContent\WEB-INF\lib目录)中加入jstl的jar包。.
在对应的目录中创建jsp文件(/WEB-INF/jsp/shello.js)。

<%@ page language="java" contentType="text/html; charset=UTF-8"
    pageEncoding="UTF-8"%>
<!DOCTYPE html>
<html>
<head>
<meta charset="UTF-8">
<title>Insert title here</title>
</head>
<body>
	<h1>你好,shello!</h1>
</body>
</html>
访问 http://127.0.0.1:8080/springmvc01/shello。

四、其他知识点
(1)访问地址为 ip地址/端口号/项目名/index.jsp ,也就是在WebContent目录下的index.jsp,访问该文件时不会经过前端控制器。
(2)在 WebContent/WEB-INF文件夹中的jsp文件是访问不到的,因为WEB-INF文件夹是加密的。
(3)访问后端控制器都要经过前端控制器。
(4)访问WebContent目录下的静态资源(如index.html、a.jpg等)都会经过前端控制器,需要在springmvc.xml文件中添加有关静态资源的设置(在beans标签中添加)。
	<!--使前端控制器不处理静态资源 ,注意,请求还是有走前端控制器,只不过不处理 -->
    <mvc:default-servlet-handler/>
    <!-- 这句话要加,否则控制器失效 -->
    <mvc:annotation-driven></mvc:annotation-driven>