微信开发接入
一、背景
最近项目中由于某些原因,涉及到了微信公众号的开发,此处简单记录下微信公众号的接入。
二、前置条件
1、需要有一个可以在外网可以访问的域名
2、本地开发,需要将内网环境穿透到外网可以访问。
3、需要有一个公众号。
注意:
1、内网穿透和外网域名 我们可以通过 natapp 来购买实现。
三、通过natapp内网穿透和域名购买
1、购买隧道
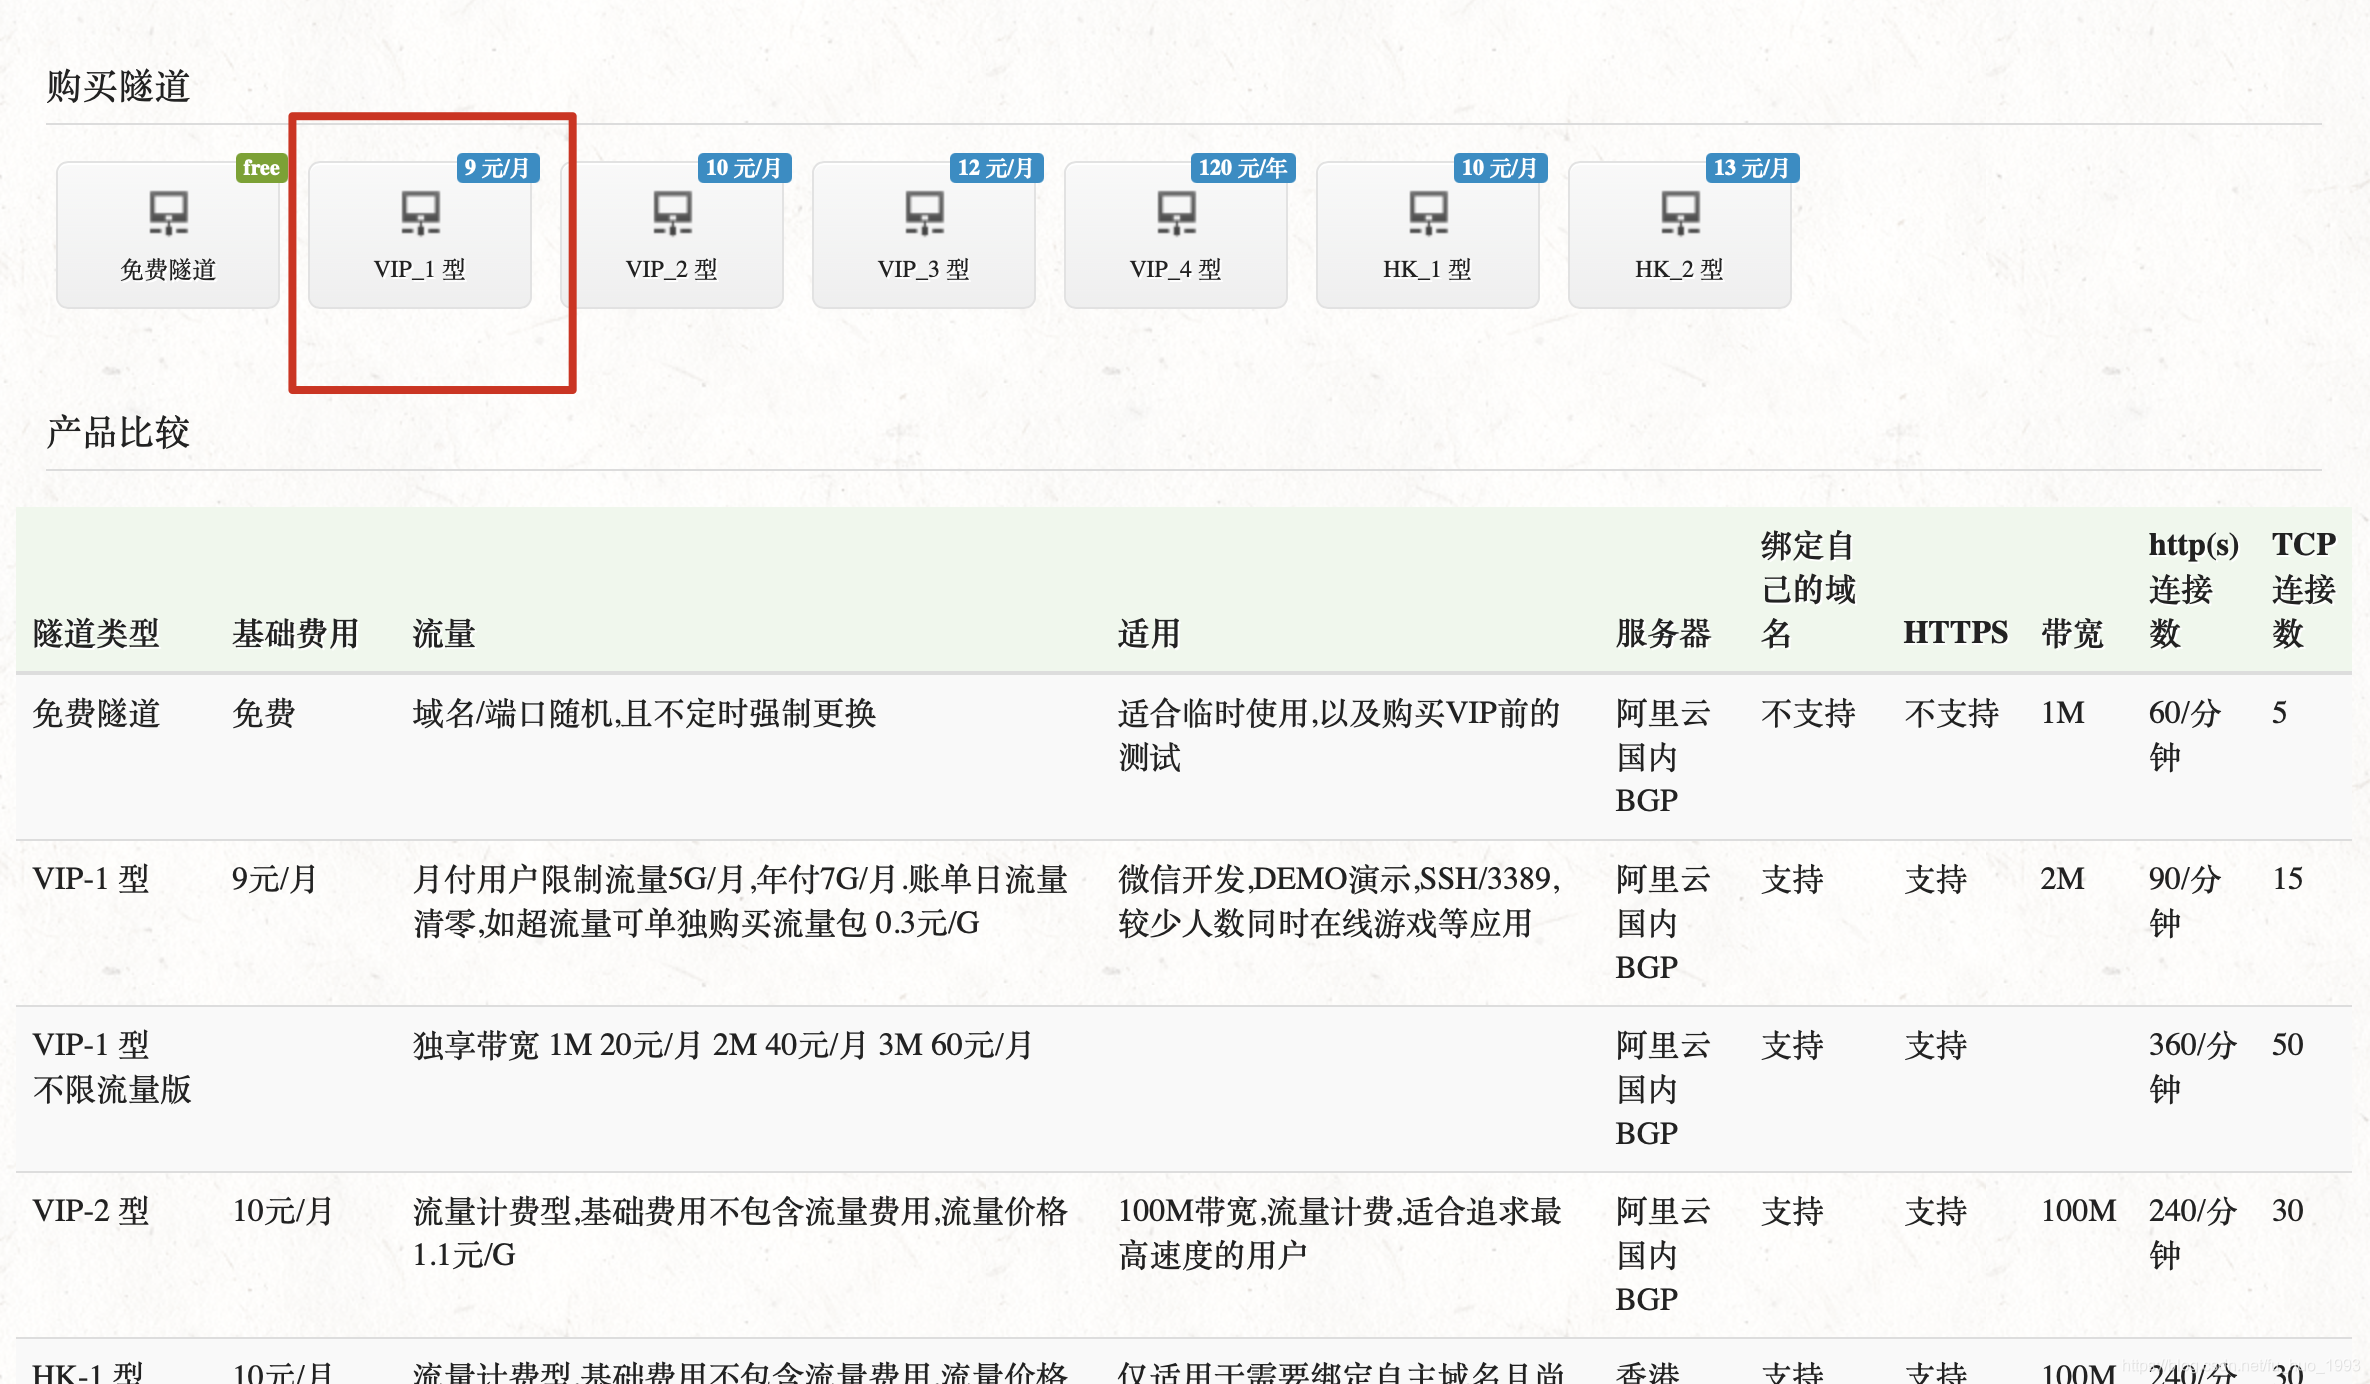
此处根据自己的情况,购买一个适合自己的隧道。
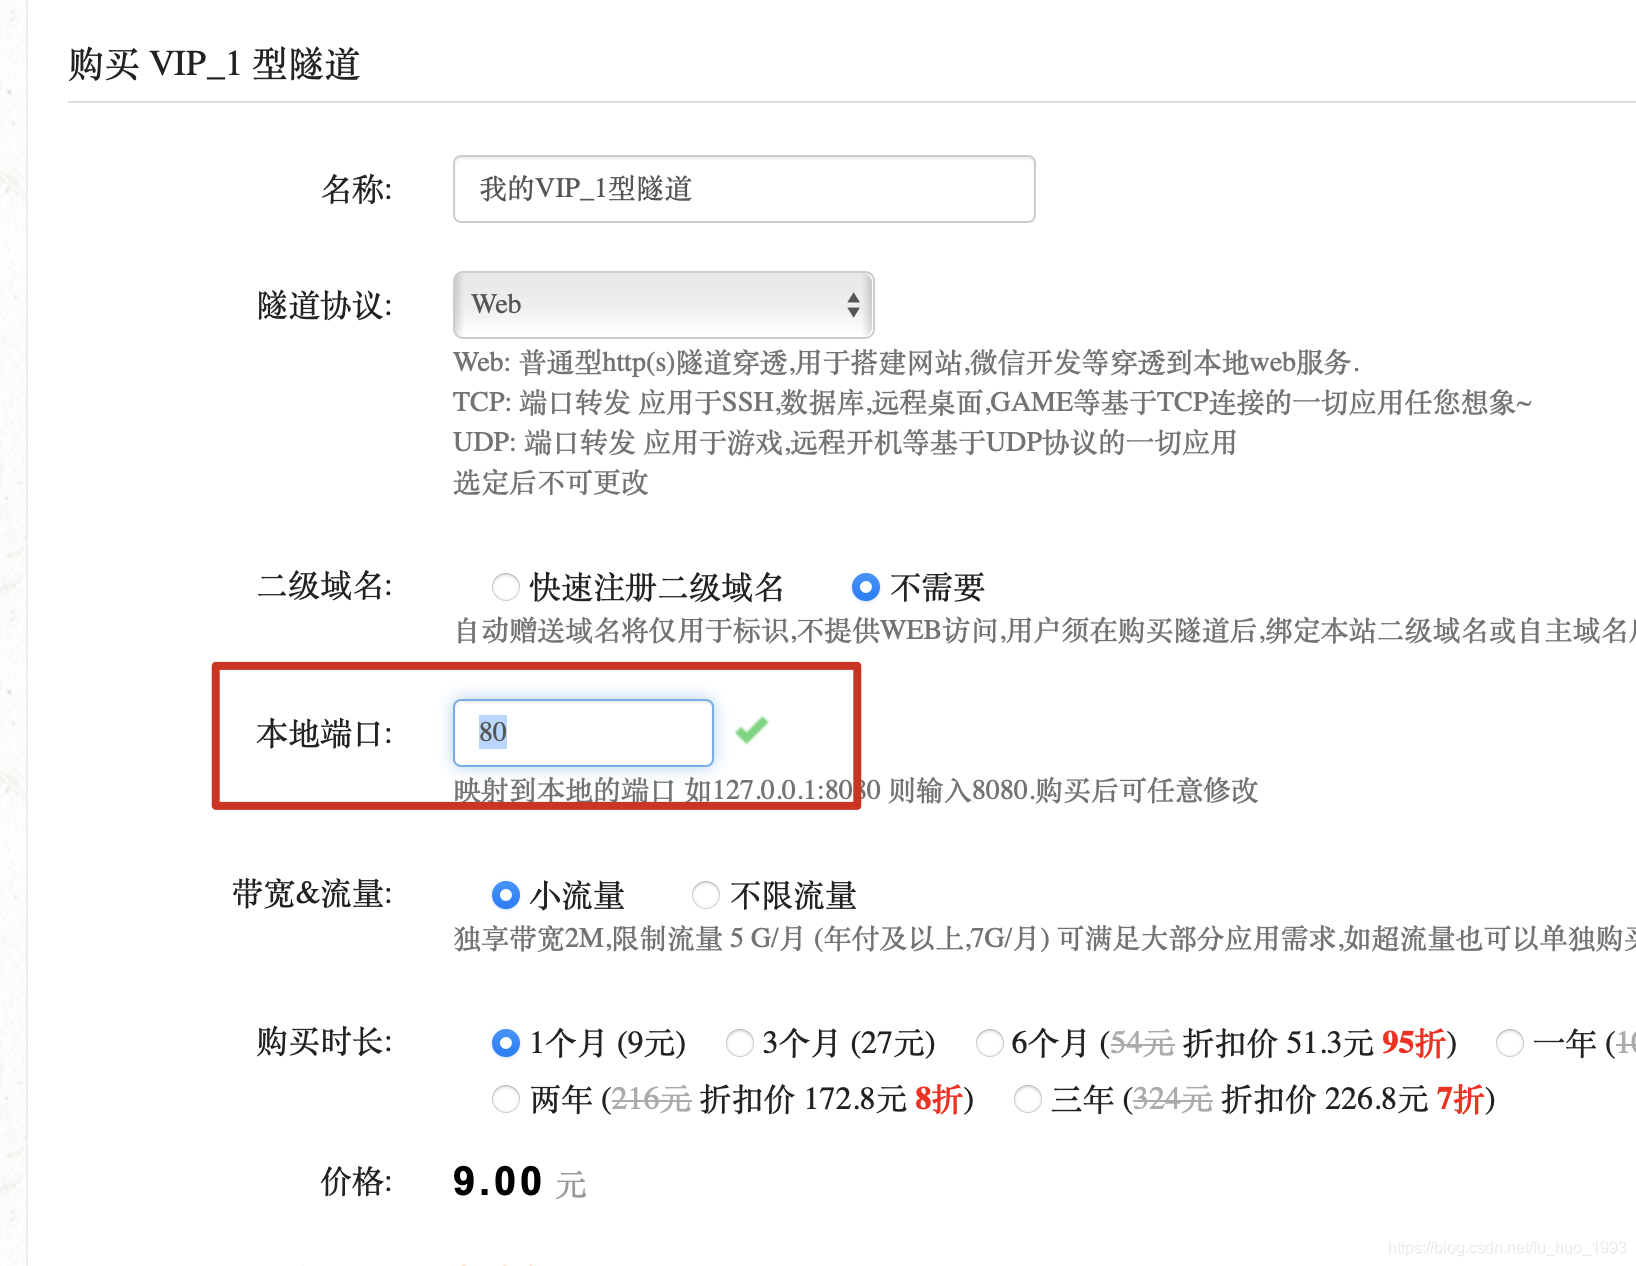
后期将会把我们自己的本地端口,映射到一个外网可以访问的网址上。
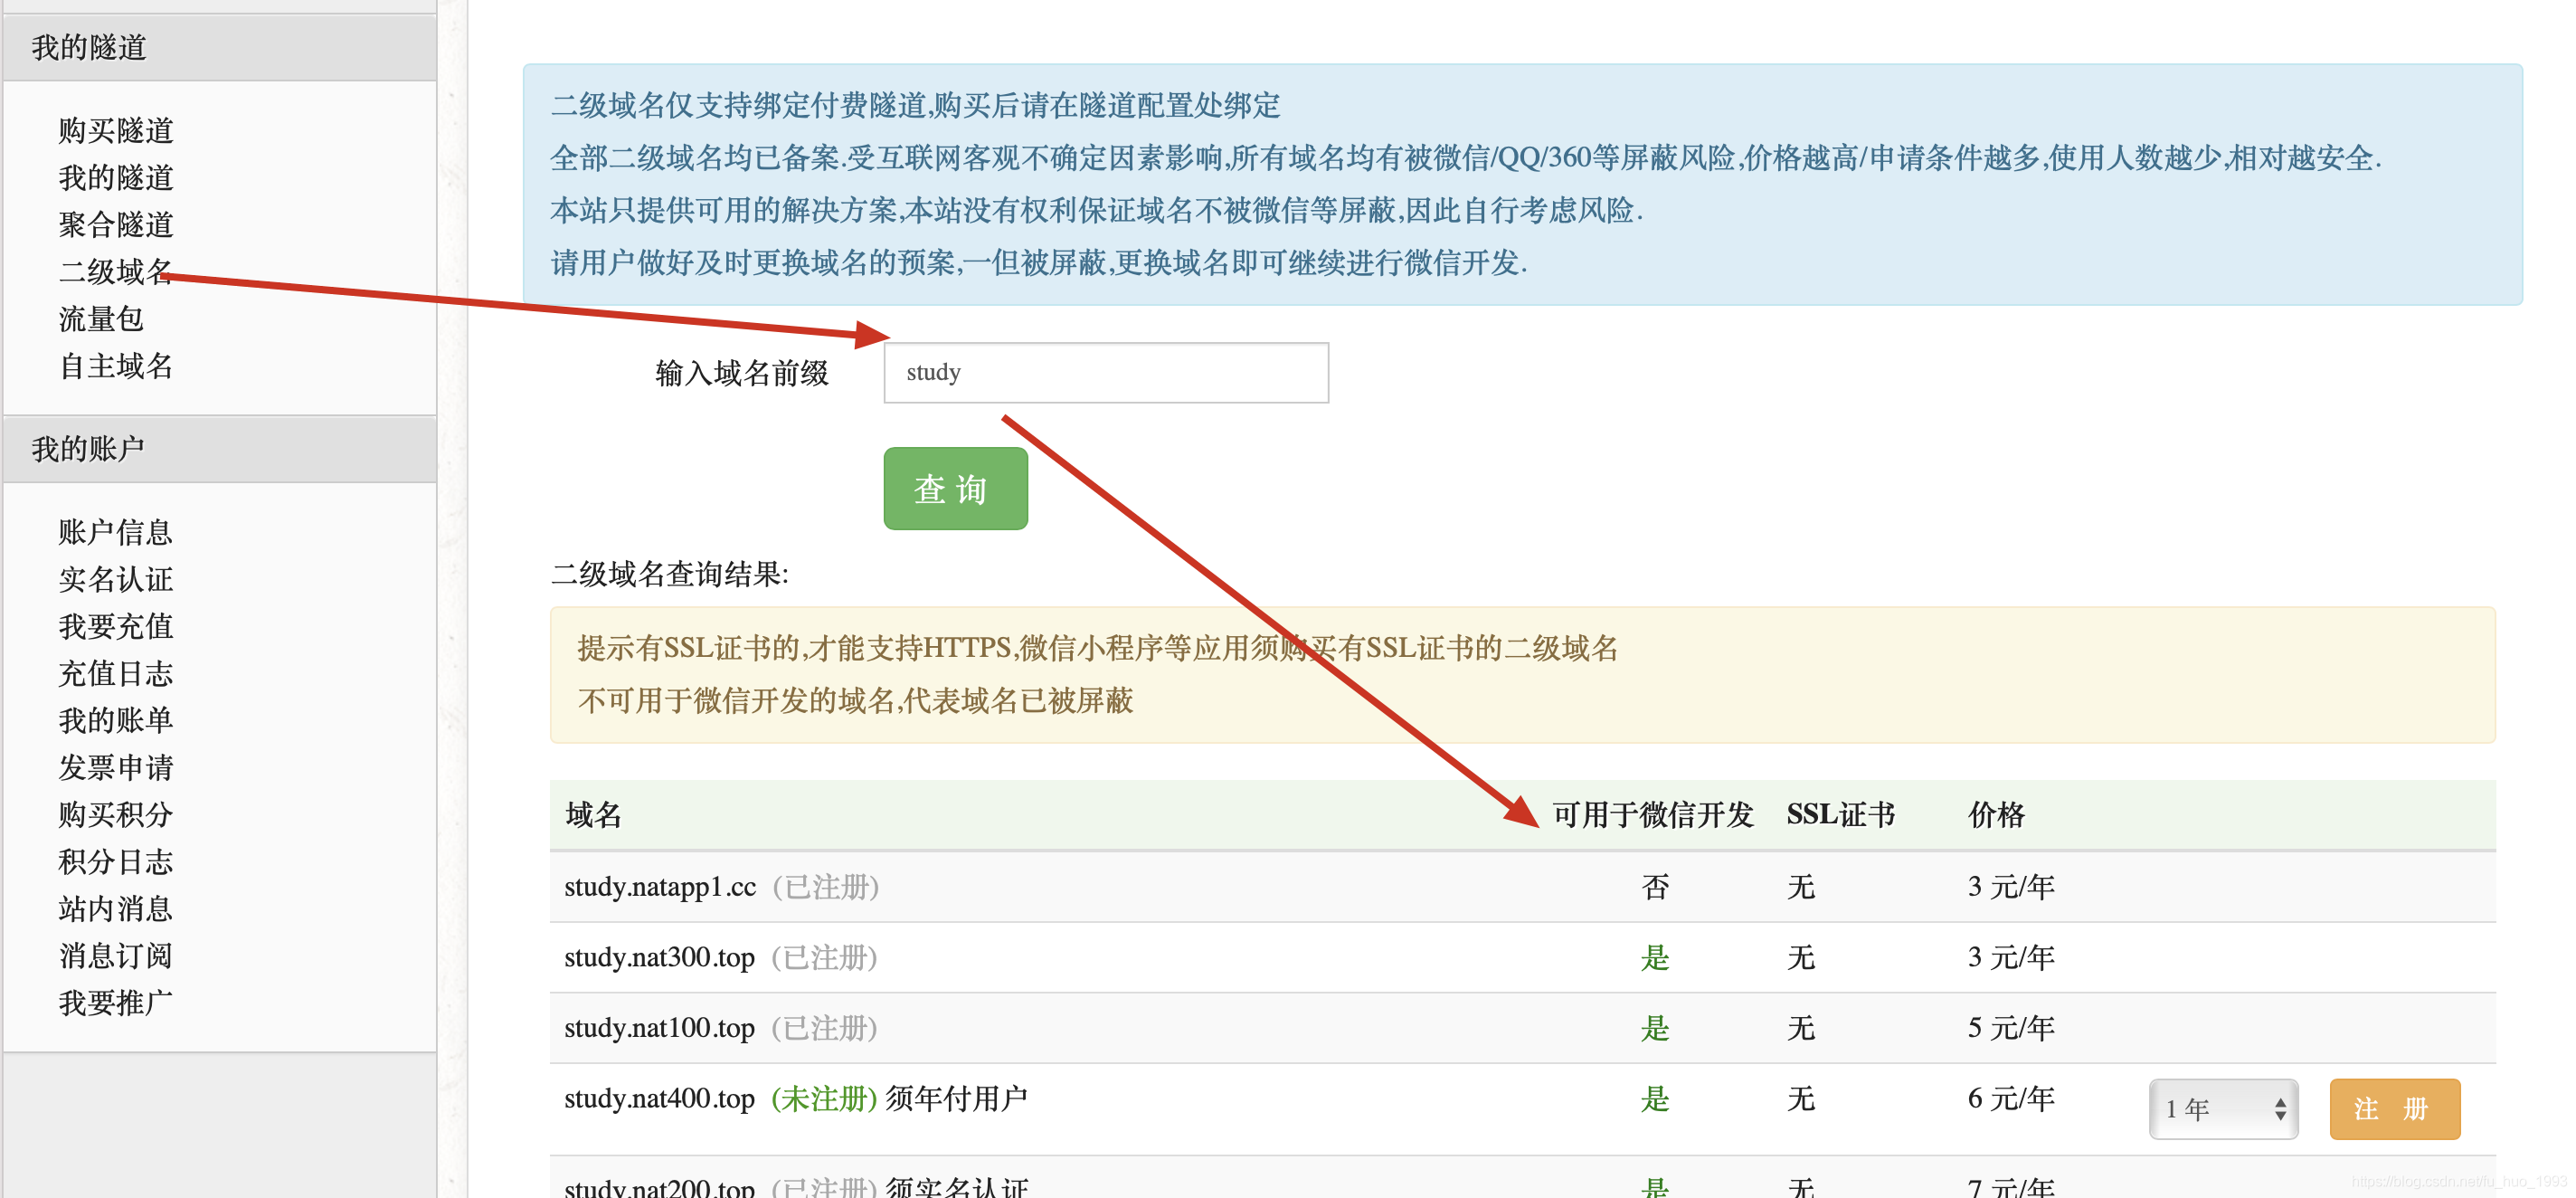
2、购买一个二级域名(如果自己有可以忽略)
注意:
1、此处购买一个 二级域名,如果自己有 域名,可以不用购买。
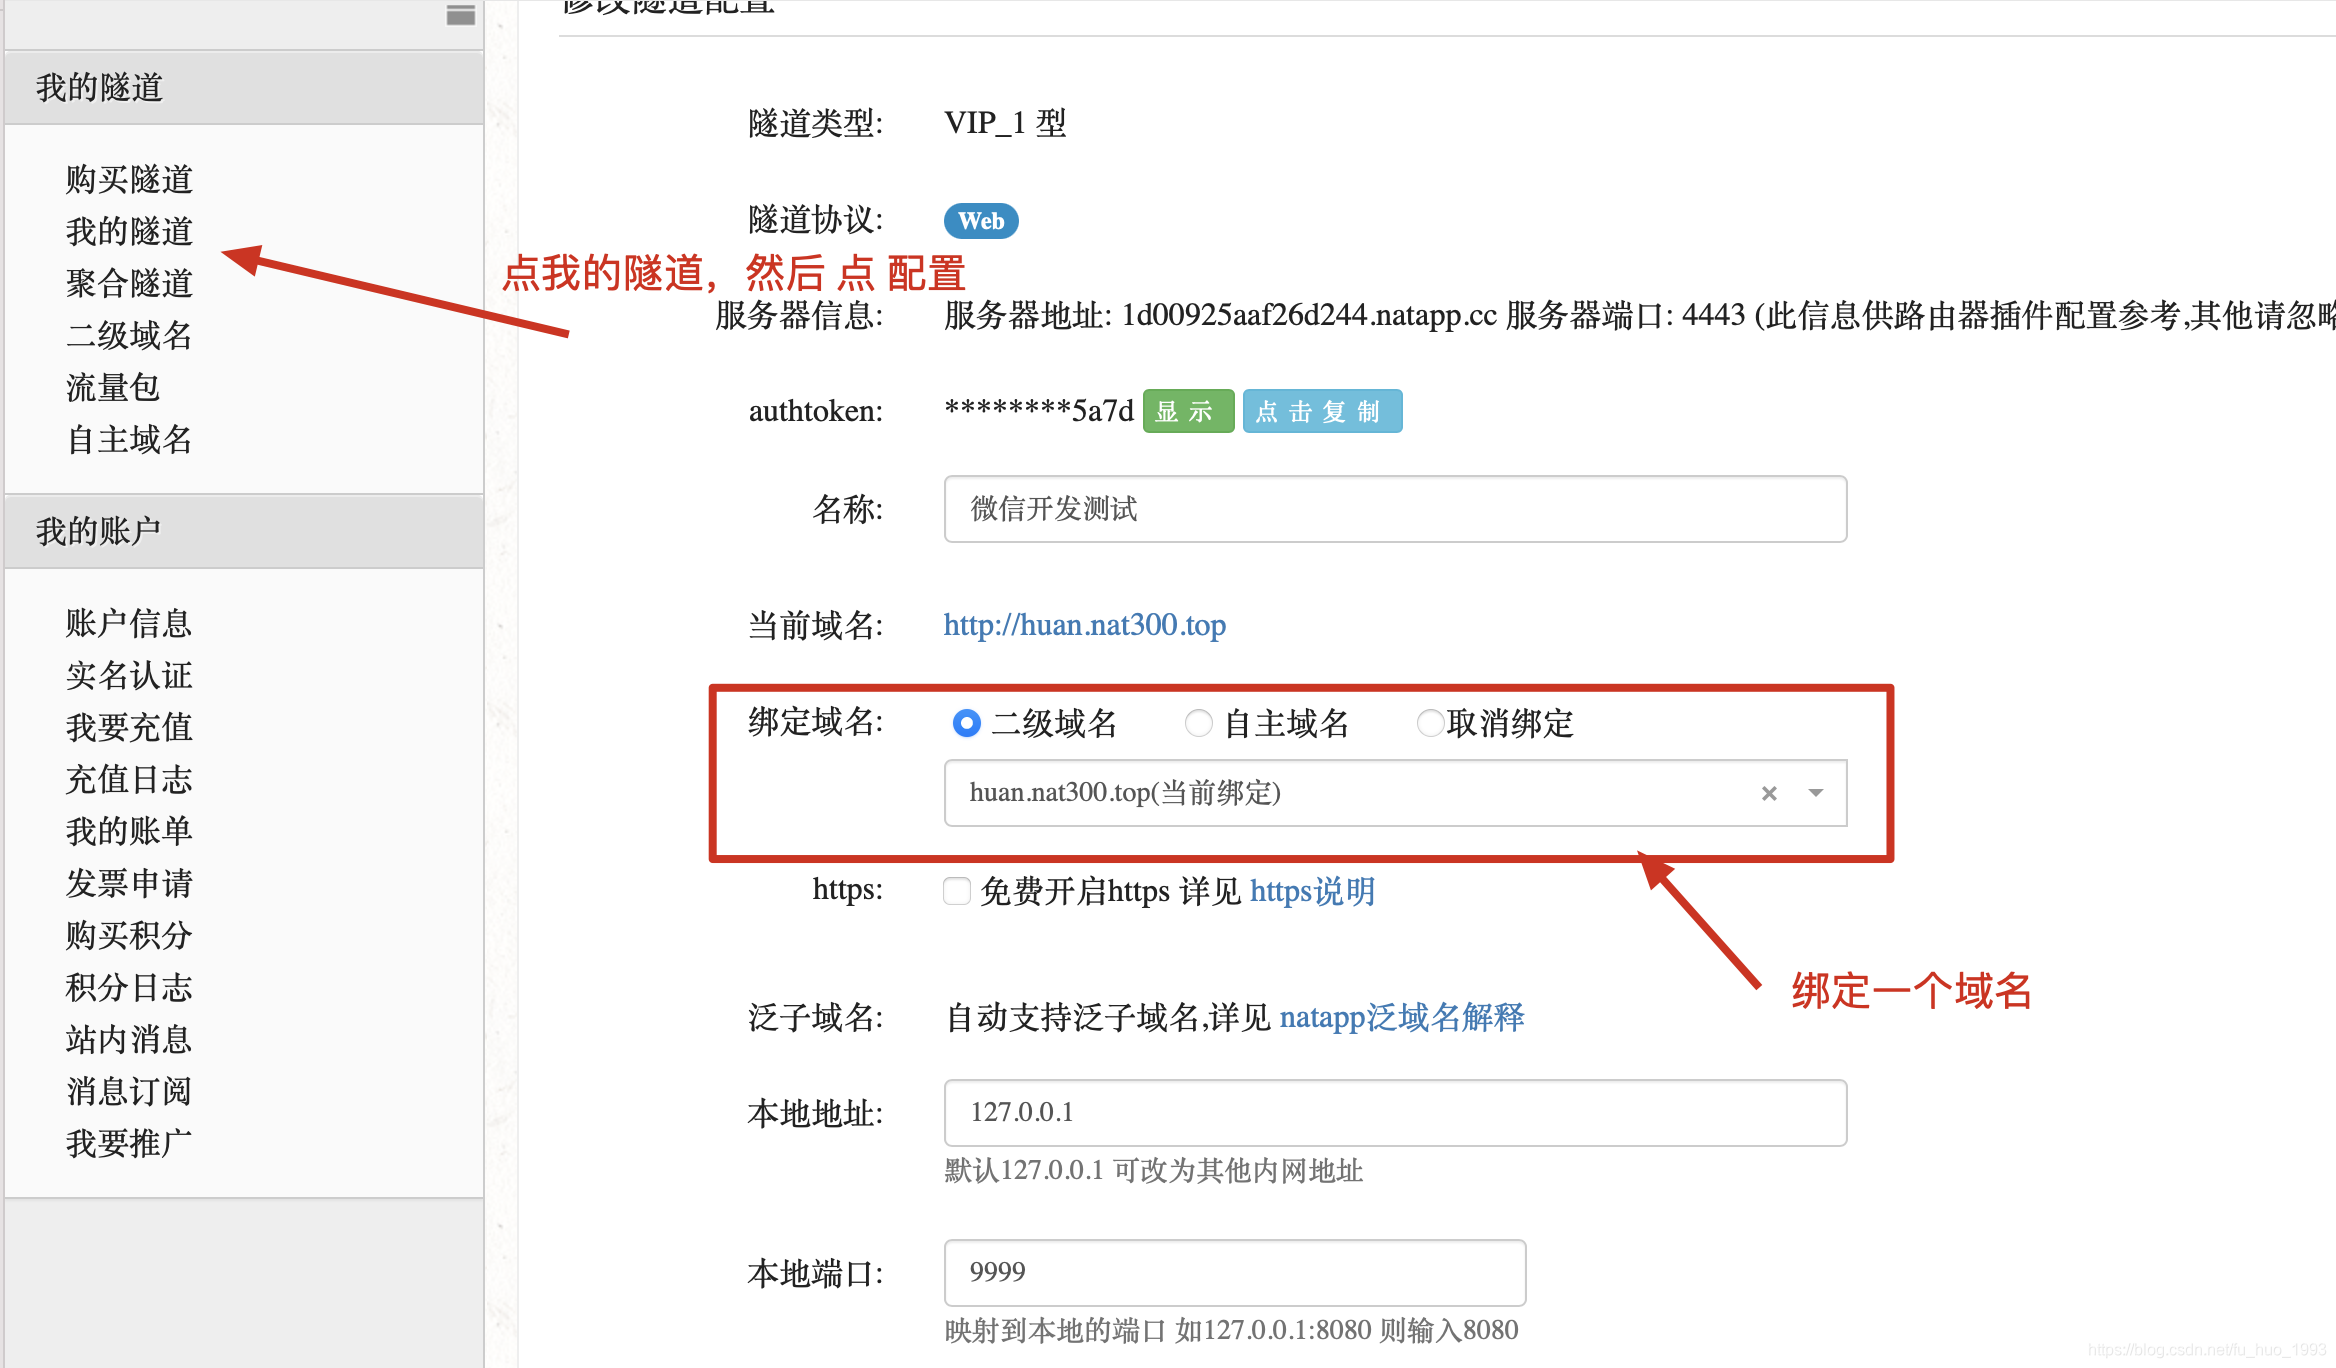
3、将域名绑定到购买的隧道上
4、下载natapp客户端
https://natapp.cn/#download
此处需要根据自己的操作系统,下载对应的客户端。
5、启动 natapp
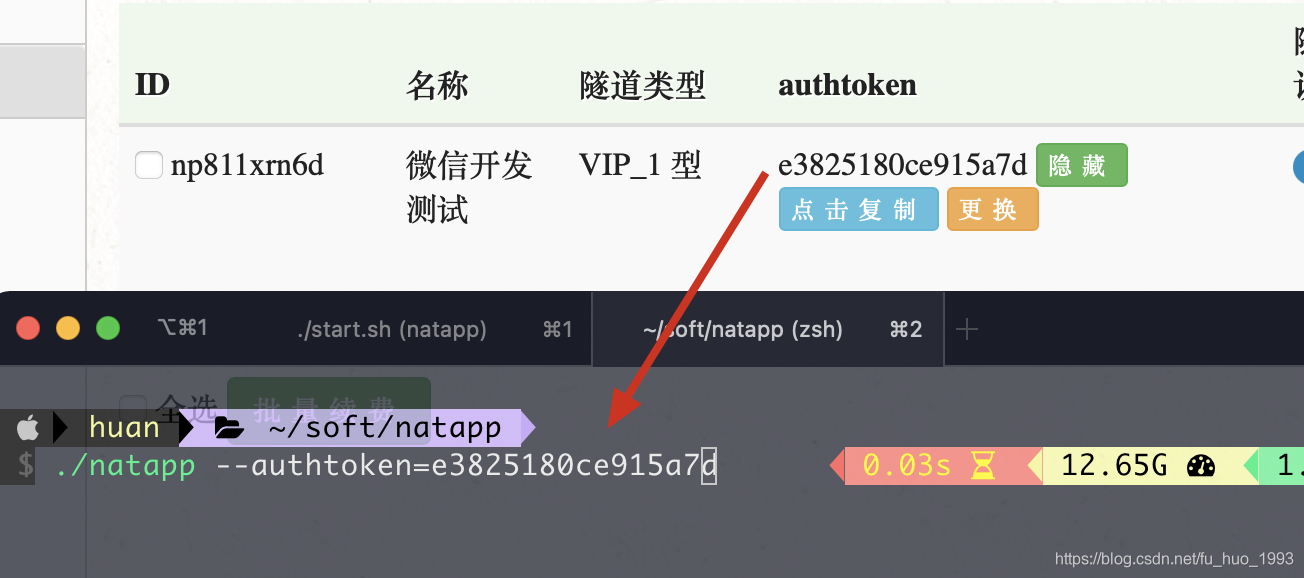
此处的 authtoken 的值为 我们自己购买的隧道的值。
四、编写微信服务端接入验证
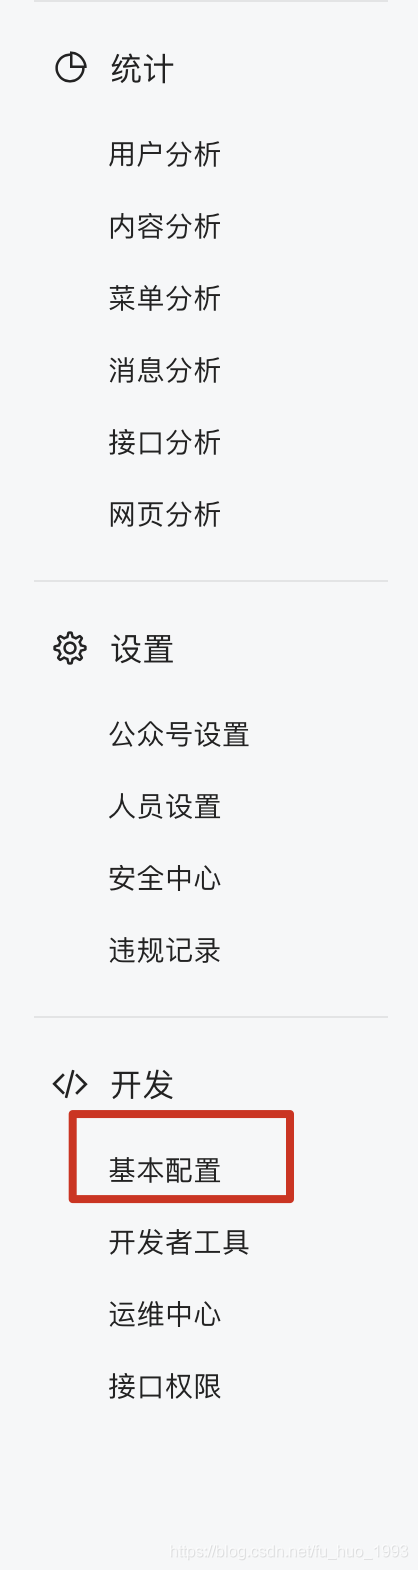
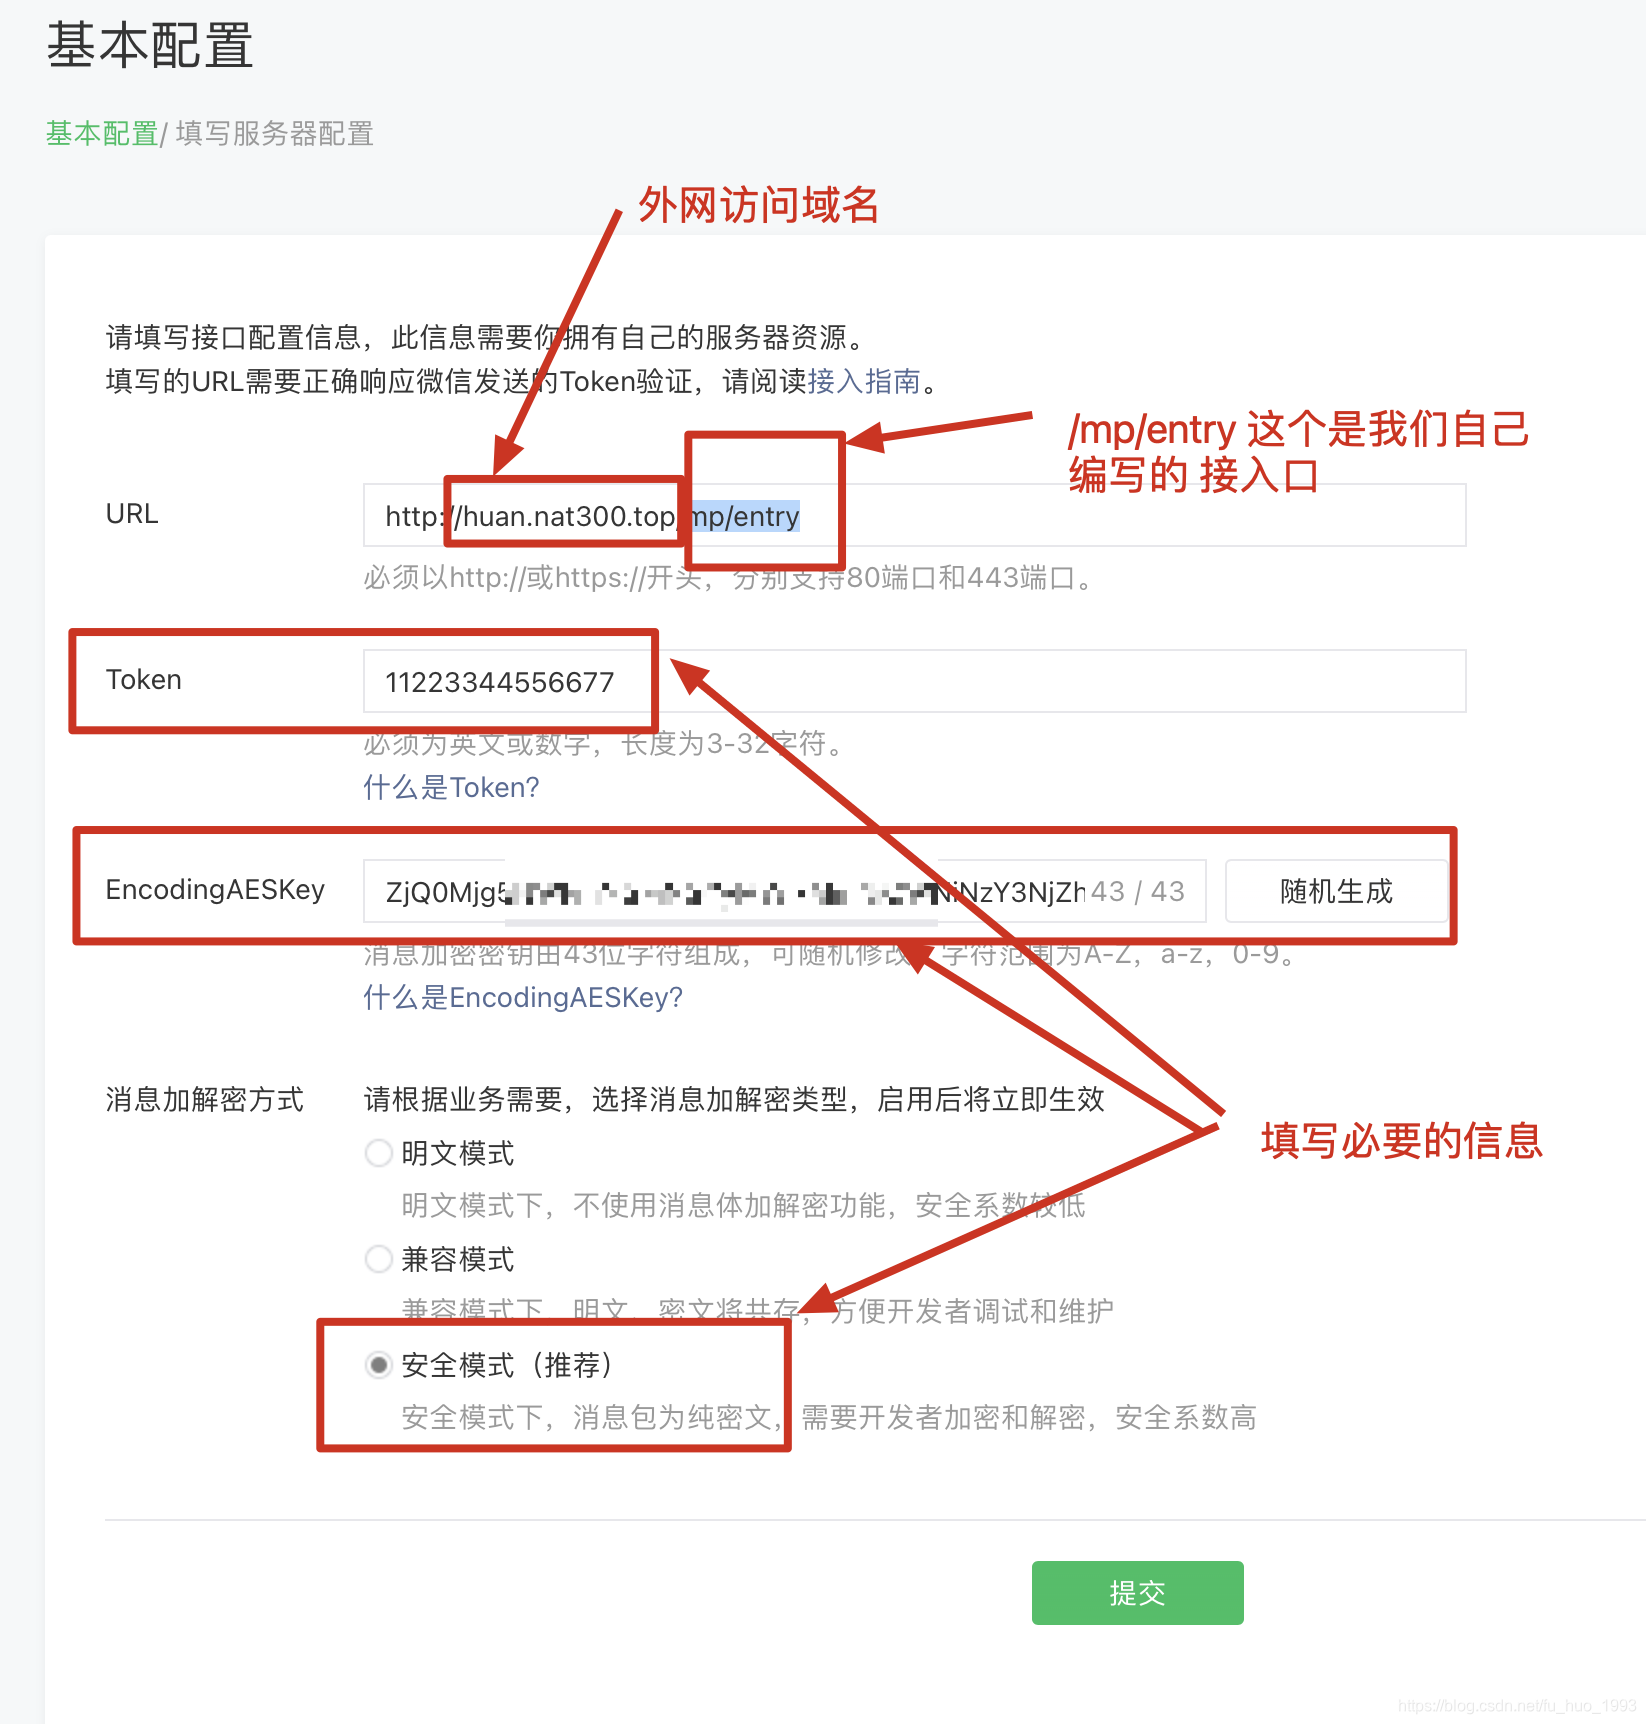
1、填写服务器配置
路径:开发->基本配置
2、编写服务端验证接入代码
微信服务器地址URL:这个可以先记下来,下面会告知在那个地方配置
我们自己接入微信公众号有些验证比较麻烦,此处借助网上的开源框架 weixin-java-mp 这个程序开发。
1、引入 weixin-java-mp.jar
<dependency>
    <groupId>com.github.binarywang</groupId>
    <artifactId>weixin-java-mp</artifactId>
    <version>4.0.0</version>
</dependency>
2、进行 mp 配置
@Configuration
public class WxMpConfiguration {


    @Autowired
    private WxMpProperties wxMpProperties;

    @Bean
    public WxMpService wxMpService() {


        WxMpServiceImpl wxMpService = new WxMpServiceImpl();
        wxMpService.setWxMpConfigStorage(wxMpConfigStorage());
        // 设置多个微信公众号的配置
        // wxMpService.setMultiConfigStorages();
        return wxMpService;
    }

    /**
     * 这个地方的配置是保存在本地,生产环境需要自己扩展,可以保存在Redis中等等
     *
     * @return WxMpConfigStorage
     */
    public WxMpConfigStorage wxMpConfigStorage() {


        WxMpDefaultConfigImpl storage = new WxMpDefaultConfigImpl();
        storage.setAppId(wxMpProperties.getAppId());
        storage.setSecret(wxMpProperties.getAppSecret());
        storage.setAesKey(wxMpProperties.getAesKey());
        storage.setToken(wxMpProperties.getToken());
        return storage;
    }
}
注意
1、WxMpConfigStorage 这个类在生产环境中,如果服务是 集群 部署的话,最好不要使用 WxMpDefaultConfigImpl 因为这个是将配置保存在 内存中。可以考虑使用 WxMpRedissonConfigImpl 这个类。
2、WxMpConfigStorage 中的配置,和上方的服务器配置保持一致。
3、服务器端代码验证
@Component
@RestController
@Slf4j
public class MpEntryController {
@Autowired
private WxMpService wxMpService;
/**
* 微信接入
*
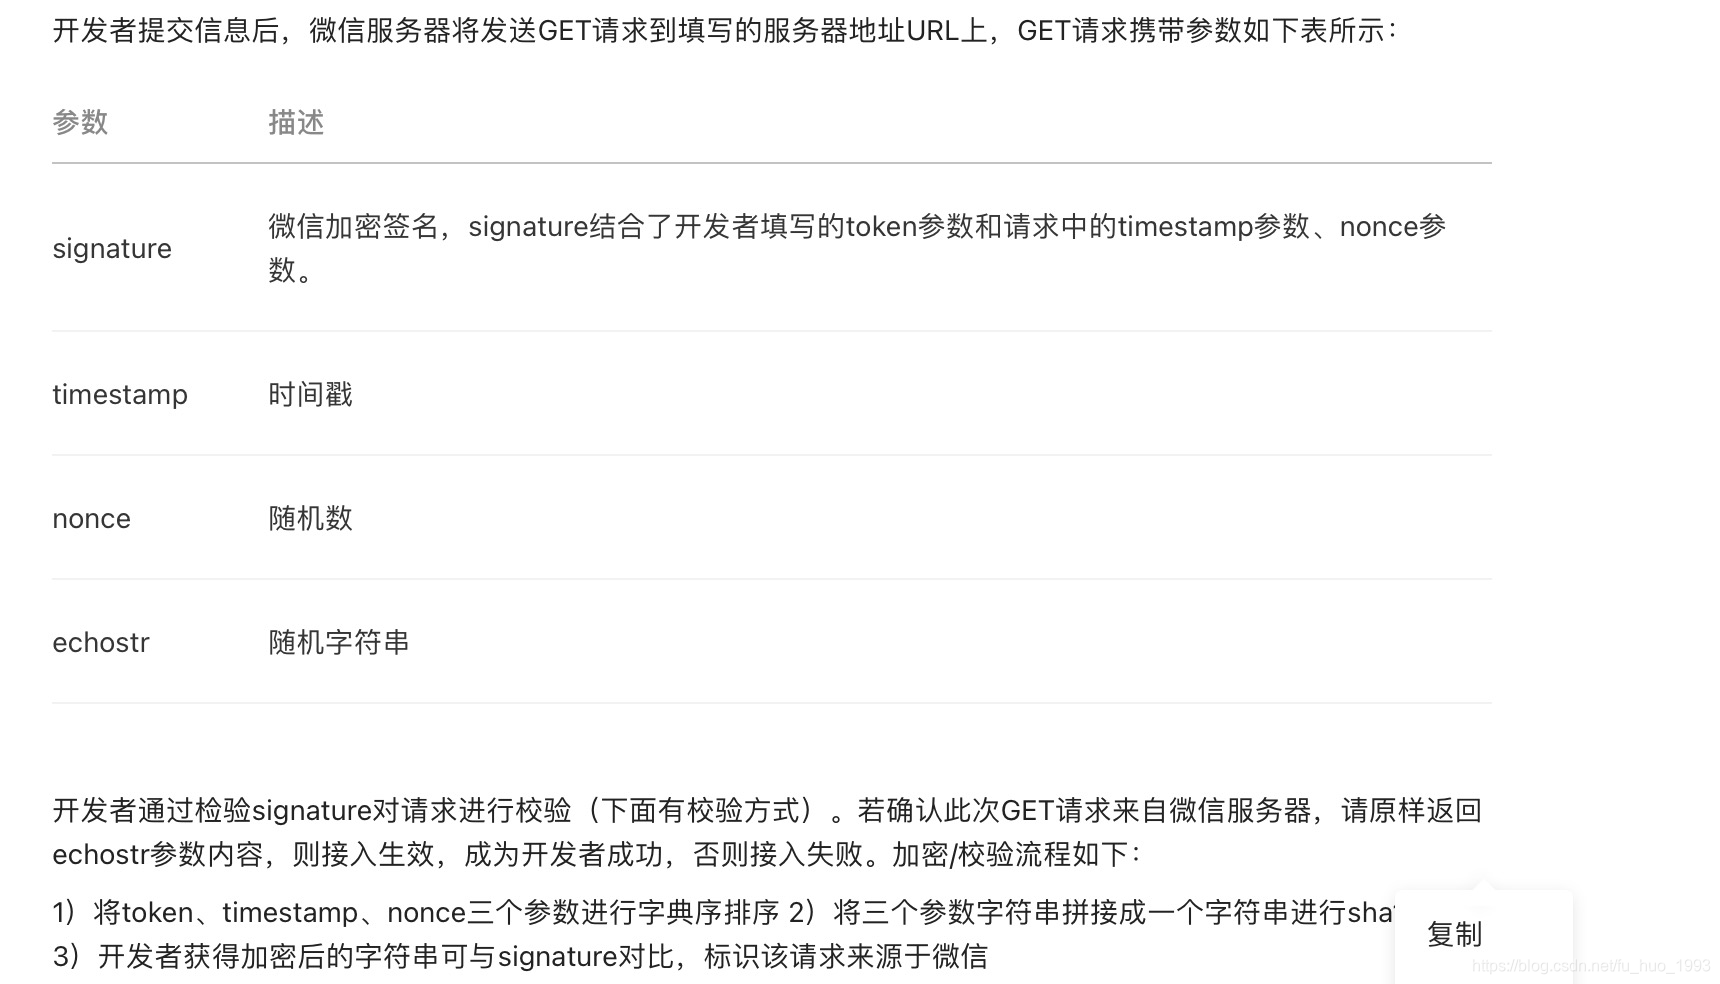
* @param signature 签名
* @param timestamp 时间戳
* @param nonce 随机数
* @param echoStr 随机字符串
* @return 接入成功返回 echoStr 的值,否则随便返回
*/
@GetMapping("/mp/entry")
public String entry(@RequestParam("signature") String signature,
@RequestParam("timestamp") String timestamp,
@RequestParam("nonce") String nonce,
@RequestParam("echostr") String echoStr) {
log.info("微信公众号/服务号接入传递的参数 signature:[{}],timestamp:[{}],nonce:[{}],echostr:[{}]",
signature, timestamp, nonce, echoStr);
if (StringUtils.isAnyBlank(signature, timestamp, nonce, echoStr)) {
log.error("接收到微信认证信息,参数非法,存在为空的参数");
return "error";
}
boolean result = wxMpService.checkSignature(timestamp, nonce, signature);
log.info("微信公众号/服务号接入成功?[{}]", result);
return result ? echoStr : "error";
}
}
注意
1、/mp/entry 这个为我们自己的接入路径,和上方图中保存一致。
4、验证
1、启动我们的web工程
2、在微信配置页面,点击提交。
3、验证通过,说明接入成功。
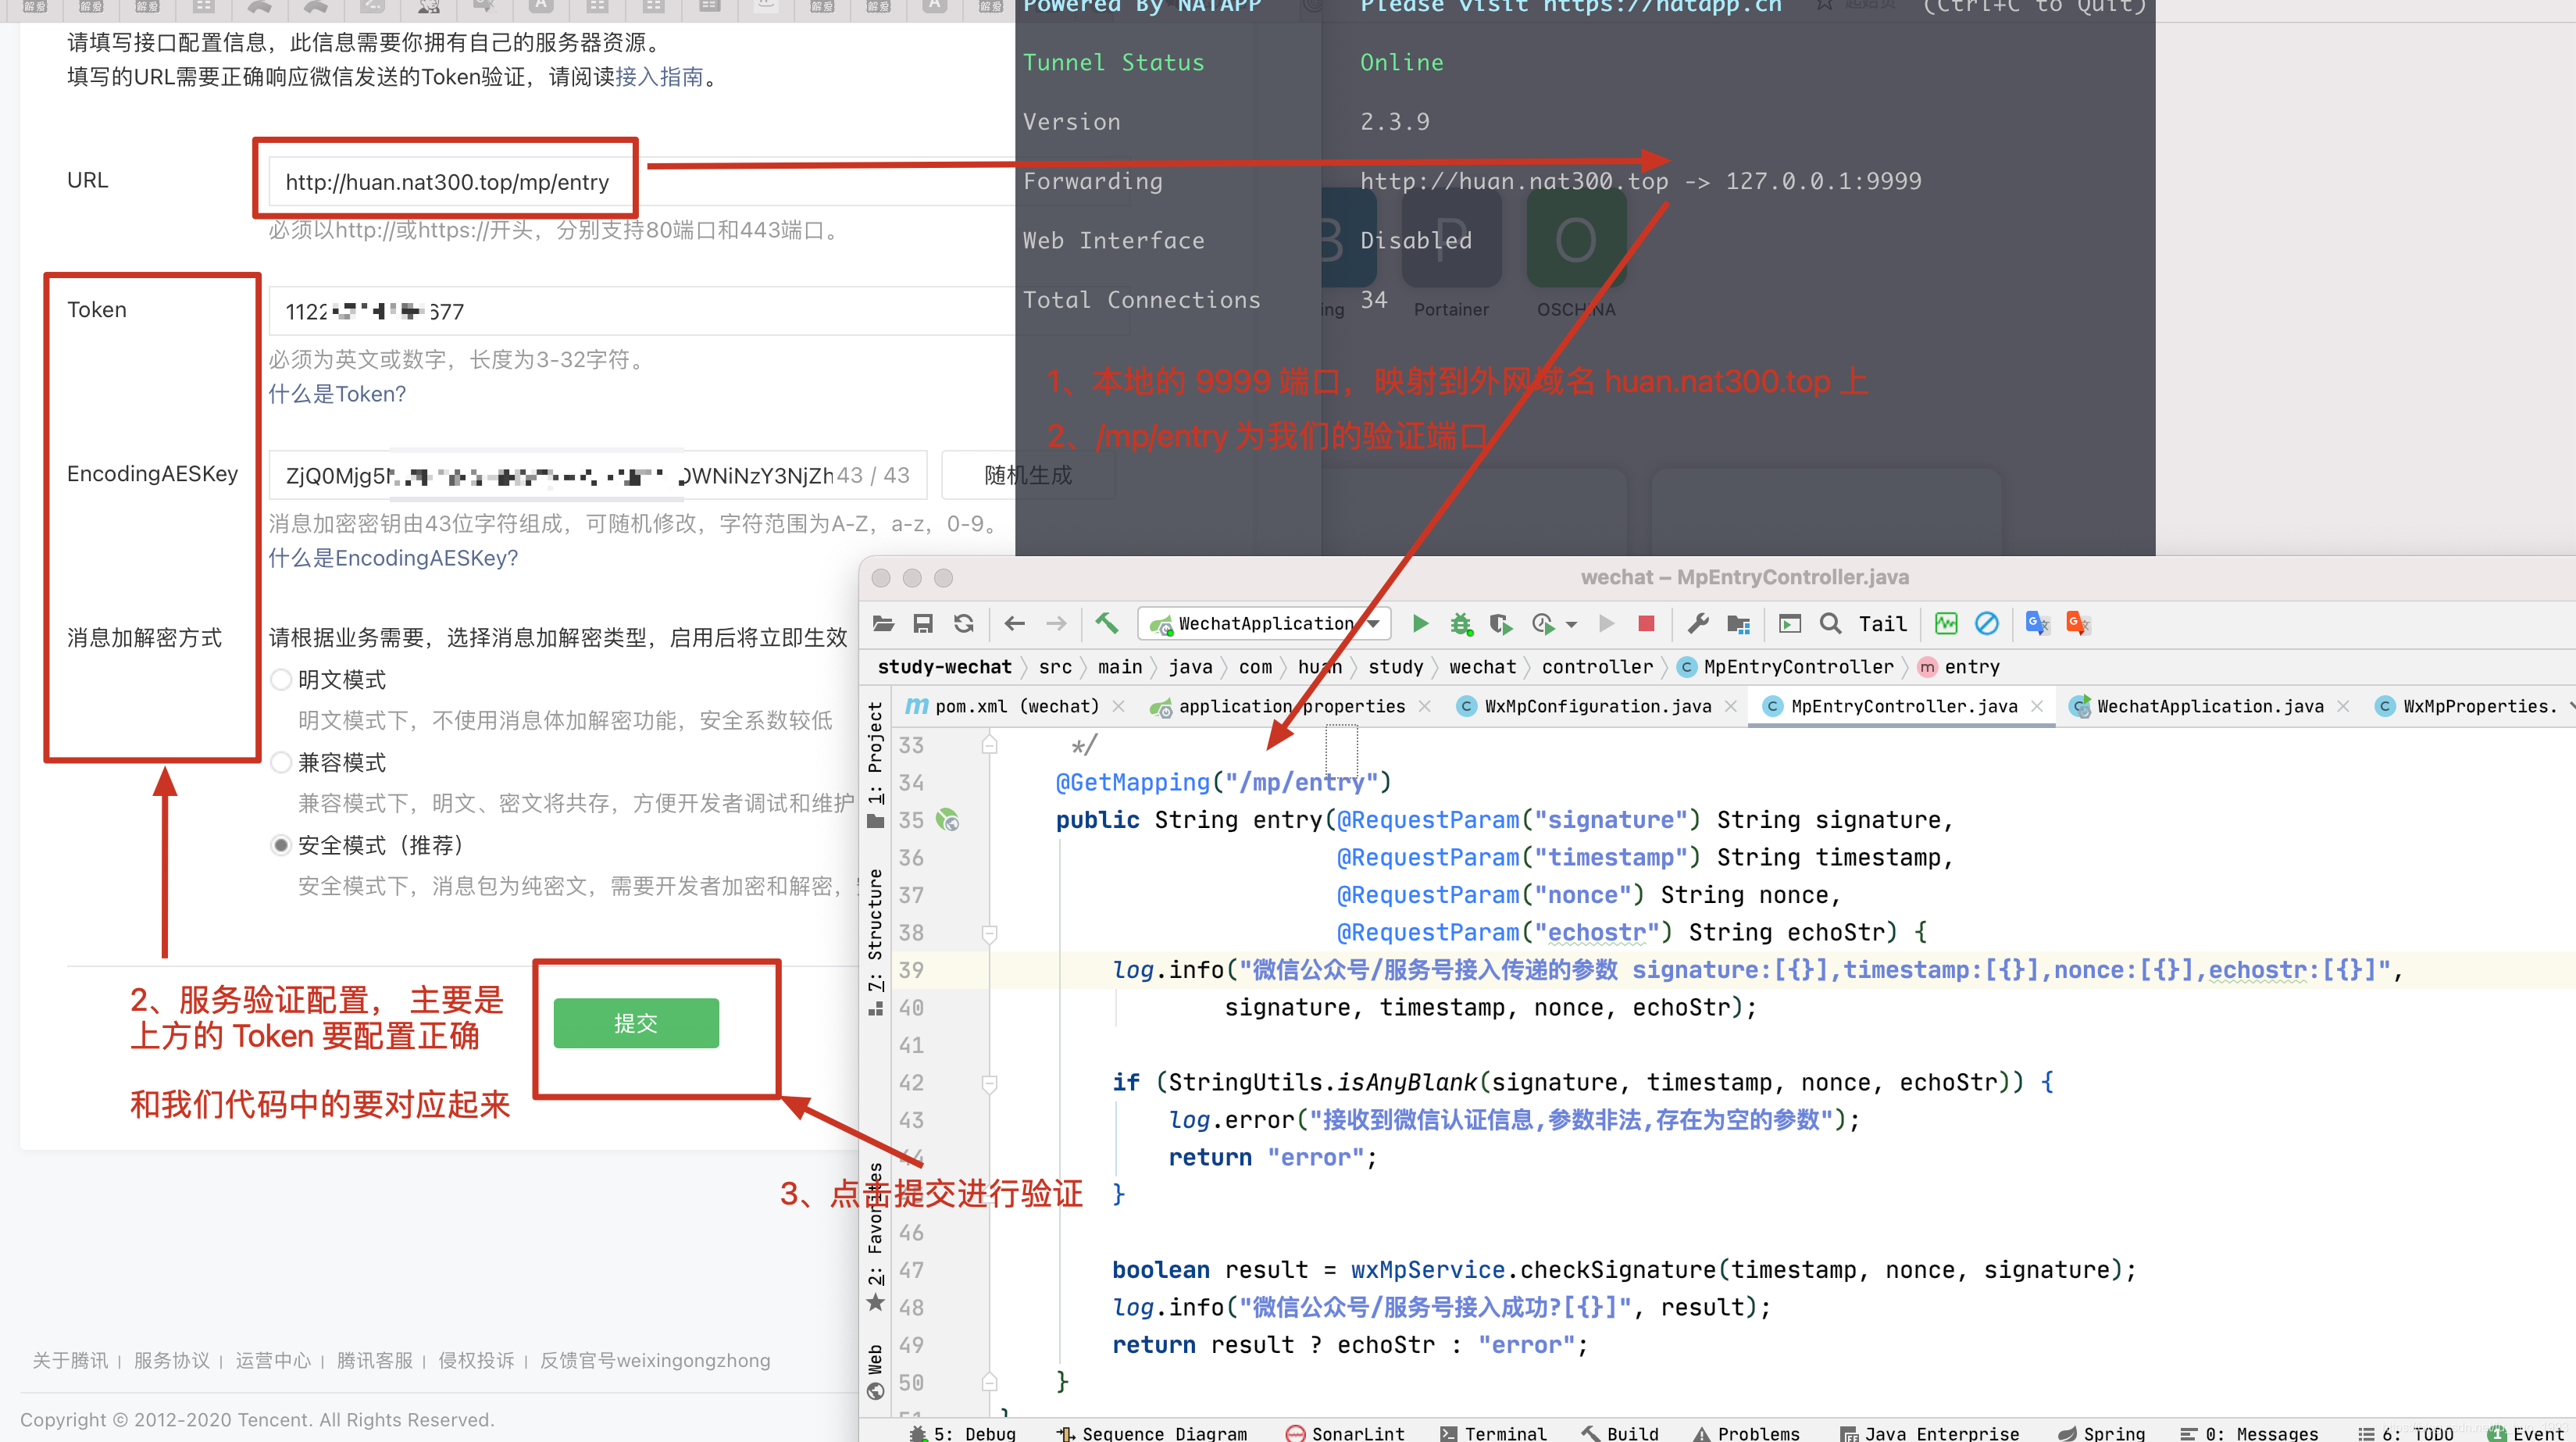
微信服务器地址URL 就是 /mp/entry
五、参考文档
1、微信接入