本人想在Win10+VS2015下配置opencv4.5.0,于是在b站以及csdn等上找了一些配置方法。
亲测:在b站上的一个教程(b站配置教程)可用,只不过其中的配置库路径的时候是“vc14”(VS2015),不是“vc15”(VS2017)。注:这篇教程比较坑(添加链接描述),慎入
下面就b站的教程总结为以下几步:
- 安装好VS2015 和 opencv
- 在系统的环境变量添加opencv安装路径下的bin文件路劲,具体地址如下:D:\software_study_install\opencv\build\x64\vc14\bin
- VS新建一个工程之后,打开所建工程,配置以下两个照片中的红框
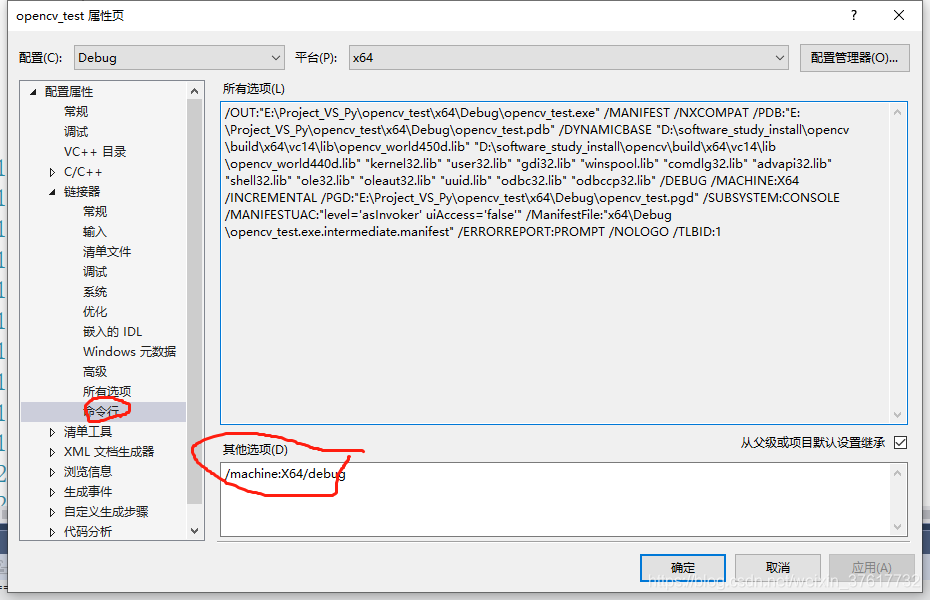
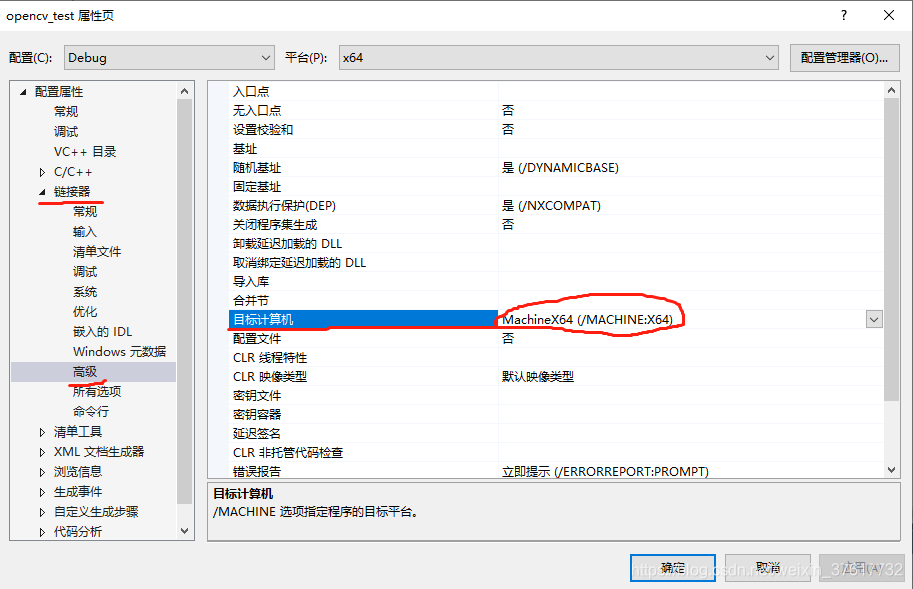
- 在工程属性下"VC++ 目录"下编辑“可执行目录”和“库目录”,按以下两张照片的红框中修改配置。其中第二张照片中的lib库是静态库,bin是编译好的库。


- 在工程属性下"链接器"下编辑“输入”,按以下一张照片的红框中修改配置。其中,如果是debug,就添加“opencv_world440d.lib”;如果是“Release”,就添加“opencv_world440.lib”。

- 大功告成,新建.cpp文件,复制以下代码测试。
测试是否安装成功的代码:
#include <opencv2/core.hpp>
#include <opencv2/imgcodecs.hpp>
#include <opencv2/highgui.hpp>
#include <iostream>

using namespace cv;
using namespace std;

int main(int argc, char** argv)
{


	String filename = "../test.jpg";

	Mat image;
	image = imread(filename, IMREAD_COLOR); // Read the file

	if (image.empty()) // Check for invalid input
	{


		cout << "Could not open or find the image" << std::endl;
		return -1;
	}

	namedWindow("Display window", WINDOW_AUTOSIZE); // Create a window for display.
	imshow("Display window", image); // Show our image inside it.

	waitKey(5100); // Wait for a keystroke in the window
	return 0;
}
如果能成功运行加载图片(图片路径要对),就说明配置成功。