文章目录
CentOS 7 - 安装 FastDFS
环境信息
操作系统
# cat /etc/centos-release
CentOS Linux release 7.7.1908 (Core)
# uname --kernel-release
3.10.0-1062.el7.x86_64
Git 版本:
# git --version
git version 2.27.0
准备
如果当初你在安装 CentOS 7 的时候,采用的是最小安装方式,那么你可能需要安装这两个工具:GCC 和 Wget。
GCC - C & C++ 编译器
在安装 Git 之前,需要确认系统中是否已经安装 GCC。可以通过执行命令 gcc --version 查看版本信息,判断是否已经安装 GCC。
如果你的操作系统中没有预装 GCC,可以执行命令 yum install --assumeyes gcc 安装 GCC。
Git
我们需要使用 Git 克隆 FastDFS 源码,需要提前准备。参考:CentOS 7 - 安装 Git
Perl
重新编译 FastDFS 的过程需要 Perl 的支持,可以执行命令 yum install --assumeyes perl 安装。
安装 FastDFS
下载、安装 libfastcommon
进入 /usr/local 目录,执行以下命令下载 libfastcommon 源码:
# git clone https://gitee.com/fastdfs100/libfastcommon.git
下载完成之后,进入 libfastcommon 源码所在的文件夹,执行以下命令切换到版本 V1.0.43:
# git checkout V1.0.43
最后,执行以下命令安装 libfastcommon:
# ./make.sh clean && ./make.sh && ./make.sh install
下载、安装 FastDFS
进入 /usr/local 目录,执行以下命令下载 FastDFS 源码:
# git clone https://gitee.com/fastdfs100/fastdfs.git
下载完成之后,进入 FastDFS 源码所在的文件夹,执行以下命令切换到版本 V6.06:
# git checkout V6.06
最后,执行以下命令安装 FastDFS:
# ./make.sh clean && ./make.sh && ./make.sh install
修改配置文件
安装完成之后,执行以下命令,即 fastdfs 源码包中 setup.sh 文件,其作用是将 fastdfs/conf 目录中的配置文件复制到 /etc/fdfs 目录:
# ./setup.sh /etc/fdfs/
修改 tracker.conf 配置文件
进入 /etc/fdfs 目录,编辑 tracker.conf 配置文件。
主要有两个参数需要修改,一个是 tracker 服务器的端口,另一个是存储数据和日志文件的基础路径:
# the tracker server port
port = 22122

# the base path to store data and log files
base_path = /home/yuqing/fastdfs
对于这两个参数,我均保持默认值,改来改去其实怪麻烦的。
注意:在启动 tracker 服务器之前需要创建好基础路径(base_path)所指定目录。
修改 storage.conf 配置文件
进入 /etc/fdfs 目录,编辑 storage.conf 配置文件。
主要有四个参数需要修改:
# the name of the group this storage server belongs to
#
# comment or remove this item for fetching from tracker server,
# in this case, use_storage_id must set to true in tracker.conf,
# and storage_ids.conf must be configured correctly.
group_name = group1

# the base path to store data and log files
# NOTE: the binlog files maybe are large, make sure
#       the base path has enough disk space,
#       eg. the disk free space should > 50GB
base_path = /home/yuqing/fastdfs

# store_path#, based on 0, to configure the store paths to store files
# if store_path0 not exists, it's value is base_path (NOT recommended)
# the paths must be exist.
#
# IMPORTANT NOTE:
#       the store paths' order is very important, don't mess up!!!
#       the base_path should be independent (different) of the store paths

store_path0 = /home/yuqing/fastdfs
#store_path1 = /home/yuqing/fastdfs2

# tracker_server can ocur more than once for multi tracker servers.
# the value format of tracker_server is "HOST:PORT",
#   the HOST can be hostname or ip address,
#   and the HOST can be dual IPs or hostnames seperated by comma,
#   the dual IPS must be an inner (intranet) IP and an outer (extranet) IP,
#   or two different types of inner (intranet) IPs.
#   for example: 192.168.2.100,122.244.141.46:22122
#   another eg.: 192.168.1.10,172.17.4.21:22122

tracker_server = 192.168.88.173:22122 // 配置 tracker 服务器所在主机的 IP,此处的端口需与 tracker.conf 配置文件中的端口一致
#tracker_server = 192.168.209.122:22122 // 因为只有一台 tracker 服务器,所以将这个参数注释。
对于这四个参数,我只修改了 tracker_server 的地址,其他均保持默认值。
注意:在启动 storage 服务器之前需要创建好基础路径(base_path)所指定目录。
修改 client.conf 配置文件
进入 /etc/fdfs 目录,编辑 client.conf 配置文件。
主要有两个参数需要修改:
# the base path to store log files
base_path = /home/yuqing/fastdfs

# tracker_server can ocur more than once for multi tracker servers.
# the value format of tracker_server is "HOST:PORT",
#   the HOST can be hostname or ip address,
#   and the HOST can be dual IPs or hostnames seperated by comma,
#   the dual IPS must be an inner (intranet) IP and an outer (extranet) IP,
#   or two different types of inner (intranet) IPs.
#   for example: 192.168.2.100,122.244.141.46:22122
#   another eg.: 192.168.1.10,172.17.4.21:22122

tracker_server = 192.168.88.173:22122
#tracker_server = 192.168.0.197:22122
对于这两个参数,我只修改了 tracker_server 的地址,其他均保持默认值。
启动 tracker 与 storage 服务器
分别执行以下命令启动 tracker 与 storage 服务器。
# /usr/bin/fdfs_trackerd /etc/fdfs/tracker.conf restart
# /usr/bin/fdfs_storaged /etc/fdfs/storage.conf restart
执行以上命令之后,再执行以下命令查看执行结果。如果输出如下信息,则两者均启动成功:
# ps -ef | grep fdfs
root       2450      1  0 22:00 ?        00:00:00 /usr/bin/fdfs_trackerd /etc/fdfs/tracker.conf restart
root       2459      1 59 22:00 ?        00:00:10 /usr/bin/fdfs_storaged /etc/fdfs/storage.conf restart
root       2484   1330  0 22:01 pts/0    00:00:00 grep --color=auto fdfs
运行监控程序
执行以下命令可以运行监控程序:
# /usr/bin/fdfs_monitor /etc/fdfs/client.conf
[2020-07-24 22:08:16] DEBUG - base_path=/home/yuqing/fastdfs, connect_timeout=5, network_timeout=60, tracker_server_count=1, anti_steal_token=0, anti_steal_secret_key length=0, use_connection_pool=0, g_connection_pool_max_idle_time=3600s, use_storage_id=0, storage server id count: 0

server_count=1, server_index=0

tracker server is 192.168.88.173:22122

group count: 1

Group 1:
group name = group1
disk total space = 48,100 MB
disk free space = 46,422 MB
trunk free space = 0 MB
storage server count = 1
active server count = 1
storage server port = 23000
storage HTTP port = 8888
store path count = 1
subdir count per path = 256
current write server index = 0
current trunk file id = 0

	Storage 1:
		id = 192.168.88.173
		ip_addr = 192.168.88.173  ACTIVE
		http domain =
		version = 6.06
		join time = 2020-07-24 22:00:48
		up time = 2020-07-24 22:00:48
		total storage = 48,100 MB
		free storage = 46,422 MB
		upload priority = 10
		store_path_count = 1
		subdir_count_per_path = 256
		storage_port = 23000
		storage_http_port = 8888
		current_write_path = 0
		source storage id =
		if_trunk_server = 0
		connection.alloc_count = 256
		connection.current_count = 0
		connection.max_count = 0
		total_upload_count = 0
		success_upload_count = 0
		total_append_count = 0
		success_append_count = 0
		total_modify_count = 0
		success_modify_count = 0
		total_truncate_count = 0
		success_truncate_count = 0
		total_set_meta_count = 0
		success_set_meta_count = 0
		total_delete_count = 0
		success_delete_count = 0
		total_download_count = 0
		success_download_count = 0
		total_get_meta_count = 0
		success_get_meta_count = 0
		total_create_link_count = 0
		success_create_link_count = 0
		total_delete_link_count = 0
		success_delete_link_count = 0
		total_upload_bytes = 0
		success_upload_bytes = 0
		total_append_bytes = 0
		success_append_bytes = 0
		total_modify_bytes = 0
		success_modify_bytes = 0
		stotal_download_bytes = 0
		success_download_bytes = 0
		total_sync_in_bytes = 0
		success_sync_in_bytes = 0
		total_sync_out_bytes = 0
		success_sync_out_bytes = 0
		total_file_open_count = 0
		success_file_open_count = 0
		total_file_read_count = 0
		success_file_read_count = 0
		total_file_write_count = 0
		success_file_write_count = 0
		last_heart_beat_time = 2020-07-24 22:07:59
		last_source_update = 1970-01-01 08:00:00
		last_sync_update = 1970-01-01 08:00:00
		last_synced_timestamp = 1970-01-01 08:00:00
运行测试程序
在运行测试程序之前,我们先简单地看看 /home/yuqing/fastdfs/data/ 目录:
# ls /home/yuqing/fastdfs/data/
00  08  10  18  20  28  30  38  40  48  50  58  60  68  70  78  80  88  90  98  A0  A8  B0  B8  C0  C8  D0  D8  E0  E8  F0  F8                 FE
01  09  11  19  21  29  31  39  41  49  51  59  61  69  71  79  81  89  91  99  A1  A9  B1  B9  C1  C9  D1  D9  E1  E9  F1  F9                 FF
02  0A  12  1A  22  2A  32  3A  42  4A  52  5A  62  6A  72  7A  82  8A  92  9A  A2  AA  B2  BA  C2  CA  D2  DA  E2  EA  F2  FA                 storage_changelog.dat
03  0B  13  1B  23  2B  33  3B  43  4B  53  5B  63  6B  73  7B  83  8B  93  9B  A3  AB  B3  BB  C3  CB  D3  DB  E3  EB  F3  FB                 storage_groups_new.dat
04  0C  14  1C  24  2C  34  3C  44  4C  54  5C  64  6C  74  7C  84  8C  94  9C  A4  AC  B4  BC  C4  CC  D4  DC  E4  EC  F4  FC                 storage_servers_new.dat
05  0D  15  1D  25  2D  35  3D  45  4D  55  5D  65  6D  75  7D  85  8D  95  9D  A5  AD  B5  BD  C5  CD  D5  DD  E5  ED  F5  FD                 storage_stat.dat
06  0E  16  1E  26  2E  36  3E  46  4E  56  5E  66  6E  76  7E  86  8E  96  9E  A6  AE  B6  BE  C6  CE  D6  DE  E6  EE  F6  fdfs_storaged.pid  storage_sync_timestamp.dat
07  0F  17  1F  27  2F  37  3F  47  4F  57  5F  67  6F  77  7F  87  8F  97  9F  A7  AF  B7  BF  C7  CF  D7  DF  E7  EF  F7  fdfs_trackerd.pid  sync
接下来,我们将运行测试程序,将一个文件上传到 /home/yuqing/fastdfs/data/ 目录中。
执行以下命令上传文件:
# /usr/bin/fdfs_test /etc/fdfs/client.conf upload /usr/include/stdlib.h
This is FastDFS client test program v6.06

Copyright (C) 2008, Happy Fish / YuQing

FastDFS may be copied only under the terms of the GNU General
Public License V3, which may be found in the FastDFS source kit.
Please visit the FastDFS Home Page http://www.fastken.com/
for more detail.

[2020-07-24 22:14:47] DEBUG - base_path=/home/yuqing/fastdfs, connect_timeout=5, network_timeout=60, tracker_server_count=1, anti_steal_token=0, anti_steal_secret_key length=0, use_connection_pool=0, g_connection_pool_max_idle_time=3600s, use_storage_id=0, storage server id count: 0

tracker_query_storage_store_list_without_group:
	server 1. group_name=, ip_addr=192.168.88.173, port=23000

group_name=group1, ip_addr=192.168.88.173, port=23000
storage_upload_by_filename
group_name=group1, remote_filename=M00/00/00/wKhYrV8a7NeAG3gVAACE7hQ7S5c92169.h
source ip address: 192.168.88.173
file timestamp=2020-07-24 22:14:47
file size=34030
file crc32=339430295
example file url: http://192.168.88.173/group1/M00/00/00/wKhYrV8a7NeAG3gVAACE7hQ7S5c92169.h
storage_upload_slave_by_filename
group_name=group1, remote_filename=M00/00/00/wKhYrV8a7NeAG3gVAACE7hQ7S5c92169_big.h
source ip address: 192.168.88.173
file timestamp=2020-07-24 22:14:47
file size=34030
file crc32=339430295
example file url: http://192.168.88.173/group1/M00/00/00/wKhYrV8a7NeAG3gVAACE7hQ7S5c92169_big.h
根据第 18 行 group_name=group1, remote_filename=M00/00/00/wKhYrV8a7NeAG3gVAACE7hQ7S5c92169.h,可知该文件上传到 /home/yuqing/fastdfs/data/00/00/ 目录中,新文件名为 wKhYrV8a7NeAG3gVAACE7hQ7S5c92169.h:
# ll /home/yuqing/fastdfs/data/00/00/
total 80
-rw-r--r--. 1 root root 34030 Jul 24 22:14 wKhYrV8a7NeAG3gVAACE7hQ7S5c92169_big.h
-rw-r--r--. 1 root root    49 Jul 24 22:14 wKhYrV8a7NeAG3gVAACE7hQ7S5c92169_big.h-m
-rw-r--r--. 1 root root 34030 Jul 24 22:14 wKhYrV8a7NeAG3gVAACE7hQ7S5c92169.h
-rw-r--r--. 1 root root    49 Jul 24 22:14 wKhYrV8a7NeAG3gVAACE7hQ7S5c92169.h-m
Java 上传文件
在使用 Java 上传文件到 FastDFS 之前,需要开放对应端口,否则无法访问。
开放端口
需要开放两个端口,一个是 tracker 服务器的 22122 端口,另一个是 storage 服务器的 23000 端口。
注意:如果你修改了配置文件的端口,那么需要开放对应的端口。
查看防火墙的状态:
# systemctl status firewalld
● firewalld.service - firewalld - dynamic firewall daemon
   Loaded: loaded (/usr/lib/systemd/system/firewalld.service; enabled; vendor preset: enabled)
   Active: active (running) since Fri 2020-07-24 00:15:12 CST; 3min 29s ago
     Docs: man:firewalld(1)
 Main PID: 743 (firewalld)
   CGroup: /system.slice/firewalld.service
           └─743 /usr/bin/python2 -Es /usr/sbin/firewalld --nofork --nopid

Jul 24 00:15:12 localhost.localdomain systemd[1]: Starting firewalld - dynamic firewall .....
Jul 24 00:15:12 localhost.localdomain systemd[1]: Started firewalld - dynamic firewall d...n.
Hint: Some lines were ellipsized, use -l to show in full.
如果防火墙没有启动,使用以下命令启动防火墙:
# systemctl start firewalld
以下是开放 22122 端口的操作步骤:
# firewall-cmd --get-active-zones // 查看当前激活的区域
public
  interfaces: ens33
# firewall-cmd --zone=public --add-port=22122/tcp --permanent // 永久性地添加 22122 端口规则到指定的区域
# firewall-cmd --zone=public --add-port=23000/tcp --permanent
success
# firewall-cmd --reload // 重新加载防火墙
success
# firewall-cmd --list-all // 查看端口是否添加到已经激活的区域规则中
public (active)
  target: default
  icmp-block-inversion: no
  interfaces: ens33
  sources:
  services: dhcpv6-client http ssh
  ports: 22122/tcp 23000/tcp
  protocols:
  masquerade: no
  forward-ports:
  source-ports:
  icmp-blocks:
  rich rules:
Java 程序
新建 Maven 项目,添加依赖:
<!-- https://mvnrepository.com/artifact/net.oschina.zcx7878/fastdfs-client-java -->
<dependency>
    <groupId>net.oschina.zcx7878</groupId>
    <artifactId>fastdfs-client-java</artifactId>
    <version>1.27.0.0</version>
</dependency>
在项目的 src/main/resources 目录下新建 fastdfs-client.properties 配置文件:
## fastdfs-client.properties

fastdfs.connect_timeout_in_seconds = 5
fastdfs.network_timeout_in_seconds = 30

fastdfs.charset = UTF-8

fastdfs.http_anti_steal_token = false
fastdfs.http_secret_key = FastDFS1234567890
fastdfs.http_tracker_http_port = 80

fastdfs.tracker_servers = 192.168.88.173:22122 // tracker 服务器的 IP:PORT

## Whether to open the connection pool, if not, create a new connection every time
fastdfs.connection_pool.enabled = true

## max_count_per_entry: max connection count per host:port , 0 is not limit
fastdfs.connection_pool.max_count_per_entry = 500

## connections whose the idle time exceeds this time will be closed, unit: second, default value is 3600
fastdfs.connection_pool.max_idle_time = 3600

## Maximum waiting time when the maximum number of connections is reached, unit: millisecond, default value is 1000
fastdfs.connection_pool.max_wait_time_in_ms = 1000
上传文件示例:
import java.io.IOException;

import org.csource.common.MyException;
import org.csource.fastdfs.ClientGlobal;
import org.csource.fastdfs.StorageClient;
import org.csource.fastdfs.StorageServer;
import org.csource.fastdfs.TrackerClient;
import org.csource.fastdfs.TrackerServer;

public class Test {


    public static void main(String[] args) {


        try {


            ClientGlobal.initByProperties("fastdfs-client.properties");
            System.out.println("ClientGlobal.configInfo(): " + ClientGlobal.configInfo());
        } catch (IOException | MyException e) {


            e.printStackTrace();
        }

        TrackerClient trackerClient = new TrackerClient();
        TrackerServer trackerServer = null;

        try {


            trackerServer = trackerClient.getConnection();
        } catch (IOException e) {


            e.printStackTrace();
        }

        StorageServer storageServer = null;
        StorageClient storageClient = new StorageClient(trackerServer, storageServer);

        String[] fileIds = null;
        try {


            fileIds = storageClient.upload_file("G:\\Pictures\\1\\1.jpg", "jpg", null); // 上传文件
        } catch (IOException | MyException e) {


            e.printStackTrace();
        }

        for (String fileId : fileIds) {


            System.out.println(fileId);
        }
    }
}
控制台输出:
ClientGlobal.configInfo(): {
  g_connect_timeout(ms) = 5000
  g_network_timeout(ms) = 30000
  g_charset = UTF-8
  g_anti_steal_token = false
  g_secret_key = FastDFS1234567890
  g_tracker_http_port = 80
  trackerServers = 192.168.88.173:22122
}
group1
M00/00/00/wKhYrV8boqOAW5IyAAKGcx2m4cI902.jpg
从控制台输出的信息得知上传的文件存储在服务器的 /home/yuqing/fastdfs/data/00/00/ 目录:
# ll /home/yuqing/fastdfs/data/00/00/
total 244
-rw-r--r--. 1 root root  34030 Jul 24 22:14 wKhYrV8a7NeAG3gVAACE7hQ7S5c92169_big.h
-rw-r--r--. 1 root root     49 Jul 24 22:14 wKhYrV8a7NeAG3gVAACE7hQ7S5c92169_big.h-m
-rw-r--r--. 1 root root  34030 Jul 24 22:14 wKhYrV8a7NeAG3gVAACE7hQ7S5c92169.h
-rw-r--r--. 1 root root     49 Jul 24 22:14 wKhYrV8a7NeAG3gVAACE7hQ7S5c92169.h-m
-rw-r--r--. 1 root root 165491 Jul 25 11:10 wKhYrV8boqOAW5IyAAKGcx2m4cI902.jpg
安装 FastDFS-Nginx 模块
在安装 FastDFS-Nginx 模块之前,需要安装 Nginx,参考:CentOS 7 - 从源码安装 Nginx
下载 FastDFS-Nginx 模块
进入 /usr/local 目录,执行以下命令克隆 FastDFS-Nginx 模块:
# git clone https://gitee.com/fastdfs100/fastdfs-nginx-module.git
克隆完成之后,进入该模块源码目录中,执行以下命令,切换到版本 V1.22:
# git checkout V1.22
安装 FastDFS-Nginx 模块
进入 Nginx 源码目录,依次执行以下命令配置、编译和安装 FastDFS-Nginx 模块:
# ./configure --add-module=/usr/local/fastdfs-nginx-module/src/
# make
# make install
注意:如果你没有将 FastDFS-Nginx 模块放在 /usr/local/ 目录下,那么请将 /usr/local/ 改为 FastDFS-Nginx 模块所在目录。
修改 Nginx 配置文件
如果你采用默认方式安装 Nginx,那么其配置文件的位置是 /usr/local/nginx/conf/nginx.conf。
修改 nginx.conf,添加如下内容:
server {
		location ~/group([0-9]) {
            root /home/yuqing/fastdfs/data;
            ngx_fastdfs_module;
        }
}
修改 mod_fastdfs.conf 配置文件
将 /usr/local/fastdfs-nginx-module/src/mod_fastdfs.conf 配置文件复制到 /etc/fdfs 目录中。
然后编辑 /etc/fdfs/mod_fastdfs.conf 文件:
# FastDFS tracker_server can ocur more than once, and tracker_server format is
#  "host:port", host can be hostname or ip address
# valid only when load_fdfs_parameters_from_tracker is true
tracker_server=192.168.88.173:22122

# the port of the local storage server
# the default value is 23000
storage_server_port=23000

# the group name of the local storage server
group_name=group1

# if the url / uri including the group name
# set to false when uri like /M00/00/00/xxx
# set to true when uri like ${group_name}/M00/00/00/xxx, such as group1/M00/xxx
# default value is false
url_have_group_name = true

# store_path#, based 0, if store_path0 not exists, it's value is base_path
# the paths must be exist
# must same as storage.conf
store_path0=/home/yuqing/fastdfs
#store_path1=/home/yuqing/fastdfs1
主要修改五个点,第一个是 tracker 服务器的地址;第二个是 storage 服务器的端口;第三个是 group_name,这个和 storage.conf 配置文件中的保持一致;第四个是 url_have_group_name;第五个是 store_path0 文件存储路径。
启动 Nginx
修改完成之后,进入 Nginx 安装目录,启动 Nginx:
# ./sbin/nginx
ngx_http_fastdfs_set pid=11763
访问文件
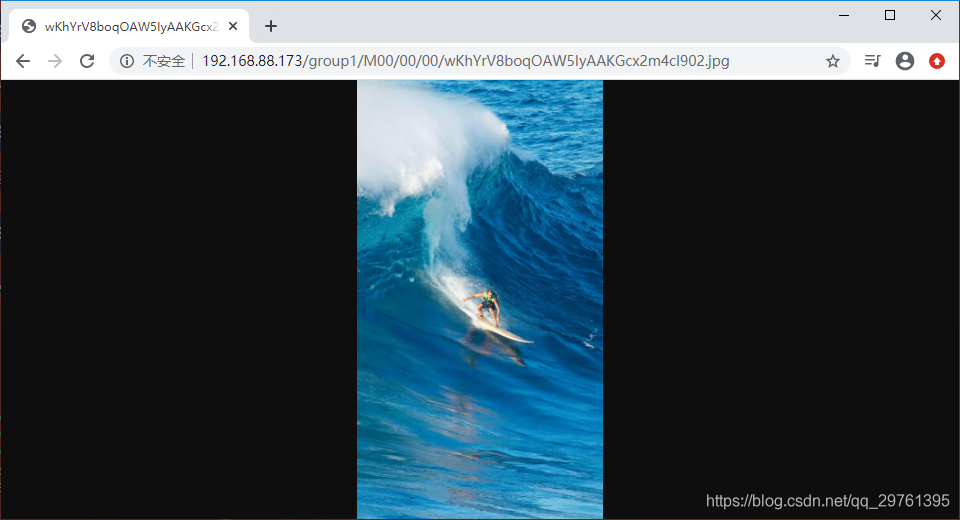
现在,一切准备就绪。让我们一起访问之前使用 Java 程序上传的图片。
通过浏览器访问 http://192.168.88.173/文件 ID,即可访问之前上传的文件:
Java 下载文件
下载文件和上传文件使用同一个工程:
import java.io.File;
import java.io.FileOutputStream;
import java.io.IOException;

import org.csource.common.MyException;
import org.csource.fastdfs.ClientGlobal;
import org.csource.fastdfs.StorageClient1;
import org.csource.fastdfs.StorageServer;
import org.csource.fastdfs.TrackerClient;
import org.csource.fastdfs.TrackerServer;

public class DownloadTest {


    public static void main(String[] args) throws IOException, MyException {


        ClientGlobal.initByProperties("fastdfs-client.properties");
        System.out.println("ClientGlobal.configInfo(): " + ClientGlobal.configInfo());

        TrackerClient trackerClient = new TrackerClient();
        TrackerServer trackerServer = null;

        trackerServer = trackerClient.getConnection();

        StorageServer storageServer = null;
        StorageClient1 storageClient = new StorageClient1(trackerServer, storageServer);

        byte[] bytes = storageClient.download_file1("group1/M00/00/00/wKhYrV8boqOAW5IyAAKGcx2m4cI902.jpg"); // 文件 ID

        FileOutputStream fos = new FileOutputStream(new File("G:\\Pictures\\1\\1-download.jpg")); // 下载之后的存放位置
        fos.write(bytes);
        fos.close();
    }
}
FastDFS 开启令牌校验,防止盗链
编辑 /etc/fdfs/http.conf 文件,有三项需要修改:
http.anti_steal.check_token:防盗链校验令牌,true 表示开启,false 表示禁用;http.anti_steal.secret_key:防盗链安全密钥,客户端访问时携带的;http.anti_steal.token_check_fail:防盗链令牌校验失败返回的文件(页面),如果不需要可以注释掉,则返回默认的。
# default value is false (0)
http.anti_steal.check_token = true

# secret key to generate anti-steal token
# this parameter must be set when http.anti_steal.check_token set to true
# the length of the secret key should not exceed 128 bytes
http.anti_steal.secret_key = FastDFS1234567890

# return the content of the file when check token fail
# default value is empty (no file sepecified)
#http.anti_steal.token_check_fail = /home/yuqing/fastdfs/conf/anti-steal.jpg
修改完成之后,重新加载 Nginx:
/usr/local/nginx/sbin/nginx -s reload
ngx_http_fastdfs_set pid=2166
现在,我们已经无法直接访问 FastDFS 上的文件:

需要提供令牌才能访问:
import java.io.UnsupportedEncodingException;
import java.security.NoSuchAlgorithmException;
import java.time.Instant;

import org.csource.common.MyException;
import org.csource.fastdfs.ProtoCommon;

/**
 * <p> 获取访问令牌
 *
 */
public class TokenTest {


    public static void main(String[] args) throws UnsupportedEncodingException, NoSuchAlgorithmException, MyException {


        long t0 = System.currentTimeMillis();

        String remoteFilename = "M00/00/00/wKhYnl9tToCAHdtfAAKGcx2m4cI102.jpg";
        String fileId = "/group1/" + remoteFilename;

        long ts = Instant.now().getEpochSecond();
        String secretKey = "FastDFS1234567890"; // 防盗链安全密钥
        String token = ProtoCommon
                .getToken(remoteFilename, (int) ts, secretKey); // 获取令牌

        StringBuilder url = new StringBuilder();
        url.append("http://192.168.88.158")
            .append(fileId)
            .append("?token=" + token)
            .append("&ts=" + ts);

        System.out.println(url);
        System.out.println(System.currentTimeMillis() - t0);
    }
}
运行程序,根据控制台输出的 URL 访问:

参考
https://github.com/happyfish100/fastdfs/blob/master/INSTALL
02.FastDFS 安装(Tracker 和 Storage)
fastDFS安装时,./make.sh编译时出错找不到./make.sh: line 99: perl: command not found