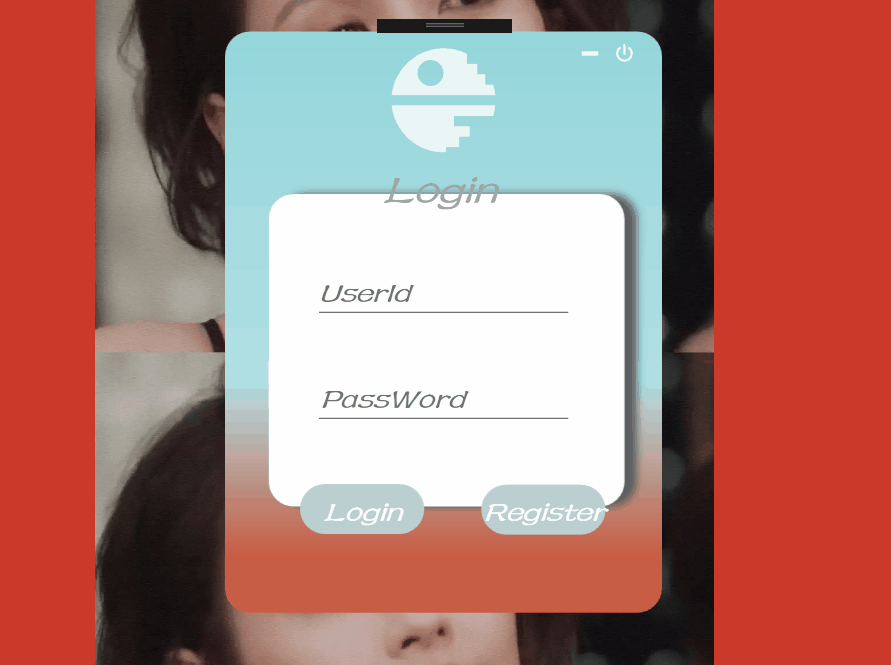
效果:
窗体移动:
private void windowsMove(object sender, MouseEventArgs e)
        {


            if (e.LeftButton == MouseButtonState.Pressed)
            {


                try
                {


                    DragMove();
                }
                catch
                {


                };


            }
窗体背景:
这个是用的矩形框,所以背景是
 <Rectangle Height="465" VerticalAlignment="Top" Margin="0,10,0.4,0" RadiusX="20" RadiusY="20"  >
            <Rectangle.Fill>
                <LinearGradientBrush EndPoint="0.5,1" StartPoint="0.5,0">
                    <GradientStop Color="#94d6da" />

                    <GradientStop Color="#afdfe4" Offset="0.6"/>

                    <GradientStop Color="#c85d44" Offset="0.9"/>

                </LinearGradientBrush>

            </Rectangle.Fill>

        </Rectangle>
主要是通过LinearGradientBrush EndPoint=“0.5,1” StartPoint="0.5,0"这句话来实现的。后面的GradientStop color来设置不同的颜色,来实现渐变效果。
输入框:
输入框引用domo里面的样式即可。前面一篇博客写了怎么使用Material Desgin.在基本工作做完之后,选择自己想引用的样式即可。
<PasswordBox x:Name="FloatingPasswordBox" materialDesign:HintAssist.Hint="PassWord" materialDesign:HintAssist.Foreground="Green" materialDesign:TextFieldAssist.UnderlineBrush="Green" Style="{StaticResource MaterialDesignFloatingHintPasswordBox}" VerticalAlignment="Top" HorizontalAlignment="Center" Margin="75,265,75.4,0" Width=" 200" Height="55" FontFamily="FZshuTi" FontSize="24" FontStyle="Italic" FontWeight="Black" />
例如password框,里面的style就是本次使用的样式,其他属性可以通过自己的需求写。
阴影:
因想实现一个突出的效果,可以使用阴影效果
         <Rectangle.Effect>
                <DropShadowEffect Color="#a1a3a6" Direction="0" RenderingBias="Quality" BlurRadius="10" ShadowDepth="10"  />
            </Rectangle.Effect>
当前使用的控件是rectangle控件。如果是其他控件只需要将rectangle替换成当前实际使用的控件类型即可