前言
传统的基于C/S架构的自动化监控系统随着web技术的发展也日新月异,目前比较常见的做法是监控页面图作为svg嵌入web浏览器,通过浏览器监控刀闸状态和开关位置,本文提供两种实现方法
方法1:较为繁琐,也是一开始用的方法,SVG文件放在外部,通过http服务启动后可以在浏览器访问,antd做路由拦截。
方法2:后来发现,直接把svg文件丢到/public,直接引用即可访问。
版本如下:
Ant Design Pro: 脚手架2.0
Python:2.7.16
SVG文件在外部文件夹
路由和菜单配置
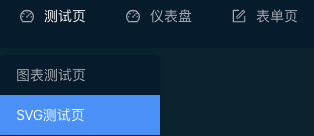
路由和菜单配置:
      // 测试页面
      {


        path: '/test',
        name: '测试页',
        icon: 'dashboard',
        routes: [
            {


            path: '/test/chartTest',
            name: '图表测试页',
            component: './_Test/ChartTest',
          },
          {


            path: '/test/svgTest',   //访问路径,输入该路径切换到SvgDisplay页面
            name: 'SVG测试页',
            component: './_Test/SvgDisplay',  //SvgDisplay是page名称
          },
        ],
      },
效果:
代理配置
把/svgTest进行拦截,切换到本地存放svg文件的路径,http服务端口配成9000
  //后端代理配置
  proxy: {


    '/api': {


      target: 'http://localhost:8080/',
      changeOrigin: true,
      // pathRewrite: { '^/api': '' }, // 把所有请求的/api替换为‘’ 空字符串
    },
    '/svgTest': {


      target: 'http://localhost:9000', //target是api服务器地址
      changeOrigin: true, //这个是是否替换这里一定要写true
      pathRewrite: {


        //这个是个正则匹配
        '^/svgTest': '/',
      },
    },
  },
页面和组件配置
SvgDisplay页面
  render() {


    const svgPath = 'furong/frzjx.svg';   //svg文件存放路径

    return (
      <Fragment>
        <div className={

    styles.rightWrap}>
          {


            svgPath ? <Svg   //Svg组件
              svgPath={

    svgPath}
            /> : null
          }
        </div>
      </Fragment>
    );
  }
Svg组件
  render() {


    const {

     svgPath } = this.props;

    return (
      <div className={

    styles.layout}>
        <embed
          id="svg"
          defer
          type="image/svg+xml"
          width="100%"
          height="1000px"
          src={

    `/svgTest/${

      svgPath}`}   //拦截后进入svg文件目录
          // onLoad={this.onLoad()}
        />
      </div>
    );
  }
启动http服务
本地新建一个文件夹,在文件夹内新建文件夹furong,存放frzjx.svg文件,然后通过Python启动9000端口的http服务,如下图,在furong文件夹上一层目录prs3000中启动http服务。

SVG文件在public文件夹(此种方法比较简单)
路径

引用路径文件
  render() {


    const svgPath = '/svg/frzjx.svg';  // 直接引用public文件夹下文件
    return (
      <Fragment>
        <div className={

    styles.rightWrap}>
          <Svg
            path={

    svgPath}
          />
        </div>
      </Fragment>
    );
  }
}
最终效果
