prepareEnvironment
ConfigurableEnvironment environment = prepareEnvironment(listeners, applicationArguments);
private ConfigurableEnvironment prepareEnvironment(SpringApplicationRunListeners listeners,
ApplicationArguments applicationArguments) {
// Create and configure the environment
ConfigurableEnvironment environment = getOrCreateEnvironment();
configureEnvironment(environment, applicationArguments.getSourceArgs());
ConfigurationPropertySources.attach(environment);
listeners.environmentPrepared(environment);
bindToSpringApplication(environment);
if (!this.isCustomEnvironment) {
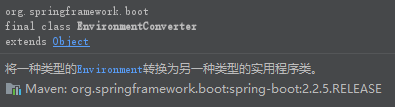
environment = new EnvironmentConverter(getClassLoader()).convertEnvironmentIfNecessary(environment,
deduceEnvironmentClass());
}
ConfigurationPropertySources.attach(environment);
return environment;
}
通过开启的监听器和默认参数准备运行环境,感觉这里有东西,虽然代码只有几行,里面肯定内涵乾坤,一行行慢慢看。
getOrCreateEnvironment
private ConfigurableEnvironment getOrCreateEnvironment() {
if (this.environment != null) {
return this.environment;
}
switch (this.webApplicationType) {
case SERVLET:
return new StandardServletEnvironment();
case REACTIVE:
return new StandardReactiveWebEnvironment();
default:
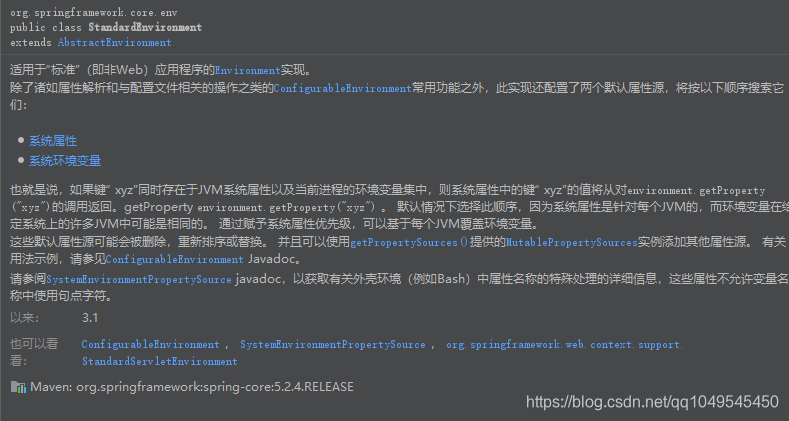
return new StandardEnvironment();
}
}
这里可以看到,先前设置的应用类型有用了,我记得先前debug看到我们当前这个应用的类型应该是SERVLET。
ConfigurableEnvironment
在看看本文的猪脚是个什么东西:
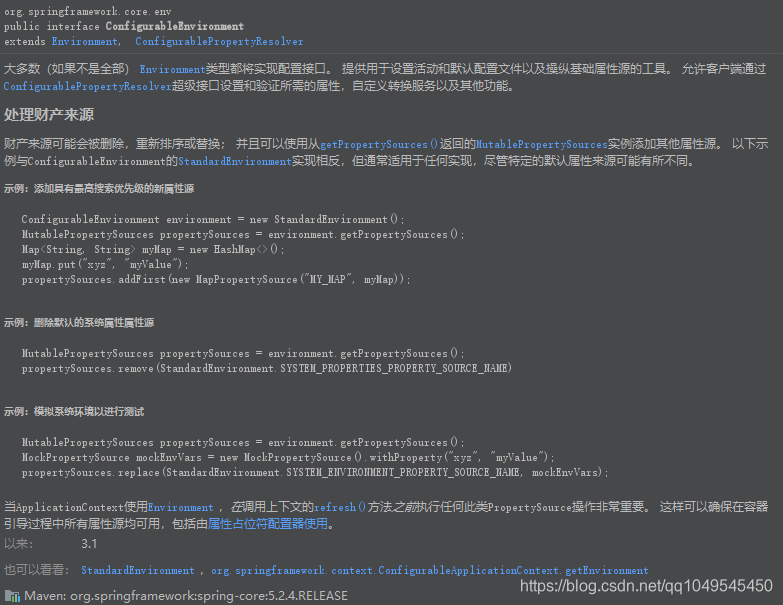
很复杂,同时感觉很强大,读的一知半解,不过无所谓,希望下回回来再看的时候了然于心。翻译里面的“处理财产来源”原文是“Manipulating property sources”,应该是‘操纵属性源"的意思吧。
类名是ConfigurableEnvironment,应该就是说这个环境是可配置的的,和这里的操纵对应的吧。
好了,接下来看本文要将的三种环境吧:
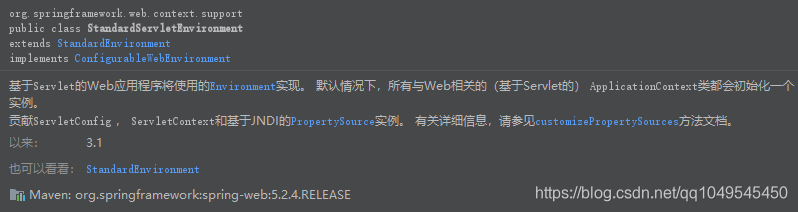
SERVLET——StandardServletEnvironment
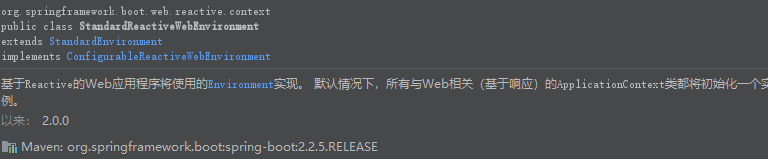
REACTIVE——StandardReactiveWebEnvironment
default——StandardEnvironment
本demo中构建的是StandardServletEnvironment,单独开了篇文章描述了StandardServletEnvironment的实例化过程:跟我一起阅读SpringBoot源码(四)——StandardServletEnvironment。
configureEnvironment
获取到环境后,对环境进行配置,
/**
	 * 模板方法以该顺序委派给configurePropertySources(ConfigurableEnvironment, String[])和configureProfiles(ConfigurableEnvironment, String[]) 。 重写此方法以完全控制环境自定义,或者重写上述方法之一以分别对属性源或配置文件进行细粒度控制。
	 * @param environment this application's environment
	 * @param args arguments passed to the {@code run} method
	 * @see #configureProfiles(ConfigurableEnvironment, String[])
	 * @see #configurePropertySources(ConfigurableEnvironment, String[])
	 */
protected void configureEnvironment(ConfigurableEnvironment environment, String[] args) {
		if (this.addConversionService) {
			ConversionService conversionService = ApplicationConversionService.getSharedInstance();
			environment.setConversionService((ConfigurableConversionService) conversionService);
		}
		configurePropertySources(environment, args);
		configureProfiles(environment, args);
	}
addConversionService默认是true,那就先看看ConversionService 是什么,看在往环境中配置什么。
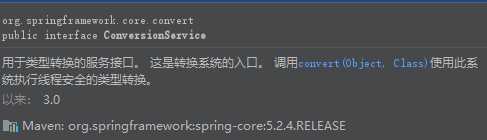
ConversionService 是一个类型转换服务接口,并且还是线程安全的。看看接口的实现类有哪些。
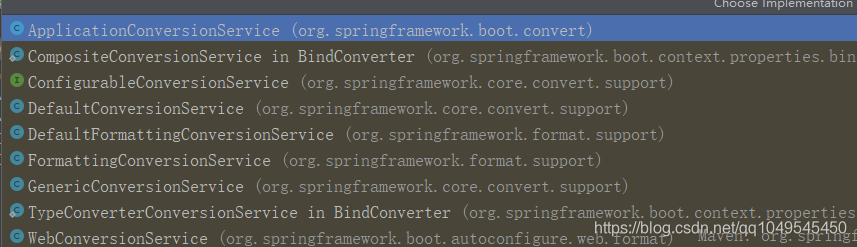
这里貌似用的是ApplicationConversionService,这里实例化ConversionService的过程创建了一个实例来管理程序用到的一些类型转换服务,就不在这里说了,另开一篇文章。跟我一起阅读SpringBoot源码(五)——ConversionService
configurePropertySources
接着来看看配置属性源的过程:
/**
	 * 在此应用程序的环境中添加,删除或重新排序任何PropertySource 。
	 * @param environment this application's environment
	 * @param args arguments passed to the {@code run} method
	 * @see #configureEnvironment(ConfigurableEnvironment, String[])
	 */
	protected void configurePropertySources(ConfigurableEnvironment environment, String[] args) {
		MutablePropertySources sources = environment.getPropertySources();
		//看看有没有默认配置(默认是null),如果有就把默认配置加到先前获取的配置上,根据规则,此时的配置优先级高于先前的配置。
		if (this.defaultProperties != null && !this.defaultProperties.isEmpty()) {
			sources.addLast(new MapPropertySource("defaultProperties", this.defaultProperties));
		}
		//addCommandLineProperties 默认为ture,下面这个逻辑大致意思就是允许从启动命令行上读取配置加到配置项里面。
		if (this.addCommandLineProperties && args.length > 0) {
			String name = CommandLinePropertySource.COMMAND_LINE_PROPERTY_SOURCE_NAME;
			//如果以前的配置的源里面有这个源,就把源信息读出来,生成一个新的CompositePropertySource,并将原来的源配置替换。
			//否则添加最高级别的源信息配置
			if (sources.contains(name)) {
				PropertySource<?> source = sources.get(name);
				CompositePropertySource composite = new CompositePropertySource(name);
				composite.addPropertySource(
						new SimpleCommandLinePropertySource("springApplicationCommandLineArgs", args));
				composite.addPropertySource(source);
				sources.replace(name, composite);
			}
			else {
				sources.addFirst(new SimpleCommandLinePropertySource(args));
			}
		}
	}

从这里貌似可以看到另一种属性配置的方式——启动参数。而且这种方式的优先级貌似最高。
configureProfiles
/**
	 * 配置该配置文件环境中哪些配置文件处于活动状态(默认情况下处于活动状态)。 在配置文件处理期间,可以通过spring.profiles.active属性激活其他配置文件。
	 * @param environment this application's environment
	 * @param args arguments passed to the {@code run} method
	 * @see #configureEnvironment(ConfigurableEnvironment, String[])
	 * @see org.springframework.boot.context.config.ConfigFileApplicationListener
	 */
	protected void configureProfiles(ConfigurableEnvironment environment, String[] args) {
		Set<String> profiles = new LinkedHashSet<>(this.additionalProfiles);
		profiles.addAll(Arrays.asList(environment.getActiveProfiles()));
		environment.setActiveProfiles(StringUtils.toStringArray(profiles));
	}
对这个配置貌似很属性,但是前面好像都没提过这个概念。这里找篇文章看看:SpringBoot的Profiles讲解
至此完成了环境的配置。
attach
配置完环境后,执行了一步attach操作,我们看下attach在干嘛:
/**
	 * 将ConfigurationPropertySource支持附加到指定的Environment 。
	 * 使环境管理的每个PropertySource适应ConfigurationPropertySource并允许经典的PropertySourcesPropertyResolver调用使用configuration property names进行解析。
	 * 附加的解析器将动态跟踪基础Environment属性源中的任何添加或删除。
	 * @param environment the source environment (must be an instance of
	 * {@link ConfigurableEnvironment})
	 * @see #get(Environment)
	 */
	public static void attach(Environment environment) {
		Assert.isInstanceOf(ConfigurableEnvironment.class, environment);
		MutablePropertySources sources = ((ConfigurableEnvironment) environment).getPropertySources();
		PropertySource<?> attached = sources.get(ATTACHED_PROPERTY_SOURCE_NAME);
		if (attached != null && attached.getSource() != sources) {
			sources.remove(ATTACHED_PROPERTY_SOURCE_NAME);
			attached = null;
		}
		if (attached == null) {
			sources.addFirst(new ConfigurationPropertySourcesPropertySource(ATTACHED_PROPERTY_SOURCE_NAME,
					new SpringConfigurationPropertySources(sources)));
		}
	}
看起来还像是把ConfigurationPropertySource的一些东西附加到Environment 上去,加强环境实例的功能。并且提升configurationProperties的配置优先级到最高。
environmentPrepared
在环境准备完成后,Spring发布了环境准备完成事件,这里发布的事件是ApplicationEnvironmentPreparedEvent事件,看下哪些侦听器侦听了这些事件吧:

有7个侦听器,这个7个侦听器都干些啥呢?看这里:跟我一起阅读SpringBoot源码(十)——侦听器
bindToSpringApplication
现在把准备好的环境绑定到Spring应用上,看下操作:
/**
	 * Bind the environment to the {@link SpringApplication}.
	 * @param environment the environment to bind
	 */
	protected void bindToSpringApplication(ConfigurableEnvironment environment) {
		try {
			Binder.get(environment).bind("spring.main", Bindable.ofInstance(this));
		}
		catch (Exception ex) {
			throw new IllegalStateException("Cannot bind to SpringApplication", ex);
		}
	}
EnvironmentConverter
//如果不是自定义环境,从当前demo来看确实不是自定义环境,默认也是false,会实例化一个环境转换器
if (!this.isCustomEnvironment) {
			environment = new EnvironmentConverter(getClassLoader()).convertEnvironmentIfNecessary(environment,
					deduceEnvironmentClass());
		}
最后的Attach
最后有attach了一次,感觉是有区别的,但是没能梳理出和刚才的attach有多大区别[手动捂脸]
至此完成了prepareEnvironment操作。