先定义一个链表的类,然后实现
废话不多说,上图
链表类
public class Node {
private Object data;
private Node next;
public Node() {
}
public Node(Object data, Node next) {
super();
this.data = data;
this.next = next;
}
public Object getData() {
return data;
}
public void setData(Object data) {
this.data = data;
}
public Node getNext() {
return next;
}
public void setNext(Node next) {
this.next = next;
}
}
链表类
public class LinkedList implements List{
private Node head;
private int size;
public LinkedList() {
head = new Node(null,null);
}
@Override
public void add(int index, Object obj) {
if(index<0 || index >size) return;
Node curr = head;
for(int i=0;i<index;i++) {
curr = curr.getNext();
}
Node node = new Node();
node.setData(obj);
node.setNext(curr.getNext());
curr.setNext(node);
size++;
}
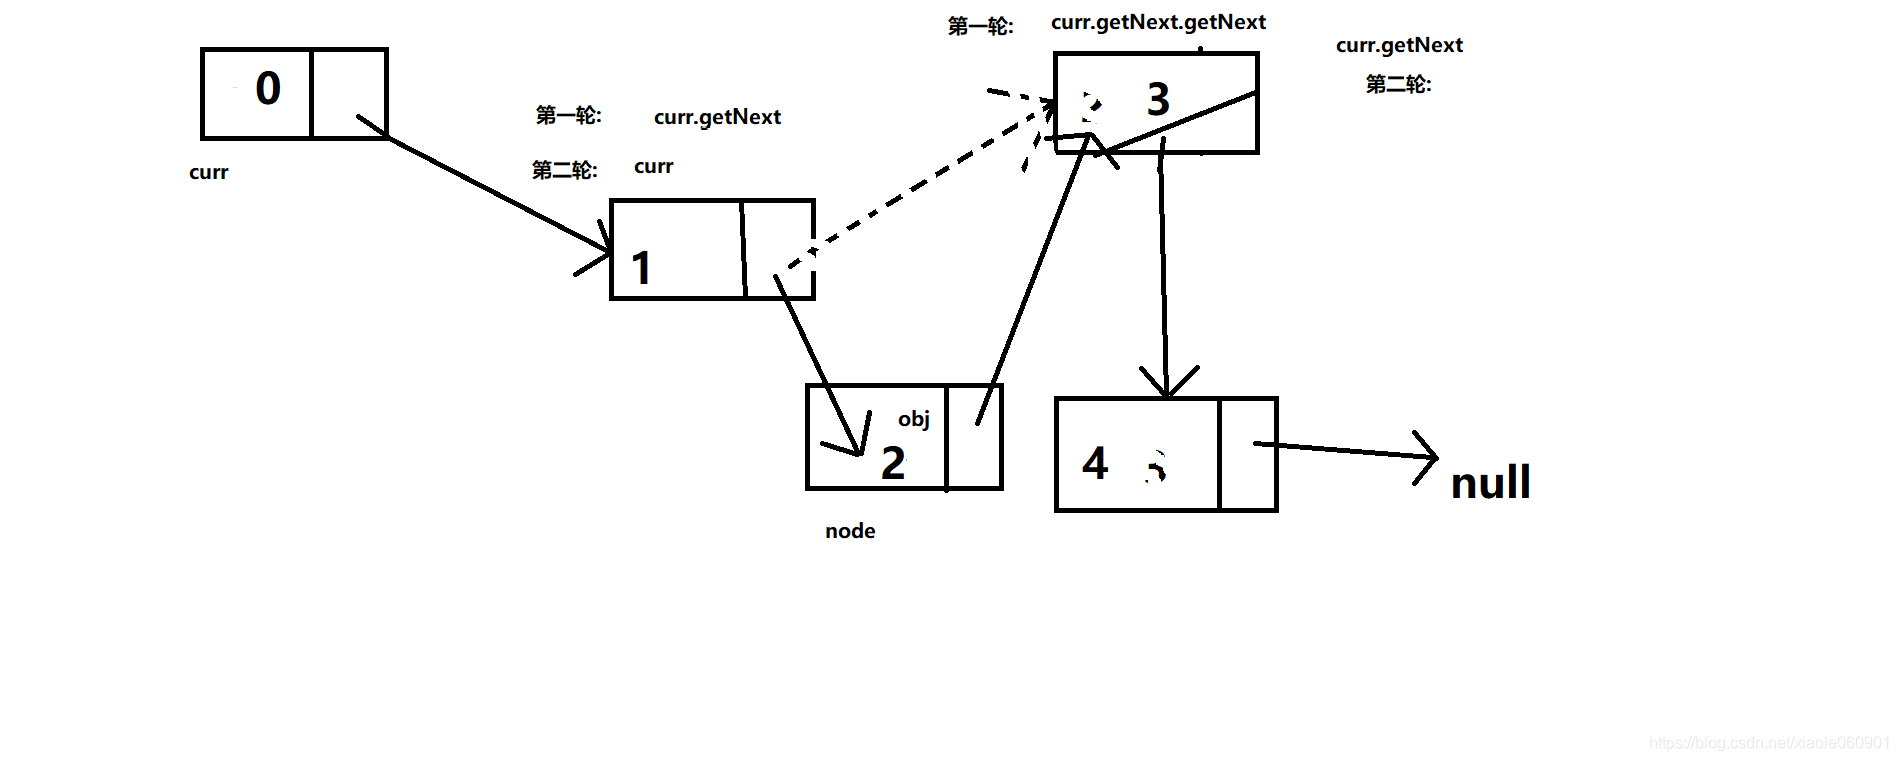
根据这个图和代码就可以轻松理解链表的插入.
喜欢就点赞收藏走起喽!!!