skynet有两种方法支持热更新lua代码:clearcache和inject,在介绍skynet热更新机制之前,先介绍skynet控制台,参考官方wiki https://github.com/cloudwu/skynet/wiki/DebugConsole
1. skynet控制台
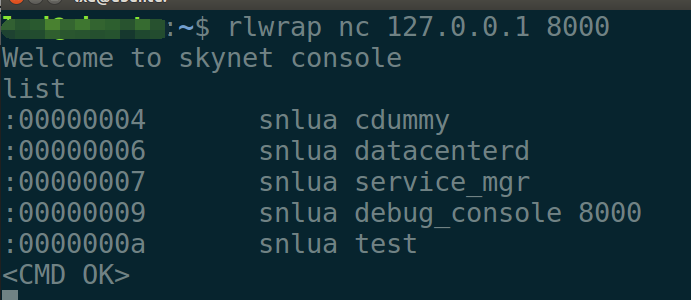
想要使用skynet控制台,需启动debug_console服务skynet.newservice("debug_console", ip, port),指定一个地址。skynet启动后,用nc命令就可以进入控制台,如图。
debug_console服务启动后,监听外部连接(第3行)。
第15行,当打开控制台连接建立后,fork一个协程在console_main_loop里处理这个tcp连接的通信交互
第6-13行,使用特定的print,数据不是输出到屏幕上,而是通过socket.write发送给控制台
第24-28行,获取控制台发来的数据,然后调用docmd
第35-52行,解析出相应指令,执行完后,通过print发送给控制台
-- service/debug_console.lua
skynet.start(function()
    local listen_socket = socket.listen (ip, port)
    skynet.error("Start debug console at " .. ip .. ":" .. port)
    socket.start(listen_socket , function(id, addr)
        local function print(...)
            local t = { ... }
            for k,v in ipairs(t) do
                t[k] = tostring(v)
            end
            socket.write(id, table.concat(t,"\t"))
            socket.write(id, "\n")
        end
        socket.start(id)
        skynet.fork(console_main_loop, id , print)
    end)
end)

local function console_main_loop(stdin, print)
    print("Welcome to skynet console")
    skynet.error(stdin, "connected")
    local ok, err = pcall(function()
        while true do
            local cmdline = socket.readline(stdin, "\n")
            ...
            if cmdline ~= "" then
                docmd(cmdline, print, stdin)
            end
        end
    end)
    ...
end

local function docmd(cmdline, print, fd)
    local split = split_cmdline(cmdline)
    local command = split[1]
    local cmd = COMMAND[command]
    local ok, list
    if cmd then
        ok, list = pcall(cmd, table.unpack(split,2))
    else
        ...
    end

    if ok then
        ...
        print(list)
        print("<CMD OK>")
    else
        print(list)
        print("<CMD Error>")
    end
end
比如,在控制台输入"list",最终会调用到COMMAND.list(),获取当前服务信息,然后返回给控制台。于是就有了上面截图的信息。
 -- service/debug_console.lua
 function COMMAND.list()
     return skynet.call(".launcher", "lua", "LIST")
 end
2. clearcache更新方法
clearcache用于新建服务的热更新,比如agent,对已有的服务不能热更新。使用方法很简单:在控制台输入"clearcache"即可,下面分析其原理:
每个snlua服务会启动一个单独的lua VM,对于同一份Lua文件,N个服务就要加载N次到内存。skynet对此做了优化,每个Lua文件只加载一次到内存,保存Lua文件-内存映射表,下一个服务加载的时候copy一份内存即可,提高了VM的启动速度(省掉读取Lua文件和解析Lua语法的过程)。参考官方wiki https://github.com/cloudwu/skynet/wiki/CodeCache
第2-6行,全局的Lua状态机,以Lua文件名为key,内存指针为value,保存在状态机的注册表里,位于栈上有效伪索引LUA_REGISTERYINDEX处。
第8行,修改了官方的luaL_loadfilex接口:
第11-15行,调用load从全局状态机的注册表里获取文件名对应的内存块,调用lua_clonefunction拷贝一份后即可返回
第16-18行,第一次加载文件到内存里
第19-26行,调用save保存文件名-内存块的映射,如果有旧的内存块,返回旧的,否则返回刚加载的内存块
// 3rd/lua/lauxlib.c
  struct codecache {
          struct spinlock lock;
          lua_State *L;
  };
  static struct codecache CC;

  LUALIB_API int luaL_loadfilex (lua_State *L, const char *filename,
                                               const char *mode) {
    ...
    const void * proto = load(filename);
    if (proto) {
      lua_clonefunction(L, proto);
      return LUA_OK;
    }
    lua_State * eL = luaL_newstate();
    int err = luaL_loadfilex_(eL, filename, mode);
    proto = lua_topointer(eL, -1);
    const void * oldv = save(filename, proto);
    if (oldv) {
      lua_close(eL);
      lua_clonefunction(L, oldv);
    } else {
      lua_clonefunction(L, proto);
      /* Never close it. notice: memory leak */
    }

    return LUA_OK;
  }
load接口,从全局状态机CC的注册表里获取指定文件对应的内存块(可能不存在)
// 3rd/lua/lauxlib.c
static const void *
 load(const char *key) {
   if (CC.L == NULL)
     return NULL;
   SPIN_LOCK(&CC)
     lua_State *L = CC.L;
     lua_pushstring(L, key);
     lua_rawget(L, LUA_REGISTRYINDEX);
     const void * result = lua_touserdata(L, -1);
     lua_pop(L, 1);
   SPIN_UNLOCK(&CC)

   return result;
 }
save接口,先获取旧的内存块(12-15行),如果有则直接返回,否则把新内存块加载到注册表中(17-19行)
static const void *
  save(const char *key, const void * proto) {
    lua_State *L;
    const void * result = NULL;

    SPIN_LOCK(&CC)
      if (CC.L == NULL) {
        init();
        L = CC.L;
      } else {
        L = CC.L;
        lua_pushstring(L, key);
        lua_pushvalue(L, -1);
        lua_rawget(L, LUA_REGISTRYINDEX);
        result = lua_touserdata(L, -1); /* stack: key oldvalue */
        if (result == NULL) {
          lua_pop(L,1);
          lua_pushlightuserdata(L, (void *)proto);
          lua_rawset(L, LUA_REGISTRYINDEX);
        } else {
          lua_pop(L,2);
        }
      }
    SPIN_UNLOCK(&CC)
    return result;
  }
clearcache的原理就是删除这个全局的状态机,这样新服务就可以用最新的Lua文件(load接口返回NULL),且不影响已有服务的运行。此时,新服务运行新的代码,旧服务运行旧的代码。
在控制台输入"clearcache"后,最终调用到c中的clearcache,删除旧的全局VM,然后新建一个(19-20行)。
-- service/debug_console.lua
function COMMAND.clearcache()
    codecache.clear()
end

// 3rd/lua/lauxlib.c
static int
cache_clear(lua_State *L) {
    (void)(L);
    clearcache();
    return 0;
}

static void
clearcache() {
    if (CC.L == NULL)
        return;
    SPIN_LOCK(&CC)
    lua_close(CC.L);
    CC.L = luaL_newstate();
    SPIN_UNLOCK(&CC)
}
3. inject更新方法
inject译为“注入”,即将新代码注入到已有的服务里,让服务执行新的代码,可以热更已开启的服务,使用方法简单,在控制台输入"inject address xxx.lua"即可,难点在于lua代码的编写,建议只做一些简单的热更。其实现原理是:给服务发送消息,让其执行新代码,新代码修改已有的函数原型(包括upvalues),完成对函数的更新。
第10行,给指定服务发送"DEBUG"类型消息
第20行,最终调用inject接口注入代码修改函数原型(包括闭包)。注:只需修改服务的register_protocol接口以及消息分发接口
-- service/debug.lua
function COMMAND.inject(address, filename)
    address = adjust_address(address)
    local f = io.open(filename, "rb")
    if not f then
        return "Can't open " .. filename
    end
    local source = f:read "*a"
    f:close()
    local ok, output = skynet.call(address, "debug", "RUN", source, filename)
    if ok == false then
        error(output)
    end
    return output
end

-- lualib/skynet/debug.lua
function dbgcmd.RUN(source, filename)
    local inject = require "skynet.inject"
    local ok, output = inject(skynet, source, filename , export.dispatch, skynet.register_protocol)
    collectgarbage "collect"
    skynet.ret(skynet.pack(ok, table.concat(output, "\n")))
end
inject的处理过程:
第7-9行,获取接口的函数原型(包括闭包),保存在u里
第11-21行,遍历所有的消息分发函数(每种消息类型对应一个函数),通过getupvaluetable接口保存函数原型(包括闭包)
第22-23行,执行新的Lua代码,通过env里的_U,_P获取原有的函数原型
-- lualib/skynet/inject.lua
 return function(skynet, source, filename , ...)
     local output = {}
     local u = {}
     local unique = {}
     local funcs = { ... }
     for k, func in ipairs(funcs) do
         getupvaluetable(u, func, unique)
     end
     local p = {}
     local proto = u.proto
     if proto then
         for k,v in pairs(proto) do
             local name, dispatch = v.name, v.dispatch
             if name and dispatch and not p[name] then
                 local pp = {}
                 p[name] = pp
                 getupvaluetable(pp, dispatch, unique)
             end
         end
     end
     local env = setmetatable( { print = print , _U = u, _P = p}, { __index = _ENV })
     local func, err = load(source, filename, "bt", env)
     ...

     return true, output
 end
示例:比如启动了一个test服务
-- test.lua 1 local skynet = require "skynet"

  local CMD = {}

  local function test(...)
      print(...)
      skynet.ret(skynet.pack("OK"))
 end

 function CMD.ping(msg)
     test(msg)
 end

 skynet.dispatch("lua", function(session, source, cmd, ...)
     local f = CMD[cmd]
     if f then
         f(...)
     end
 end)

 skynet.start(function()
 end)
在控制台输入"inject address inject_test.lua"热更test服务,
第23行,通过全局环境变量_P获取lua类型消息分发函数里的接口CMD
第24行,获取CMD.ping接口的所有闭包
第25行,得到test的函数原型
第27-30行,更新接口,完成热更。
-- inject_test.lua
print("hotfix begin")

if not _P then
    print("hotfix faild, _P not define")
    return
end

local function get_upvalues(f)
    local u = {}
    if not f then return u end
    local i = 1
    while true do
        local name, value = debug.getupvalue(f, i)
        if name == nil then
            return u
        end
        u[name] = value
        i = i + 1
    end
end

local CMD = _P.lua.CMD
local upvalues = get_upvalues(CMD.ping)
local test = upvalues.test

CMD.ping = function(msg)
    local postfix = "aaa"
    test(msg .. postfix)
end

print("hotfix end")本篇文章就写到这,在2021年1月13/14号我会开一个四小时玩转skynet训练营,也就是两个礼拜之后,现在已经开放报名,对游戏开发感兴趣的诸位同好可以订阅一下,
训练营内容大概如下:
1. 多核并发编程
2. 消息队列,线程池
3. actor消息调度
4. 网络模块实现
5. 时间轮定时器实现
6. lua/c接口编程
7. skynet编程精要
8. demo演示actor编程思维
期待与诸位同好共襄技术盛举
凭借报名截图可以进群973961276领取上一期skynet训练营的录播以及这期的预习资料哦!