1. 常用属性
常用的 scaleType 的属性值:
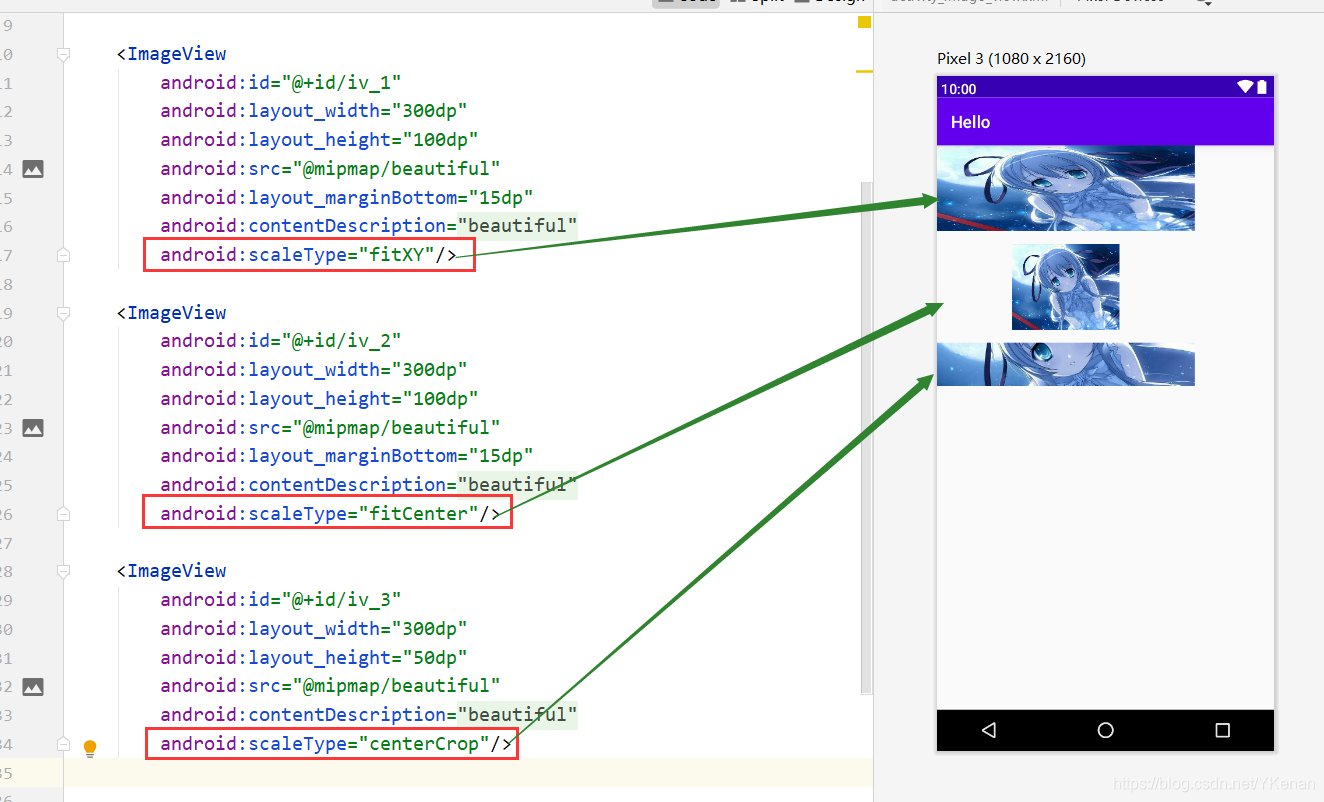
- fitXY: 撑满控件, 宽高比可能发生改变
- fitCenter: 保持宽高比缩放, 直至能够完全显示
- centerCrop: 保持宽高比缩放, 直至完全覆盖控件, 裁剪显示
<?xml version="1.0" encoding="utf-8"?>
<LinearLayout xmlns:android="http://schemas.android.com/apk/res/android"
    xmlns:app="http://schemas.android.com/apk/res-auto"
    xmlns:tools="http://schemas.android.com/tools"
    android:layout_width="match_parent"
    android:layout_height="match_parent"
    android:orientation="vertical"
    tools:context=".ImageViewActivity">

    <ImageView
        android:id="@+id/iv_1"
        android:layout_width="300dp"
        android:layout_height="100dp"
        android:src="@mipmap/beautiful"
        android:layout_marginBottom="15dp"
        android:contentDescription="@string/beautiful"
        android:scaleType="fitXY"/>

    <ImageView
        android:id="@+id/iv_2"
        android:layout_width="300dp"
        android:layout_height="100dp"
        android:src="@mipmap/beautiful"
        android:layout_marginBottom="15dp"
        android:contentDescription="@string/beautiful"
        android:scaleType="fitCenter"/>

    <ImageView
        android:id="@+id/iv_3"
        android:layout_width="300dp"
        android:layout_height="50dp"
        android:src="@mipmap/beautiful"
        android:contentDescription="@string/beautiful"
        android:scaleType="centerCrop"/>


</LinearLayout>
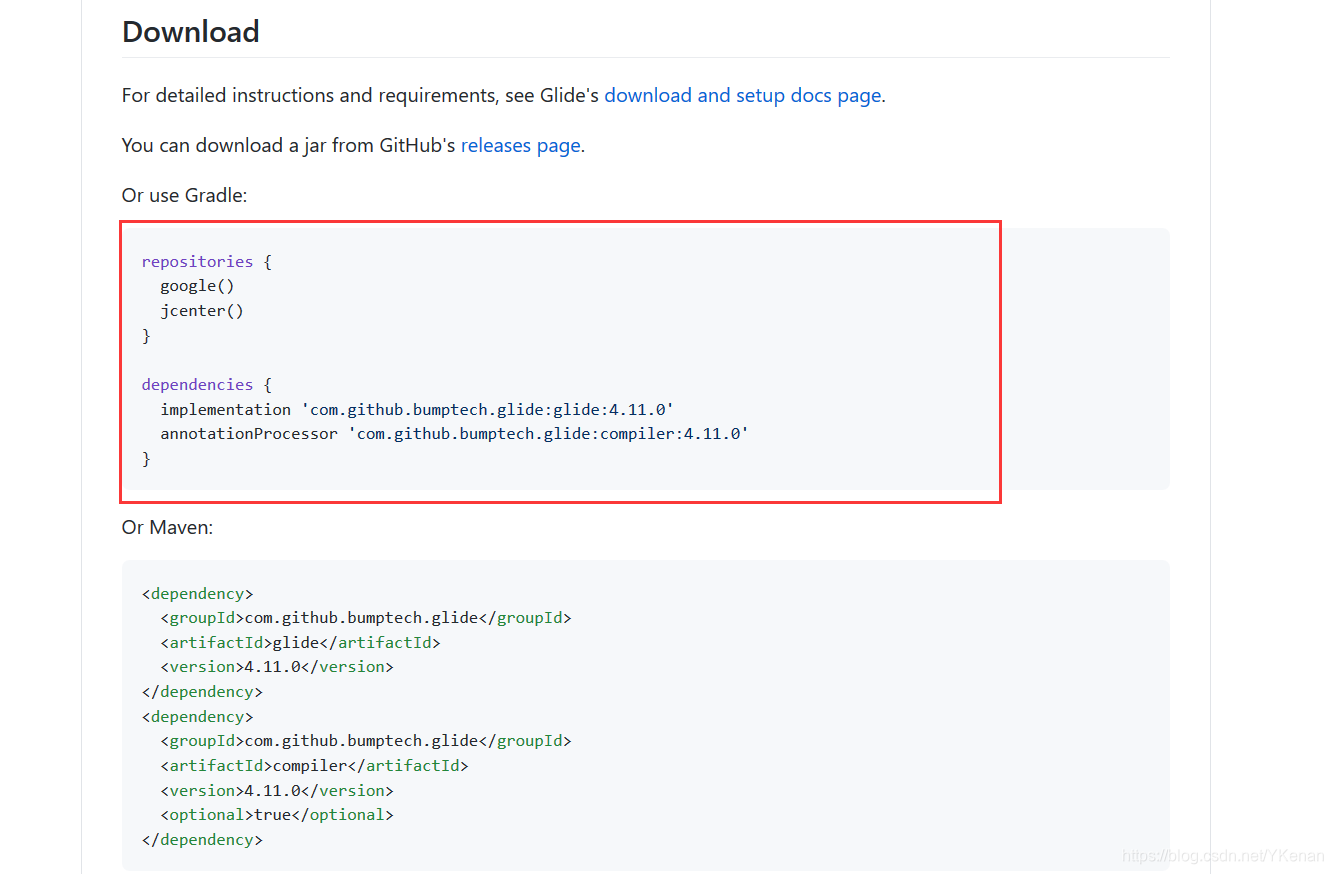
2. 加载网络照片
使用 glide 库.
https://github.com/bumptech/glide
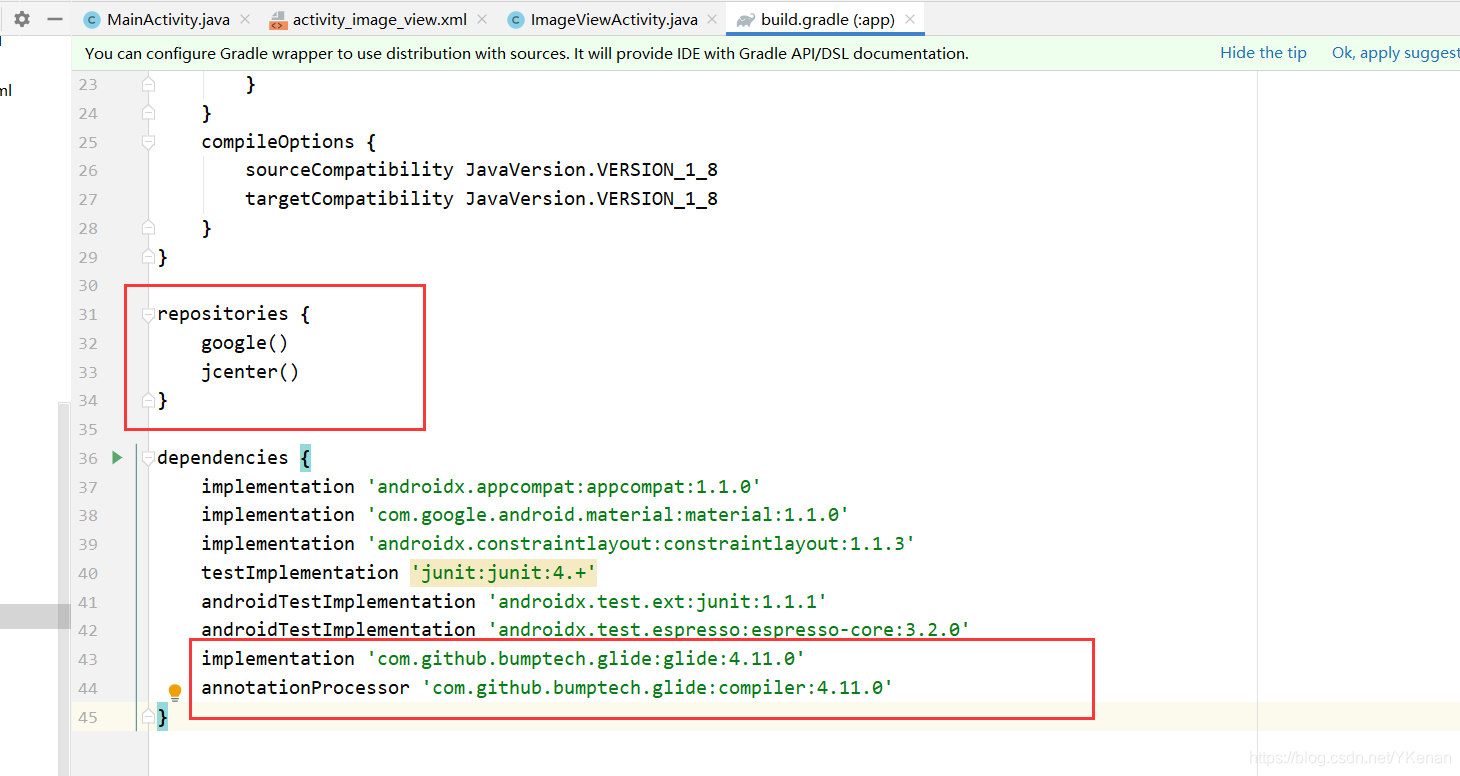
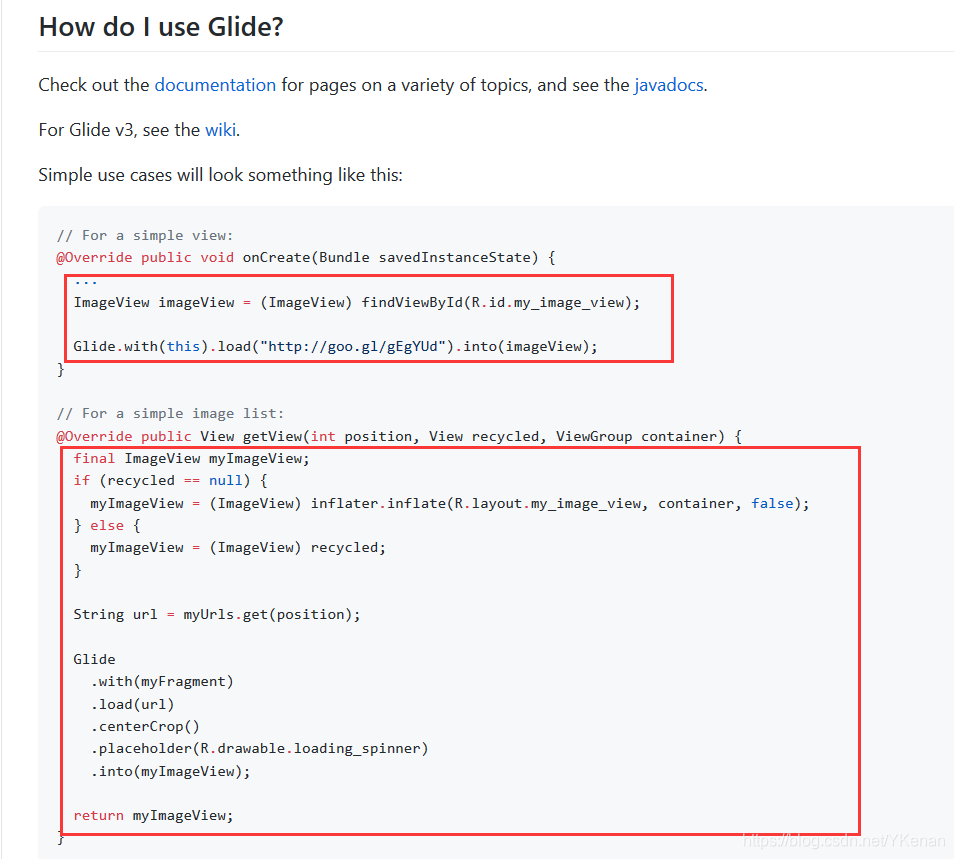
如何使用
添加权限
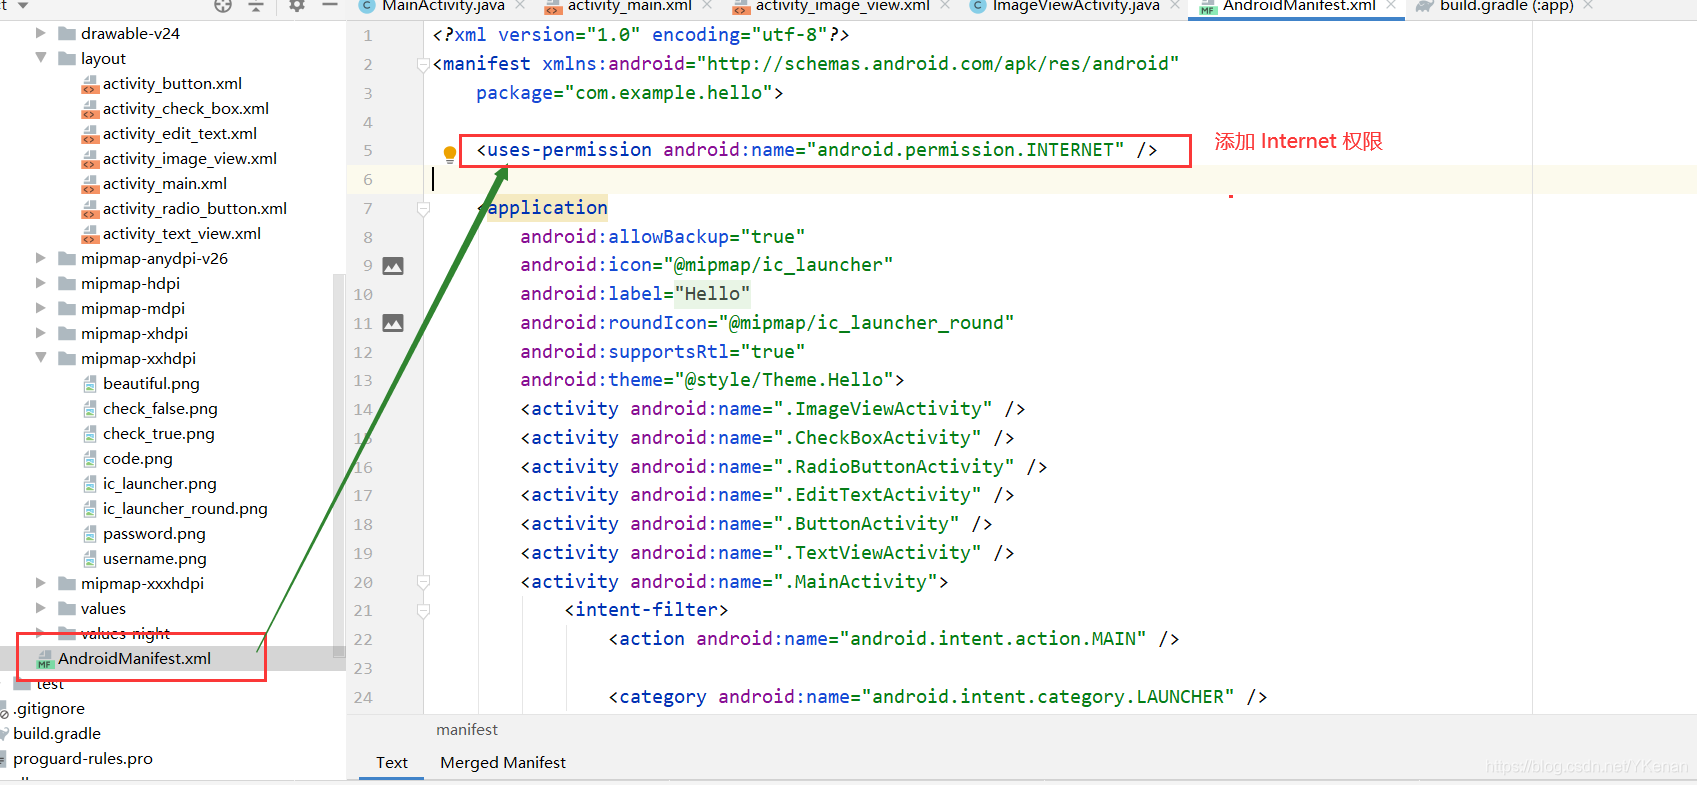
<uses-permission android:name="android.permission.INTERNET" />
package com.example.hello;

import androidx.appcompat.app.AppCompatActivity;

import android.os.Bundle;
import android.widget.ImageView;

import com.bumptech.glide.Glide;

public class ImageViewActivity extends AppCompatActivity {


    // 声明
    private ImageView iv4;

    @Override
    protected void onCreate(Bundle savedInstanceState) {


        super.onCreate(savedInstanceState);
        setContentView(R.layout.activity_image_view);
        // 得到 ImageView
        iv4 = findViewById(R.id.iv_4);
        // 加载网路图
        Glide.with(this).load("https://ss3.bdstatic.com/70cFv8Sh_Q1YnxGkpoWK1HF6hhy/it/u=295289102,3688591987&fm=26&gp=0.jpg").into(iv4);
    }
}
注意: 若没有加权限运行后, 没有显示, 控制台报错, 此时再把权限加上去后, 需要把手机上的测试卸载后在运行就可以正常显示了.