axios
本文只讲简单用法,封装以及拦截器会在下期写
接触新事物的最好方法就是看文档 axios
axios是一个promise 的 HTTP 库常用于发送post get 等request请求
promise常用于异步操作
安装
npm install axios
基础用法
比如post请求
axios.post("url", data).then(res => {
        //操作
      });
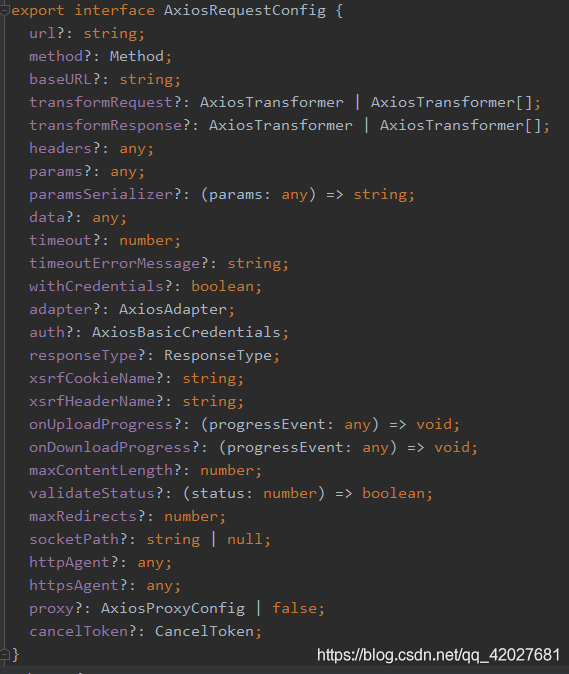
扒一扒源码可以发现
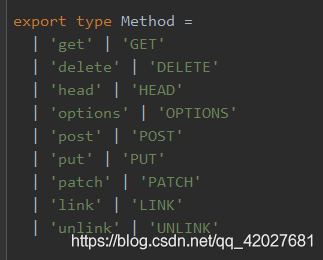 这些参数和方法
当然我们还可以这样写
axios({url,method})method就是post get等用到什么写什么 参考上图
url,method还有数据一般都是必备的
踩坑
因为是异步操作,有些时候数据不能及时渲染,就要用到$nextTick来拿数据或者forceUpdate更新
上篇文章我们讲过 传送门
小例子
后端
我们来做一个小例子,会python的小伙伴可以跟着写,不会的可以看别的文章的例子
百度开发平台使用
vue数据可视化
我们来实现一个简单的在线python编译器
编写后端接口 用到flask
from flask import Flask,request
import subprocess, time

app = Flask(__name__)

@app.route("/hello",methods=['POST'])
def hello():
    ip = request.remote_addr
    print(ip)
    f=open('./1/{}.py'.format(ip),"w",encoding='utf-8')
    f.write(request.form.get("a"))
    f.close()
    p = subprocess.Popen('python ./1/{}.py'.format(ip), stdout=subprocess.PIPE, stderr=subprocess.STDOUT)
    return p.stdout.read()
if __name__=='__main__':
        app.run(host='0.0.0.0',port=6666)
这里通过localhost:6666/hello可以调用hello方法
后端思路
从前端接收代码,保存到python文件,文件命名为ip地址.py当然用完记得删除文件可以通过os模块来实现
将文件执行结果重定向然后获取
qs库
前端常用的一个库,用来解析参数或者查询参数的库
安装
npm install qs
前端
<template>
  <div>
    <label>
      <textarea v-model="dm" style="width: 300px;height: 400px"> </textarea>
    </label>
    <buton @click="doIt">运行</buton>
    <label>
      <textarea readonly="readonly" v-model="results" style="width: 300px;height: 400px"></textarea>
    </label>
  </div>
</template>

<script>
import qs from "querystring";
import axios from "axios";
export default {


  name: "pythonTest",
  data() {


    return {


      dm: "",
      results: ""
    };
  },
  methods: {


    doIt() {


      this.results = "";
      let datas = {

      a: this.dm};
      axios.post("/awe/hello", qs.stringify(datas)).then(res => {


        this.results = res.data;
      });
    }
  }
};
</script>

<style scoped></style>
这里我使用了代理
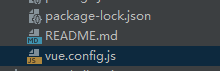
module.exports = {
  devServer: {
      "/awe": {
        target: "http://127.0.0.1:6666",
        changeOrigin: true,
        pathRewrite: {
          "^/awe": ""
        }
      }
    },
    host: "0.0.0.0",
    port: 8083,
    clientLogLevel: "info"
  }
};
如果不用代理 就
这样写
使用 qs.stringify是因为后端要通过form接收,前端也要这样发送
axios.post("http://localhost:6666/hello", qs.stringify(datas)).then(res => {
        this.results = res.data;
      });
前端思路
向后端接口传送数据
后端处理完后返回给前端
前后端分离也是这个思路
效果
本系列下篇会讲封装axios以及拦截器
大家好,我是代码哈士奇,是一名软件学院网络工程的学生,因为我是“狗”,狗走千里吃肉。想把大学期间学的东西和大家分享,和大家一起进步。但由于水平有限,博客中难免会有一些错误出现,有纰漏之处恳请各位大佬不吝赐教!暂时只在csdn这一个平台进行更新,博客主页:https://blog.csdn.net/qq_42027681。
未经本人允许,禁止转载

后续会推出
前端:vue入门 vue开发小程序 等
后端: java入门 springboot入门等
服务器:mysql入门 服务器简单指令 云服务器运行项目
python:推荐不温卜火 一定要看哦
一些插件的使用等
大学之道亦在自身,努力学习,热血青春
如果对编程感兴趣可以加入我们的qq群一起交流:974178910

有问题可以下方留言,看到了会回复哦