Java集合的总结:二
泛型
概述:
是一种把明确数据类型的工作推迟到创建对象或调用方法的时候才去明确的一种特殊数据类型。
格式:
<数据类型>
注意:
数据类型必须是引用数据类型
优点:
把运行时可能出现的异常提前到编译时,提高程序的健壮性
由来:
早期版本使用Object代替任意数据类型,但是在向下转型时,可能会出现类型转换异常,为了解决这个问题,jdk提出了泛型这个技术
泛型类:
Public class 类型<泛型类型…>
泛型方法:
把泛型定义在方法上
public <泛型类型> 返回值类型 方法名(泛型类型){}
泛型接口:
格式:public interface 接口名<泛型类型1…>
//接口泛型:
//    1. 在实现时,不给定数据类型
//    2. 在实现时,给定数据类型

public interface MyInterface<T> {


// public void show(String s);第一种
public abstract void show(T t);//第二种
}

//在实现时,给定数据类型
class MyInterfaceImpl implements MyInterface<String> {


    @Override
    public void show(String s) {


    }
}

//在实现时不给定数据类型
    class MyInterfaceImpl<T> implements MyInterface<T> {


        @Override
        public void show(T t) {


        }
}
泛型案例:
public class generic <T> {


    private T t;

    public Object getObject() {


        return t;
    }

    public void setObject(T t) {


        this.t = t;
    }
}
class  Demo{


    public static void main(String[] args) {


      generic<String> o = new generic<>();
      o.setObject("tom");
      System.out.println(o.getObject());
    }
}
泛型通配符:
泛型通配符<?>:任意类型,如果没有明确,那么就是Object以及任意的Java类了
//<? extends E>:向下限定,E及其子类
//<? super E>:向上限定,E及其父类

public class genericDEMO {


    public static void main(String[] args) {


        //Collection <Animal>collection = new ArrayList<Animal>();
        //Collection <Animal>collection2 = new ArrayList<Object>();
       //Collection <Animal>collection3 = new ArrayList<Cat>();
       // Collection <Animal>collection4 = new ArrayList<Dog>();

//        Collection<?> collection = new ArrayList<Animal>();
//        Collection<?> collection2 = new ArrayList<Object>();
//        Collection<?> collection3 = new ArrayList<Cat>();
//        Collection<?> collection4 = new ArrayList<Dog>();

//        Collection<? extends Animal> collection = new ArrayList<Animal>();
//        Collection<? extends Animal> collection2 = new ArrayList<Object>();//报错,只能实现本身和子类
//        Collection<? extends Animal> collection3 = new ArrayList<Cat>();
//        Collection<? extends Animal> collection4 = new ArrayList<Dog>();

//          Collection<? super Animal> collection = new ArrayList<Animal>();
//          Collection<? super Animal> collection2 = new ArrayList<Object>();
//          Collection<? super Animal> collection3 = new ArrayList<Cat>();//报错,只能实现本身和父类
//          Collection<? super Animal> collection4 = new ArrayList<Dog>();

    }
}
Set接口
概述:
一个不包含重复元素的 collection。
特点:
1.不重复
2.无序(存入数据和取出数据不一致)
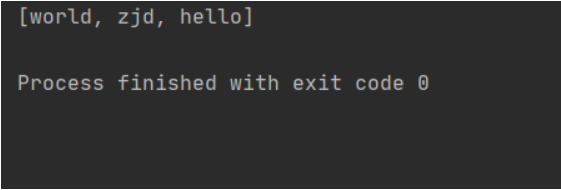
public class SetDemo {


    public static void main(String[] args) {


        Set<String> s = new HashSet<String>();
        s.add("hello");
        s.add("world");
        s.add("zjd");
        s.add("zjd");
        System.out.println(s);
    }
}
HashSet
概述:
此类实现 Set 接口,由哈希表(实际上是一个 HashMap 实例)支持。它不保证 set 的迭代顺序;特别是它不保证该顺序恒久不变。此类允许使用 null 元素。
代码案例:
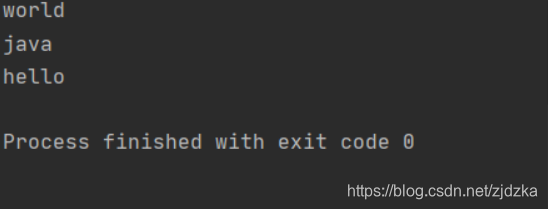
public class HashSetDemo {


    public static void main(String[] args) {


        HashSet<String> hs = new HashSet<String>();
        hs.add("hello");
        hs.add("world");
        hs.add("java");
        hs.add("world");

        Iterator iterator = hs.iterator();
        while (iterator.hasNext()){


            String s = (String)iterator.next();
            System.out.println(s);
        }
    }
}
特点:
HashSet如何保证元素唯一性:
-
1.底层数据结构是哈希表
-
2.哈希表底层依赖了两个方法:
首先会判断hashcode()是否相等,如果相等继续判断equals()方法,如果返回false,则添加元素。
练习:
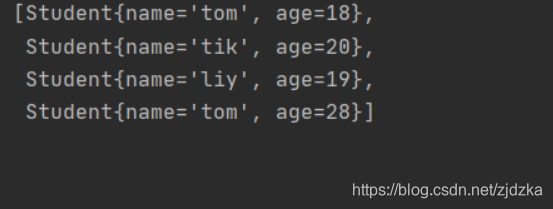
public class HashSetDemo2 {


    public static void main(String[] args) {


        HashSet<Student> hs = new HashSet<Student>();
        Student s = new Student("tom",18);
        Student s2 = new Student("tik",20);
        Student s3 = new Student("liy",19);
        Student s4 = new Student("tom",28);
        Student s5 = new Student("tom",18);
        hs.add(s);
        hs.add(s2);
        hs.add(s3);
        hs.add(s4);
        hs.add(s5);

        System.out.println(hs);//重写了equals和hashcode

    }
}
哈希表:
元素是链表的数组,它综合了这两种的优势,查询快,增删快。
LinkedHashSet
概述:
元素有序唯一,底层是链表和哈希表
由链表保证元素有序
由哈希表保证元素唯一
代码案例:
public class LinkedHashSetDemo {


    public static void main(String[] args) {


        LinkedHashSet<String> lh = new LinkedHashSet<String>();
        lh.add("hello");
        lh.add("world");
        lh.add("zjd");
        lh.add("zjd");
        System.out.println(lh);

    }
}

TreeSet
概述:
使用元素的自然顺序对元素进行排序
或者根据创建 set 时提供的 Comparator 进行排序
具体取决于使用的构造方法。
特点–代码案例:
public class TreeSetDemo {


    public static void main(String[] args) {


        TreeSet<Integer> ts = new TreeSet<Integer>();
        ts.add(1);
        ts.add(6);
        ts.add(4);
        ts.add(3);

        System.out.println(ts);
    }
}
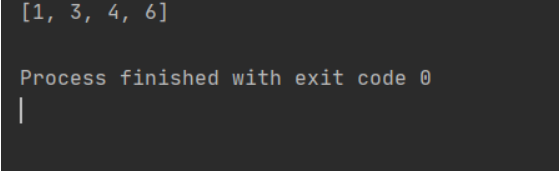
底层结构的实现采用的是红黑二叉树,红黑二叉树,我在后续的数据结构中作一分析
自然排序:
public class TreeSetStudentDemo {


    public static void main(String[] args) {


        TreeSet<Student> ts = new TreeSet<Student>();
        Student s = new Student("tom",18);
        Student s2 = new Student("liy",20);
        Student s3 = new Student("jic",19);
        Student s4 = new Student("cj",28);
        Student s5 = new Student("wb",28);

        ts.add(s);
        ts.add(s2);
        ts.add(s3);
        ts.add(s4);
        ts.add(s5);
        System.out.println(ts);
    }
}
比较器排序:
public class MyComparatorDemo {


    public static void main(String[] args) {


       // TreeSet<Teacher> ts = new TreeSet<Teacher>(new MyComparator());
        //如果参数是一个接口,我们可以采用匿名内部类的方法
        TreeSet<Teacher> ts = new TreeSet<Teacher>(new Comparator<Teacher>() {


            @Override
            public int compare(Teacher o, Teacher o2) {


                int num = o.getAge()-o2.getAge();//主要因素
                int result = num ==0? o.getName().compareTo(o2.getName()) :num;//次要因素
                return result;
            }
        });
        Teacher t = new Teacher("tom",18);
        Teacher t2 = new Teacher("wb",14);
        Teacher t3 = new Teacher("cj",35);
        Teacher t4 = new Teacher("jic",28);
        Teacher t5 = new Teacher("cj",35);
        Teacher t6 = new Teacher("titi",18);
        ts.add(t);
        ts.add(t2);
        ts.add(t3);
        ts.add(t4);
        ts.add(t5);
        ts.add(t6);


        System.out.println(ts);

    }
}
Map接口
概述:
K - 此映射所维护的键的类型
V - 映射值的类型
将键映射到值的对象。一个映射不能包含重复的键;每个键最多只能映射到一个值。
与Collection区别:
1.Map是双列的,而Colletion是单列的
2.Map的键唯一,Collection的子体系Set是唯一的
3.Map集合的数据结构值针对键有效,跟值无关
Collection集合的数据结构是针对元素有效
常见方法:
public class MapDemo {


    public static void main(String[] args) {


        //创建一个Map集合,使用多态创建
        Map<String,String> map = new HashMap<String, String>();

        //添加元素,其实也是修改功能
       //System.out.println("put:"+map.put("tom","jack"));
       // System.out.println("put:"+map.put("tom","rose"));

        map.put("tom","jir");//乱序
        map.put("jack","rose");
        map.put("james","davis");
        map.put("txw","zjd");
        //移除元素,如果删除键不存在的元素,则返回null
        //System.out.println(map.remove("james"));//返回对应被删除的值
        //map.clear();
        //System.out.println(map.remove("tom"));

        //是否包含键和值
        boolean txw = map.containsKey("txw");
        boolean txb = map.containsKey("txb");
        boolean davis = map.containsValue("davis");
        System.out.println(txw);
        System.out.println(txb);
        System.out.println(davis);

        //判断是否为空
        boolean empty = map.isEmpty();
        System.out.println(empty);

        //判断长度
        int size = map.size();
        System.out.println(size);
        System.out.println("map:"+map);//重写了toString

    }
}
两种遍历方式:
public class MapDemo3 {


    public static void main(String[] args) {


        Map<String,Integer> map = new HashMap<String,Integer>();
        map.put("a",1);
        map.put("b",2);
        map.put("c",3);
        map.put("d",4);
        //System.out.println(map);

        //方式1
        Set<String> keys = map.keySet();
       Iterator iterator = keys.iterator();
        while (iterator.hasNext()){


            String s =(String) iterator.next();
            Integer v = map.get(keys);
            System.out.println(s+"---"+v);
        }
        System.out.println("________________________________________________");
        //方式2
        Set<Map.Entry<String,Integer>> maps = map.entrySet();
        Iterator<Map.Entry<String,Integer>> iterator1 = maps.iterator();
        while (iterator1.hasNext()){


            Map.Entry<String,Integer> entry = iterator1.next();
            System.out.println(entry);
        }
    }
}
HashMap
概述:
键是哈希表结构,可以保证键的唯一性
常见四种用法:
HashMap<String,String>
public class HashMapDemo {


    public static void main(String[] args) {


        HashMap<String,String> hashMap = new HashMap<String,String>();
        hashMap.put("no1","tom");
        hashMap.put("no2","jack");
        hashMap.put("no3","rose");
        hashMap.put("no4","lily");

        //遍历,获取键集合
        Set<String> keys = hashMap.keySet();
        for(String key:keys){


            String value =hashMap.get(key);
            System.out.println(key+"---"+value);
        }
        System.out.println("________________________________________");
        //方式二,获取键值对对象
        Set<Map.Entry<String,String>> maps = hashMap.entrySet();
        for(Map.Entry<String,String> map:maps){


            String key = map.getKey();
            String val = map.getValue();
            System.out.println(key+"---"+val);
        }
    }
}
HashMap<Integer,String>
public class HashMapDemo2 {


    public static void main(String[] args) {


        HashMap<Integer,String> hashMap = new HashMap<Integer,String>();
        hashMap.put(1,"tom");
        hashMap.put(2,"jim");
        hashMap.put(3,"rik");
        hashMap.put(1,"tik");

        //遍历
        Set<Integer> keys = hashMap.keySet();
        for(Integer key:keys){


            String val = hashMap.get(key);
            System.out.println(key+"---"+val);
            //键相同,则值直接覆盖
        }

    }
}
HashMap<String,Student>
public class HashMapDemo3 {


    public static void main(String[] args) {


        HashMap<String, Student> hashMap = new HashMap<String, Student>();

        Student s1 =new Student("tom",18);
        Student s2 =new Student("jack",16);
        Student s3 =new Student("lily",24);
        Student s4 =new Student("tom",18);

        hashMap.put("no1",s1);
        hashMap.put("no2",s2);
        hashMap.put("no3",s3);
        hashMap.put("no4",s4);

        //遍历
        Set<String> keys = hashMap.keySet();
        for(String key:keys){


            Student val = hashMap.get(key);
            System.out.println(key+"---"+val.getName()+"---"+val.getAge());
            //由结果知,我们HashMap只与键有关,值无关,值可以重复。
        }
    }
}
HashMap<Student,String>
/**
 * HashMap<Student,String>
 *          HashMap的底层实现原理是哈希表,它可以保证键的唯一性
 *          但是我们哈希表是依赖什么保证唯一性的呢?
 *              hashCode()和equals()方法
 *  注意:当我们自定义对象作为键时,应该遵循底层哈希表结构,我们认为该对象的所以属性一样则为同一个对象,
 *       所以我们需要重写hashCode()和equals()方法
 *
 */

public class HashMapDemo4 {


    public static void main(String[] args) {


        HashMap<Student,String> hashMap = new HashMap<Student,String>();

        Student s1 =new Student("tom",18);
        Student s2 =new Student("jack",16);
        Student s3 =new Student("lily",24);
        Student s4 =new Student("tom",18);

        hashMap.put(s1,"no1");
        hashMap.put(s2,"no2");
        hashMap.put(s3,"no3");
        hashMap.put(s4,"no4");

        //遍历
        Set<Student> keys =hashMap.keySet();
        for(Student key:keys){


            String val = hashMap.get(key);
            System.out.println(key+"---"+val);
        }
    }
}
LinkedHashMap
概述:
Map 接口的哈希表和链接列表实现,具有可预知的迭代顺序。
代码案例:
/**
 * Map接口的哈希表和链接列表实现,具有可预知的迭代顺序。
 *    是HashMap的子类,由链表保证了元素的有序性(元素插入与取出顺序一致)
 *    由哈希表保证了元素的唯一性
 */

public class LinkedHashMapDemo {


    public static void main(String[] args) {


        LinkedHashMap<Integer,String> linkedHashMap = new LinkedHashMap<Integer,String>();
        linkedHashMap.put(1,"tom");
        linkedHashMap.put(2,"jack");
        linkedHashMap.put(3,"rose");
        linkedHashMap.put(1,"tit");

        Set<Integer> keys = linkedHashMap.keySet();
        for(Integer key:keys){


            String val = linkedHashMap.get(key);
            System.out.println(key+"---"+val);
        }
    }
}
TreeMap
概述:
基于红黑树的实现。该映射根据其键的自然顺序进行排序,或者根据创建映射时提供的 Comparator 进行排序,具体取决于使用的构造方法。
常见用法:
HashMap<String,String>
public class TreeMapDemo {


    public static void main(String[] args) {


        TreeMap<String,String> treeMap = new TreeMap<String,String>();
        treeMap.put("no2","tom");
        treeMap.put("no1","jack");
        treeMap.put("no4","rose");
        treeMap.put("no3","lily");
        treeMap.put("no2","tik");

        Set<String> keys =treeMap.keySet();
        for(String key:keys){


            String val = treeMap.get(key);
            System.out.println(key+"---"+val);
        }
    }
}
HashMap<Student,String>
/**
 * HashMap<Student,String>
 *     类转化异常:
 *
 */

public class TreeMapDemo2 {


    public static void main(String[] args) {


        TreeMap<Student,String> treeMap = new TreeMap<Student,String>(new Comparator<Student>() {


            @Override
            public int compare(Student s1, Student s2) {


                int num =s1.getAge()-s2.getAge();
                int result = num==0?s1.getName().compareTo(s2.getName()) :num;
                return result;
            }
        });

        Student s1 =new Student("tom",18);
        Student s2 =new Student("jack",16);
        Student s3 =new Student("lily",24);
        Student s4 =new Student("tik",18);

        treeMap.put(s1,"no1");
        treeMap.put(s2,"no2");
        treeMap.put(s3,"no3");
        treeMap.put(s4,"no4");

        Set<Student> keys = treeMap.keySet();
        for(Student key:keys){


            String val = treeMap.get(key);
            System.out.println(key+"---"+val);
        }
    }
}
面试题
面试题一:1.HashMap和Hashtable的区别
共同点:
都是双列集合,底层都是哈希算法
不同点:
1.HashMap是线程不安全的,效率高,JDK1.2版本
Hashtable是线程安全的,效率低,JDK1.0版本
2.HashMap可以存储null键和null值
Hashtable不可以存储null键和null值