vue.js的动态路由
步骤:
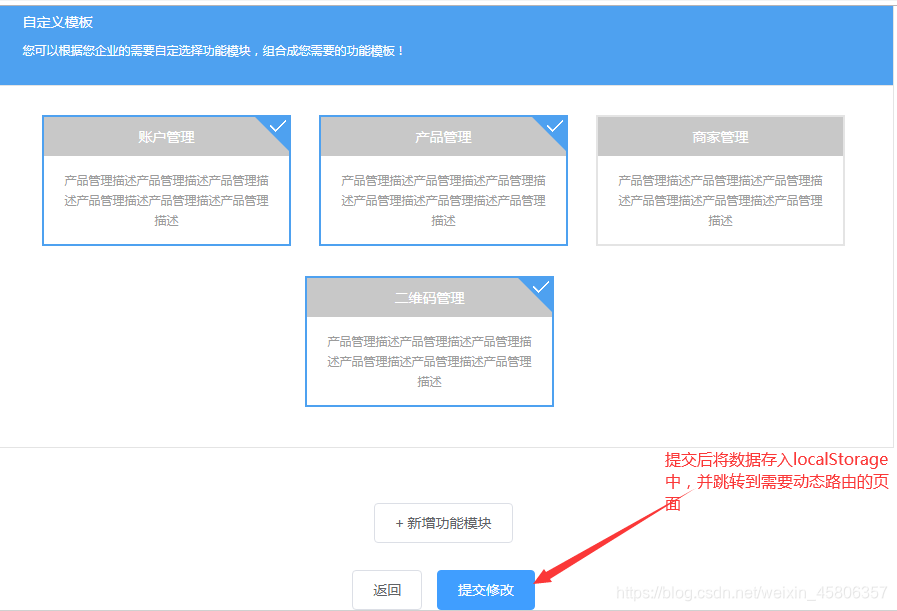
1.在需要将数据提交后跳转的页面,为提交按钮绑定点击事件,并将数据转为json字符串存入localStorage中
按钮:绑定点击事件

methods:中写入方法

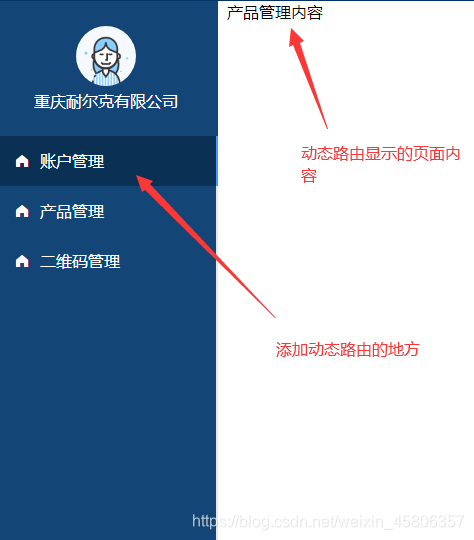
2.在需要实现动态路由的页面,生命周期‘mounted加载完成’中获取前台页面存入localStorage的数据
在需要添加动态路由的地方渲染获取到的数据
在data中return返回一个
moduleList: []


3.写一个静态的路由文件,用于我们前端默认存储某个地址用的组件
let staticRpute = [
  {


    name: '首页',
    component: () => import('../components/Index')
  },
  {


    name: '账户管理',
    component: () => import('../components/acount')
  },
  {


    name: '产品管理',
    component: () => import('../components/product')
  },
  {


    name: '商家管理',
    component: () => import('../components/entprise')
  },
  {


    name: '二维码管理',
    component: () => import('../components/qrcode')
  }
]
export default staticRpute
4.在入口文件main.js中,写路由拦截并且添加动态路由
// 路由拦截
router.beforeEach((to, from, next) => {


  // console.log(to)
  // 动态添加路由
  if (to.path === '/' || to.path === '/register' || to.path === '/seccond') {


  // 判断默认有的地址就直接next走
    next()
  } else {


  // 否者再判断vuex中数据是否有
    if (store.state.step.chooseModule.length <= 0) {


       // 将存入localStorage的数据得到转为对象--【parse从一个字符串中解析出json对象】--*修改备注*
      let routerPath = JSON.parse(window.localStorage.getItem('module'))
      console.log(routerPath)
      routerPath.forEach((item) => {


      // 循环得到的数据 'forEach' 循环
      // 找到import引入的staticRpute文件中的地址内容
        let staticitem = staticRpute.find((itemrouter) => {


        // 返回找到的name
          return itemrouter.name === item.name
        })
        // 将找到的内容合并对象到循环中的item中
        Object.assign(item, staticitem) // 合并对象
      })
      // 触发vuex模块中数据下的事件   使用的是commit
      // commit触发的是 mutations 中的内容事件
      // dispatch 触发的是actions 中的内容事件
      store.commit('changeChooseModule', routerPath)
      // 往路由中添加路由  路由中的方法 addRoutes
      router.addRoutes([{


        path: '/index',
        component: () => import('./components/Index'),
        children: routerPath
      }])
      next({

    ...to, replace: true}) // '...'三个点是序列化拓展查找
    } else {


      next()
    }
  }
})
最终展示:
心得:
1.原理需要我们自己多理解
例如:
commit和dispatch 对应触发的内容块中的事件;
vue中的某些方法也需要自己去了解,如本次用到的 路由中的方法 addRoutes
2.练习需要继续完善
总结:
动态路由步骤:1、2、3、4,如上所诉
json.parse和json.stringify的区别如下链接
json.parse和json.stringify的区别于此链接