一级路由配置
前置条件
vue工程中安装了router
其中在router文件夹中的index.js为配置文件
并在入口文件main.js中进行配置
import router from './router'

new Vue({
  router: router,
  store,
  render: h => h(App)
}).$mount('#app')
配置
(1)router配置文件
配置文件的结构如下
import Vue from 'vue'
import VueRouter from 'vue-router'
import Movie from '@/views/Movie'
import Cinema from '@/views/Cinema'
import Center from '../views/Center.vue'

Vue.use(VueRouter)

const router = new VueRouter({
  // mode: 'history',
  // base: process.env.BASE_URL,
  routes: [
    {
      path: '/cinema',
      component: Cinema
    },
    {
      path: '/center',
      component: Center
    },
    {
      path: '/movie',
      component: Movie
    }
  ]
})

export default router
因为页面级的组件创建在views的文件夹下
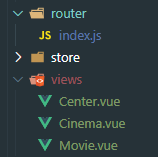
所以可以看到两种导入方式
import Cinema from '@/views/Cinema'
import Center from '../views/Center.vue'
实际上,@就是指向src文件夹
(2)入口文件
在main.js中进行导入
import Vue from 'vue'
import App from './App.vue'
import router from './router'
import store from './store'

Vue.config.productionTip = false

new Vue({
  router: router,
  store,
  render: h => h(App)
}).$mount('#app')
(3)插槽
路由指向的组件在需要被调用的时候使用<router-view></router-view>插槽即可

声明式导航
(1)原生版本
写一个tabber组件,调用,完事
<template>
<div>
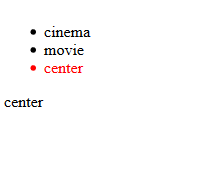
<ul>
<li><a href="#/cinema">cinema</a></li>
<li><a href="#/movie">movie</a></li>
<li><a href="#/center">center</a></li>
</ul>
</div>
</template>注意:href中要加上#
(2)vue版本
原生版本可以实现路由
但是还有一些漏洞,比如:
页面跳转后li的样式变换不好做,还要用jq等工具
所以vue给我做了个轮子
router-link
把tabber组件的代码改为如下:
<template>
    <div>
        <ul>
            <router-link to="/cinema" tag="li" active-class="select">cinema</router-link>
            <router-link to="/movie" tag="li" active-class="select">movie</router-link>
            <router-link to="/center" tag="li" active-class="select">center</router-link>
        </ul>
    </div>
</template>

<style lang="css" scoped>
    .select{
        color: red
    }
</style>
保存后再看一下
发现一切都和想象中的一样好起来了
router-link中的一些参数解释:
to:路由到的页面,不用加#
tag:渲染的样式
active-class:被选中后的样式class
比如刚刚的例子渲染完就是这样

重定向
路由配置完毕后,打入http://localhost:8080/,我们直接进入到了主界面。
如果想要进入首页的时候自动跳转到某个页面(比如movie)怎么办?
很简单,在配置路由时在routers中加上:
    {
      path: '*',
      redirect: '/movie'
    }
就可以了
一切不在已定义的跳转都会重定向到/movie
二级路由
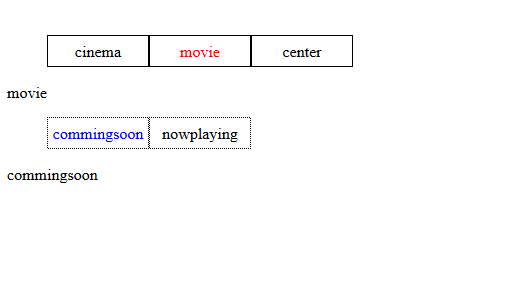
我们的目标是在/movie路由下设值两个二级路由
- /movie/nowplaying
- /movie/commingsoon
配置子路由
在router的配置文件中为movie路由添加一个children属性
    {
      path: '/movie',
      component: Movie,
      children: [
        {
          path: 'nowplaying',
          component: Nowplaying
        },
        {
          path: 'commingsoon',
          component: Commingsoon
        }
      ]
},注意:这里的二级path有两种写法
path: 'commingsoon',path: '/movie/commingsoon',但是千万不能写成
/commingsoon
然后写两个组件,并且进行import,这里不再赘述
注意:为了规范,建议在创建两个子组件的时候放在一个新的文件夹里
比如,这里的Commingsoon和Nowplaying组件,我们就放在/views/Movie文件夹下

router-view与router-link
和一级路由介绍的一样,先做一个二级tabber
<template>
    <div>
        <ul>
            <router-link to="/movie/commingsoon" tag="li" active-class="select">commingsoon</router-link>
            <router-link to="/movie/nowplaying" tag="li" active-class="select">nowplaying</router-link>
        </ul>
    </div>
</template>
然后在Movie组件中进行调用
<template>
<div>
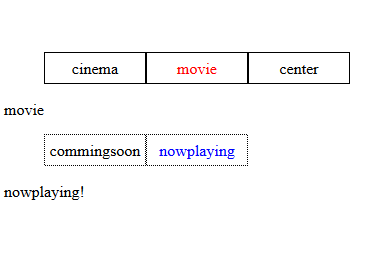
movie
<movietabber></movietabber>
<router-view></router-view>
</div>
</template>
<script>
import MovieTabber from '../components/MovieTabber'
export default {
components: {
movietabber: MovieTabber
}
}
</script>
跑起来,发现没有问题
二级redirect
还有一些小问题,比如访问/movie的时候,两个子组件是不会显示的
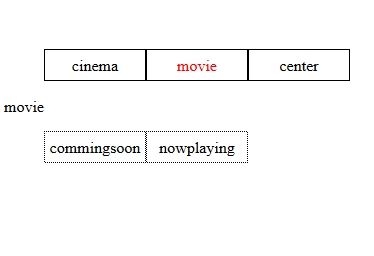
实际项目中应该至少要显示一些东西
在配置文件下添加重定向,添加后如下:
    {
      path: '/movie',
      component: Movie,
      children: [
        {
          path: 'nowplaying',
          component: Nowplaying
        },
        {
          path: 'commingsoon',
          component: Commingsoon
        },
        {
          path: '',
          redirect: 'nowplaying'
        }
      ]
    },
发现默认会有选择,好起来了