从源码分析 Android 动画如何展现到屏幕上:补间动画、属性动画、帧动画
Android动画目前分为三种:
- 补间动画: 是通过对场景里的对象不断做图像变换(透明度、缩放、平移、旋转)从而产生动画效果,是一种渐进式动画,并且View动画支持自定义。
- 属性动画: 这也是在android3.0之后引进的动画,在手机的版本上是android4.0就可以使用这个动 画,通过动态的改变对象的属性从而达到动画效果。
- 帧动画: 通过顺序播放一系列图像从而产生动画效果,。图片过多时容易造成OOM(Out Of Memory内存用完)异常。
补间动画和属性动画的区别
- 补间动画只是改变了View的显示效果而已,并不会真正的改变View的属性
- 属性动画可以改变View的显示效果和属性
下面就从源码分析三种动画是如何生效,还有补间动画和属性动画的区别
1. 补间动画
找一种最简单的补间动画开始来分析补间动画是怎么生效的
TranslateAnimation translateAnimation = new TranslateAnimation(0, 300.0f, 0, 0);
translateAnimation.setDuration(2 * 1000);
translateAnimation.setFillAfter(true);
imageView.startAnimation(translateAnimation);
看看 View 是如何开始动画的
android.view.View
public void startAnimation(Animation animation) {
    animation.setStartTime(Animation.START_ON_FIRST_FRAME);
    // 记录下需要的动画
    setAnimation(animation);
    invalidateParentCaches();
    // 进行重绘
    invalidate(true);
}

public void setAnimation(Animation animation) {
    mCurrentAnimation = animation;

    if (animation != null) {
        // If the screen is off assume the animation start time is now instead of
        // the next frame we draw. Keeping the START_ON_FIRST_FRAME start time
        // would cause the animation to start when the screen turns back on
        if (mAttachInfo != null && mAttachInfo.mDisplayState == Display.STATE_OFF
                && animation.getStartTime() == Animation.START_ON_FIRST_FRAME) {
            animation.setStartTime(AnimationUtils.currentAnimationTimeMillis());
        }
        animation.reset();
    }
}
View 进行重绘,必然要重新执行 draw 方法,这里也是动画最终执行的地方
android.view.View
boolean draw(Canvas canvas, ViewGroup parent, long drawingTime) {
    final boolean hardwareAcceleratedCanvas = canvas.isHardwareAccelerated();
    /* If an attached view draws to a HW canvas, it may use its RenderNode + DisplayList.
     *
     * If a view is dettached, its DisplayList shouldn't exist. If the canvas isn't
     * HW accelerated, it can't handle drawing RenderNodes.
     */
    ...

    // 第一部分:获取动画对 View 的偏移值,设置到 transformToApply 属性上
    Transformation transformToApply = null;
    boolean concatMatrix = false;
    final boolean scalingRequired = mAttachInfo != null && mAttachInfo.mScalingRequired;
    final Animation a = getAnimation();
    if (a != null) {
        more = applyLegacyAnimation(parent, drawingTime, a, scalingRequired);
        concatMatrix = a.willChangeTransformationMatrix();
        if (concatMatrix) {
            mPrivateFlags3 |= PFLAG3_VIEW_IS_ANIMATING_TRANSFORM;
        }
        transformToApply = parent.getChildTransformation();
    }

    ...

    // 把动画对 View 的偏移值绘制到屏幕上
    float alpha = drawingWithRenderNode ? 1 : (getAlpha() * getTransitionAlpha());
    if (transformToApply != null
            || alpha < 1
            || !hasIdentityMatrix()
            || (mPrivateFlags3 & PFLAG3_VIEW_IS_ANIMATING_ALPHA) != 0) {
        if (transformToApply != null || !childHasIdentityMatrix) {
            int transX = 0;
            int transY = 0;

            if (offsetForScroll) {
                transX = -sx;
                transY = -sy;
            }

            if (transformToApply != null) {
                if (concatMatrix) {
                    if (drawingWithRenderNode) {
                        renderNode.setAnimationMatrix(transformToApply.getMatrix());
                    } else {
                        // Undo the scroll translation, apply the transformation matrix,
                        // then redo the scroll translate to get the correct result.
                        canvas.translate(-transX, -transY);
                        canvas.concat(transformToApply.getMatrix());
                        canvas.translate(transX, transY);
                    }
                    parent.mGroupFlags |= ViewGroup.FLAG_CLEAR_TRANSFORMATION;
                }

                float transformAlpha = transformToApply.getAlpha();
                if (transformAlpha < 1) {
                    alpha *= transformAlpha;
                    parent.mGroupFlags |= ViewGroup.FLAG_CLEAR_TRANSFORMATION;
                }
            }

            if (!childHasIdentityMatrix && !drawingWithRenderNode) {
                canvas.translate(-transX, -transY);
                canvas.concat(getMatrix());
                canvas.translate(transX, transY);
            }
        }
    ...
}
先看第一部分,如何获取动画对 View 的偏移值,设置到 transformToApply 属性上
android.view.View
private boolean applyLegacyAnimation(ViewGroup parent, long drawingTime,
        Animation a, boolean scalingRequired) {
    Transformation invalidationTransform;
    ...

    final Transformation t = parent.getChildTransformation();
    boolean more = a.getTransformation(drawingTime, t, 1f);

    ...
}
调用 Animation.getTransformation 方法来获取 Transformation
根据 getTransformation 的方法名就可以知道,第二个参数是用来重新设置的,所以会把动画的属性设置到 parent.getChildTransformation() 上
android.view.animation.Animation
public boolean getTransformation(long currentTime, Transformation outTransformation,
        float scale) {
    mScaleFactor = scale;
    return getTransformation(currentTime, outTransformation);
}


public boolean getTransformation(long currentTime, Transformation outTransformation) {
    ...
        // 根据当前时间和补偿器来获取当前的 Transformation
        final float interpolatedTime = mInterpolator.getInterpolation(normalizedTime);
        applyTransformation(interpolatedTime, outTransformation);
    ...
}
applyTransformation 方法在 Animation 中是一个空实现,具体看移动动画的实现 TranslateAnimation
android.view.animation.TranslateAnimation
protected void applyTransformation(float interpolatedTime, Transformation t) {
    float dx = mFromXDelta;
    float dy = mFromYDelta;
    // 根据补偿器时间来计算当前需要偏移的 dx 和 dy,并只是到 Transformation 上
    if (mFromXDelta != mToXDelta) {
        dx = mFromXDelta + ((mToXDelta - mFromXDelta) * interpolatedTime);
    }
    if (mFromYDelta != mToYDelta) {
        dy = mFromYDelta + ((mToYDelta - mFromYDelta) * interpolatedTime);
    }
    t.getMatrix().setTranslate(dx, dy);
}
这里设置结束,也就相当于 parent.getChildTransformation() 设置了 dx 和 dy 的偏移
后面 transformToApply = parent.getChildTransformation() ,transformToApply就相当于设置过偏移的 Transformation 实例了
接下来,看下第二部分:把动画对 View 的偏移值绘制到屏幕上
android.view.View
boolean draw(Canvas canvas, ViewGroup parent, long drawingTime) {
    final boolean hardwareAcceleratedCanvas = canvas.isHardwareAccelerated();
    /* If an attached view draws to a HW canvas, it may use its RenderNode + DisplayList.
     *
     * If a view is dettached, its DisplayList shouldn't exist. If the canvas isn't
     * HW accelerated, it can't handle drawing RenderNodes.
     */
    ...

    // 把动画对 View 的偏移值绘制到屏幕上
    float alpha = drawingWithRenderNode ? 1 : (getAlpha() * getTransitionAlpha());
    if (transformToApply != null
            || alpha < 1
            || !hasIdentityMatrix()
            || (mPrivateFlags3 & PFLAG3_VIEW_IS_ANIMATING_ALPHA) != 0) {
        if (transformToApply != null || !childHasIdentityMatrix) {
            int transX = 0;
            int transY = 0;

            if (offsetForScroll) {
                transX = -sx;
                transY = -sy;
            }

            if (transformToApply != null) {
                if (concatMatrix) {
                    if (drawingWithRenderNode) {
                        renderNode.setAnimationMatrix(transformToApply.getMatrix());
                    } else {
                        // Undo the scroll translation, apply the transformation matrix,
                        // then redo the scroll translate to get the correct result.
                        canvas.translate(-transX, -transY);
                        // 把 transformToApply 的偏移应用到 canvas 上
                        canvas.concat(transformToApply.getMatrix());
                        canvas.translate(transX, transY);
                    }
                    parent.mGroupFlags |= ViewGroup.FLAG_CLEAR_TRANSFORMATION;
                }

                float transformAlpha = transformToApply.getAlpha();
                if (transformAlpha < 1) {
                    alpha *= transformAlpha;
                    parent.mGroupFlags |= ViewGroup.FLAG_CLEAR_TRANSFORMATION;
                }
            }

            if (!childHasIdentityMatrix && !drawingWithRenderNode) {
                canvas.translate(-transX, -transY);
                canvas.concat(getMatrix());
                canvas.translate(transX, transY);
            }
        }
    ...
}
这也是补间动画,View 移动之后为什么不可以点击的原因。
因为补间动画是通过 canvas 画布进行偏移绘制,而 View 的属性 left, right, top, bottom 都没改变,相当于对 View 进行触摸事件分发还在原来的地方。
所以,点击原来位置可以响应,新的位置不响应。
2. 属性动画
同样找一种最简单的属性动画开始来分析属性动画是怎么生效的
ObjectAnimator animator = ObjectAnimator.ofFloat(imageView, "translationX", 0, 300);
animator.setDuration(2 * 1000);
animator.start();
首先是对 ObjectAnimator 进行动画参数的设置
android.animation.ObjectAnimator
public static ObjectAnimator ofFloat(Object target, String propertyName, float... values) {
    ObjectAnimator anim = new ObjectAnimator(target, propertyName);
     // 设置动画参数
    anim.setFloatValues(values);
    return anim;
}

public void setFloatValues(float... values) {
    if (mValues == null || mValues.length == 0) {
        // No values yet - this animator is being constructed piecemeal. Init the values with
        // whatever the current propertyName is
        if (mProperty != null) {
            setValues(PropertyValuesHolder.ofFloat(mProperty, values));
        } else {
            // 设置动画参数
            setValues(PropertyValuesHolder.ofFloat(mPropertyName, values));
        }
    } else {
        super.setFloatValues(values);
    }
}
需要 ObjectAnimator 的父类 ValueAnimator 进行设置记录
android.animation.ValueAnimator
public void setValues(PropertyValuesHolder... values) {
    int numValues = values.length;
    // 记录下动画的参数,后面具体做动画时会使用到
    mValues = values;
    mValuesMap = new HashMap<String, PropertyValuesHolder>(numValues);
    for (int i = 0; i < numValues; ++i) {
        PropertyValuesHolder valuesHolder = values[i];
        mValuesMap.put(valuesHolder.getPropertyName(), valuesHolder);
    }
    // New property/values/target should cause re-initialization prior to starting
    mInitialized = false;
}
接下来真正开始动画
android.animation.ObjectAnimator
public void start() {
    ...
    super.start();
}
ObjectAnimator 的父类 ValueAnimator 真正开始动画
android.animation.ValueAnimator
public void start() {
    start(false);
}

private void start(boolean playBackwards) {
    ...
    // 增加动画的回调
    addAnimationCallback(0);

    if (mStartDelay == 0 || mSeekFraction >= 0 || mReversing) {
        // If there's no start delay, init the animation and notify start listeners right away
        // to be consistent with the previous behavior. Otherwise, postpone this until the first
        // frame after the start delay.
        // 开始动画
        startAnimation();
        if (mSeekFraction == -1) {
            // No seek, start at play time 0. Note that the reason we are not using fraction 0
            // is because for animations with 0 duration, we want to be consistent with pre-N
            // behavior: skip to the final value immediately.
            // 设置第一帧动画,进行开始
            setCurrentPlayTime(0);
        } else {
            setCurrentFraction(mSeekFraction);
        }
    }
}

// 增加动画的回调
private void addAnimationCallback(long delay) {
    if (!mSelfPulse) {
        return;
    }
    getAnimationHandler().addAnimationFrameCallback(this, delay);
}
在 AnimationHandler 加入 addAnimationFrameCallback 的回调
android.animation.AnimationHandler
public void addAnimationFrameCallback(final AnimationFrameCallback callback, long delay) {
    // 第一次加入 callback 回调的时候,加入 mFrameCallback 回调
    if (mAnimationCallbacks.size() == 0) {
        getProvider().postFrameCallback(mFrameCallback);
    }
    // 只是把 callback 回调加入到 mAnimationCallbacks 的集合当中
    if (!mAnimationCallbacks.contains(callback)) {
        mAnimationCallbacks.add(callback);
    }

    if (delay > 0) {
        mDelayedCallbackStartTime.put(callback, (SystemClock.uptimeMillis() + delay));
    }
}
addAnimationFrameCallback 方法只是把 callback 加入到了 mAnimationCallbacks 集合当中,我们来找下,哪里具体回调了 callback
通过搜索可以快速找到在 doAnimationFrame 方法里回调了 callback 方法
android.animation.AnimationHandler
private void doAnimationFrame(long frameTime) {
    long currentTime = SystemClock.uptimeMillis();
    final int size = mAnimationCallbacks.size();
    for (int i = 0; i < size; i++) {
        final AnimationFrameCallback callback = mAnimationCallbacks.get(i);
        if (callback == null) {
            continue;
        }
        if (isCallbackDue(callback, currentTime)) {
            callback.doAnimationFrame(frameTime);
            if (mCommitCallbacks.contains(callback)) {
                getProvider().postCommitCallback(new Runnable() {
                    @Override
                    public void run() {
                        commitAnimationFrame(callback, getProvider().getFrameTime());
                    }
                });
            }
        }
    }
    cleanUpList();
}
继续往上回溯,找到调用 doAnimationFrame 的方法,是在 mFrameCallback 里面的
android.animation.AnimationHandler
private final Choreographer.FrameCallback mFrameCallback = new Choreographer.FrameCallback() {
    @Override
    public void doFrame(long frameTimeNanos) {
        doAnimationFrame(getProvider().getFrameTime());
        if (mAnimationCallbacks.size() > 0) {
            getProvider().postFrameCallback(this);
        }
    }
};
看来就是前面 addAnimationFrameCallback 方法里面,第一次添加 callback 的时候加上去的,具体分析下 getProvider().postFrameCallback(mFrameCallback); 方法
看到 getProvider 拿到的是 MyFrameCallbackProvider
android.animation.AnimationHandler
private AnimationFrameCallbackProvider getProvider() {
    if (mProvider == null) {
        mProvider = new MyFrameCallbackProvider();
    }
    return mProvider;
}
接下来看下 MyFrameCallbackProvider 具体是什么。
里面直接通过 Choreographer.getInstance() 方法拿到了当前线程的 mChoreographer对象。
getProvider().postFrameCallback(mFrameCallback) 就是调用 mChoreographer.postFrameCallback(callback)
Choreographer 会每 16ms 回调一次 doFrame 方法
android.animation.AnimationHandler
private class MyFrameCallbackProvider implements AnimationFrameCallbackProvider {

    final Choreographer mChoreographer = Choreographer.getInstance();

    @Override
    public void postFrameCallback(Choreographer.FrameCallback callback) {
        mChoreographer.postFrameCallback(callback);
    }

    @Override
    public void postCommitCallback(Runnable runnable) {
        mChoreographer.postCallback(Choreographer.CALLBACK_COMMIT, runnable, null);
    }

    @Override
    public long getFrameTime() {
        return mChoreographer.getFrameTime();
    }

    @Override
    public long getFrameDelay() {
        return Choreographer.getFrameDelay();
    }

    @Override
    public void setFrameDelay(long delay) {
        Choreographer.setFrameDelay(delay);
    }
}
再回到 ValueAnimator.start 方法看 startAnimation 做了什么。
其实就是做了一些初始化动画和通知动画开始的回调
android.animation.ValueAnimator
private void startAnimation() {
    if (Trace.isTagEnabled(Trace.TRACE_TAG_VIEW)) {
        Trace.asyncTraceBegin(Trace.TRACE_TAG_VIEW, getNameForTrace(),
                System.identityHashCode(this));
    }

    mAnimationEndRequested = false;
    initAnimation();
    mRunning = true;
    if (mSeekFraction >= 0) {
        mOverallFraction = mSeekFraction;
    } else {
        mOverallFraction = 0f;
    }
    if (mListeners != null) {
        notifyStartListeners();
    }
}

void initAnimation() {
    if (!mInitialized) {
        int numValues = mValues.length;
        for (int i = 0; i < numValues; ++i) {
            mValues[i].init();
        }
        mInitialized = true;
    }
}
通过前面的 AnimationHandler.addAnimationFrameCallback 方法已经知道,Choreographer 会每 16ms 回调一次 doFrame 方法,而 doFrame 方法会调用 callback.doAnimationFrame
看下 ValueAnimator.doAnimationFrame 做了什么
public final boolean doAnimationFrame(long frameTime) {
    ...
    // 计算当前的时间
    final long currentTime = Math.max(frameTime, mStartTime);
    boolean finished = animateBasedOnTime(currentTime);

    if (finished) {
        endAnimation();
    }
    return finished;
}


boolean animateBasedOnTime(long currentTime) {
    boolean done = false;
    if (mRunning) {
        // 根据时间计算得到,当前的比例
        float currentIterationFraction = getCurrentIterationFraction(
                mOverallFraction, mReversing);
        // 设置动画具体值,改变 View 位置关键所在
        animateValue(currentIterationFraction);
    }
    return done;
}
ObjectAnimator 对 animateValue 有自己的而实现
android.animation.ObjectAnimator
void animateValue(float fraction) {
    final Object target = getTarget();
    if (mTarget != null && target == null) {
        // We lost the target reference, cancel and clean up. Note: we allow null target if the
        /// target has never been set.
        cancel();
        return;
    }

    super.animateValue(fraction);
    int numValues = mValues.length;
    for (int i = 0; i < numValues; ++i) {
        mValues[i].setAnimatedValue(target);
    }
}
具体到 setAnimatedValue 看下怎么调用
android.animation.PropertyValuesHolder$FloatPropertyValuesHolder
void setAnimatedValue(Object target) {
    ...
    if (mJniSetter != 0) {
        nCallFloatMethod(target, mJniSetter, mFloatAnimatedValue);
        return;
    }
    ...
}
mJniSetter 是前面就设置好的,通过 setupSetter 提前已经设好了,而 setupSetter 的时机是在动画初始化的时候,ObjectAnimator.initAnimation 方法中调用的,详细可以自己去看
android.animation.PropertyValuesHolder$FloatPropertyValuesHolder
void setupSetter(Class targetClass) {
    ...
        if (!wasInMap) {
            String methodName = getMethodName("set", mPropertyName);
            try {
                mJniSetter = nGetFloatMethod(targetClass, methodName);
            } catch (NoSuchMethodError e) {
                // Couldn't find it via JNI - try reflection next. Probably means the method
                // doesn't exist, or the type is wrong. An error will be logged later if
                // reflection fails as well.
            }
            if (propertyMap == null) {
                propertyMap = new HashMap<String, Long>();
                sJNISetterPropertyMap.put(targetClass, propertyMap);
            }
            propertyMap.put(mPropertyName, mJniSetter);
        }
    ...
}


// 这里的 propertyName = translationX, 返回为函数名为 "setTranslationX"
static String getMethodName(String prefix, String propertyName) {
    if (propertyName == null || propertyName.length() == 0) {
        // shouldn't get here
        return prefix;
    }
    char firstLetter = Character.toUpperCase(propertyName.charAt(0));
    String theRest = propertyName.substring(1);
    return prefix + firstLetter + theRest;
}
最终调用的 View 里面的 setTranslationX 方法
android.view.View
public void setTranslationX(float translationX) {
    if (translationX != getTranslationX()) {
        invalidateViewProperty(true, false);
        mRenderNode.setTranslationX(translationX);
        invalidateViewProperty(false, true);

        invalidateParentIfNeededAndWasQuickRejected();
        notifySubtreeAccessibilityStateChangedIfNeeded();
    }
}
View 的 setTranslationX,还是调用 RenderNode 里面的 native 方法,进行硬件加速动画绘制
android.view.RenderNode
public boolean setTranslationX(float translationX) {
    return nSetTranslationX(mNativeRenderNode, translationX);
}
下面是完整的调用链
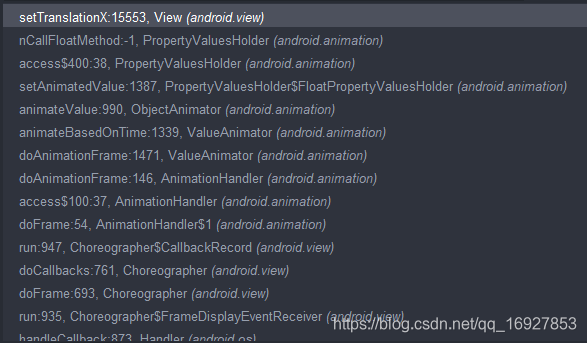
总结一下属性动画更新的原理:通过 Choreographer 会每 16ms 回调一次 doFrame 方法,在 doFrame 方法里不断地更新 View 的属性以达到动画的效果。
那么问题来了,属性动画并没有更新 View 的位置属性 left, right, top, botoom, 为什么和补间动画不一样,这个 View 还可以点击呢?
其实,这个问题也很简单,在 dispatchTouchEvent 进行触摸事件分发的时候,对 View 的位置进行了一次转换
android.view.ViewGroup
public boolean dispatchTouchEvent(MotionEvent ev) {
        if (mInputEventConsistencyVerifier != null) {
            mInputEventConsistencyVerifier.onTouchEvent(ev, 1);
        }

        ...
                        if (dispatchTransformedTouchEvent(ev, cancelChild,
                                target.child, target.pointerIdBits)) {
                            handled = true;
                        }
        ...
}

// 对子 View 进行转黄
private boolean dispatchTransformedTouchEvent(MotionEvent event, boolean cancel,
            View child, int desiredPointerIdBits) {
        final boolean handled;

        ...

        if (child == null) {
            handled = super.dispatchTouchEvent(transformedEvent);
        } else {
            final float offsetX = mScrollX - child.mLeft;
            final float offsetY = mScrollY - child.mTop;
            transformedEvent.offsetLocation(offsetX, offsetY);
            // 判断子 View 是否需要转换
            if (! child.hasIdentityMatrix()) {
                transformedEvent.transform(child.getInverseMatrix());
            }

            handled = child.dispatchTouchEvent(transformedEvent);
        }

        // Done.
        transformedEvent.recycle();
        return handled;
    }
获取当前 View 的转换矩阵
android.view.View
public final Matrix getInverseMatrix() {
    ensureTransformationInfo();
    if (mTransformationInfo.mInverseMatrix == null) {
        mTransformationInfo.mInverseMatrix = new Matrix();
    }
    final Matrix matrix = mTransformationInfo.mInverseMatrix;
    mRenderNode.getInverseMatrix(matrix);
    return matrix;
}
最终,还是要通过硬件加速的数据获取,setTranslationX 也最终会反应到这个 matrix 当中,有兴趣可以自己调试看下参数
android.view.RenderNode
public void getInverseMatrix(@NonNull Matrix outMatrix) {
    nGetInverseTransformMatrix(mNativeRenderNode, outMatrix.native_instance);
}
3. 逐帧动画
同样找一种最简单的逐帧动画开始来分析逐帧动画是怎么生效的
AnimationDrawable animationDrawable=(AnimationDrawable) getResources().getDrawable(R.drawable.frame_animation);
view.setBackgroundDrawable(animationDrawable);
animationDrawable.start()
开始逐帧动画
android.graphics.drawable.AnimationDrawable
public void start() {
    mAnimating = true;

    if (!isRunning()) {
        // Start from 0th frame.
        // 设置为第一帧
        setFrame(0, false, mAnimationState.getChildCount() > 1
                || !mAnimationState.mOneShot);
    }
}
具体怎么设置第一帧动画
android.graphics.drawable.AnimationDrawable
private void setFrame(int frame, boolean unschedule, boolean animate) {
    if (frame >= mAnimationState.getChildCount()) {
        return;
    }
    mAnimating = animate;
    mCurFrame = frame;
    // 设置为相应帧 Drawable
    selectDrawable(frame);
    if (unschedule || animate) {
        // 结束的时候停止循环更新
        unscheduleSelf(this);
    }
    if (animate) {
        // Unscheduling may have clobbered these values; restore them
        mCurFrame = frame;
        mRunning = true;
        // 把自己加入循环中,不断收到消息更新动画帧
        scheduleSelf(this, SystemClock.uptimeMillis() + mAnimationState.mDurations[frame]);
    }
}
scheduleSelf 是父类 Drawable 实现的
android.graphics.drawable.Drawable
public void scheduleSelf(@NonNull Runnable what, long when) {
    final Callback callback = getCallback();
    if (callback != null) {
        // 在 callback 中具体加入
        callback.scheduleDrawable(this, what, when);
    }
}
那这个 getCallback 拿到的是哪里设置的呢?只有一个 setCallback 方法
android.graphics.drawable.Drawable
public final void setCallback(@Nullable Callback cb) {
    mCallback = cb != null ? new WeakReference<>(cb) : null;
}
可以找到 setCallback 是 View.setBackgroundDrawable 方法的时候调用的,
android.view.View
public void setBackgroundDrawable(Drawable background) {
        computeOpaqueFlags();

    ...
        background.setCallback(this);
}
接下来看下 callback 是什么时候回调的。也是通过 mChoreographer 实例来回调,每 16ms 回调一次。
android.view.View
public void scheduleDrawable(@NonNull Drawable who, @NonNull Runnable what, long when) {
    if (verifyDrawable(who) && what != null) {
        final long delay = when - SystemClock.uptimeMillis();
        if (mAttachInfo != null) {
            mAttachInfo.mViewRootImpl.mChoreographer.postCallbackDelayed(
                    Choreographer.CALLBACK_ANIMATION, what, who,
                    Choreographer.subtractFrameDelay(delay));
        } else {
            // Postpone the runnable until we know
            // on which thread it needs to run.
            getRunQueue().postDelayed(what, delay);
        }
    }
}
看看 callback 回调中做了什么,找到 run 方法。
public void run() {
    nextFrame(false);
}


private void nextFrame(boolean unschedule) {
    // 帧数加一
    int nextFrame = mCurFrame + 1;
    final int numFrames = mAnimationState.getChildCount();
    final boolean isLastFrame = mAnimationState.mOneShot && nextFrame >= (numFrames - 1);

    // Loop if necessary. One-shot animations should never hit this case.
    if (!mAnimationState.mOneShot && nextFrame >= numFrames) {
        nextFrame = 0;
    }

    // 不断循环调用 setFrame,知道结尾帧
    setFrame(nextFrame, unschedule, !isLastFrame);
}