一、配置
新建一个web项目(勾选2.5版本,有web.xml)

在lib文件夹中导入对应的包

在src目录下创建配置文件,因为要用到注解和自动装配进行信息传入,故提前配置 xml信息(Service.xml)
<?xml version="1.0" encoding="UTF-8"?>
<beans xmlns="http://www.springframework.org/schema/beans"
	xmlns:xsi="http://www.w3.org/2001/XMLSchema-instance"
	xmlns:context="http://www.springframework.org/schema/context"
	xmlns:aop="http://www.springframework.org/schema/aop"
	xsi:schemaLocation="http://www.springframework.org/schema/beans http://www.springframework.org/schema/beans/spring-beans.xsd
		http://www.springframework.org/schema/context http://www.springframework.org/schema/context/spring-context-4.3.xsd
		http://www.springframework.org/schema/aop http://www.springframework.org/schema/aop/spring-aop-4.3.xsd">
	<!-- 扫描器 -->
	<context:component-scan base-package="project"></context:component-scan>
	<!-- 自动装配 -->
	<aop:aspectj-autoproxy></aop:aspectj-autoproxy>
</beans>
同时也要配置好web.xml
<?xml version="1.0" encoding="UTF-8"?>
<web-app xmlns:xsi="http://www.w3.org/2001/XMLSchema-instance" xmlns="http://java.sun.com/xml/ns/javaee" xsi:schemaLocation="http://java.sun.com/xml/ns/javaee http://java.sun.com/xml/ns/javaee/web-app_2_5.xsd" id="WebApp_ID" version="2.5">
  <display-name>NEwSp</display-name>
  <welcome-file-list>
    <welcome-file>index.html</welcome-file>
    <welcome-file>index.htm</welcome-file>
    <welcome-file>index.jsp</welcome-file>
    <welcome-file>default.html</welcome-file>
    <welcome-file>default.htm</welcome-file>
    <welcome-file>default.jsp</welcome-file>
  </welcome-file-list>
  <context-param>
  <!-- 配置Springxml的路径 方便web服务器找到Spring配置-->
    <param-name>contextConfigLocation</param-name>
    <param-value>classpath:Service.xml

    </param-value>
  </context-param>
<!--  配置监听器 -->
  <listener>
    <listener-class>org.springframework.web.context.ContextLoaderListener
        </listener-class>
  </listener>
  <servlet>
    <description></description>
    <display-name>BeanServlet</display-name>
    <servlet-name>BeanServlet</servlet-name>
    <servlet-class>project.BeanServlet</servlet-class>
  </servlet>
  <servlet-mapping>
    <servlet-name>BeanServlet</servlet-name>
    <url-pattern>/BeanServlet</url-pattern>
  </servlet-mapping>

</web-app>
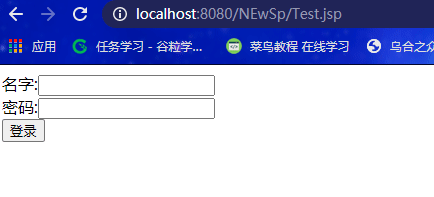
二、前端请求页面
<%@ page language="java" contentType="text/html; charset=utf-8"
	pageEncoding="utf-8"%>
<!DOCTYPE html>
<html>
<head>
<meta charset="utf-8">
<title>Insert title here</title>
</head>
<body>
	<form action="BeanServlet" method="post">

		名字:<input type="text" name="name"><br />
		 密码:<input type="password" name="pass"><br />
		<input type="submit" value="登录">

	</form>
</body>
</html>
三、Servlet处理层
package project;

import java.io.IOException;
import javax.servlet.ServletException;
import javax.servlet.http.HttpServlet;
import javax.servlet.http.HttpServletRequest;
import javax.servlet.http.HttpServletResponse;

import org.springframework.context.ApplicationContext;
import org.springframework.context.support.ClassPathXmlApplicationContext;

public class BeanServlet extends HttpServlet {


	private static final long serialVersionUID = 1L;
	IMPL im;


//web项目中与Spring进行数据交接的设置一般在初始化函数中进行数据请求(init方法)
	@Override
	public void init() throws ServletException {


		ApplicationContext con = new ClassPathXmlApplicationContext("Service.xml");
		im = (IMPL) con.getBean(IMPL.class);

	}

	public BeanServlet() {


		super();
		// TODO Auto-generated constructor stub
	}

	protected void doGet(HttpServletRequest request, HttpServletResponse response)
			throws ServletException, IOException {


		request.setCharacterEncoding("utf-8");
		response.setCharacterEncoding("utf-8");

		String name = request.getParameter("name");
		int pass = Integer.parseInt(request.getParameter("pass"));
		im.Updata();
		if (im.getName().equals(name)) {


			if (im.getPass() == pass) {


				request.setAttribute("name", name);
				request.getRequestDispatcher("a.jsp").forward(request, response);

			} else {


				System.out.println("失敗");
				response.sendRedirect("Test.jsp");
			}

		} else {


			System.out.println("失敗");
			response.sendRedirect("Test.jsp");
		}

	}

	protected void doPost(HttpServletRequest request, HttpServletResponse response)
			throws ServletException, IOException {


		// TODO Auto-generated method stub
		doGet(request, response);
	}

}
因为做的是一个简易的web项目,目的是为了与Spring进行融合,所以数据请求就没有连接数据库,单用一个业务层代替了
User用户数据存储
package project;

import org.springframework.stereotype.Component;

@Component("user")
public class User {


	private String name;
	private int pass;

	public String getName() {


		return name;
	}

	public void setName(String name) {


		this.name = name;
	}

	public int getPass() {


		return pass;
	}

	public void setPass(int pass) {


		this.pass = pass;
	}

}
IMPL这里提前预设了用户信息
package project;

import org.springframework.beans.factory.annotation.Autowired;
import org.springframework.stereotype.Service;

@Service("imp")
public class IMPL {


	@Autowired
	User user;
	private String name = "zs";
	private int pass = 123456;

	public void setUser(User user) {


		this.user = user;
	}

	public String getName() {


		return name;
	}

	public int getPass() {


		return pass;
	}

	public void Updata() {


		user.setPass(pass);
		user.setName(name);

	}

	public void show(String name, int id) {


		System.out.println("name:" + name + ",id:" + id);
	}
}
四、测试
成功携带用户信息,跳转success.jsp页面
这里用EL标签实现
<%@ page language="java" contentType="text/html; charset=utf-8"
    pageEncoding="utf-8"%>
<!DOCTYPE html>
<html>
<head>
<meta charset="utf-8">
<title>Insert title here</title>
</head>
<body>
welcome back:${requestScope.name}
</body>
</html>
失败则返回Test.jsp页面