Learning Opencv 3 —— 十五章 背景去除 Background Subtraction
背景去除概述
background subtraction 也被称为 background differencing。这里将首先介绍经典背景模型的缺点,之后将介绍一些更高阶的方法。其中将介绍一种处理室内光线相对稳定的快速方法和一种能够兼容室外场景的一种称为 codebook 速度较慢的方法。
背景去除的不足
背景模型能够很好地处理简单场景,但其假定图像中的像素点是相互独立的。但这个假定在通常情况下是不成立的,为了对周围像素的信息加以考虑,一种简单的方式是将模型分为不同的区域,比如明亮的部分和昏暗的部分。不过这样就造成必须保存和计算两个模型,造成更高的存储空间和计算量。另一种是使用诸如腐蚀,膨胀或漫水法区分不同的像素点,从而对每个连通区域进行处理解决像素点不独立的问题。
场景模型
同时由于现实中的场景多种多样,比如一个黑暗的房子突然打开了灯,显然整个房子不能都被设置为前景。因此通常我们需要一个更高的场景模型,其中将在前景和后景中定义多个层次,并引入基于时间的方法从而将相对不变的前景部分变为背景。同时针对全局改变比如打开一个房间的灯,我们可以使用全局帧差异,即如果许多像素点在同一刻发生改变,我们将将其归类为一个全局而不是局部改变从而针对这个新场景使用一个不同的模型。
像素切片
在建模像素点差异之前,首选考虑某一行像素点随时间变化的情况。Opencv 给出了一个类,一旦实例化就可以给出关于这行像素点随时间变化的所有信息。
cv::LineIterator::LineIterator(
	const cv::Mat& image, // Image to iterate over
	cv::Point pt1, // Start point for iterator
	cv::Point pt2, // End point for iterator
	int connectivity = 8, // Connectivity, either 4 or 8
	int left_to_right = 0 // 1='fixed iteration direction'
);
参数说明:
- image:输入图像,可以是任意数据类型和通道数
- pt1, pt2:行片段的起始和终止位置
- connectivity:4连通或8连通
- left_to_right:0 表示从 pt1 到 pt2,1 表示从最左边到最右边(不用考虑两个的顺序)
//Example 15-1. Reading out the RGB values of all pixels in one row of a video and
// accumulating those values into three separate comma separated files
//
#include <opencv2/opencv.hpp>
#include <iostream>
#include <fstream>

using namespace std;

void help(char** argv ) {
	cout << "\n"
		<< "Example: 15-1: Read out RGB pixel values and store them to disk\nCall:\n"
		<< argv[0] <<" <path/video_file>\n"
		<< "\nExample:\n" << argv[0] << " ../tree.avi"
		<< "\n This will store to files blines.csv, glines.csv and rlines.csv\n\n"
		<< endl;
}

int main( int argc, char** argv) {
	// Argument handling
	//
	if(argc != 2) { help(argv); return -1; }
	cv::namedWindow( argv[0], CV_WINDOW_AUTOSIZE );
	cv::VideoCapture cap;
	if((argc < 2)|| !cap.open(argv[1]))
	{
		cerr << "Couldn't open video file" << endl;
		help(argv);
		cap.open(0);
		return -1;
	}

	//Prepare Output
	//
	cv::Point pt1(10,10), pt2(30,30);
	int max_buffer;
	cv::Mat rawImage;
	ofstream b,g,r;
	b.open("blines.csv");
	g.open("glines.csv");
	r.open("rlines.csv");

	// MAIN PROCESSING LOOP:
	//
	for(;;) {
		cap >> rawImage;
		if( !rawImage.data ) break;
		cv::LineIterator it( rawImage, pt1, pt2, 8);
		for( int j=0; j<it.count; ++j,++it ) {
			b << (int)(*it)[0] << ", ";
			g << (int)(*it)[1] << ", ";
			r << (int)(*it)[2] << ", ";
			(*it)[2] = 255;   // Mark this sample in red
		}
		cv::imshow( argv[0], rawImage );
		int c = cv::waitKey(10);
		b << "\n"; g << "\n"; r << "\n";
	}

	// CLEAN UP:
	//
	b << endl; g << endl; r << endl;
	b.close(); g.close(); r.close();
	cout << "\n"
		<< "Data stored to files: blines.csv, glines.csv and rlines.csv\n\n"
		<< endl;
}
帧差值
最简单的背景去除方法就是从几帧之后的一帧中减去一帧,然后标记任何足够大差异的像素为前景。这个过程趋向于去获取移动物体的边缘。对于单通道图像,可以使用 adsdiff 来获取图像的差值。
cv::absdiff(
	frameTime1, // First input array
	frameTime2, // Second input array
	frameForeground // Result array
);
由于任何图像都包含噪声和抖动,因此小于 15 的差异被忽略
cv::threshold(
	frameForeground, // Input image
	frameForeground, // Result image
	15, // Threshold value
	255, // Max value for upward operations
	cv::THRESH_BINARY // Threshold type to use
);
最后可能还需要使用 cv::erode() 对图像进行腐蚀从而去除小的噪声区域。对于多通道图像,可以针对每一个通道进行相同的操作,最后通过 cv::max() 来得到前景区域。
平均背景法
其通过多帧得到背景图像的均值和方差,之后如果待检测图像中的像素点偏离均值相比于方差过大,则认为存在前景物体。
// Example 15-2. Learning a background model to identify foreground pixels
#include <opencv2/opencv.hpp>
#include <iostream>
#include <cstdlib>
#include <fstream>

using namespace std;

// Global storage
//
// Float, 3-channel images
//
cv::Mat image;
cv::Mat IavgF, IdiffF, IprevF, IhiF, IlowF;
cv::Mat tmp, tmp2, mask;

// Float, 1-channel images
//
vector<cv::Mat> Igray(3);
vector<cv::Mat> Ilow(3);
vector<cv::Mat> Ihi(3);

// Byte, 1-channel image
//
cv::Mat Imaskt;

// Thresholds
//
float high_thresh = 20.0;  //scaling the thesholds in backgroundDiff()
float low_thresh = 28.0;

// Counts number of images learned for averaging later
//
float Icount;

// I is just a sample image for allocation purposes
// (passed in for sizing)
//
void AllocateImages( const cv::Mat& I ) {
	cv::Size sz = I.size();
	IavgF = cv::Mat::zeros(sz, CV_32FC3 );
	IdiffF = cv::Mat::zeros(sz, CV_32FC3 );
	IprevF = cv::Mat::zeros(sz, CV_32FC3 );
	IhiF = cv::Mat::zeros(sz, CV_32FC3 );
	IlowF = cv::Mat::zeros(sz, CV_32FC3 );
	Icount = 0.00001; // Protect against divide by zero
	tmp = cv::Mat::zeros( sz, CV_32FC3 );
	tmp2 = cv::Mat::zeros( sz, CV_32FC3 );
	Imaskt = cv::Mat( sz, CV_32FC1 );
}

// Learn the background statistics for one more frame
// I is a color sample of the background, 3-channel, 8u
//
void accumulateBackground( cv::Mat& I ){
	static int first = 1; // nb. Not thread safe
	I.convertTo( tmp, CV_32F ); // convert to float
	if( !first ){
		IavgF += tmp;
		cv::absdiff( tmp, IprevF, tmp2 );
		IdiffF += tmp2;
		Icount += 1.0;
	}
	first = 0;
	IprevF = tmp;
}

void setHighThreshold( float scale ) {
	IhiF = IavgF + (IdiffF * scale);
	cv::split( IhiF, Ihi );
}

void setLowThreshold( float scale ) {
	IlowF = IavgF - (IdiffF * scale);
	cv::split( IlowF, Ilow );
}

void createModelsfromStats() {
	IavgF *= (1.0/Icount);
	IdiffF *= (1.0/Icount);

	// Make sure diff is always something
	//
	IdiffF += cv::Scalar( 1.0, 1.0, 1.0 );
	setHighThreshold( high_thresh);
	setLowThreshold( low_thresh);
}


// Create a binary: 0,255 mask where 255 (red) means foreground pixel
// I      Input image, 3-channel, 8u
// Imask  Mask image to be created, 1-channel 8u
//
void backgroundDiff(
		cv::Mat& I,
		cv::Mat& Imask) {

	I.convertTo( tmp, CV_32F ); // To float
	cv::split( tmp, Igray );

	// Channel 1
	//
	cv::inRange( Igray[0], Ilow[0], Ihi[0], Imask );

	// Channel 2
	//
	cv::inRange( Igray[1], Ilow[1], Ihi[1], Imaskt );
	Imask = cv::min( Imask, Imaskt );

	// Channel 3
	//
	cv::inRange( Igray[2], Ilow[2], Ihi[2], Imaskt );
	Imask = cv::min( Imask, Imaskt );

	// Finally, invert the results
	//
	Imask = 255 - Imask;
}

///
void help(char** argv ) {
	cout << "\n"
	<< "Train a background model on  the first <#frames to train on> frames of an incoming video, then run the model\n"
	<< argv[0] <<" <#frames to train on> <avi_path/filename>\n"
	<< "For example:\n"
	<< argv[0] << " 50 ../tree.avi\n"
	<< "'A' or 'a' to adjust thresholds, esc, 'q' or 'Q' to quit"
	<< endl;
}

void showForgroundInRed( char** argv, const cv::Mat &img) {
		cv::Mat rawImage;
		cv::split( img, Igray );
		Igray[2] = cv::max( mask, Igray[2] );
		cv::merge( Igray, rawImage );
		cv::imshow( argv[0], rawImage );
		cv::imshow("Segmentation", mask);
}

void adjustThresholds(char** argv, cv::Mat &img) {
	int key = 1;
	while((key = cv::waitKey()) != 27 && key != 'Q' && key != 'q')  // Esc or Q or q to exit
	{
		if(key == 'L') { low_thresh += 0.2;}
		if(key == 'l') { low_thresh -= 0.2;}
		if(key == 'H') { high_thresh += 0.2;}
		if(key == 'h') { high_thresh -= 0.2;}
		cout << "H or h, L or l, esq or q to quit;  high_thresh = " << high_thresh << ", " << "low_thresh = " << low_thresh << endl;
		setHighThreshold(high_thresh);
		setLowThreshold(low_thresh);
		backgroundDiff(img, mask);
		showForgroundInRed(argv, img);
	}
}


int main( int argc, char** argv) {
	cv::namedWindow( argv[0], cv::WINDOW_AUTOSIZE );
	cv::VideoCapture cap;
	if((argc < 3)|| !cap.open(argv[2])) {
		cerr << "Couldn't run the program" << endl;
		help(argv);
		cap.open(0);
		return -1;
	}
	int number_to_train_on = atoi( argv[1] );

	// FIRST PROCESSING LOOP (TRAINING):
	//
	int frame_count = 0;
	int key;
	bool first_frame = true;
	cout << "Total frames to train on = " << number_to_train_on << endl; //db
	while(1) {
		cout << "frame#: " << frame_count << endl;
		cap >> image;
		if( !image.data ) exit(1); // Something went wrong, abort
		if(frame_count == 0) { AllocateImages(image);}
		accumulateBackground( image );
		cv::imshow( argv[0], image );
		frame_count++;
		if( (key = cv::waitKey(7)) == 27 || key == 'q' || key == 'Q' || frame_count >= number_to_train_on) break; //Allow early exit on space, esc, q
	}

	// We have accumulated our training, now create the models
	//
	cout << "Creating the background model" << endl;
	createModelsfromStats();
	cout << "Done!  Hit any key to continue into single step. Hit 'a' or 'A' to adjust thresholds, esq, 'q' or 'Q' to quit\n" << endl;

	// SECOND PROCESSING LOOP (TESTING):
	//
	cv::namedWindow("Segmentation", cv::WINDOW_AUTOSIZE ); //For the mask image
	while((key = cv::waitKey()) != 27 || key == 'q' || key == 'Q'  ) { // esc, 'q' or 'Q' to exit
		cap >> image;
		if( !image.data ) exit(0);
		cout <<  frame_count++ << endl;
		backgroundDiff( image, mask );
		cv::imshow("Segmentation", mask);

		// A simple visualization is to write to the red channel
		//
		showForgroundInRed( argv, image);
		if(key == 'a') {
			cout << "In adjust thresholds, 'H' or 'h' == high thresh up or down; 'L' or 'l' for low thresh up or down." << endl;
			cout << " esq, 'q' or 'Q' to quit " << endl;
			adjustThresholds(argv, image);
			cout << "Done with adjustThreshold, back to frame stepping, esq, q or Q to quit." << endl;
		}
	}
	exit(0);
}
累加均值、方差以及协方差
除了像上面说的使用 cv::Mat::operator+=() 来累加图像,opencv 提供了一个 cv::accumulate() 函数来实现。
void accumulate(
	cv::InputArray src, // Input, 1 or 3 channels, U8 or F32
	cv::InputOutputArray dst, // Result image, F32 or F64
	cv::InputArray mask = cv::noArray() // Use src pixel if mask pixel != 0
);
其提供了两个额外的功能,一是它会自动处理图像格式的转换,二是提供了模板功能,可以指定需要累加的区域。
除此之外,opencv 还提供了一个 cv::accumulateWeighted() 来进行加权累加。
![]()
void accumulateWeighted(
	cv::InputArray src, // Input, 1 or 3 channels, U8 or F32
	cv::InputOutputArray dst, // Result image, F32 or F64
	double alpha, // Weight factor applied to src
	cv::InputArray mask = cv::noArray() // Use src pixel if mask pixel != 0
);
参数说明:
- dst:累加结果
- src:新加的图像
- alpha:权重参数
- mask:模板参数,非零参与计算
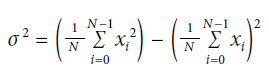
opencv 同样提供一个函数 cv::accumulateSquare() 来计算平方,并通过以下公式就能够得到最后的方差。

void accumulateSquare(
	cv::InputArray src, // Input, 1 or 3 channels, U8 or F32
	cv::InputOutputArray dst, // Result image, F32 or F64
	cv::InputArray mask = cv::noArray() // Use src pixel if mask pixel != 0
);

void accumulateVariance(
	cv::Mat& I
) {
	if (sum.empty) {
		sum = cv::Mat::zeros(I.size(), CV_32FC(I.channels()));
		sqsum = cv::Mat::zeros(I.size(), CV_32FC(I.channels()));
	}
	cv::accumulate(I, sum);
	cv::accumulateSquare(I, sqsum);
	image_count++;
}
计算协方差矩阵

对于 RGB 三通道,对应的协方差矩阵将是一个 3 * 3 的矩阵,其中对角线上的元素就是对应 RGB 的方差,这个通过之前的方法就可以求解。对于非对角线上的元素就需要使用以下函数。
void accumulateProduct(
	cv::InputArray src1, // Input, 1 or 3 channels, U8 or F32
	cv::InputArray src2, // Input, 1 or 3 channels, U8 or F32
	cv::InputOutputArray dst, // Result image, F32 or F64
	cv::InputArray mask = cv::noArray() // Use src pixel if mask pixel != 0
);
不过其并不能针对其中的某一个通道进行计算,对于多通道将只能针对每一个通道都得到计算结果。
//Example 15-3. Computing the on and off-diagonal elements of a variance/covariance model
#include <opencv2/opencv.hpp>
#include <vector>
#include <iostream>
#include <cstdlib>
#include <fstream>

using namespace std;

vector<cv::Mat> planes(3);
vector<cv::Mat> sums(3);
vector<cv::Mat> xysums(6);
cv::Mat sum, sqsum;
int image_count = 0;

//A function to accumulate
// the information we need for our variance computation:
//
void accumulateVariance(
	cv::Mat& I) {
	if( sum.empty() ) {
		sum = cv::Mat::zeros( I.size(), CV_32FC(I.channels()) );
		sqsum = cv::Mat::zeros( I.size(), CV_32FC(I.channels()) );
		image_count = 0;
	}
	cv::accumulate( I, sum );
	cv::accumulateSquare( I, sqsum );
	image_count++;
}

//The associated variance computation function would then be:
// (note that 'variance' is sigma^2)
//
void computeVariance(
	cv::Mat& variance) {
	double one_by_N = 1.0 / image_count;
	variance = (one_by_N * sqsum) - ((one_by_N * one_by_N) * sum.mul(sum));
}

//Same as above function, but compute standard deviation
void computeStdev(
	cv::Mat& std__) {
	double one_by_N = 1.0 / image_count;
	cv::sqrt(((one_by_N * sqsum) -((one_by_N * one_by_N) * sum.mul(sum))), std__);
}

//And avg images
void computeAvg(
	cv::Mat& av) {
	double one_by_N = 1.0 / image_count;
	av = one_by_N * sum;
}

// ===================================================================//


void accumulateCovariance(
cv::Mat& I
) {
	int i, j, n;

	if( sum.empty() ) {
		image_count = 0;
		for( i=0; i<3; i++ ) {
			// the r, g, and b sums
			sums[i]
			= cv::Mat::zeros( I.size(), CV_32FC1 );
		}
		for( n=0; n<6; n++ ) {
			// the rr, rg, rb, gg, gb, and bb elements
			xysums[n] = cv::Mat::zeros( I.size(), CV_32FC1 );
		}
	}
	cv::split( I, planes );
	for( i=0; i<3; i++ ) {
		cv::accumulate( planes[i], sums[i] );
	}
	n = 0;
	for( i=0; i<3; i++ ) {
		// "row" of Sigma
		for( j=i; j<3; j++ ) {
			// "column" of Sigma
			n++;
			cv::accumulateProduct( planes[i], planes[j], xysums[n] );
		}
	}
	image_count++;
}

//The corresponding compute function is also just a slight extension of
//the compute function for the variances we saw earlier.
//   note that 'variance' is sigma^2
//
void computeCoariance(
	cv::Mat& covariance
	// a six-channel array, channels are the
	// rr, rg, rb, gg, gb, and bb elements of Sigma_xy
) {
	double one_by_N = 1.0 / image_count;

	// reuse the xysum arrays as storage for individual entries
	//
	int n = 0;
	for( int i=0; i<3; i++ ) {
		// "row" of Sigma
		for( int j=i; j<3; j++ ) {
			// "column" of Sigma
			n++;
			xysums[n] = (one_by_N * xysums[n])
			- ((one_by_N * one_by_N) * sums[i].mul(sums[j]));
		}
	}

	// reassemble the six individual elements into a six-channel array
	//
	cv::merge( xysums, covariance );
}


/Utilities to run///

void help(char** argv ) {
	cout << "\n"
	<< "Compute mean and std on <#frames to train on> frames of an incoming video, then run the model\n"
	<< argv[0] <<" <#frames to train on> <avi_path/filename>\n"
	<< "For example:\n"
	<< argv[0] << " 50 ../tree.avi\n"
	<< "'a' to adjust thresholds, esc, 'q' or 'Q' to quit"
	<< endl;
}

//  Borrowed code from example_15-02  //

// Global storage
//
// Float, 3-channel images
//
cv::Mat image; // movie frame
cv::Mat IavgF, IdiffF, IhiF, IlowF; //threshold
cv::Mat tmp, mask; //scratch and our mask

// Float, 1-channel images
//
vector<cv::Mat> Igray(3); //scratch to split image
vector<cv::Mat> Ilow(3);//low per pixel thresh
vector<cv::Mat> Ihi(3); //high per pixel thresh

// Byte, 1-channel image
//
cv::Mat Imaskt; //Temp mask

// Thresholds
//
float high_thresh = 21.0;  //scaling the thesholds in backgroundDiff()
float low_thresh = 2.0;    //

// I is just a sample image for allocation purposes
// (passed in for sizing)
//
void AllocateImages( const cv::Mat& I ) {
	cv::Size sz = I.size();
	IavgF = cv::Mat::zeros(sz, CV_32FC3 );
	IdiffF = cv::Mat::zeros(sz, CV_32FC3 );
	IhiF = cv::Mat::zeros(sz, CV_32FC3 );
	IlowF = cv::Mat::zeros(sz, CV_32FC3 );
	tmp = cv::Mat::zeros( sz, CV_32FC3 );
	Imaskt = cv::Mat( sz, CV_32FC1 );
}


void setHighThreshold( float scale ) {
	IhiF = IavgF + (IdiffF * scale);
	cv::split( IhiF, Ihi );
}

void setLowThreshold( float scale ) {
	IlowF = IavgF - (IdiffF * scale);
	cv::split( IlowF, Ilow );
}

void createModelsfromStats() {
	//IavgF is already set;
	//IdiffF is the standard deviation image...

	// Make sure diff is always something
	//
	IdiffF += cv::Scalar( 0.1, 0.1, 0.1 );
	setHighThreshold( high_thresh);
	setLowThreshold( low_thresh);
}


// Create a binary: 0,255 mask where 255 (red) means foreground pixel
// I      Input image, 3-channel, 8u
// Imask  Mask image to be created, 1-channel 8u
//
void backgroundDiff(
		cv::Mat& I,
		cv::Mat& Imask) {

	I.convertTo( tmp, CV_32F ); // To float
	cv::split( tmp, Igray );

	// Channel 1
	//
	cv::inRange( Igray[0], Ilow[0], Ihi[0], Imask );

	// Channel 2
	//
	cv::inRange( Igray[1], Ilow[1], Ihi[1], Imaskt );
	Imask = cv::min( Imask, Imaskt );

	// Channel 3
	//
	cv::inRange( Igray[2], Ilow[2], Ihi[2], Imaskt );
	Imask = cv::min( Imask, Imaskt );

	// Finally, invert the results
	//
	Imask = 255 - Imask;
}


void showForgroundInRed( char** argv, const cv::Mat &img) {
		cv::Mat rawImage;
		cv::split( img, Igray );
		Igray[2] = cv::max( mask, Igray[2] );
		cv::merge( Igray, rawImage );
		cv::imshow( argv[0], rawImage );
		cv::imshow("Segmentation", mask);
}

void adjustThresholds(char** argv, cv::Mat &img) {
	int key = 1;
	while((key = cv::waitKey()) != 27 && key != 'Q' && key != 'q')  // Esc or Q or q to exit
	{
		if(key == 'L') { low_thresh += 0.2;}
		if(key == 'l') { low_thresh -= 0.2;}
		if(key == 'H') { high_thresh += 0.2;}
		if(key == 'h') { high_thresh -= 0.2;}
		cout << "H or h, L or l, esq or q to quit;  high_thresh = " << high_thresh << ", " << "low_thresh = " << low_thresh << endl;
		setHighThreshold(high_thresh);
		setLowThreshold(low_thresh);
		backgroundDiff(img, mask);
		showForgroundInRed(argv, img);
	}
}

int main( int argc, char** argv) {
	cv::namedWindow( argv[0], cv::WINDOW_AUTOSIZE );
	cv::VideoCapture cap;
	if((argc < 3)|| !cap.open(argv[2])) {
		cerr << "Couldn't run the program" << endl;
		help(argv);
		cap.open(0);
		return -1;
	}
	int number_to_train_on = atoi( argv[1] );

	// FIRST PROCESSING LOOP (TRAINING):
	//
	int image_count = 0;
	int key;
	bool first_frame = true;
	cout << "Total frames to train on = " << number_to_train_on << endl; //db
	while(1) {
		cout << "frame#: " << image_count << endl;
		cap >> image;
		if( !image.data ) exit(1); // Something went wrong, abort
		if(image_count == 0) AllocateImages( image );
		accumulateVariance(image);
		cv::imshow( argv[0], image );
		image_count++;
		if( (key = cv::waitKey(7)) == 27 || key == 'q' || key == 'Q' || image_count >= number_to_train_on) break; //Allow early exit on space, esc, q
	}

	// We have accumulated our training, now create the models
	//
	cout << "Creating the background model" << endl;
	computeAvg(IavgF);
	computeStdev(IdiffF);
	createModelsfromStats();
	cout << "Done!  Hit any key to continue into single step. Hit 'a' or 'A' to adjust thresholds, esq, 'q' or 'Q' to quit\n" << endl;

	// SECOND PROCESSING LOOP (TESTING):
	//
	cv::namedWindow("Segmentation", cv::WINDOW_AUTOSIZE ); //For the mask image
	while((key = cv::waitKey()) != 27 || key == 'q' || key == 'Q'  ) { // esc, 'q' or 'Q' to exit
		cap >> image;
		if( !image.data ) exit(0);
		cout <<  image_count++ << endl;
		backgroundDiff( image, mask );
		cv::imshow("Segmentation", mask);

		// A simple visualization is to write to the red channel
		//
		showForgroundInRed( argv, image);
		if(key == 'a') {
			cout << "In adjust thresholds, 'H' or 'h' == high thresh up or down; 'L' or 'l' for low thresh up or down." << endl;
			cout << " esq, 'q' or 'Q' to quit " << endl;
			adjustThresholds(argv, image);
			cout << "Done with adjustThreshold, back to frame stepping, esq, q or Q to quit." << endl;
		}
	}
	exit(0);
}
关于模型测试的简单说明以及 opencv 马氏距离
为更好地进行模型评估,通常选用 z-score 进行评估。
对于多通道,可以对多通道 z-score 求平方根。在此基础上,进一步引入马氏距离
double cv::Mahalanobis( // Return distance as F64
	cv::InputArray vec1, // First vector (1-dimensional, length n)
	cv::InputArray vec2, // Second vector (1-dimensional, length n)
	cv::InputArray icovar // Inverse covariance matrix, n-by-n
);
其中 vec1 和 vec2 为待计算马氏距离的两个向量,icovar 为抽取向量的逆协方差矩阵(矩阵求逆比较复杂,且只需要协方差矩阵的逆矩阵),其中 vec1 和 vec2 为 d 维向量,协方差矩阵为 d * d 维。