SwiftUI学习笔记之Animations 一
SwiftUI的Animations可以用到View当中,不仅是数值变化可以使用,即使是布尔变量也可以使用,例如在Button中使用
 @State private var enabled = false
    var body: some View {
        Button("点我") {
            self.enabled.toggle()
        }
        .frame(width: 200, height: 200)
        .background(enabled ? Color.blue : Color.red)
    }
当点击button时,背景颜色立刻变为蓝色或者红色。如果我们加上animation
@State private var enabled = false
    var body: some View {
        Button("Tap Me") {
            self.enabled.toggle()
        }
        .frame(width: 200, height: 200)
        .background(enabled ? Color.blue : Color.red)
        .animation(.default)
    }
}
则颜色变化则渐变为红色或者蓝色。
除了默认的动画模式还有很多可供选择
比如
interpolatingSpring
.animation(.interpolatingSpring(stiffness: 10, damping: 2))
easeInOut
.animation(.easeOut(duration: 2))
如果需要关闭动画或者使用不同的动画则可以
}
        .frame(width: 200, height: 200)
        .background(enabled ? Color.blue : Color.red)
        .animation(.easeOut(duration: 2))
        .animation(nil)
在.animation(nil)以后的modifier则不会再使用easeOut动画,我们则可以加入别的动画应用到modifier中,如
}
        .frame(width: 200, height: 200)
        .background(enabled ? Color.blue : Color.red)
        .animation(.easeOut(duration: 2))
        .animation(nil)
        .clipShape(RoundedRectangle(cornerRadius: enabled ? 60 : 0))
        .animation(Animation.interpolatingSpring(stiffness: 10, damping: 1))
当使用clipShape时,动画呈现的方式为interpolatingSpring
也可以直接在赋值时使用动画如
Button("Tap Me") {
//animations
            withAnimation(Animation.easeOut(duration: 2)){

                    self.enabled.toggle()

            }

        }
        .frame(width: 200, height: 200)
        .background(enabled ? Color.blue : Color.red)
        .clipShape(RoundedRectangle(cornerRadius: enabled ? 60 : 0))
        .animation(Animation.interpolatingSpring(stiffness: 10, damping: 1))
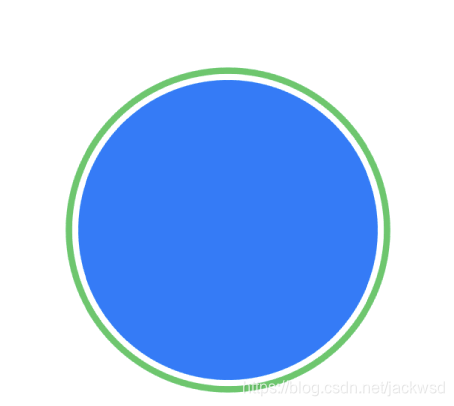
光圈变化
当button被点击时,出现绿色光圈,并由小到大变化四次
首先为button添加overlay
.overlay(
            Circle()

                .stroke(Color.green,lineWidth: 4)

                .scaleEffect(animationAmount)

                .opacity(Double(2 - animationAmount))
                .animation(
                    Animation.easeInOut(duration: 4)
                        .repeatForever(autoreverses: false)
                )


        )
变量animationAmout用于变化光圈大小以及光圈的透明度,在struct内定义
@State private var animationAmount: CGFloat = 1
button的全代码
Button("Tap Me") {
            withAnimation(Animation.easeOut(duration: 2)){

                    self.enabled.toggle()
                    self.animationAmount = 2

            }

        }
        .frame(width: 200, height: 200)
        .background(enabled ? Color.blue : Color.red)
        .clipShape(RoundedRectangle(cornerRadius: enabled ? 100 : 0))
        //.animation(Animation.interpolatingSpring(stiffness: 10, damping: 1))
        .overlay(
            Circle()

                .stroke(Color.green,lineWidth: 4)

                .scaleEffect(animationAmount)
                .opacity(Double(2 - animationAmount))
                .animation(
                    Animation.easeInOut(duration: 4)
                        .repeatForever(autoreverses: false)
                )
                //.opacity(self.enabled ? 100 : 0)
        )
然后点击后