Spring框架集~02.Spring Security自定义登录逻辑
上一篇文章
当进行自定义登录逻辑时需要用到上一篇文章所提到的UserDetailsService和PasswordEncoder。但是Spring Security有一个要求,那就是当进行自定义登录逻辑的时候,容器内必须有PasswordEncoder实例。所以不能直接new对象。
事实上我们可以编写一个配置类
@Configuration
public class SecurityConfig {
    @Bean
    public PasswordEncoder passwordEncoder(){
        return new BCryptPasswordEncoder();
    }
}
自定义逻辑
在Spring Security中实现UserDetailService就表示为用户详情服务。在这个类中编写用户认证逻辑。
代码这一块,我就不把数据库和实体类拿来展示了。以免浪费空间
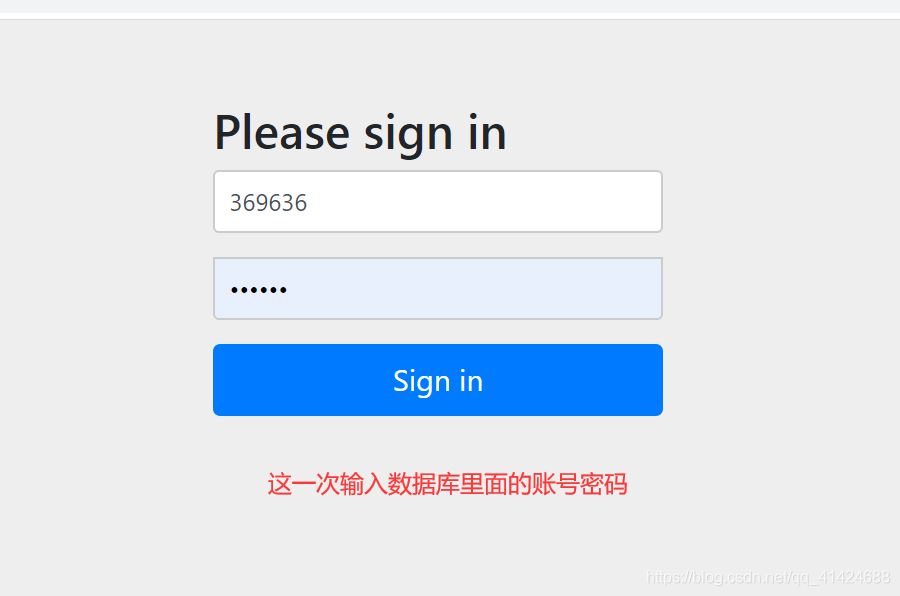
还有一方面就是,本人比较懒....所以就懒得新建数据库表了。直接用以前就有的学生表吧...不过里面的学号字段son在下文可以对应username
@Service
public class UserDetailsServiceImpl implements UserDetailsService {
@Autowired
private PasswordEncoder passwordEncoder;
@Autowired
private StudentMapper studentMapper;
@Override
public UserDetails loadUserByUsername(String son) throws UsernameNotFoundException {
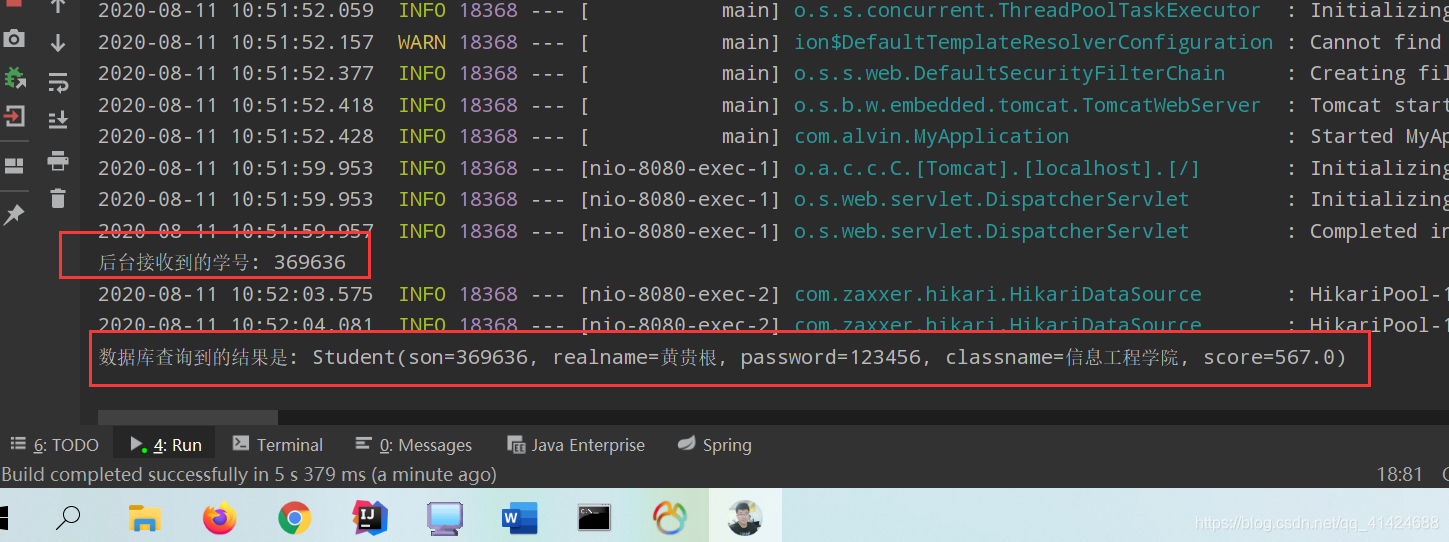
System.out.println("后台接收到的学号: " + son);
//查询数据库,判断用户名是否存在,如果不存在就抛出UsernameNotFoundException
Student student = studentMapper.Login(son);
if(student == null){
throw new UsernameNotFoundException("用户名不存在!");
}
//把查询出来的密码进行解析,或直接把password放到构造方法中。
System.out.println("数据库查询到的结果是: " + student);
String password = passwordEncoder.encode(student.getPassword());
UserDetails result = new User(son,password, AuthorityUtils.createAuthorityList());
return result;
}
}
自定义登录页面
虽然说Spring Security提供了登录页面,但是对于实际项目中,基本上还是用自己定义的登陆页面。所以Spring Security中不仅仅提供了登录页面,还支持用户自定义登录页面。实现过程也比较简单,只需要修改配置类即可。
不过现在也只是学习,也不用花太多时间去搞得光鲜亮丽。差不多就得了...
<!DOCTYPE html>
<html lang="en" xmlns:th="http://www.thymeleaf.org">
<link rel="shortcut icon" href="../resources/favicon.ico" th:href="@{/static/favicon.ico}"/>
    <head>
        <meta charset="UTF-8">
        <title>Title</title>
    </head>

    <body>
        <form action="/login" method="post">
            <input type="text" name="username"/>
            <input type="password" name="password"/>
            <input type="submit" value="提交"/>
        </form>
    </body>
</html>
我们现在来修改下刚才的配置类
修改配置类中主要是设置哪个页面是登录页面。配置类需要继承WebSecurityConfigurerAdapter,并重写configure方法。
| successForwardUrl() | 登录成功后跳转地址 |
| loginPage() | 登录页面 |
| loginProcessingUrl | 登录页面表单提交地址,此地址可以不真实存在 |
| antMatchers() | 匹配内容 |
| permitAll() | 允许 |
configure方法中除了FailureForwardUrl()以外其他配置都是必须写的配置
重写父类型中的配置逻辑。 如果调用了super.configure,则使用父类型的默认流程配置。需要自定义,则删除super.configure方法的调用。当提供自定义配置,删除super.configure方法的时候,所有的默认流程全部清空。
http.formLogin().loginProcessingUrl(String path);用户登录请求地址。就是处理用户登录逻辑的地址。
SpringSecurity提供的处理登录请求控制器,是path监听软编码的。可以通过此方法动态配置监听地址。只要配置地址和页面的请求地址一致,即可完成登录逻辑。
登录成功,默认返回的成功页面是 '/'。 如果有前置请求,则默认返回前置地址。如: 直接访问 loginPage, 登录成功进入 '/'如: 访问/ok,未登录,进入loginPage, 登录成功后,重新返回/ok。
登录失败,默认返回的页面是 http.formLogin().loginPage(String path) 方法参数?error
http.formLogin().defaultSuccessUrl(String path, boolean alwaysUse)设置登录成功后,响应重定向地址。 Spring Security要求,必须传递绝对路径。如果传递的是相对路径,则相当于当前服务器的根,开始寻址。 http://localhost:port/
参数alwaysUse,可以省略。默认为false。配置为false的时候,通常重定向失效。
登录请求参数命名:默认规则是: 用户名必须是username。 密码必须是password。此逻辑由UsernamePasswordAuthenticationFilter决定。
@param http 基于HTTP协议的Security配置对象。包含所有的SpringSecurity相关配置逻辑。@throws Exception 当配置出错的时候,抛出。
@Configuration
public class SecurityConfig extends WebSecurityConfigurerAdapter {
    @Bean
    public PasswordEncoder passwordEncoder() {
        return new BCryptPasswordEncoder();
    }

    @Override
    protected void configure(HttpSecurity http) throws Exception {
        //配置认证
        http.formLogin()
                //哪个URL为登录页面
                .loginPage("/")
                //当发现什么URL时执行登录逻辑
                .loginProcessingUrl("/login")
                //成功后跳转到哪里
                .successForwardUrl("/success")
                //失败后跳转到哪里
                .failureForwardUrl("/false");
        // 设置URL的授权问题
        // 多个条件取交集
        http.authorizeRequests()
                // 匹配 / 控制器  permitAll() 不需要被认证就可以访问
                .antMatchers("/").permitAll()
                // anyRequest() 所有请求   authenticated() 必须被认证
                .anyRequest().authenticated();

        // 关闭csrf
        http.csrf().disable();
    }
}
编写Controller
@Controller
public class UserController {

    @RequestMapping("/{page}.html")
    public String showPage(@PathVariable String page){
        return page;
    }

    @RequestMapping("/")
    public String showLogin(){
        return "login";
    }
    @RequestMapping("/success")
    public String success(){
        return "success";
    }
    @RequestMapping("/false")
    public String fallse(){
        return "false";
    }
}
这个时候输入正确的账号密码就可以登陆成功,否则失败
接下来的操作,下篇文章继续