一、事务
1、什么的事务
- 事务:逻辑上的一组操作,组成这组操作的各个单元,要么全部成功,要么全部失败。
2、事务的特性
- 原子性:事务不可分割。
- 一致性:事务执行前后数据完整性保持一致。
- 隔离性:一个事务的执行不应该受到其他事务的干扰。
- 持久性:一旦事务结束,数据就持久化到数据库。
3、如果不考虑隔离性就会引发安全性的问题
(1)读问题:
- 脏读:一个事务读取到另外一个事务未提交的数据。
- 不可重复读:一个事务读取到另外一个事务已经提交的update的数据,导致一个事务中多次查询结果不一致。
- 虚读/幻读:一个事务读取到另外一个事务已经提交的insert的数据,导致一个事务当中,多次中查询的结果不一致。
(2)写问题:
- 丢失更新:
4、解决读问题
(1)设置事务的隔离级别
- read uncommitted:未提交读,任何读问题都解决不了。(效率最高安全性最低)
- read committed:已提交读,解决脏读,但是不可重复读和虚读有可能发生。
- repeatable read:重复读, 解决脏读和不可重复读,但是虚读有可能发生。
- Serializable:解决所有读的问题。(不允许有事物并发,但是效率比较低)
二、Spring的事务管理的API
1、PlatformTransactionManager:平台事务管理器(接口):
平台事务管理器:是Spring用于管理事务的真正的对象。
- DataSourceTransactionManager:底层使用JDBC事务管理就使用DataSourceTransactionManager这个对象。
- HibernateTransactionManager:底层使用Hibernate事务管理就使用HibernateTransactionManager这个对象。
2、TransactionDefinition:事务的定义信息(接口):
- 事务定义:用于定义事务的相关的信息,隔离级别,超时信息,传播行为,是否只读。
3、TransactionStatus:事务的状态(接口):
- 事务状态:用于记录在事务管理过程当中,事务的状态的对象。
4、事务管理的API的关系:
- Spring进行事务管理的时候,首先平台事务管理器根据事务定义信息进行事务的管理,在事务管理的过程当中,就会产生各种状态,将这些状态的信息记录到事务状态的对象当中。
三、Spring的事务的传播行为
1、Spring当中提供了七种事务的传播行为:
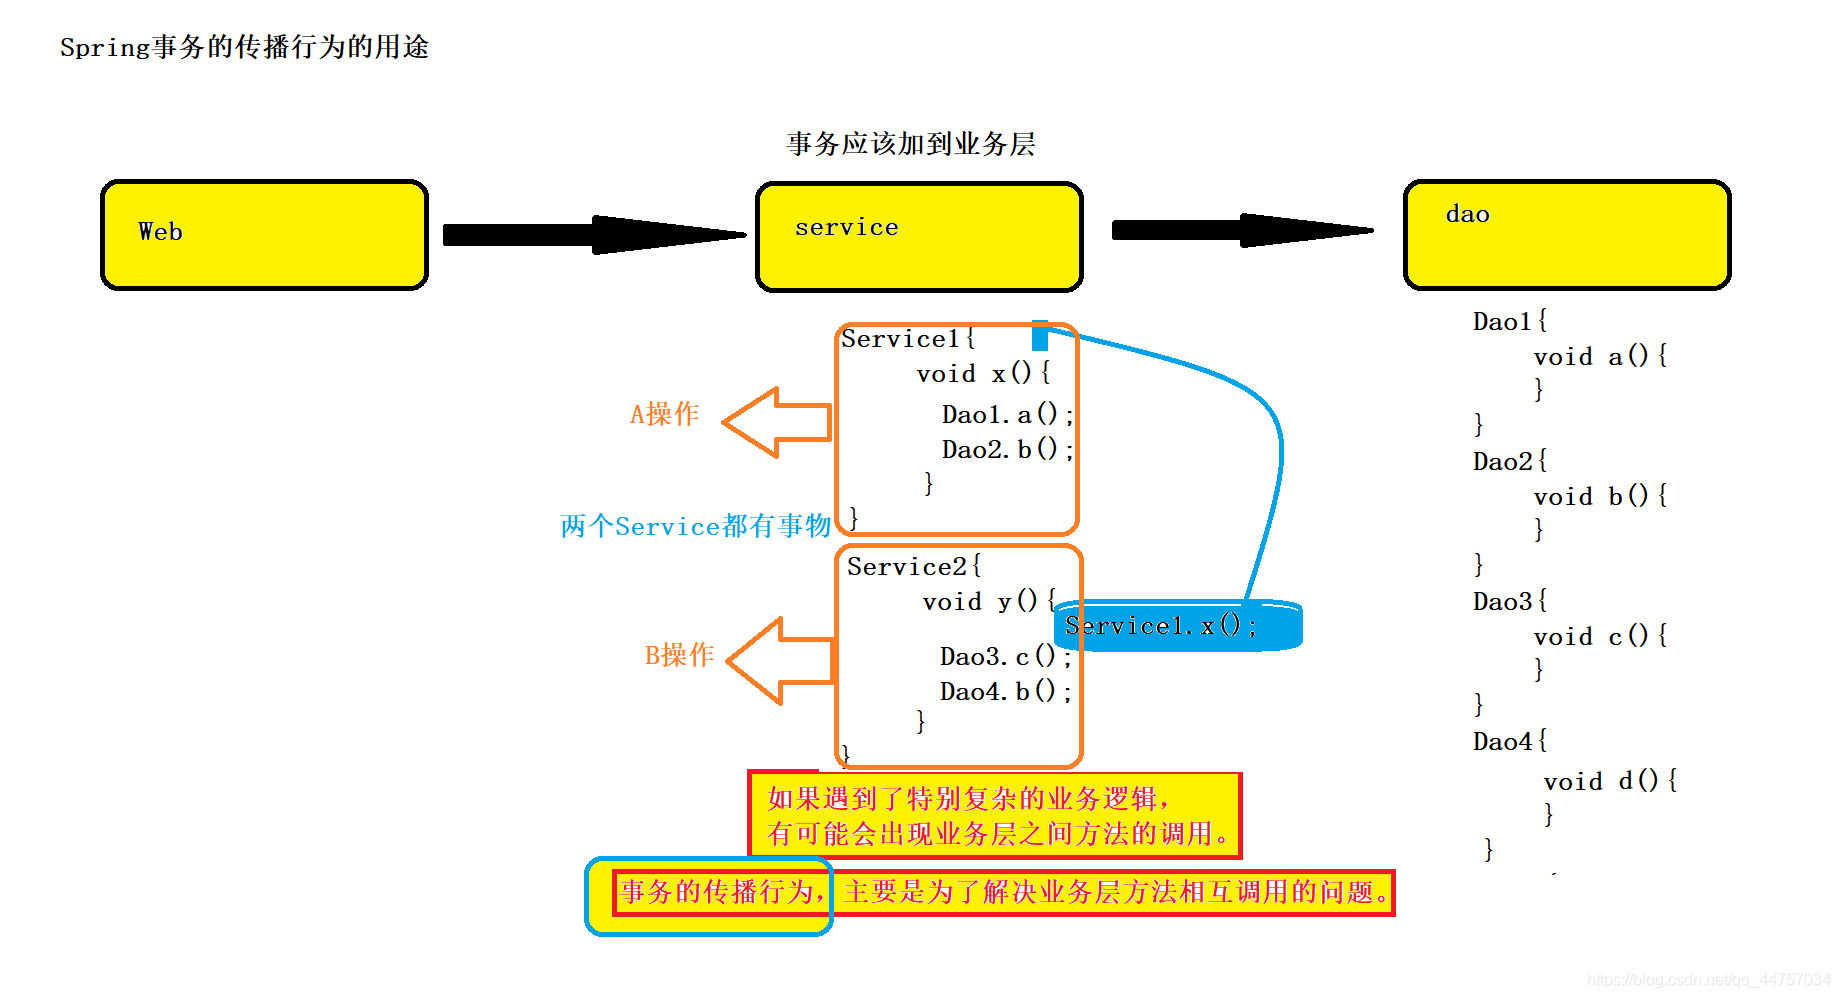
(1) 保证多个操作在同一个事务中:
上图当中的A和B
- PROPAGATION_REQUIRED:
默认值,代表的是:如果A中有事务,当B调用A的时候B就会使用A当中的事务,如果A里面没有事务B会创建一个新的事务,然后将操作包含进来。(前提B当中没有事务)。
- PROPAGATION_SUPPORTS:支持事务,如果A中有事务,当B调用A的时候B就会使用A当中的事务。如果A当中没有事务,B调用A的时候就不使用事物(前提B当中没有事务)。
- PROPAGATION_MANDATORY:如果A中有事务,使用A当中的事务,如果A当中没有事务,当B调用A的时候就抛出异常(B当中没有事务)。
(2)保证多个操作不在同一个事务当中
- PROPAGATION_REQUIRES_NEW:
如果A当中有事务,将A的事务挂起(暂停),B创建新的事务,只包含自身(也就是B当中的方法)。
如果A当中没有事务,也会创建一个新事务,只包含自身操作(也就是B当中的方法)。
- PROPAGATION_NOT_SUPPORTED:如果A中有事务,不会使用A当中的事务(A事务挂起),不使用事务管理。
- PROPAGATION_NEVER:如果A中有事务直接报异常。
(3) 嵌套式事务
- PROPAGATION_NESTED:
嵌套事务,如果A当中有事务,就按照A的事务执行,执行完成后,会设置保存点(在A事务之后的地方),然后 执行B当中的操作,
如果没有异常,就执行通过,
如果有异常,就可以选择回滚到初始位置,也可以回滚到保存点。
四、Spring的事务管理
1、搭建Spring的事务管理的环境
(1)创建业务层(Service)的接口和实现类
package com.itzheng.tx.demo1;
/*
 - 转账的业务层的接口
 */
public interface AccountService {
	public void transfer(String from,String to,Double money);
}
package com.itzheng.tx.demo1;
/*
 - 转账的业务层的实现
 */
public class AccountServiceImpl implements AccountService {
	@Override
	/*
	 * from :转出账号
	 *to:转入账号
	 *money:转账的金额
	*/
	public void transfer(String from, String to, Double money) {
	}
}
(2)创建Dao的接口和实现类
package com.itzheng.tx.demo1;
/*
 - 转账的DAO的接口
 */
public interface AccountDao {
	public void outMoney(String from,Double money);
	public void inMoney(String to,Double money);
}
package com.itzheng.tx.demo1;
/*
 - 转账的Dao的实现类
 */
public class AccountDaoImpl implements AccountDao {
	@Override
	public void outMoney(String from, Double money) {
		// TODO Auto-generated method stub
	}
	@Override
	public void inMoney(String to, Double money) {
		// TODO Auto-generated method stub
	}
}
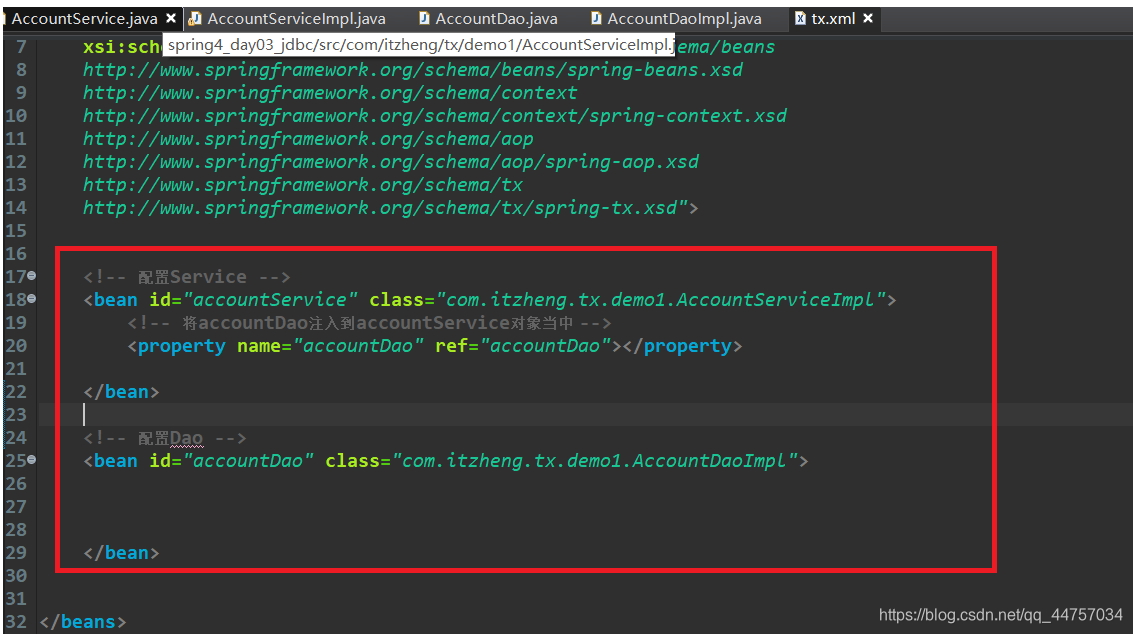
(3)在src下创建tx.xml文件,配置Service和Dao:交给Spring管理
- a、创建jdbc.properties
jdbc.driverClass=com.mysql.jdbc.Driver
jdbc.url=jdbc:mysql:///spring4_day03
jdbc.username=root
jdbc.password=root
- b、创建数据库
create database spring4_test;
use spring4_test;
create table account(
     id int primary key auto_increment,
     name varchar(20),
     money double
);
- c、在AccountServiceImpl类当中声明AccountDao类和set方法:
package com.itzheng.tx.demo1;
/*
 - 转账的业务层的实现
 */
public class AccountServiceImpl implements AccountService {
	//注入:Dao
	private AccountDao accountDao;
	public void setAccountDao(AccountDao accountDao) {
		this.accountDao = accountDao;
	}
	@Override
	/*
	 *from :转出账号
	 *to:转入账号
	 *money:转账的金额
	*/
	public void transfer(String from, String to, Double money) {
	}
}
- 在tx.xml将accountDao注入到accountService对象当中:
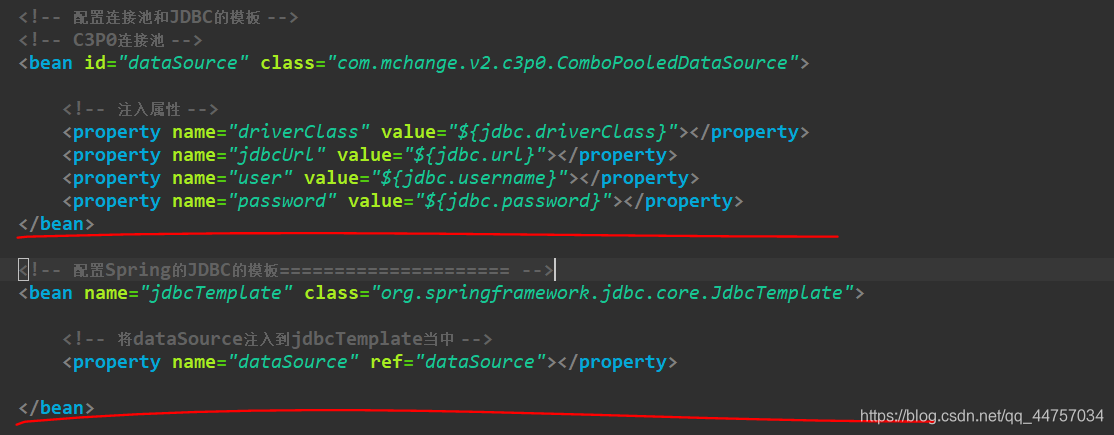
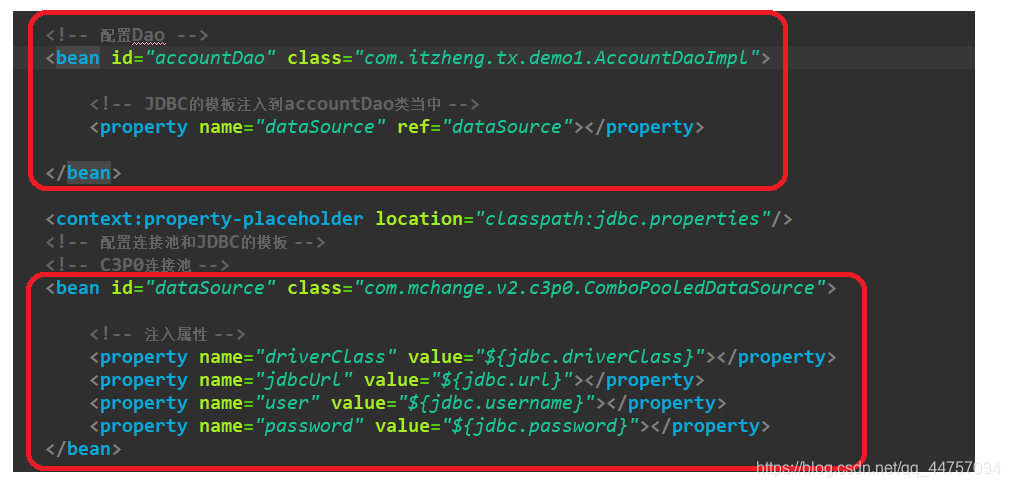
(4)配置JDBC模板和数据库连接池在Dao当中编写扣钱和加钱的方法
- a、在tx.xml配置文件当中配置连接池和JDBC模板
- b、在Dao当中注入JDBC的模板:AccountDaoImpl继承JdbcDaoSupport类:就相当于将tx.xml当中配置好的JDBC模板,当前类就会获得JDBC模板以及DataSource(连接池)相关的东西
- c、在accountDao当中注入JDBC模板
<!-- 配置Dao -->
<bean id="accountDao" class="com.itzheng.tx.demo1.AccountDaoImpl">
	<!-- JDBC的模板注入到accountDao类当中 -->
	<property name="jdbcTemplate" ref="jdbcTemplate"></property>
</bean>
-
e、当中AccountDaoImpl继承了JdbcDaoSupport之后可以简化xml当中注入模板的配置
在不配置属性模板的情况将DataSource(连接池)注入到对象当中,相当于完成了JDBC模板的注入和连接池的注入,在AccountDaoImpl当中就不需要创建jdbcTemplate的属性和set方法
-
f、修改AccountDaoImpl,创建加钱和减钱的方法
package com.itzheng.tx.demo1;
import org.springframework.jdbc.core.support.JdbcDaoSupport;
/*
 - 转账的Dao的实现类
 */
public class AccountDaoImpl extends JdbcDaoSupport implements AccountDao {
	@Override
	public void outMoney(String from, Double money) {
		// TODO Auto-generated method stub
		this.getJdbcTemplate().update("update account set money = money - ? where name = ?",money,from);
	}
	@Override
	public void inMoney(String to, Double money) {
		// TODO Auto-generated method stub
		this.getJdbcTemplate().update("update account set money = moeny + ? where name = ?",money,to);
	}
}
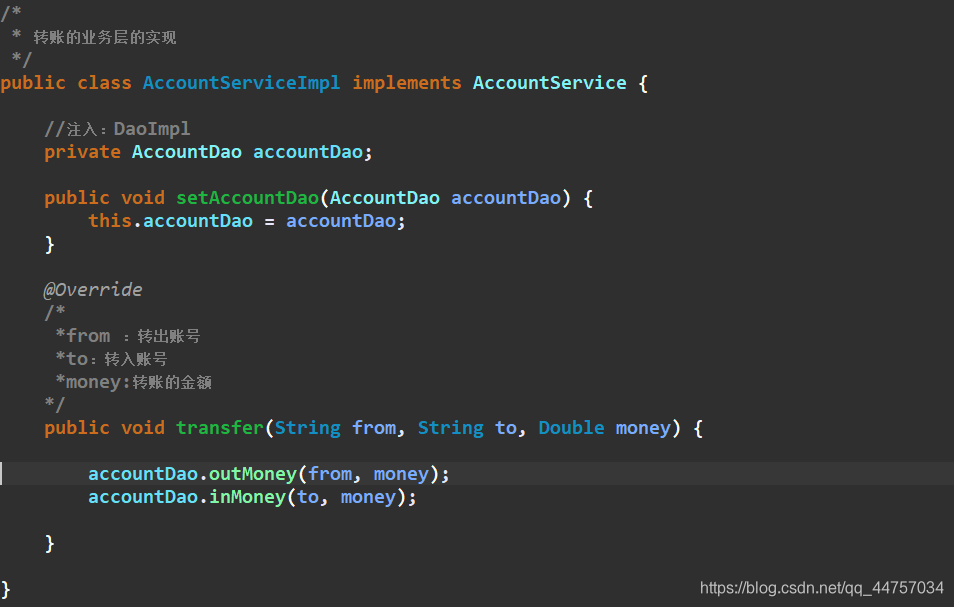
- g、在AccountServiceImpl当中调用dao 的方法
2、测试
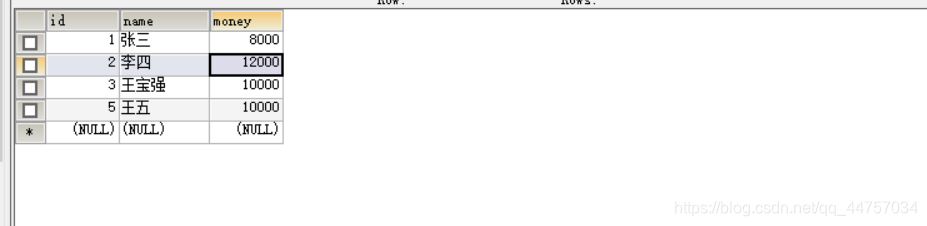
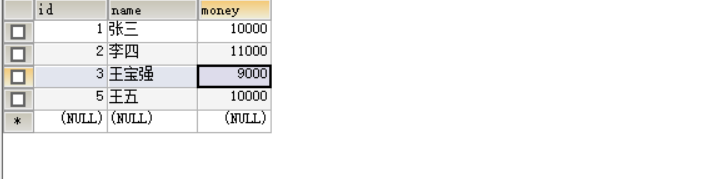
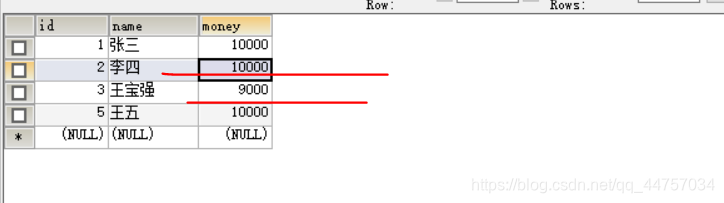
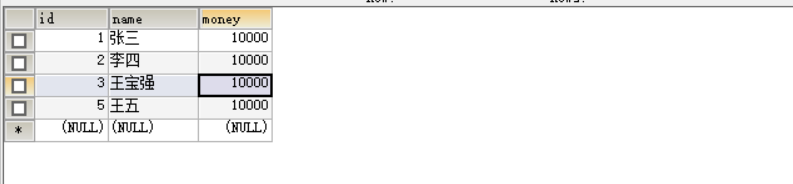
(1)插入一些数据在数据库当中

(2)创建测试方法(没有事务)
- 没有事务
package com.itzheng.tx.demo1;
import javax.annotation.Resource;
import org.junit.Test;
import org.junit.runner.RunWith;
import org.springframework.test.context.ContextConfiguration;
import org.springframework.test.context.junit4.SpringJUnit4ClassRunner;
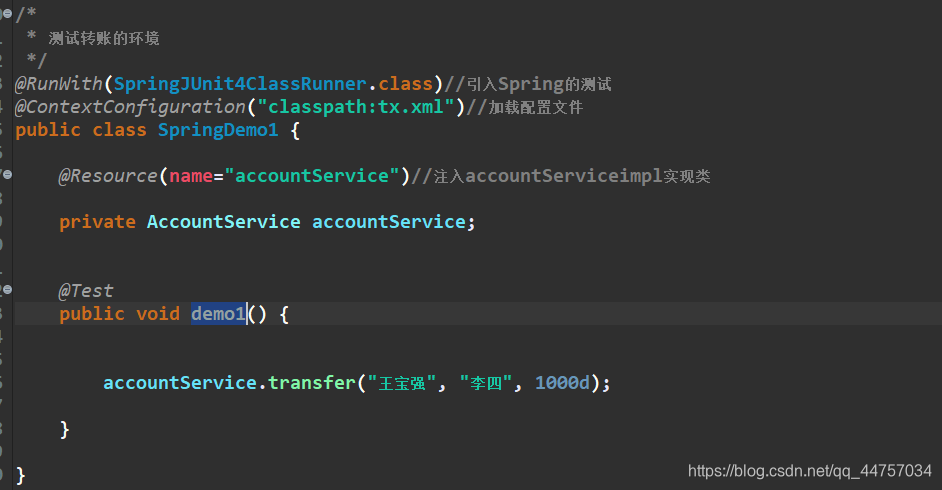
/*
测试转账的环境
*/
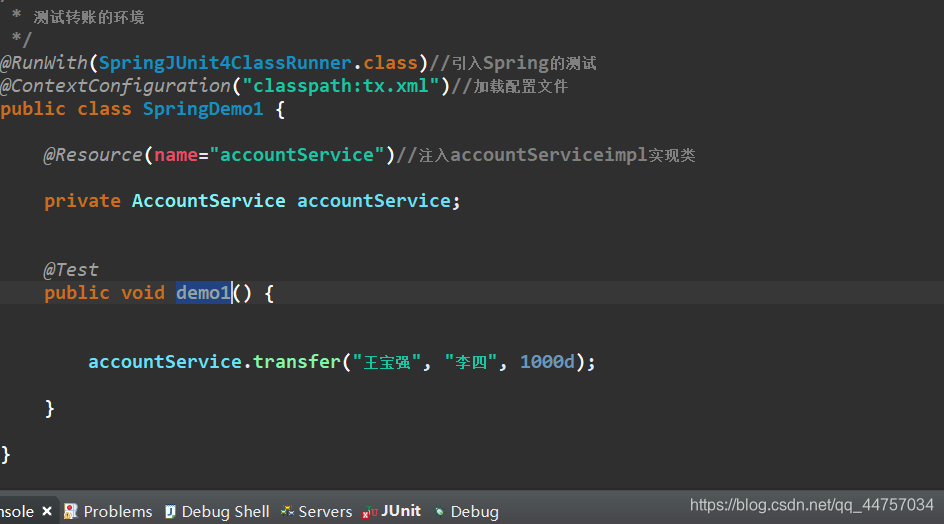
@RunWith(SpringJUnit4ClassRunner.class)//引入Spring的测试
@ContextConfiguration("classpath:tx.xml")//加载配置文件
public class SpringDemo1 {
@Resource(name="accountService")//注入accountServiceimpl实现类
private AccountService accountService;
@Test
public void demo1() {
accountService.transfer("王宝强", "李四", 1000d);
}
}
- 在没有异常的情况下,转账成功
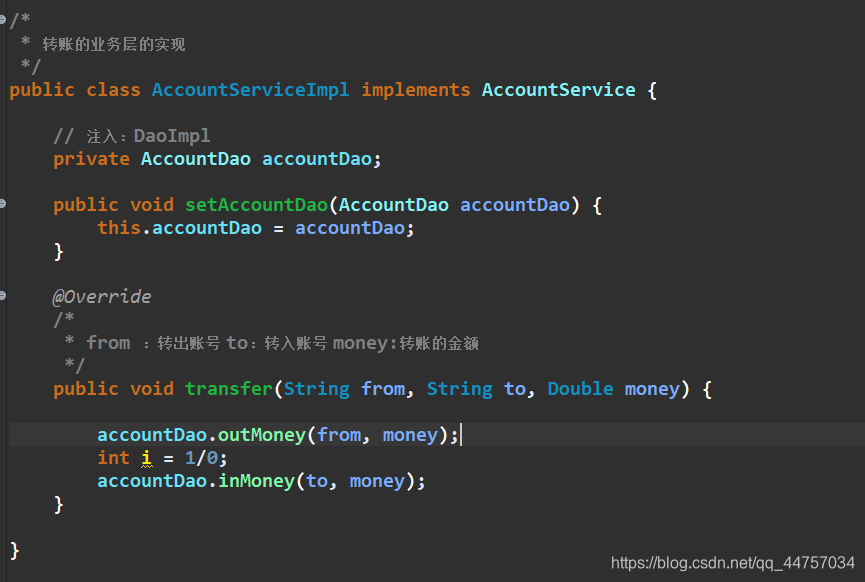
- 当有异常的情况下,在AccountServiceImpl当中设置一个异常
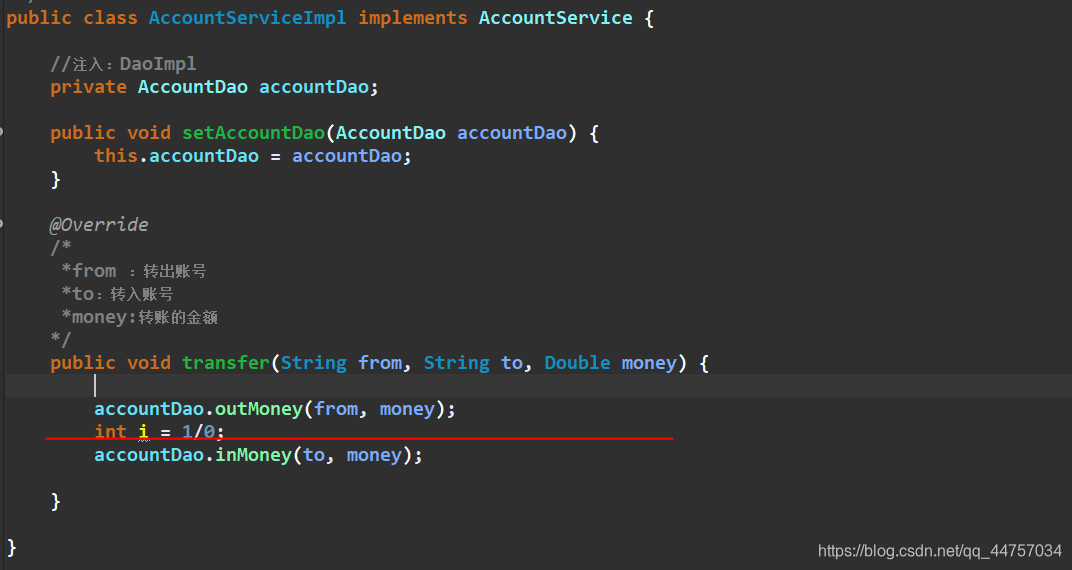
- 转账异常
Spring事务管理的事务管理分为两大类
3、Spring事务管理:第一类(编程式事务:需要手动编写代码)
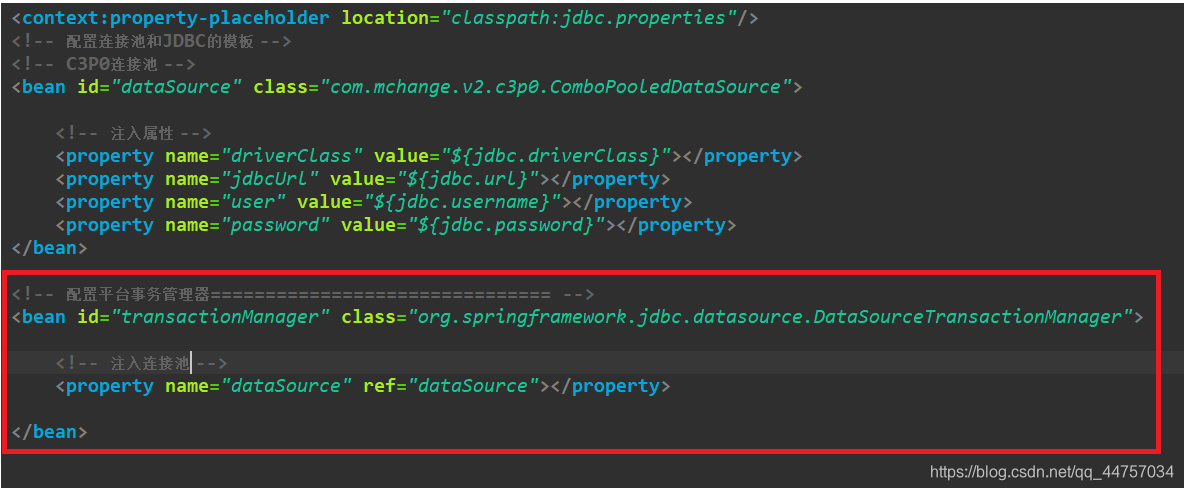
(1)第一步:在上面创建的tx.xml当中配置平台事务管理器
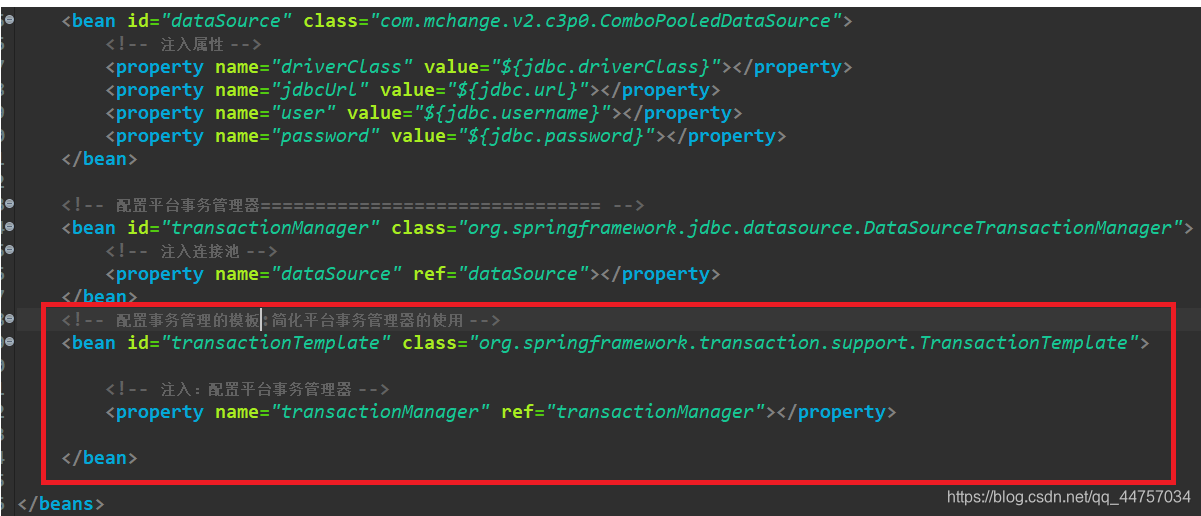
(2)第二步:Spring提供了事务管理的模板类
- 配置事务管理的模板类
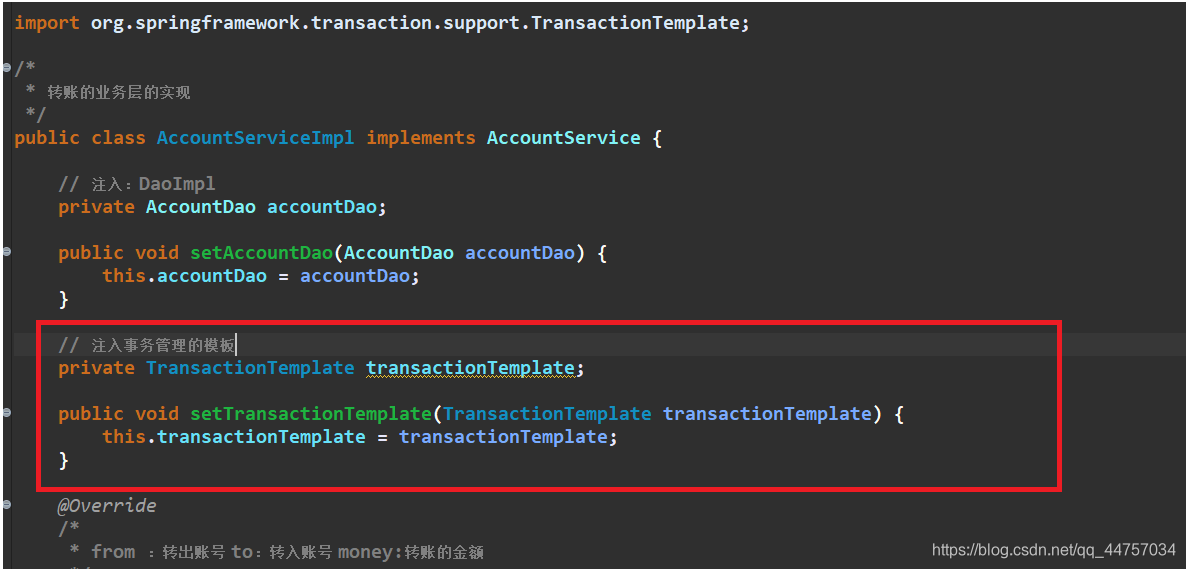
(3)第三步:在业务层注入是事务管理的模板
- 在AccountServiceImpl当中声明TransactionTemplate并设置set方法
- 在tx.xml当中 注入事务管理的模板

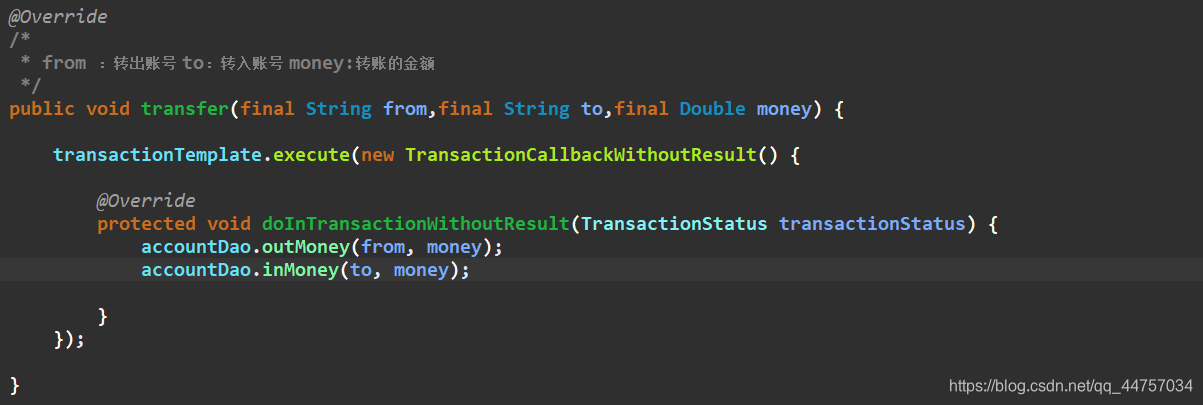
(4)第四步:在AccountServiceImpl类当中调用dao方法的方法并设置事务
- transactionTemplate编程式事务对象调用.execute方法(newTransactionCallbackWithoutResult() 事务回滚放入到编程事务并设置事务方法,如下
package com.itzheng.tx.demo1;
import org.springframework.transaction.TransactionStatus;
import org.springframework.transaction.support.TransactionCallbackWithoutResult;
import org.springframework.transaction.support.TransactionTemplate;
/*
- 转账的业务层的实现
*/
public class AccountServiceImpl implements AccountService {
// 注入:DaoImpl
private AccountDao accountDao;
public void setAccountDao(AccountDao accountDao) {
this.accountDao = accountDao;
}
// 注入事务管理的模板
private TransactionTemplate transactionTemplate;
public void setTransactionTemplate(TransactionTemplate transactionTemplate) {
this.transactionTemplate = transactionTemplate;
}
@Override
/*
* from :转出账号 to:转入账号 money:转账的金额
*/
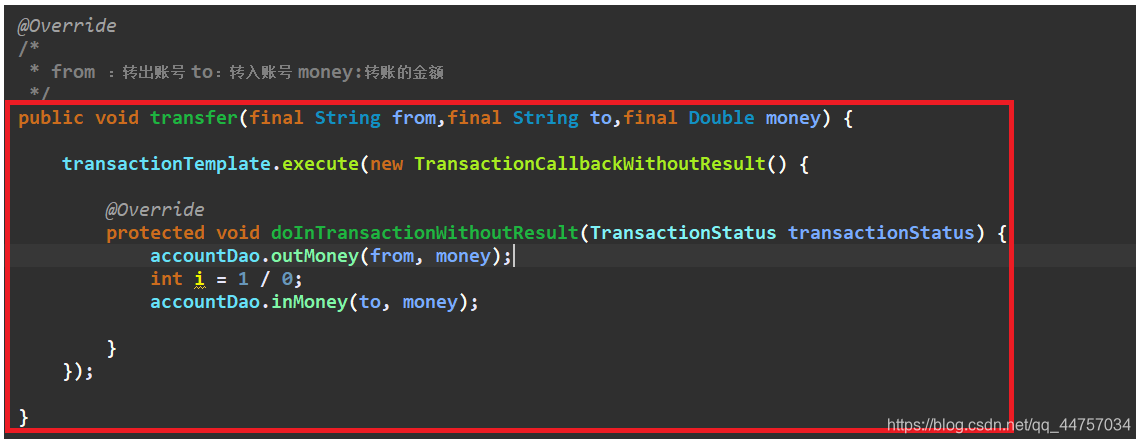
public void transfer(final String from,final String to,final Double money) {
transactionTemplate.execute(new TransactionCallbackWithoutResult() {
@Override
protected void doInTransactionWithoutResult(TransactionStatus transactionStatus) {
accountDao.outMoney(from, money);
int i = 1 / 0;
accountDao.inMoney(to, money);
}
});
}
}
(5)第五步:测试(有事务的情况)
- a、有异常的情况下
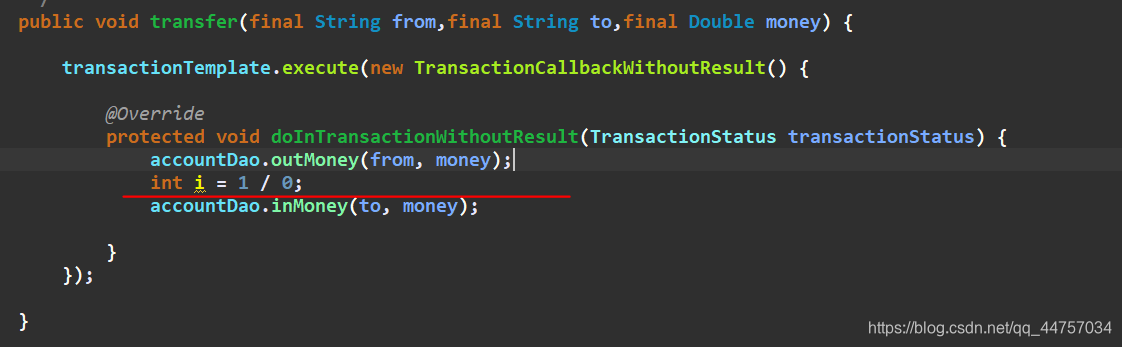
- 测试
- 在AccountServiceImpl 当中调用Dao层当中有异常,数据没有变化(且数据没有异常)
- b、没有异常的情况下
- 测试
- 转账成功

4、Spring事务管理:第二类(声明式事务管理:通过配置实现的)— AOP
(1)XML 方式声明式事务管理
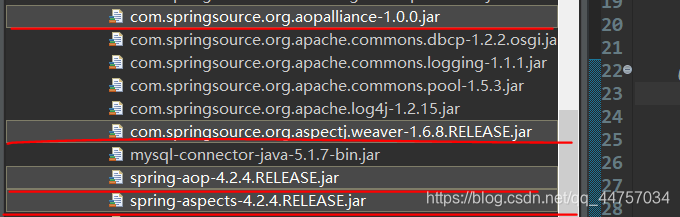
- 第一步:引入aop的开发包4个jar
- 第二步:恢复转账环境
- 创建AccountService和AccountServiceImpl和AccountDao和AccountDaoImpl
package com.itzheng.tx.demo2;
/*
 - 转账的业务层的接口
 */
public interface AccountService {
	public void transfer(String from,String to,Double money);
}
package com.itzheng.tx.demo2;
/*
- 转账的业务层的实现
*/
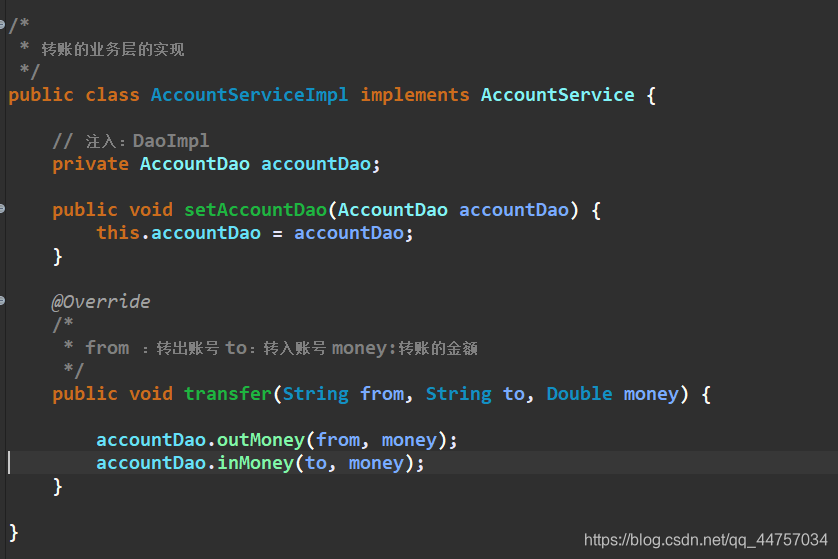
public class AccountServiceImpl implements AccountService {
// 注入:DaoImpl
private AccountDao accountDao;
public void setAccountDao(AccountDao accountDao) {
this.accountDao = accountDao;
}
@Override
/*
* from :转出账号 to:转入账号 money:转账的金额
*/
public void transfer(String from, String to, Double money) {
accountDao.outMoney(from, money);
accountDao.inMoney(to, money);
}
}
package com.itzheng.tx.demo2;
/*
 - 转账的DAO的接口
 */
public interface AccountDao {
	public void outMoney(String from,Double money);
	public void inMoney(String to,Double money);
}
package com.itzheng.tx.demo2;
import org.springframework.jdbc.core.support.JdbcDaoSupport;
/*
 - 转账的Dao的实现类
 */
public class AccountDaoImpl extends JdbcDaoSupport implements AccountDao {
	@Override
	public void outMoney(String from, Double money) {
		// TODO Auto-generated method stub
		this.getJdbcTemplate().update("update account set money = money - ? where name = ?",money,from);
	}
	@Override
	public void inMoney(String to, Double money) {
		// TODO Auto-generated method stub
		this.getJdbcTemplate().update("update account set money = money + ? where name = ?",money,to);
	}
}
- 新创建一个配置文件tx2.xml
<?xml version="1.0" encoding="UTF-8"?>
<beans xmlns="http://www.springframework.org/schema/beans"
	xmlns:xsi="http://www.w3.org/2001/XMLSchema-instance"
	xmlns:context="http://www.springframework.org/schema/context"
	xmlns:aop="http://www.springframework.org/schema/aop"
	xmlns:tx="http://www.springframework.org/schema/tx"
	xsi:schemaLocation="http://www.springframework.org/schema/beans
	http://www.springframework.org/schema/beans/spring-beans.xsd
	http://www.springframework.org/schema/context
	http://www.springframework.org/schema/context/spring-context.xsd
	http://www.springframework.org/schema/aop
	http://www.springframework.org/schema/aop/spring-aop.xsd
	http://www.springframework.org/schema/tx
	http://www.springframework.org/schema/tx/spring-tx.xsd">
	<!-- 配置Service -->
	<bean id="accountService"
		class="com.itzheng.tx.demo2.AccountServiceImpl">
		<!-- 将accountDao注入到accountService对象当中 -->
		<property name="accountDao" ref="accountDao"></property>
	</bean>
	<!-- 配置Dao -->
	<bean id="accountDao" class="com.itzheng.tx.demo2.AccountDaoImpl">
		<!-- JDBC的模板注入到accountDao类当中 -->
		<property name="dataSource" ref="dataSource"></property>
	</bean>
	<context:property-placeholder location="classpath:jdbc.properties"/>
	<!-- 配置连接池和JDBC的模板 -->
	<!-- C3P0连接池 -->
	<bean id="dataSource" class="com.mchange.v2.c3p0.ComboPooledDataSource">
		<!-- 注入属性 -->
		<property name="driverClass" value="${jdbc.driverClass}"></property>
		<property name="jdbcUrl" value="${jdbc.url}"></property>
		<property name="user" value="${jdbc.username}"></property>
		<property name="password" value="${jdbc.password}"></property>
	</bean>
</beans>
- 测试类上去除事务管理器
package com.itzheng.tx.demo2;
import javax.annotation.Resource;
import org.junit.Test;
import org.junit.runner.RunWith;
import org.springframework.test.context.ContextConfiguration;
import org.springframework.test.context.junit4.SpringJUnit4ClassRunner;
/*
 - 测试转账的环境
 */
@RunWith(SpringJUnit4ClassRunner.class)//引入Spring的测试
@ContextConfiguration("classpath:tx2.xml")//加载配置文件
public class SpringDemo1 {
	@Resource(name="accountService")//注入accountServiceimpl实现类
	private AccountService accountService;
	@Test
	public void demo1() {
		accountService.transfer("张三", "李四", 1000d);
	}
}
- 第三步:在tx2.xml当中配置事务管理器并注入数据库连接池
	<!-- 配置事务管理器=============================== -->
	<bean id="transactionManager" class="org.springframework.jdbc.datasource.DataSourceTransactionManager">
	     <!-- 注入连接池 -->
		<property name="dataSource" ref="dataSource"></property>
	</bean>
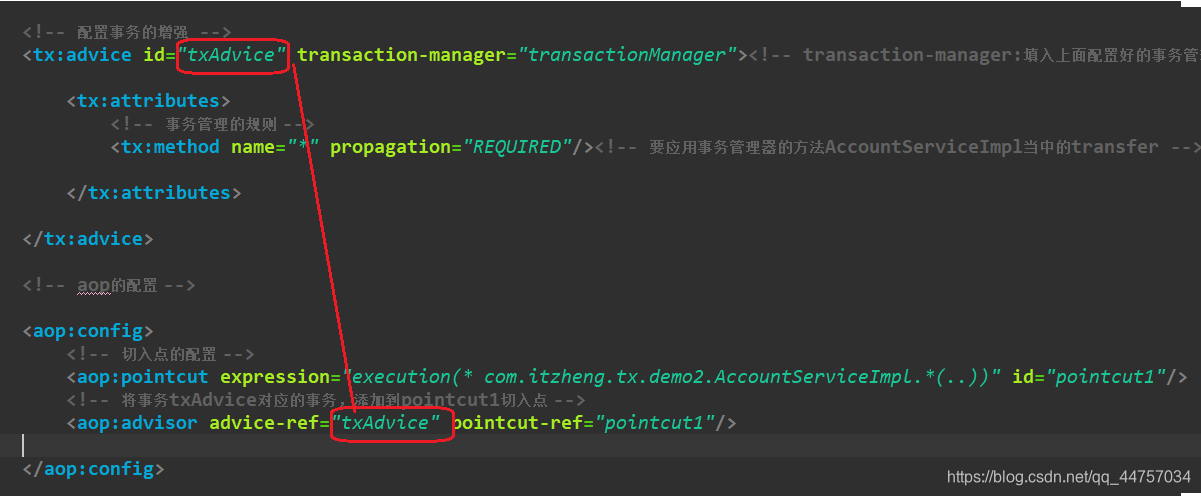
- 第四步:配置事务的增强(设置事务管理的规则)
transaction-manager:注入上面配置好的事务管理器
配置事务的增强要应用事务管理器的方法AccountServiceImpl当中的transfer方法
<!-- 配置事务的增强  -->
	<tx:advice transaction-manager="transactionManager">
		<tx:attributes>
			<!-- 事务管理的规则 -->
			<tx:method name="transfer" propagation="REQUIRED"/>
		</tx:attributes>
	</tx:advice>
- 其中的tx:attributes当中的name的值可以用*号代替
例如 :事务管理的规则
< tx:method name="save * " propagation=“REQUIRED” isolation=“DEFAULT”/ >
< tx:method name="update * " propagation=“REQUIRED” isolation=“DEFAULT”/ >
< tx:method name="delete * " propagation=“REQUIRED” isolation=“DEFAULT”/ >
< tx:method name="find * " propagation=“REQUIRED” isolation=“DEFAULT”/ > - 第五步:AOP的配置:切入点的配置,将事务txAdvice对应的事务,添加到pointcut1切入点
<!-- aop的配置 -->
	<aop:config>
		<!-- 切入点的配置 -->
		<aop:pointcut expression="execution(* com.itzheng.tx.demo2.AccountServiceImpl.*(..))" id="pointcut1"/>
		<!-- 将事务txAdvice对应的事务,添加到pointcut1切入点 -->
		<aop:advisor advice-ref="txAdvice" pointcut-ref="pointcut1"/>
	</aop:config>
- 第五步:测试:
- a、有异常的情况下
测试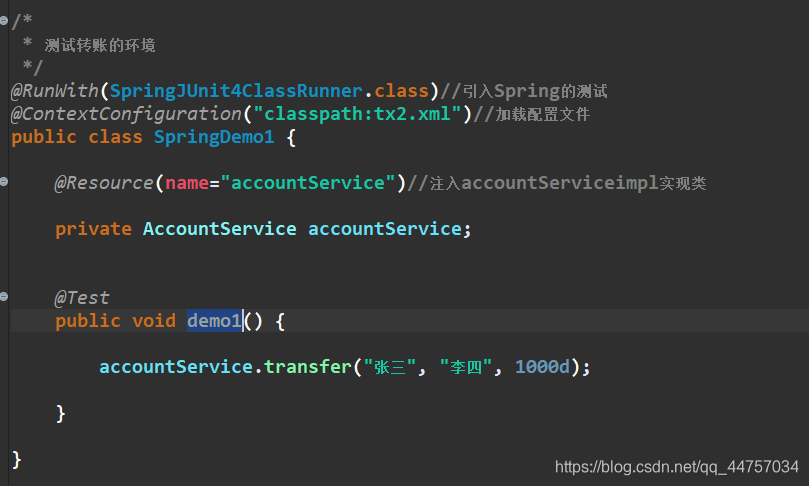
转账失败数据没有变换

- b、没有异常的情况下
数据变化,转账成功

(2)注解方式的声明式事务管理
- 第一步:引入aop的开发包4个jar
- 第二步:恢复转账环境:
创建AccountService和AccountServiceImpl和AccountDao和AccountDaoImpl - 第三步:创建配置文件tx3.xml:
<?xml version="1.0" encoding="UTF-8"?>
<beans xmlns="http://www.springframework.org/schema/beans"
xmlns:xsi="http://www.w3.org/2001/XMLSchema-instance"
xmlns:context="http://www.springframework.org/schema/context"
xmlns:aop="http://www.springframework.org/schema/aop"
xmlns:tx="http://www.springframework.org/schema/tx"
xsi:schemaLocation="http://www.springframework.org/schema/beans
http://www.springframework.org/schema/beans/spring-beans.xsd
http://www.springframework.org/schema/context
http://www.springframework.org/schema/context/spring-context.xsd
http://www.springframework.org/schema/aop
http://www.springframework.org/schema/aop/spring-aop.xsd
http://www.springframework.org/schema/tx
http://www.springframework.org/schema/tx/spring-tx.xsd">
<!-- 配置Service -->
<bean id="accountService" class="com.itzheng.tx.demo3.AccountServiceImpl">
<!-- 将accountDao注入到accountService对象当中 -->
<property name="accountDao" ref="accountDao"></property>
</bean>
<!-- 配置Dao -->
<bean id="accountDao" class="com.itzheng.tx.demo3.AccountDaoImpl">
<!-- JDBC的模板注入到accountDao类当中 -->
<property name="dataSource" ref="dataSource"></property>
</bean>
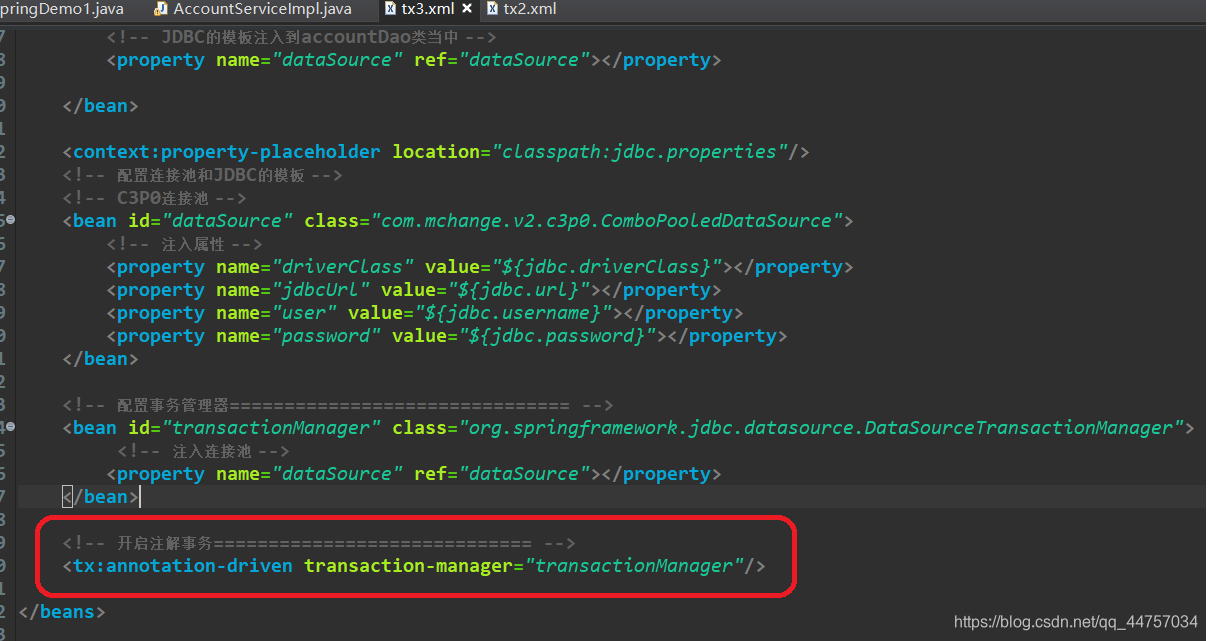
<context:property-placeholder location="classpath:jdbc.properties"/>
<!-- 配置连接池和JDBC的模板 -->
<!-- C3P0连接池 -->
<bean id="dataSource" class="com.mchange.v2.c3p0.ComboPooledDataSource">
<!-- 注入属性 -->
<property name="driverClass" value="${jdbc.driverClass}"></property>
<property name="jdbcUrl" value="${jdbc.url}"></property>
<property name="user" value="${jdbc.username}"></property>
<property name="password" value="${jdbc.password}"></property>
</bean>
</beans>
- 第四步:配置事务管理器:
<!-- 配置事务管理器=============================== -->
<bean id="transactionManager" class="org.springframework.jdbc.datasource.DataSourceTransactionManager">
	<!-- 注入连接池 -->
	<property name="dataSource" ref="dataSource"></property>
</bean>
- 第五步:开启注解:
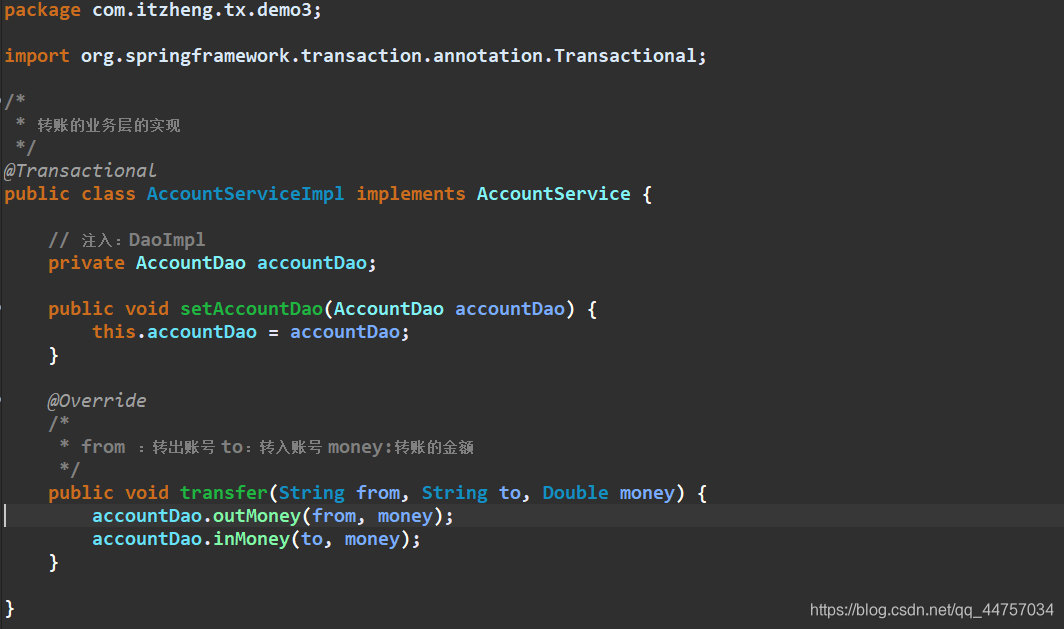
- 第六步:在业务层类上添加注解@Transactional:
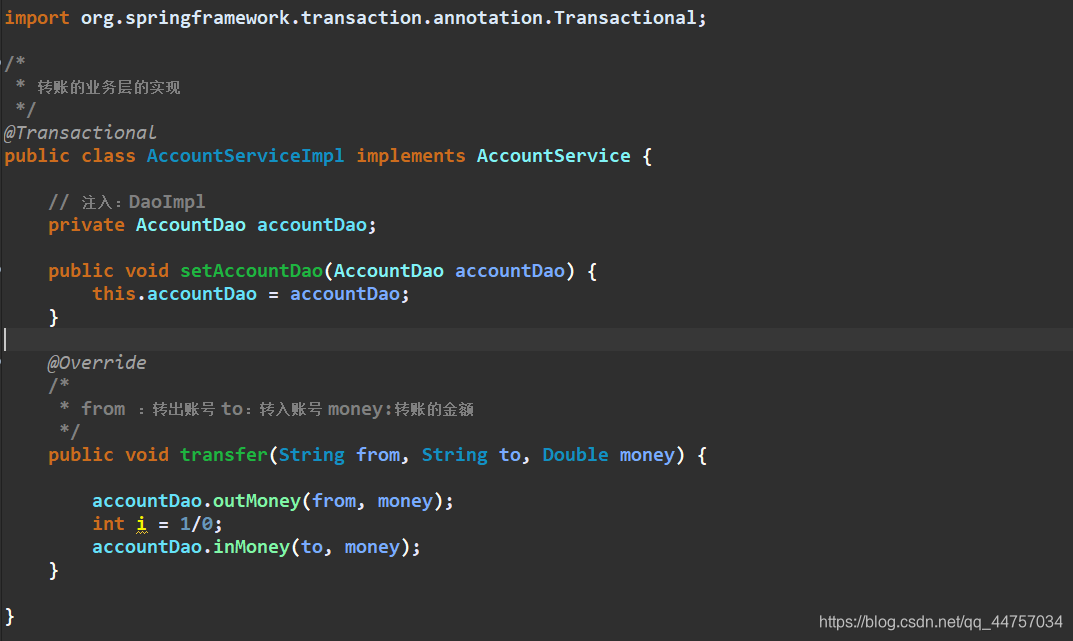
- 第七步:测试在有异常的情况下
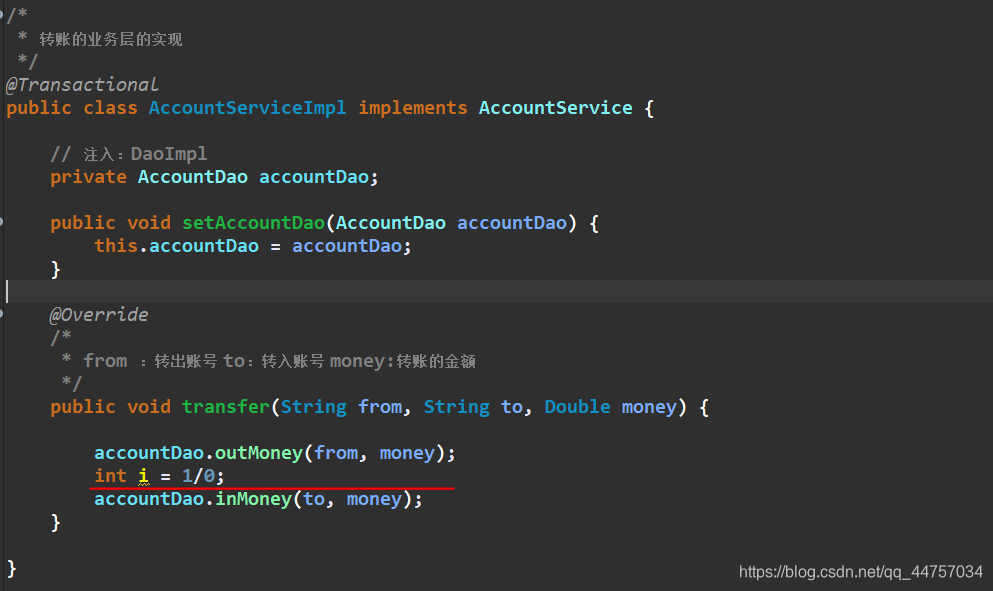
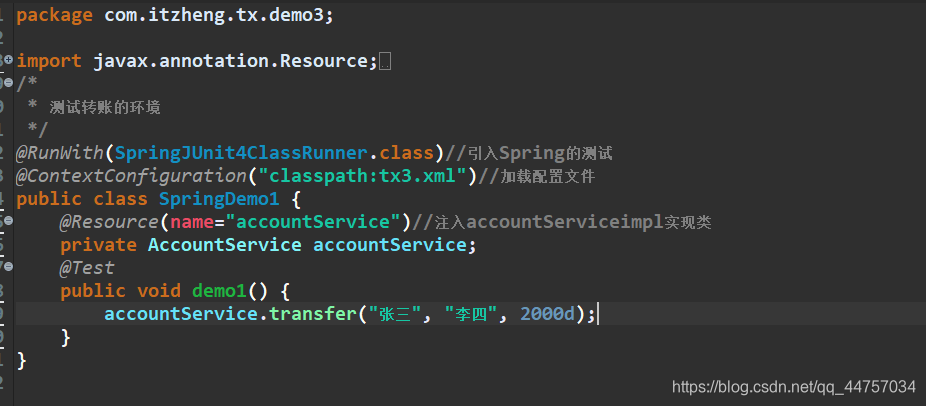
转账失败,数据没有变化
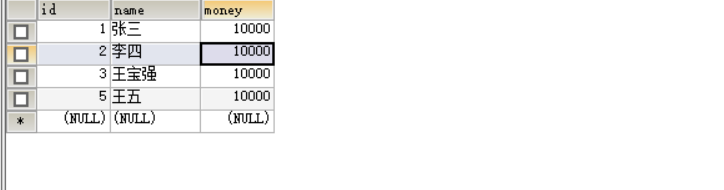
- 第八步:测试在没有异常的情况下
转账成功数据没有异常