1 编写转账案例,引出事务管理问题
需求:账号转账,Tom账号取出1000元,存放到Jack账号上
1.1 建表脚本(MySQL)
CREATE TABLE t_account (
id INT(11) NOT NULL AUTO_INCREMENT,
name VARCHAR(20) NOT NULL,
money DOUBLE DEFAULT NULL,
PRIMARY KEY (id)
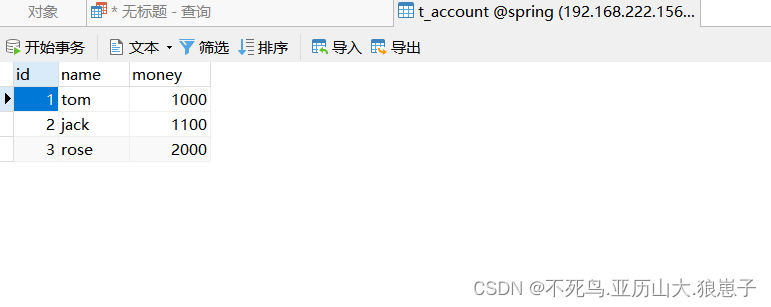
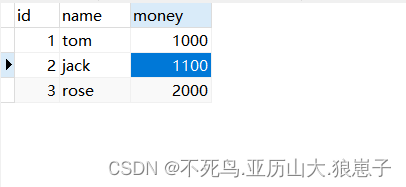
) INSERT INTO `t_account` (`id`, `name`, `money`) VALUES ('1', 'tom', '1000');
INSERT INTO `t_account` (`id`, `name`, `money`) VALUES ('2', 'jack', '1100');
INSERT INTO `t_account` (`id`, `name`, `money`) VALUES ('3', 'rose', '2000');1.2 新建工程
第一步:新建一个maven项目
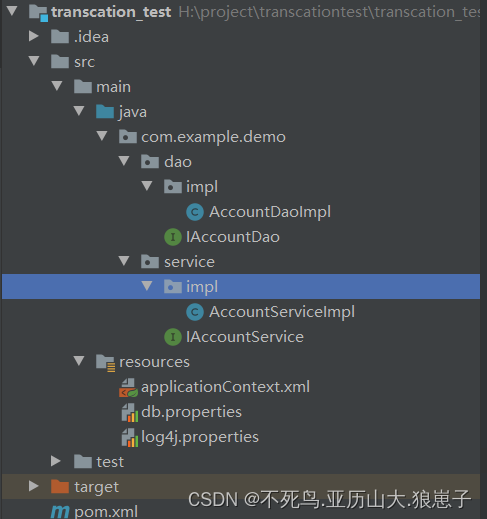
第二步:引入依赖和applicationContext.xml配置文件和log4j.properties文件和db.properties文件:
pom.xml:
    <dependencies>
        <!-- junit测试 -->
        <dependency>
            <groupId>junit</groupId>
            <artifactId>junit</artifactId>
            <version>4.10</version>
        </dependency>

        <!-- spring核心包 -->
        <dependency>
            <groupId>org.springframework</groupId>
            <artifactId>spring-context</artifactId>
            <version>4.2.8.RELEASE</version>
        </dependency>
        <!-- spring集成测试 -->
        <dependency>
            <groupId>org.springframework</groupId>
            <artifactId>spring-test</artifactId>
            <version>4.2.8.RELEASE</version>
        </dependency>

        <!-- spring事物管理 -->
        <dependency>
            <groupId>org.springframework</groupId>
            <artifactId>spring-jdbc</artifactId>
            <version>4.2.8.RELEASE</version>
        </dependency>


        <!-- c3p0数据源 -->
        <dependency>
            <groupId>c3p0</groupId>
            <artifactId>c3p0</artifactId>
            <version>0.9.1.2</version>
        </dependency>

        <!-- 数据库驱动 -->
        <dependency>
            <groupId>mysql</groupId>
            <artifactId>mysql-connector-java</artifactId>
            <version>5.1.6</version>
        </dependency>

        <!-- 注解开发切面包 -->
        <dependency>
            <groupId>org.aspectj</groupId>
            <artifactId>aspectjweaver</artifactId>
            <version>1.9.1</version>
        </dependency>

    </dependencies>
applicationContext.xml:
<?xml version="1.0" encoding="UTF-8"?>
<beans xmlns="http://www.springframework.org/schema/beans"
       xmlns:xsi="http://www.w3.org/2001/XMLSchema-instance"
       xmlns:p="http://www.springframework.org/schema/p"
       xmlns:context="http://www.springframework.org/schema/context"
       xmlns:aop="http://www.springframework.org/schema/aop"
       xmlns:tx="http://www.springframework.org/schema/tx"
       xsi:schemaLocation="http://www.springframework.org/schema/beans
                           http://www.springframework.org/schema/beans/spring-beans.xsd
                           http://www.springframework.org/schema/context
                           http://www.springframework.org/schema/context/spring-context.xsd
                           http://www.springframework.org/schema/aop
                           http://www.springframework.org/schema/aop/spring-aop.xsd
                           http://www.springframework.org/schema/tx
                           http://www.springframework.org/schema/tx/spring-tx.xsd">
</beans>
log4j.properties:
### direct log messages to stdout ###
log4j.appender.stdout=org.apache.log4j.ConsoleAppender
log4j.appender.stdout.Target=System.err
log4j.appender.stdout.layout=org.apache.log4j.PatternLayout
log4j.appender.stdout.layout.ConversionPattern=%d{ABSOLUTE} %5p %c{1}:%L - %m%n
log4j.rootLogger=info, stdout
db.properties:
jdbc.driverClass=com.mysql.jdbc.Driver
jdbc.url=jdbc:mysql://192.168.222.156:3306/spring?characterEncoding=utf8&useSSL=false
jdbc.user=root
jdbc.password=123456第三步:创建IAccountDao接口
创建AccounDaoImpl实现类,实现了IAccountDao接口
账户操作持久层
技术方案:jdbctempate
package com.example.demo.dao;

public interface IAccountDao {
    // 转出
    public void out(String name, Double money);

    // 转入
    public void in(String name, Double money);
}
第四步:建立service层,创建IAccountService接口,编写转账的业务代码:
package com.example.demo.service;

public interface IAccountService {
    //转账业务:
    public void transfer(String outName,String inName,Double money);
}
package com.example.demo.service.impl;
import com.example.demo.dao.IAccountDao;
import com.example.demo.service.IAccountService;
public class AccountServiceImpl implements IAccountService {
// 注入dao
private IAccountDao accountDao;
public void setAccountDao(IAccountDao accountDao) {
this.accountDao = accountDao;
}
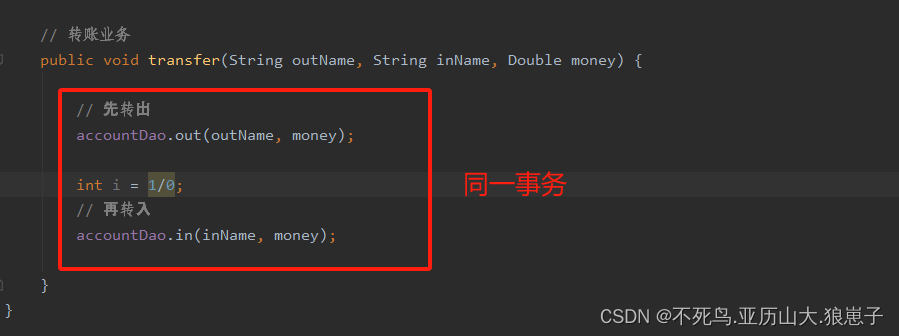
// 转账业务
public void transfer(String outName, String inName, Double money) {
// 先转出
accountDao.out(outName, money);
// 再转入
accountDao.in(inName, money);
}
}
第五步: 将对象配置到spring工厂
applicationContext.xml文件添加配置
    <!-- 引入配置文件 -->
    <context:property-placeholder location="classpath:db.properties" />
    <!-- 配置数据源 -->
    <bean id="dataSource" class="com.mchange.v2.c3p0.ComboPooledDataSource">
        <property name="driverClass" value="${jdbc.driverClass}" />
        <property name="jdbcUrl" value="${jdbc.url}" />
        <property name="user" value="${jdbc.user}" />
        <property name="password" value="${jdbc.password}" />
    </bean>


    <!-- 管理dao和service -->
    <bean id="accountDao" class="com.example.demo.dao.impl.AccountDaoImpl">
        <!-- 注入数据源 -->
        <property name="dataSource" ref="dataSource" />
    </bean>

    <bean id="accountService" class="com.example.demo.service.impl.AccountServiceImpl">
        <property name="accountDao" ref="accountDao"></property>
</bean>第六步:使用SpringTest进行测试
package com.example.demo.service.impl;

import com.example.demo.service.IAccountService;
import org.junit.Test;
import org.junit.runner.RunWith;
import org.springframework.beans.factory.annotation.Autowired;
import org.springframework.test.context.ContextConfiguration;
import org.springframework.test.context.junit4.SpringJUnit4ClassRunner;

//集成spring测试
@RunWith(SpringJUnit4ClassRunner.class)
@ContextConfiguration(locations="classpath:applicationContext.xml")
public class AccountServiceImplTest {

    //注入测试对象
    @Autowired
    private IAccountService accountService;


    @Test
    public void testTransfer() {
        accountService.transfer("tom", "jack", 1000d);
    }

}
但是发现问题:
事务管理问题:在Service层没有事务的情况下,如果出现异常,则会转账不成功,数据异常。
在转账方法中添加如下异常:

运行前:
运行后:

事务未生效。
注意:如果不配置事务,那么每一个数据库的操作都是单独的一个事务。
2 XML配置方式添加事务管理(tx、aop元素)
【操作思路】:aop三步走
- 确定目标:需要对AccountService 的 transfer方法,配置切入点
- 需要Advice (环绕通知),方法前开启事务,方法后提交关闭事务
- 配置切面和切入点
配置Advice通知:
Spring为简化事务的配置,提供了**<tx:advice>**来配置事务管理,也可以理解为该标签是spring为你实现好了的事务的通知增强方案。
    <!-- 配置事物管理器 -->
	<bean id="transactionManager"
		class="org.springframework.jdbc.datasource.DataSourceTransactionManager">
		<property name="dataSource" ref="dataSource" />
	</bean>

	<!-- 配置事物通知 -->
	<!-- transaction-manager: 指定事物管理器的id,如果事物管理器的id为transactionManager的话 该属性可以省略(缺省值) -->
	<tx:advice id="txAdvice" transaction-manager="transactionManager">
		<!-- 配置事物管理细则(事物定义信息) -->
		<tx:attributes>
			<!-- 需要被增强(事物 管理)的方法 -->
			<tx:method name="transfer" isolation="DEFAULT" propagation="REQUIRED"
				read-only="false" timeout="-1" />
		</tx:attributes>
	</tx:advice>

	<!-- 配置切入点和切面 -->
	<aop:config>
		<aop:pointcut expression="bean(*Service)" id="mycut" />
		<aop:advisor advice-ref="txAdvice" pointcut-ref="mycut" />
	</aop:config>
使用AccountServiceImplTest.java测试:数据正常!

事物添加的前后对比
没有添加事务:
两个方法分属不同事务。

添加事务后:
分属同一事务
【注意】如果不配置,则走默认的事务(默认事务是每个数据库操作都是一个事务,相当于没事务),所以我们开发时需要配置事务。
3 注解配置方式添加事务管理 @Transactional
步骤:
- 在需要管理事务的方法或者类上面 添加@Transactional 注解
- 配置注解驱动事务管理(事务管理注解生效的作用)(需要配置对特定持久层框架使用的事务管理器)
创建项目spring_transaction_anntx:

替换applicationContext.xml中的<bean> 配置为注解
改造dao:
package com.example.demo.dao.impl;

import com.example.demo.dao.IAccountDao;
import org.springframework.beans.factory.annotation.Autowired;
import org.springframework.jdbc.core.support.JdbcDaoSupport;
import org.springframework.stereotype.Repository;

import javax.sql.DataSource;

@Repository("accountDao")
public class AccountDaoImpl extends JdbcDaoSupport implements IAccountDao {

    //将数据源注入给父类,父类中需要通过数据源创建jdbctemplate
    @Autowired
    public void setSuperDataSource(DataSource dataSource){
        super.setDataSource(dataSource);
    }

    public void out(String name, Double money) {
        String sql = "update t_account set money = money-? where name = ?";
        super.getJdbcTemplate().update(sql, money, name);

    }

    public void in(String name, Double money) {
        String sql = "update t_account set money = money+? where name = ?";
        super.getJdbcTemplate().update(sql, money, name);
    }
}
改造service:
package com.example.demo.service.impl;

import com.example.demo.dao.IAccountDao;
import com.example.demo.service.IAccountService;
import org.springframework.stereotype.Service;

@Service("accountService")
public class AccountServiceImpl implements IAccountService {
    // 注入dao
    @Autowired
    private IAccountDao accountDao;

    public void setAccountDao(IAccountDao accountDao) {
        this.accountDao = accountDao;
    }

    // 转账业务
    public void transfer(String outName, String inName, Double money) {

        // 先转出
        accountDao.out(outName, money);

        // 再转入
        accountDao.in(inName, money);

    }
}
在applicationContext.xml中配置注解扫描:
    <!-- 开启注解扫描 -->
    <context:component-scan base-package="com.example.demo" />
测试方法是否能正常运行

以上步骤全部没问题后,开始配置注解方式的事物管理
第一步:配置 事物管理器:
在applicationContext.xml中,根据选用的持久层框架配置事物管理器:
    <!-- 配置事物管理器 -->
    <bean id="transactionManager"
          class="org.springframework.jdbc.datasource.DataSourceTransactionManager">
        <property name="dataSource" ref="dataSource" />
    </bean>
第二步: 在需要管理事物的方法上添加@Transactional注解,表示对该方法进行事物管理
第三步:在applicationContext.xml中开启事物注解驱动,让@Transactional注解生效

<?xml version="1.0" encoding="UTF-8"?>
<beans xmlns="http://www.springframework.org/schema/beans"
       xmlns:xsi="http://www.w3.org/2001/XMLSchema-instance"
       xmlns:p="http://www.springframework.org/schema/p"
       xmlns:context="http://www.springframework.org/schema/context"
       xmlns:aop="http://www.springframework.org/schema/aop"
       xmlns:tx="http://www.springframework.org/schema/tx"
       xsi:schemaLocation="http://www.springframework.org/schema/beans
                           http://www.springframework.org/schema/beans/spring-beans.xsd
                           http://www.springframework.org/schema/context
                           http://www.springframework.org/schema/context/spring-context.xsd
                           http://www.springframework.org/schema/aop
                           http://www.springframework.org/schema/aop/spring-aop.xsd
                           http://www.springframework.org/schema/tx
                           http://www.springframework.org/schema/tx/spring-tx.xsd">
    <!-- 引入配置文件 -->
    <context:property-placeholder location="classpath:db.properties" />
    <!-- 配置数据源 -->
    <bean id="dataSource" class="com.mchange.v2.c3p0.ComboPooledDataSource">
        <property name="driverClass" value="${jdbc.driverClass}" />
        <property name="jdbcUrl" value="${jdbc.url}" />
        <property name="user" value="${jdbc.user}" />
        <property name="password" value="${jdbc.password}" />
    </bean>

    <!-- 开启注解扫描 -->
    <context:component-scan base-package="com.example.demo" />

    <!-- 配置事物管理器 -->
    <bean id="transactionManager"
          class="org.springframework.jdbc.datasource.DataSourceTransactionManager">
        <property name="dataSource" ref="dataSource" />
    </bean>

    <!--配置事务注解驱动-->
    <tx:annotation-driven transaction-manager="transactionManager" />

</beans>第四步:测试事物是否正常
提示:
如果 @Transactional 标注在 Class 上面, 那么将会对这个 Class 里面所有的 public 方法都包装事务方法。等同于该类的每个公有方法都放上了@Transactional。
如果某方法需要单独的事务定义,则需要在方法上加@Transactional来覆盖类上的标注声明。记住:方法级别的事务覆盖类级别的事务(就近原则)
package com.example.demo.service.impl;
import org.springframework.beans.factory.annotation.Autowired;
import org.springframework.stereotype.Service;
import org.springframework.transaction.annotation.Transactional;
import com.example.demo.dao.IAccountDao;
import com.example.demo.service.IAccountService;
@Service("accountService")
@Transactional
// 放置在类上表示对该类中所有的方法都进行事物管理
public class AccountServiceImpl implements IAccountService {
// 注入dao
@Autowired
private IAccountDao accountDao;
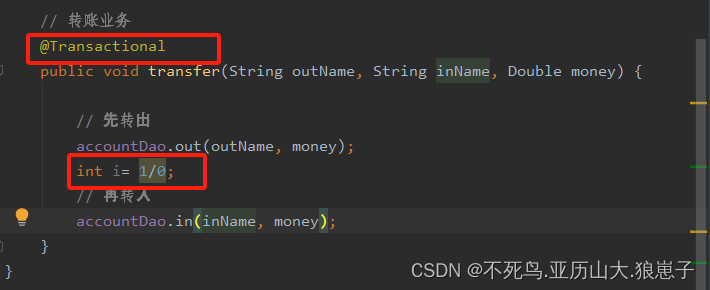
// 转账业务
@Transactional
public void transfer(String outName, String inName, Double money) {
// 先转出
accountDao.out(outName, money);
// 发生异常
int i = 1 / 0;
// 再转入
accountDao.in(inName, money);
}
@Transactional(readOnly = true)
// 当方法上的事物定义信息和类上的冲突时,就近原则使用方法上的配置
public Double queryMoney(String name) {
// TODO Auto-generated method stub
return null;
}
}4 小结-xml和注解的选择
XML配置方式和注解配置方式进行事务管理 哪种用的多?
XML方式,集中式维护,统一放置到applicationContext.xml文件中,缺点在于配置文件中的内容太多。
使用@Transactional注解进行事务管理,配置太分散,使用XML进行事务管理,属性集中配置,便于管理和维护
注意:以后的service的方法名字的命名,必须是上面规则,否则,不能被spring事务管理。!!!!
即以save开头的方法,update开头的方法,delete开头的方法,表示增删改的操作,故事务为可写
以find开头的方法,表示查询,故事务为只读