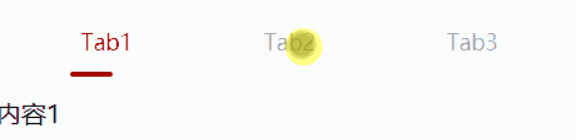
效果图
可根据需求来修改样式或封装成组件。
wxml
<!-- tab框  -->
<view class="nav_title">
  <view class="nav_tab">
  <!-- 如果选中的下表等于当前的索引,就使用active class名,否则class名为common -->
    <view wx:for="{{list}}"
      wx:key="list"
      class="{{selected==index?'active':'common'}}"
      data-index='{{index}}'
      bindtap="selected">
    {{item}}
  <!-- 如果选中的下表等于当前的索引,就添加下划线 -->
      <view class="{{selected==index?'nav_underline':''}}"></view>
    </view>
  </view>
  <!-- tab1  -->
  <view wx:if="{{selected == 0}}">内容1</view>

  <!-- tab2 -->
  <view wx:if="{{selected == 1}}">内容2</view>
  <!-- tab3 -->
  <view wx:if="{{selected == 2}}">内容3</view>
</view>
wxss
/* 页面背景色 */
page {
  background: rgba(247, 247, 247, 1);
}

.nav_tab {
  width: 702rpx;
  margin: 20rpx auto;
  height: 100rpx;
  display: flex;
  background: #fff;
  border-radius: 10rpx;
  flex-direction: row;
}
/* 未选中的样式 */
.common {
  line-height: 100rpx;
  text-align: center;
  flex: 1;
  color: #333;
  font-size: 28rpx;
  opacity: 0.5;
}
/* 选中时的样式 */
.active {
  line-height: 100rpx;
  text-align: center;
  color: #ef9ba8;
  flex: 1;
  font-size: 28rpx;
}
/* 下划线的样式 */
.nav_underline {
  background: #ef9ba8;
  width: 54rpx;
  height: 6rpx;
  margin-top: -10rpx;
  margin-left: 70rpx;
  border-radius: 8rpx;
}
js
Page({

  /**
   * 页面的初始数据
   */
  data: {
    selected: 0,
    list: ['Tab1', 'Tab2', 'Tab3'],
  },
  //tab框
  selected: function (e) {
    let that = this
    //console.log(e)
    let index = e.currentTarget.dataset.index
    //console.log("index",index)
    if (index == 0) {
      that.setData({
        selected: 0
      })
    } else if (index == 1) {
      that.setData({
        selected: 1
      })
    } else {
      that.setData({
        selected: 2
      })
    }
  }