将这个图片保存为 png 或者 jpg 格式
数据增强
AlexNet 是十分经典的卷积神经网络,这里对 AlexNet 的原理不做介绍,AlexNet 取得了 2012年 ImageNet LSVRC(大规模视觉识别挑战赛)冠军,其中之一就是运用了数据增强(data augmentation),数据增强的目的是为了防止图像的不同方位,角度来对模型预测产生较大影响
数据增强 TensorFlow 1.x 实现
数据增强部分函数解析
导入必要模块
import tensorflow as tf
import matplotlib.pyplot as plt
import numpy as np
图像编码处理
注意:输入图像为 jpg 格式使用 decode_jpeg 进行解码,如果输入图像为 png 格式,使用 decode_png 进行解码,但实际上两种图片格式与两种解码方式可以混用,至少在本篇混用不会出现任何 bug,当然为了不必要以及莫名的报错,使用对应的函数最好
TensorFlow1.x 可以使用 tf.gfile.FastGFile 或者 tf.gfile.GFile 读取文件
TensorFlow 的图像模式采用 RGB 通道顺序,与 matplotlib 相同
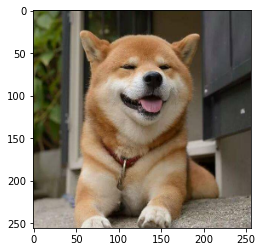
image_raw_data = tf.gfile.FastGFile('./data/dog.jpg', 'rb').read()

img_data = tf.image.decode_jpeg(image_raw_data)

with tf.Session().as_default() as sess:
    img_data_decode = img_data.eval()
    print('image_data decode type:\n', type(img_data_decode))
    print('image_data decode shape:\n', img_data_decode.shape)
    print('image_data decode value:\n', img_data_decode)

    plt.imshow(img_data.eval())
    plt.show()
image_data decode type:
 <class 'numpy.ndarray'>
image_data decode shape:
 (554, 578, 3)
image_data decode value:
 [[[ 32  42   7]
  [ 26  36   1]
  [ 20  30   0]
  ...
  [ 59  63  64]
  [ 61  65  66]
  [ 61  65  66]]

 [[112 122  87]
  [107 117  80]
  [101 111  76]
  ...
  [ 66  70  71]
  [ 67  71  72]
  [ 67  71  72]]

 [[114 124  87]
  [110 121  81]
  [105 115  78]
  ...
  [ 69  73  74]
  [ 69  73  74]
  [ 69  73  74]]

 ...

 [[194 185 176]
  [195 186 177]
  [198 189 180]
  ...
  [120 110 108]
  [131 122 117]
  [131 122 117]]

 [[194 185 176]
  [195 186 177]
  [196 187 178]
  ...
  [140 130 128]
  [136 127 122]
  [136 127 122]]

 [[190 181 172]
  [191 182 173]
  [193 184 175]
  ...
  [147 137 135]
  [160 151 146]
  [160 151 146]]]
![[外链图片转存失败,源站可能有防盗链机制,建议将图片保存下来直接上传(img-P1vGmkqc-1588240759414)(output_3_1.png)]](https://img-blog.csdnimg.cn/20200430180956208.png)
图像缩放函数 tensorflow.image.resize_images()
tf.image.resize_images(
images,
size,
method=ResizeMethodV1.BILINEAR,
align_corners=False,
preserve_aspect_ratio=False,
name=None
)
method: 表示缩放时使用的方法,method 可选择方法如下:
•ResizeMethod.BILINEAR: 双线性插值,method=0
•ResizeMethod.NEAREST_NEIGHBOR: 最近邻插值 method=1
•ResizeMethod.BICUBIC: 双立方插值 method=2
•ResizeMethod.AREA: 像素区域插值 method=3
images: 4-D 张量[batch, height, width, channels] 或 3-D 张量[height, width, channels]
size: 宽高尺寸 new_height, new_width
preserve_aspect_ratio: 是否保留长宽比,默认为False,如果设置了此项,则将 images 在 size 保留原始图像的纵横比的同时将其调整为适合的尺寸。如果图像 size 大于当前尺寸,则按比例放大图像 image
align_corners: 布尔变量,默认False,如果为True,则输入和输出张量的 4 个角像素的中心对齐,并保留角像素处的值(一般忽略这项设置)
name: 命名
返回缩放后的 image,4-D 返回 4-D float 张量[batch, new_height, new_width, channels] 3-D 返回 3-D float 张量[new_height, new_width, channels]
****************************************************line*****************************************************
其中 resized1 = tf.cast(resized1, tf.int32) resized1 = resized1.eval(session=sess) 可以替换为 resized1 = np.asarray(resized1.eval(session=sess), dtype='uint8'),既然是 TensorFlow 的主场,我们尽量使用 TensorFLow 内部提供的格式转换函数,当然 TensorFlow 对 numpy 的支持也非常友好,为了节约空间,下面不在输出图像变换后的值,这里承接上面图像编码处理后的输入值
resized0 = tf.image.resize_images(img_data, [256,256], method=0)
resized0 = tf.cast(resized0, tf.int32)
resized0 = resized0.eval(session=sess)
print('resize type:\n', type(resized0))
print('resize shape:\n', resized0.shape)
plt.imshow(resized0)
plt.show()
resize type:
 <class 'numpy.ndarray'>
resize shape:
 (256, 256, 3)
resized1 = tf.image.resize_images(img_data, [256,256], method=1)
resized1 = tf.cast(resized1, tf.int32)
resized1 = resized1.eval(session=sess)
print('resize type:\n', type(resized1))
print('resize shape:\n', resized1.shape)
plt.imshow(resized1)
plt.show()
resize type:
 <class 'numpy.ndarray'>
resize shape:
 (256, 256, 3)
![[外链图片转存失败,源站可能有防盗链机制,建议将图片保存下来直接上传(img-CxIhnQCg-1588240759419)(output_7_1.png)]](https://img-blog.csdnimg.cn/20200430181135920.png)
下面这个双立方插值需要使用 resized2 = np.asarray(resized2.eval(session=sess), dtype='uint8'),使用 resized2 = tf.cast(resized1, tf.int32) resized2 = resized2.eval(session=sess) 能正常显示,但是会有 Clipping input data to the valid range for imshow with RGB data ([0..1] for floats or [0..255] for integers). 弹出,当然也可以用 resized2 = tf.cast(resized2, tf.uint8) resized2 = resized2.eval(session=sess),不信?你可以试一试
resized2 = tf.image.resize_images(img_data, [256,256], method=2)
resized2 = tf.cast(resized2, tf.uint8)
resized2 = resized2.eval(session=sess)
print('resize type:\n', type(resized2))
print('resize shape:\n', resized2.shape)
plt.imshow(resized2)
plt.show()
resize type:
 <class 'numpy.ndarray'>
resize shape:
 (256, 256, 3)
![[外链图片转存失败,源站可能有防盗链机制,建议将图片保存下来直接上传(img-2lDXbrJN-1588240759422)(output_9_1.png)]](https://img-blog.csdnimg.cn/2020043018115432.png)
resized3 = tf.image.resize_images(img_data, [256,256], method=3)
resized3 = tf.cast(resized3, tf.int32)
resized3 = resized3.eval(session=sess)
print('resize type:\n', type(resized3))
print('resize shape:\n', resized3.shape)
plt.imshow(resized3)
plt.show()
resize type:
 <class 'numpy.ndarray'>
resize shape:
 (256, 256, 3)
![[外链图片转存失败,源站可能有防盗链机制,建议将图片保存下来直接上传(img-i5HfkBdZ-1588240759424)(output_10_1.png)]](https://img-blog.csdnimg.cn/20200430181209410.png)
记得关闭上一个 Session() 进程哦
sess.close()
图像裁剪函数 tf.image.resize_with_crop_or_pad()
tf.image.resize_with_crop_or_pad(
image,
target_height,
target_width
)
image: 4-D 张量[batch, height, width, channels] 或 三维张量[height, width, channels]
target_height: 目标高度
target_width: 目标宽度
返回裁剪或填充后的 image,4-D 返回 4-D float 张量[batch, new_height, new_width, channels] 3-D 返回 3-D float 张量[new_height, new_width, channels]
如果目标尺寸小于原图像,则从中心进行裁剪,反之则用黑色填充
*****************************************************line****************************************************
下面我们使用 dog.png 为例,切记在图像格式转换中,尽量避免直接修改后缀名,可以编写程序进行图像格式转换,最简单的方法是下载格式工厂,使用格式工厂进行转换,而且格式工厂能进行图像批处理转换
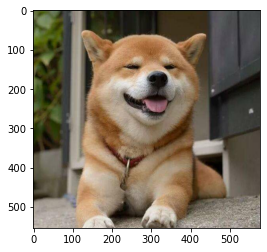
image_raw_data = tf.gfile.FastGFile('./data/dog.png', 'rb').read()

img_data = tf.image.decode_png(image_raw_data)

with tf.Session().as_default() as sess:
    img_data_decode = img_data.eval()
    print('image_data decode type:\n', type(img_data_decode))
    print('image_data decode shape:\n', img_data_decode.shape)
    print('image_data decode value:\n', img_data_decode)

    plt.imshow(img_data.eval())
    plt.show()
image_data decode type:
 <class 'numpy.ndarray'>
image_data decode shape:
 (554, 578, 3)
image_data decode value:
 [[[ 32  42   7]
  [ 26  36   1]
  [ 20  30   0]
  ...
  [ 59  63  64]
  [ 61  65  66]
  [ 61  65  66]]

 [[112 122  87]
  [107 117  82]
  [101 111  76]
  ...
  [ 66  70  71]
  [ 67  71  72]
  [ 67  71  72]]

 [[114 125  85]
  [110 121  81]
  [105 116  76]
  ...
  [ 69  73  74]
  [ 69  73  74]
  [ 69  73  74]]

 ...

 [[194 185 176]
  [195 186 177]
  [198 189 180]
  ...
  [120 110 108]
  [131 122 117]
  [131 122 117]]

 [[194 185 176]
  [195 186 177]
  [196 187 178]
  ...
  [140 130 128]
  [136 127 122]
  [136 127 122]]

 [[190 181 172]
  [191 182 173]
  [193 184 175]
  ...
  [147 137 135]
  [160 151 146]
  [160 151 146]]]
![[外链图片转存失败,源站可能有防盗链机制,建议将图片保存下来直接上传(img-Q5ClYuWo-1588240759425)(output_14_1.png)]](https://img-blog.csdnimg.cn/20200430181300427.png)
cropped = tf.image.resize_with_crop_or_pad(img_data, 256, 256)
cropped = cropped.eval(session=sess)
print('resize type:\n', type(cropped))
print('resize shape:\n', cropped.shape)
plt.imshow(cropped)
plt.show()
resize type:
 <class 'numpy.ndarray'>
resize shape:
 (256, 256, 3)
![[外链图片转存失败,源站可能有防盗链机制,建议将图片保存下来直接上传(img-v4hmouxu-1588240759427)(output_15_1.png)]](https://img-blog.csdnimg.cn/20200430181438210.png)
padded = tf.image.resize_image_with_crop_or_pad(img_data, 800, 800)
padded = padded.eval(session=sess)
print('resize type:\n', type(padded))
print('resize shape:\n', padded.shape)
plt.imshow(padded)
plt.show()
resize type:
 <class 'numpy.ndarray'>
resize shape:
 (800, 800, 3)
![[外链图片转存失败,源站可能有防盗链机制,建议将图片保存下来直接上传(img-iPoQuToN-1588240759428)(output_16_1.png)]](https://img-blog.csdnimg.cn/20200430181429122.png)
sess.close()
随机剪裁函数 tf.image.random_crop()
tf.image.random_crop(
value,
size,
seed=None,
name=None
)
value: 输入张量
size: 一维张量,剪裁维度
seed: 随机种子,设置同一个 seed 将裁剪出同样的图
name: 命名
返回剪裁后的张量及维度
image_raw_data = tf.gfile.FastGFile('./data/dog.jpg', 'rb').read()

img_data = tf.image.decode_jpeg(image_raw_data)

with tf.Session().as_default() as sess:
    img_data_decode = img_data.eval()
    print('image_data decode type:\n', type(img_data_decode))
    print('image_data decode shape:\n', img_data_decode.shape)
    plt.imshow(img_data.eval())
    plt.show()
image_data decode type:
 <class 'numpy.ndarray'>
image_data decode shape:
 (554, 578, 3)
![[外链图片转存失败,源站可能有防盗链机制,建议将图片保存下来直接上传(img-hEgFzQUB-1588240759429)(output_19_1.png)]](https://img-blog.csdnimg.cn/20200430181412749.png)
fig = plt.gcf()
fig.set_size_inches(20, 10)
for i in range(5):
    ax_img = plt.subplot(1, 5, i + 1)
    rd_cropped = tf.image.random_crop(img_data, [200, 200, 3])
    rd_cropped = rd_cropped.eval(session=sess)
    ax_img.imshow(rd_cropped)
    ax_img.set_title(str(type(rd_cropped)) \
                     + str(rd_cropped.shape),
                     fontsize=10)
plt.show()
![[外链图片转存失败,源站可能有防盗链机制,建议将图片保存下来直接上传(img-aSO7J4Nm-1588240759430)(output_20_0.png)]](https://img-blog.csdnimg.cn/20200430181402545.png?x-oss-process=image/watermark,type_ZmFuZ3poZW5naGVpdGk,shadow_10,text_aHR0cHM6Ly9ibG9nLmNzZG4ubmV0L3FxXzM5NTY3NDI3,size_16,color_FFFFFF,t_70)
sess.close()
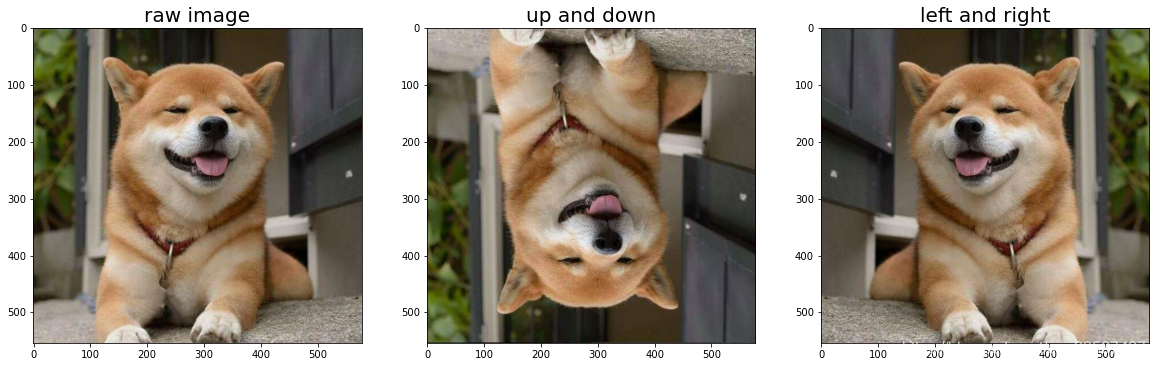
上下翻转与水平翻转
tf.image.flip_left_right() 左右翻转
tf.image.flip_up_down() 上下翻转
image_raw_data = tf.gfile.FastGFile('./data/dog.jpg', 'rb').read()

img_data = tf.image.decode_jpeg(image_raw_data)

sess = tf.Session()
fig = plt.gcf()
fig.set_size_inches(20, 10)
ax_raw = plt.subplot(1, 3, 1)
img_raw = sess.run(img_data)
ax_raw.imshow(img_raw)
ax_raw.set_title('raw image', fontsize=20)

ax_up_down = plt.subplot(1, 3, 2)
img_up_down = tf.image.flip_up_down(img_data)
img_up_down = sess.run(img_up_down)
ax_up_down.imshow(img_up_down)
ax_up_down.set_title('up and down', fontsize=20)

ax_left_right = plt.subplot(1, 3, 3)
img_left_right = tf.image.flip_left_right(img_data)
img_left_right = sess.run(img_left_right)
ax_left_right.imshow(img_left_right)
ax_left_right.set_title('left and right', fontsize=20)
plt.show()

sess.close()
![上传(img-9uF4qRQI-1588240759432)(output_23_0.png)]](https://img-blog.csdnimg.cn/20200430181343476.png?x-oss-process=image/watermark,type_ZmFuZ3poZW5naGVpdGk,shadow_10,text_aHR0cHM6Ly9ibG9nLmNzZG4ubmV0L3FxXzM5NTY3NDI3,size_16,color_FFFFFF,t_70)
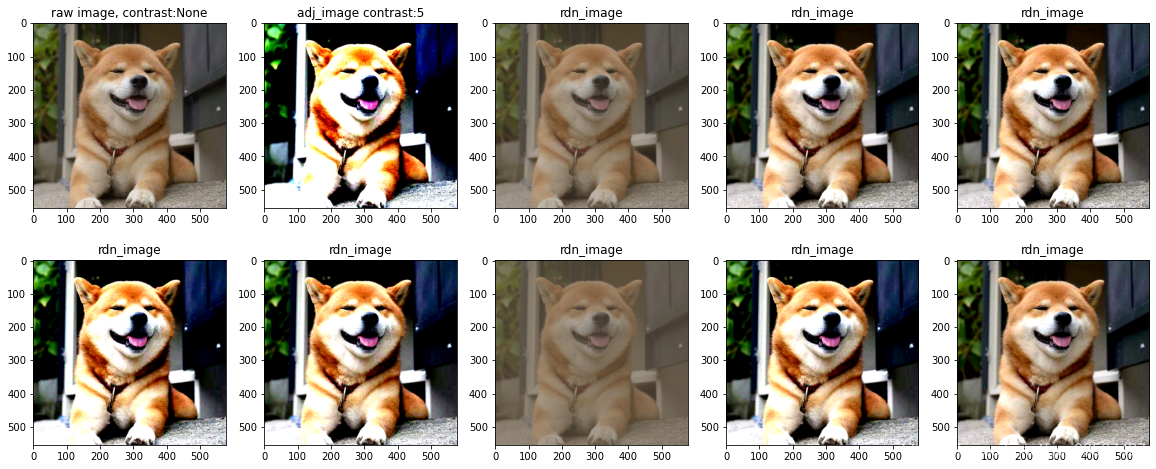
改变图像对比度 tf.image.random_contrast() 与 tf.image.adjust_contrast()
tf.image.adjust_contrast(
images,
contrast_factor
)
image: 输入图像
contrast_factor: 调整对比度的浮点乘法器,对比因子,float 类型
tf.image.random_contrast(
image,
lower,
upper,
seed=None
)
image: 输入图像
lower: 低值对比因子,float类型
upper: 高值对比因子,float类型
seed: 随机种子
返回值如输入值同类型图像
可以看出 tf.image.adjust_contrast() 是直接指定调节对比度,tf.image.random_contrast() 则是随机调节
image_raw_data = tf.gfile.FastGFile('./data/dog.jpg', 'rb').read()

img_data = tf.image.decode_jpeg(image_raw_data)

sess = tf.Session()

fig = plt.gcf()
fig.set_size_inches(20, 8)

ax_img = plt.subplot(2, 5, 1)
ax_img.imshow(sess.run(img_data))
ax_img.set_title('raw image' + ', contrast:None', fontsize=12)

ax_img = plt.subplot(2, 5, 2)
contrast = tf.image.adjust_contrast(img_data, 5)
ax_img.imshow(sess.run(contrast))
ax_img.set_title('adj_image' + ' contrast:5', fontsize=12)

for i in range(2, 10):
    ax_img = plt.subplot(2, 5, i + 1)
    contrast = tf.image.random_contrast(img_data, 0.001, 3)
    contrast = contrast.eval(session=sess)
    ax_img.imshow(contrast)
    ax_img.set_title('rdn_image', fontsize=12)
plt.show()

sess.close()
![[外链图片转存失败,源站可能有防盗链机制,建议将图片保存下来直接上传(img-RyrQhZOg-1588240759435)(output_25_0.png)]](https://img-blog.csdnimg.cn/20200430181327170.png?x-oss-process=image/watermark,type_ZmFuZ3poZW5naGVpdGk,shadow_10,text_aHR0cHM6Ly9ibG9nLmNzZG4ubmV0L3FxXzM5NTY3NDI3,size_16,color_FFFFFF,t_70)
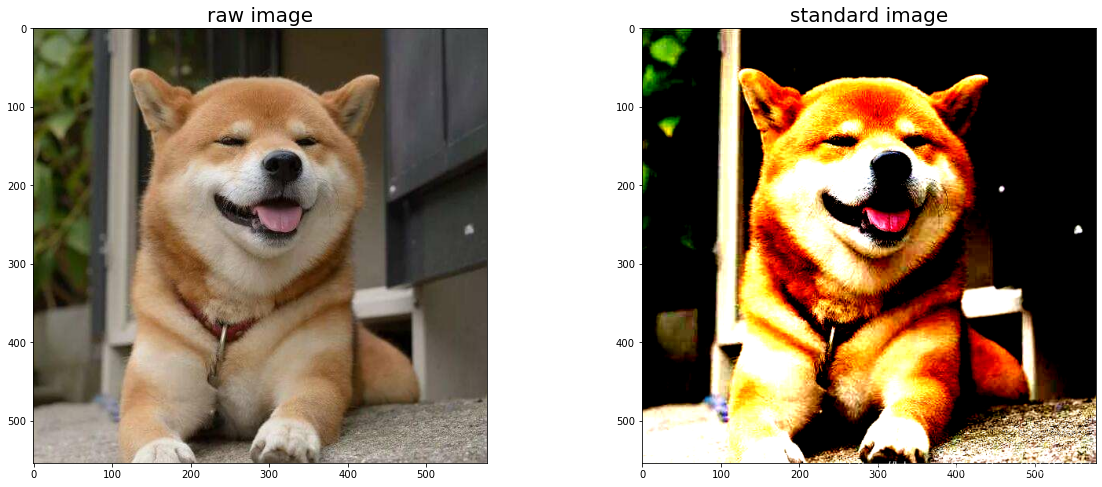
白化处理
将图像的像素值转化成零均值和单位方差,图像标准化
image_raw_data = tf.gfile.FastGFile('./data/dog.png', 'rb').read()

img_data = tf.image.decode_png(image_raw_data)

sess = tf.Session()
fig = plt.gcf()
fig.set_size_inches(20, 8)

ax_img1 = plt.subplot(1, 2, 1)
ax_img1.imshow(img_data.eval(session=sess))
ax_img1.set_title('raw image', fontsize=20)

ax_img2 = plt.subplot(1, 2, 2)
standarlization = tf.image.per_image_standardization(img_data)
ax_img2.imshow(standarlization.eval(session=sess))
ax_img2.set_title('standard image', fontsize=20)

plt.show()

sess.close()
![[外链图片转存失败,源站可能有防盗链机制,建议将图片保存下来直接上传(img-G0Yhm4V8-1588240759436)(output_27_1.png)]](https://img-blog.csdnimg.cn/20200430181310743.png?x-oss-process=image/watermark,type_ZmFuZ3poZW5naGVpdGk,shadow_10,text_aHR0cHM6Ly9ibG9nLmNzZG4ubmV0L3FxXzM5NTY3NDI3,size_16,color_FFFFFF,t_70)
数据增强 TensorFlow 2.x 实现
数据增强部分函数解析
导入必要的模块
import tensorflow as tf
import matplotlib.pyplot as plt
import numpy as np

tf.__version__
'2.0.0'
图像编码处理
由于 TensorFlow2.x 使用的 eager Execution,解码后的图片可以直接带入 plt.show(),即下面 plt.imshow(img_data.numpy()) 与 plt.imshow(img_data)等价,图像读入与解码函数为 TensorFlow2.x 的 io 模块
image_raw_data = tf.io.gfile.GFile('./data/dog.jpg', 'rb').read()

img_data = tf.io.decode_jpeg(image_raw_data)

print('image_data decode type:\n', type(img_data))
print('image_data decode shape:\n', img_data.shape)
print('image_data decode value:\n', img_data.numpy())

plt.imshow(img_data.numpy())
plt.show()
image_data decode type:
 <class 'tensorflow.python.framework.ops.EagerTensor'>
image_data decode shape:
 (554, 578, 3)
image_data decode value:
 [[[ 32  42   7]
  [ 26  36   1]
  [ 20  30   0]
  ...
  [ 59  63  64]
  [ 61  65  66]
  [ 61  65  66]]

 [[112 122  87]
  [107 117  80]
  [101 111  76]
  ...
  [ 66  70  71]
  [ 67  71  72]
  [ 67  71  72]]

 [[114 124  87]
  [110 121  81]
  [105 115  78]
  ...
  [ 69  73  74]
  [ 69  73  74]
  [ 69  73  74]]

 ...

 [[194 185 176]
  [195 186 177]
  [198 189 180]
  ...
  [120 110 108]
  [131 122 117]
  [131 122 117]]

 [[194 185 176]
  [195 186 177]
  [196 187 178]
  ...
  [140 130 128]
  [136 127 122]
  [136 127 122]]

 [[190 181 172]
  [191 182 173]
  [193 184 175]
  ...
  [147 137 135]
  [160 151 146]
  [160 151 146]]]
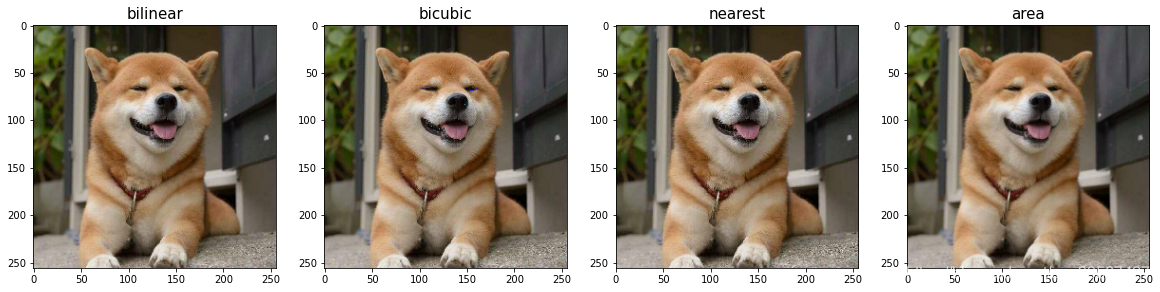
图像缩放函数,tf.image.resize()
tf.image.resize(
images, size, method=ResizeMethod.BILINEAR, preserve_aspect_ratio=False,
antialias=False, name=None
)
antialias: 对图像进行下采样时是否使用抗混叠滤波器
其他参数含义与 TensorFLow1.x 相同,需要注意的是 method 参数,在 TensorFlow1.x 中其值为 0、1、2、3 分别代表四种缩放方式,在 TensorFlow2.x 中其值如下
bilinear: 双线性插值。如果’antialias’为true,则在下采样时变为半径为1的帽子/帐篷过滤器功能
lanczos3: 半径为 3 的 Lanczos 核
lanczos5: 半径为 5 的 Lanczos 核
bicubic: 双立方插值
gaussian: 半径为 3 的高斯核,sigma = 1.5 / 3.0
nearest: 最近邻插值
area: 像素区域插值
mitchellcubic:Mitchell-Netravali双立方插值滤波器
主要了解与TensorFLow1.x 的 4 种方法(双线性插值、最近邻插值、双立方插值、像素区域插值 )就足够使用了
fig = plt.gcf()
fig.set_size_inches(20, 10)

ax_img1 = plt.subplot(1, 4, 1)
resized1 = tf.image.resize(img_data, [256,256], method='bilinear')
resized1 = resized1.numpy().astype('uint8')
ax_img1.imshow(resized1)
ax_img1.set_title('bilinear', fontsize=15)

ax_img2 = plt.subplot(1, 4, 2)
resized2 = tf.image.resize(img_data, [256,256], method='bicubic')
resized2 = resized2.numpy().astype('uint8')
ax_img2.imshow(resized2)
ax_img2.set_title('bicubic', fontsize=15)

ax_img3 = plt.subplot(1, 4, 3)
resized3 = tf.image.resize(img_data, [256,256], method='nearest')
resized3 = resized3.numpy().astype('uint8')
ax_img3.imshow(resized3)
ax_img3.set_title('nearest', fontsize=15)

ax_img4 = plt.subplot(1, 4, 4)
resized4 = tf.image.resize(img_data, [256,256], method='area')
resized4 = resized4.numpy().astype('uint8')
ax_img4.imshow(resized4)
ax_img4.set_title('area', fontsize=15)

plt.show()
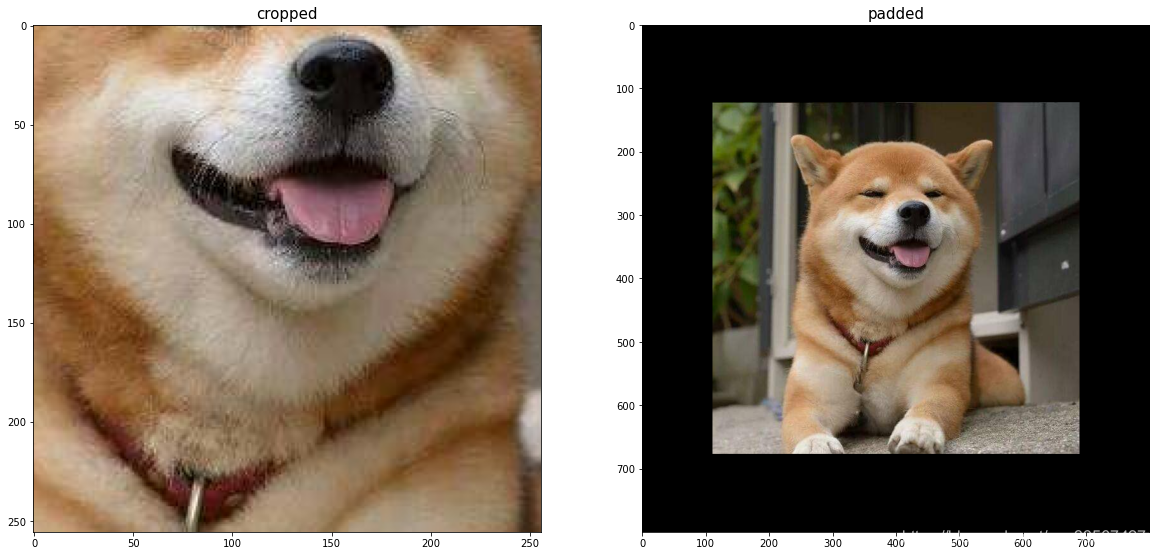
图像裁剪函数 tf.image.resize_with_crop_or_pad()
tf.image.resize_with_crop_or_pad(
image, target_height, target_width
)
cropped = tf.image.resize_with_crop_or_pad(img_data, 256, 256)
padded = tf.image.resize_with_crop_or_pad(img_data, 800, 800)

fig = plt.gcf()
fig.set_size_inches(20, 10)

ax_img1 = plt.subplot(1, 2, 1)
ax_img1.imshow(cropped)
ax_img1.set_title('cropped', fontsize=15)

ax_img2 = plt.subplot(1, 2, 2)
ax_img2.imshow(padded)
ax_img2.set_title('padded', fontsize=15)
plt.show()
随机剪裁函数 tf.image.random_crop()
tf.image.random_crop(
value, size, seed=None, name=None
)
用法与 TensorFlow1.x 相同
fig = plt.gcf()
fig.set_size_inches(20, 10)
for i in range(5):
    ax_img = plt.subplot(1, 5, i + 1)
    rd_cropped = tf.image.random_crop(img_data, [200, 200, 3])
    ax_img.imshow(rd_cropped.numpy().astype('uint8'))
plt.show()

上下翻转与水平翻转
tf.image.flip_left_right(
image
)
左右翻转
tf.image.flip_up_down(
image
)
上下翻转
用法与 TensorFlow1.x 相同
fig = plt.gcf()
fig.set_size_inches(20, 10)
ax_raw = plt.subplot(1, 3, 1)
ax_raw.imshow(img_data)
ax_raw.set_title('raw image', fontsize=20)

ax_up_down = plt.subplot(1, 3, 2)
img_up_down = tf.image.flip_up_down(img_data)
ax_up_down.imshow(img_up_down)
ax_up_down.set_title('up and down', fontsize=20)

ax_left_right = plt.subplot(1, 3, 3)
img_left_right = tf.image.flip_left_right(img_data)
ax_left_right.imshow(img_left_right)
ax_left_right.set_title('left and right', fontsize=20)
plt.show()
改变图像对比度 tf.image.random_contrast() 与 tf.image.adjust_contrast()
tf.image.adjust_contrast(
images, contrast_factor
)
tf.image.random_contrast(
image, lower, upper, seed=None
)
用法与 TensorFlow1.x 相同
fig = plt.gcf()
fig.set_size_inches(20, 8)

ax_img = plt.subplot(2, 5, 1)
ax_img.imshow(img_data)
ax_img.set_title('raw image' + ', contrast:None', fontsize=12)

ax_img = plt.subplot(2, 5, 2)
contrast = tf.image.adjust_contrast(img_data, 5)
ax_img.imshow(contrast)
ax_img.set_title('adj_image' + ' contrast:5', fontsize=12)

for i in range(2, 10):
    ax_img = plt.subplot(2, 5, i + 1)
    contrast = tf.image.random_contrast(img_data, 0.001, 3)
    ax_img.imshow(contrast)
    ax_img.set_title('rdn_image', fontsize=12)
plt.show()
白化处理
将图像的像素值转化成零均值和单位方差,图像标准化
tf.image.per_image_standardization(
image
)
fig = plt.gcf()
fig.set_size_inches(20, 8)

ax_img1 = plt.subplot(1, 2, 1)
ax_img1.imshow(img_data)
ax_img1.set_title('raw image', fontsize=20)

ax_img2 = plt.subplot(1, 2, 2)
standarlization = tf.image.per_image_standardization(img_data)
ax_img2.imshow(standarlization)
ax_img2.set_title('standard image', fontsize=20)

plt.show()
总结
TensorFlow1.x 与 TensorFlow2.x 的绝大部分图像增强函数用法一致,所以 TensorFlow1.x 与 TensorFlow2.x 在函数用法上没有特别大的差别,最大的不同在于 TensorFlow1.x 与 TensorFlow2.x 的执行方式不同,同时图像增强函数太多,这里只列举了一部分常用函数,在 TensorFlow 官网,选择自己想要查询的文档,可以查看到大量的图像增强函数的用法,并且图像增强函数较其它函数更容易理解,官网文档戳此