【MOOC嵩天Python语言程序设计】第9周 Python计算生态概览
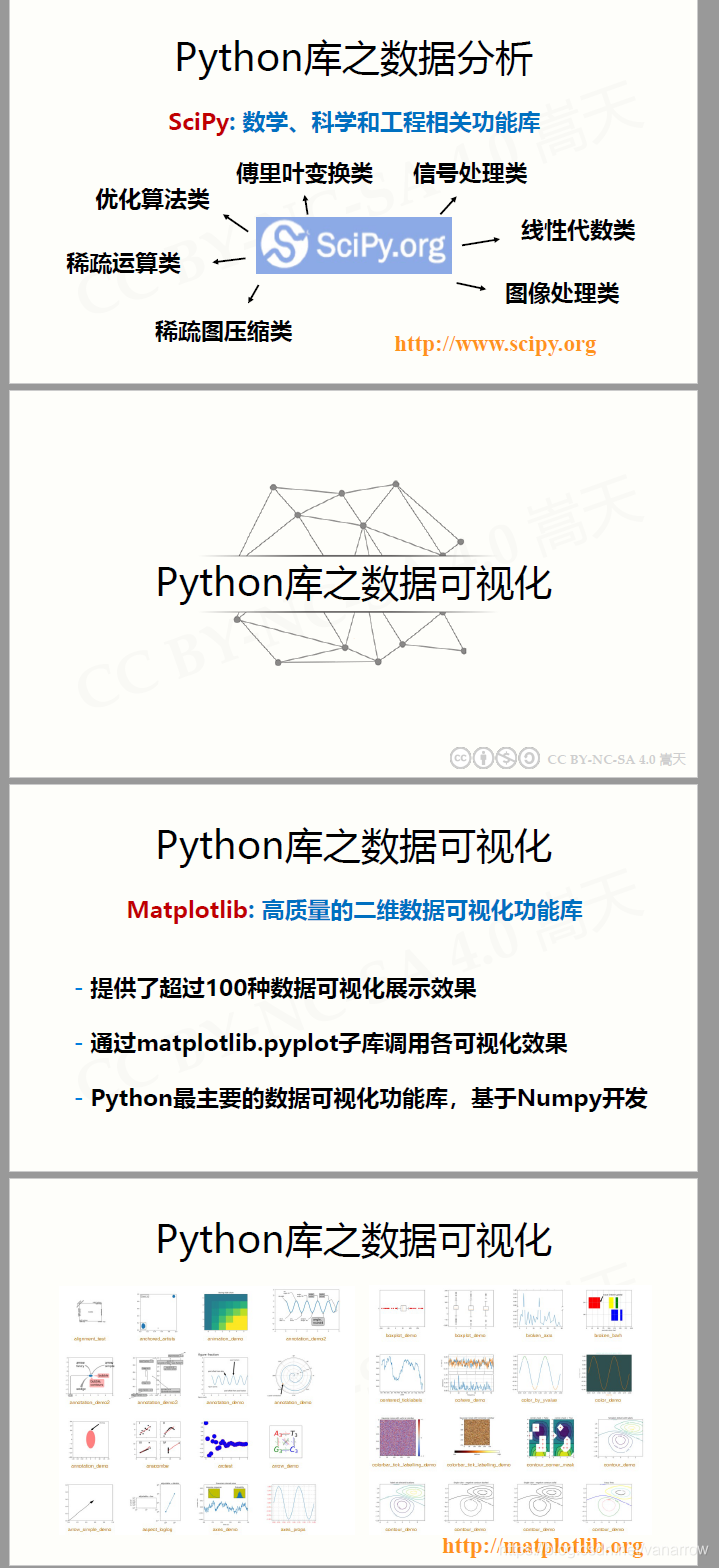
9.1 从数据处理到人工智能


from PyPDF2 import PdfFileReader,PdfFileMerger
merger = PdfFileMerger()
input1 = open("document1.pdf","rb")
input2 = open("document2.pdf","rb")
merger.append(fileobj = input1,pages = (0,3))
merger.merge(position = 2,fileobj = input2,pages = (0,1))
output = open("document - output.pdf","wb")
merger.write(output)


import tensorflow as tf
init = tf.global_variables_initializer()
sess = tf.Session()
sess.run(init)
res = sess.run(result)
print('result:',res)

def pySum():
    a = [0, 1, 2, 3, 4]
    b = [9, 8, 7, 6, 5]
    c = []
    for i in range(len(a)):
        c.append(a[i]**2 + b[i]**3)
    return c
print(pySum())
[729, 513, 347, 225, 141]
import numpy as np
def npSum():
    a = np.array([0, 1, 2, 3, 4])
    b = np.array([9, 8, 7, 6, 5])
    c = a**2 + b**3
    return c
print(npSum())
[729, 513, 347, 225, 141]
9.2 实例15:霍兰德人格分析雷达图
# HollandRadarDraw
import numpy as np
import matplotlib.pyplot as plt
import matplotlib
matplotlib.rcParams['font.family'] = 'SimHei'
radar_labels = np.array(['研究型(I)', '艺术型(A)', '社会型(S)', \
                         '企业型(E)', '常规型(C)', '现实型(R)'])  # 雷达标签
nAttr = 6
data = np.array([[0.40, 0.32, 0.35, 0.30, 0.30, 0.88],
                 [0.85, 0.35, 0.30, 0.40, 0.40, 0.30],
                 [0.43, 0.89, 0.30, 0.28, 0.22, 0.30],
                 [0.30, 0.25, 0.48, 0.85, 0.45, 0.40],
                 [0.20, 0.38, 0.87, 0.45, 0.32, 0.28],
                 [0.34, 0.31, 0.38, 0.40, 0.92, 0.28]])  # 数据值
data_labels = ('艺术家', '实验员', '工程师', '推销员', '社会工作者', '记事员')
angles = np.linspace(0, 2 * np.pi, nAttr, endpoint=False)
data = np.concatenate((data, [data[0]]))
angles = np.concatenate((angles, [angles[0]]))
fig = plt.figure(facecolor="white")
plt.subplot(111, polar=True)
plt.plot(angles, data, 'o-', linewidth=1, alpha=0.2)
plt.fill(angles, data, alpha=0.25)
plt.thetagrids(angles * 180 / np.pi, radar_labels, frac=1.2)
plt.figtext(0.52, 0.95, '霍兰德人格分析', ha='center', size=20)
legend = plt.legend(data_labels, loc=(0.94, 0.80), labelspacing=0.1)
plt.setp(legend.get_texts(), fontsize='large')
plt.grid(True)
plt.savefig('holland_radar.jpg')
plt.show()
demo演示报错如下
Traceback (most recent call last): File “C:/Users/Nah/Desktop/1.py”,
line 23, in
plt.thetagrids(angles * 180 / np.pi, radar_labels, frac=1.2) File “C:\Program
Files\Python38\lib\site-packages\matplotlib\pyplot.py”, line 1748, in
thetagrids
lines, labels = ax.set_thetagrids(*args, **kwargs) File “C:\Program
Files\Python38\lib\site-packages\matplotlib\projections\polar.py”,
line 1316, in set_thetagrids
t.update(kwargs) File “C:\Program Files\Python38\lib\site-packages\matplotlib\text.py”, line 177, in
update
super().update(kwargs) File “C:\Program Files\Python38\lib\site-packages\matplotlib\artist.py”, line 974, in
update
ret = [_update_property(self, k, v) for k, v in props.items()] File “C:\Program
Files\Python38\lib\site-packages\matplotlib\artist.py”, line 974, in
ret = [_update_property(self, k, v) for k, v in props.items()] File “C:\Program
Files\Python38\lib\site-packages\matplotlib\artist.py”, line 969, in
_update_property
raise AttributeError(’{!r} object has no property {!r}’ AttributeError: ‘Text’ object has no property ‘frac’
- AttributeError: ‘Text’ object has no property ‘frac’
删掉frac参数,还报错
Traceback (most recent call last):
File “C:/Users/Nah/Desktop/1.py”, line 28, in
plt.savefig(‘holland_radar.jpg’)
File “C:\Program Files\Python38\lib\site-packages\matplotlib\pyplot.py”, line 722, in savefig
res = fig.savefig(*args, **kwargs)
File “C:\Program Files\Python38\lib\site-packages\matplotlib\figure.py”, line 2180, in savefig
self.canvas.print_figure(fname, **kwargs)
File “C:\Program Files\Python38\lib\site-packages\matplotlib\backend_bases.py”, line 2021, in print_figure
canvas = self._get_output_canvas(format)
File “C:\Program Files\Python38\lib\site-packages\matplotlib\backend_bases.py”, line 1961, in _get_output_canvas
raise ValueError(
ValueError: Format ‘jpg’ is not supported (supported formats: eps, pdf, pgf, png, ps, raw, rgba, svg, svgz)
ValueError: Format ‘jpg’ is not supported (supported formats: eps, pdf, pgf, png, ps, raw, rgba, svg, svgz)
- 把jpg改为png,<(^-^)>
完整如下
# HollandRadarDraw
import numpy as np
import matplotlib.pyplot as plt
import matplotlib
matplotlib.rcParams['font.family'] = 'SimHei'
radar_labels = np.array(['研究型(I)', '艺术型(A)', '社会型(S)', \
                         '企业型(E)', '常规型(C)', '现实型(R)'])  # 雷达标签
nAttr = 6
data = np.array([[0.40, 0.32, 0.35, 0.30, 0.30, 0.88],
                 [0.85, 0.35, 0.30, 0.40, 0.40, 0.30],
                 [0.43, 0.89, 0.30, 0.28, 0.22, 0.30],
                 [0.30, 0.25, 0.48, 0.85, 0.45, 0.40],
                 [0.20, 0.38, 0.87, 0.45, 0.32, 0.28],
                 [0.34, 0.31, 0.38, 0.40, 0.92, 0.28]])  # 数据值
data_labels = ('艺术家', '实验员', '工程师', '推销员', '社会工作者', '记事员')
angles = np.linspace(0, 2 * np.pi, nAttr, endpoint=False)
data = np.concatenate((data, [data[0]]))
angles = np.concatenate((angles, [angles[0]]))
fig = plt.figure(facecolor="white")
plt.subplot(111, polar=True)
plt.plot(angles, data, 'o-', linewidth=1, alpha=0.2)
plt.fill(angles, data, alpha=0.25)
plt.thetagrids(angles * 180 / np.pi, radar_labels)
plt.figtext(0.52, 0.95, '霍兰德人格分析', ha='center', size=20)
legend = plt.legend(data_labels, loc=(0.94, 0.80), labelspacing=0.1)
plt.setp(legend.get_texts(), fontsize='large')
plt.grid(True)
plt.savefig('holland_radar.png')
plt.show()

import matplotlib
import matplotlib.pyplot as plt
import numpy as np
matplotlib.rcParams['font.family']='SimHei'
matplotlib.rcParams['font.sans-serif']=['SimHei']   #为了正确显示中文字体,将字体更改为黑体‘SimHei’
data_labels=np.array(['工程师','实验员','艺术家','推销员','社会工作者','记事员'])
n=6
radar_labels=np.array(['    研究型(I)','艺术型(A)','社会型(S)',\
                     '企业型(E)   ','常规型(C)','现实型(R)'])    #  为了美观加了几个空格
data=np.array([[0.40,0.32,0.35,0.30,0.30,0.88],         #6种职业数据,列表元素为列表
              [0.85,0.35,0.30,0.40,0.40,0.30],
              [0.43,0.89,0.30,0.28,0.22,0.30],
              [0.30,0.25,0.48,0.85,0.45,0.40],
              [0.20,0.38,0.87,0.45,0.32,0.28],
              [0.34,0.31,0.38,0.40,0.92,0.28]])
angles=np.linspace(0,2*np.pi,n,endpoint=False)       #将360度平均分为n个部分(有endpoint=False分为6个部分,反之5个部分)
data=np.concatenate((data,[data[0]]))
angles=np.concatenate((angles,[angles[0]]))

plt.figure(facecolor='white')    #绘制全局绘图区域
plt.subplot(111,polar=True)    #绘制一个1行1列极坐标系子图,当前位置为1

plt.figtext(0.52,0.95,'霍兰德人格分析',ha='center',size=20)   #放置标题 ,ha是horizontalalignment(水平对齐方式)的缩写
plt.thetagrids(angles*180/np.pi,radar_labels)       #放置属性(radar_labels)
plt.plot(angles,data,'o-',linewidth=1.5,alpha=0.2)      #连线,画出不规则六边形
plt.fill(angles,data,alpha=0.25)        #填充,alpha是透明度(自己的实践理解)
legend=plt.legend(data_labels,loc=(0.94,0.80),labelspacing=0.1)    #放置图注(右上角)
plt.setp(legend.get_texts(),fontsize='small')
plt.grid(True)    #打开坐标网格
plt.show()       #显示

9.3 从Web解析到网络空间


9.4 从人机交互到艺术设计


import wx
app = wx.App(False)
frame = wx.Frame(None,wx.ID_ANY,"Hello World")
frame.Show(True)
app.MainLoop()

import gi
gi.require_version("Gtk", "3.0")

from gi.repository import Gtk

window = Gtk.Window(title="Hello World")
window.show()
window.connect("destroy", Gtk.main_quit)
Gtk.main()
    #RoseDraw.py
    import turtle as t
    # 定义一个曲线绘制函数
    def DegreeCurve(n, r, d=1):
        for i in range(n):
            t.left(d)
            t.circle(r, abs(d))
    # 初始位置设定
    s = 0.2 # size
    t.setup(450*5*s, 750*5*s)
    t.pencolor("black")
    t.fillcolor("red")
    t.speed(100)
    t.penup()
    t.goto(0, 900*s)
    t.pendown()
    # 绘制花朵形状
    t.begin_fill()
    t.circle(200*s,30)
    DegreeCurve(60, 50*s)
    t.circle(200*s,30)
    DegreeCurve(4, 100*s)
    t.circle(200*s,50)
    DegreeCurve(50, 50*s)
    t.circle(350*s,65)
    DegreeCurve(40, 70*s)
    t.circle(150*s,50)
    DegreeCurve(20, 50*s, -1)
    t.circle(400*s,60)
    DegreeCurve(18, 50*s)
    t.fd(250*s)
    t.right(150)
    t.circle(-500*s,12)
    t.left(140)
    t.circle(550*s,110)
    t.left(27)
    t.circle(650*s,100)
    t.left(130)
    t.circle(-300*s,20)
    t.right(123)
    t.circle(220*s,57)
    t.end_fill()
    # 绘制花枝形状
    t.left(120)
    t.fd(280*s)
    t.left(115)
    t.circle(300*s,33)
    t.left(180)
    t.circle(-300*s,33)
    DegreeCurve(70, 225*s, -1)
    t.circle(350*s,104)
    t.left(90)
    t.circle(200*s,105)
    t.circle(-500*s,63)
    t.penup()
    t.goto(170*s,-30*s)
    t.pendown()
    t.left(160)
    DegreeCurve(20, 2500*s)
    DegreeCurve(220, 250*s, -1)
    # 绘制一个绿色叶子
    t.fillcolor('green')
    t.penup()
    t.goto(670*s,-180*s)
    t.pendown()
    t.right(140)
    t.begin_fill()
    t.circle(300*s,120)
    t.left(60)
    t.circle(300*s,120)
    t.end_fill()
    t.penup()
    t.goto(180*s,-550*s)
    t.pendown()
    t.right(85)
    t.circle(600*s,40)
    # 绘制另一个绿色叶子
    t.penup()
    t.goto(-150*s,-1000*s)
    t.pendown()
    t.begin_fill()
    t.rt(120)
    t.circle(300*s,115)
    t.left(75)
    t.circle(300*s,100)
    t.end_fill()
    t.penup()
    t.goto(430*s,-1070*s)
    t.pendown()
    t.right(30)
    t.circle(-600*s,35)
    t.done()

9.5 实例16:玫瑰花绘制
9.9 全课程总结与学习展望


import requests
r = requests.get('https://api.github.com/user', auth=('user', 'pass'))
print(
r.status_code,
r.headers['content-type'],
r.encoding,
r.text,
sep='\n'
)
403
application/json; charset=utf-8
utf-8
{“message”:“Maximum number of login attempts exceeded. Please try again later.”,“documentation_url”:“https://developer.github.com/v3”}
from goose import Goose
url = 'http://www.elmundo.es/elmundo/2012/10/28/espana/1351388909.html'
g = Goose({'use_meta_language': False,'target_language':'es'})
article = g.extract(url=url)
article.cleaned_text[:150]
# 10行左右Hello Word程序
from wsgiref.simple_server import make_server
from pyramid.config import Configurator
from pyramid.response import Response
def hello_world(request):
    return Response('Hello World')
if __name__ == '__main__':
    with Configurator() as config:
        config.add_route('hello', '/')
    config.add_view(hello_world, route_name='hello')
    app = config.make_wsgi_app()
    server = make_server('0.0.0.0', 6543, app)
    server.serve_forever()
from flask import Flask
app = Flask(__name__)
@app.route('/')
def hello_world():
    return 'Hello, World!'
# 对微信每个消息反馈一个Hello World
import werobot
robot = werobot.WeRoBot(token='tokenhere')
@robot.handler
def hello(message):
    return 'Hello World!'