一、Spring Boot快速搭建
1、使用IntelliJ IDEA 新建项目
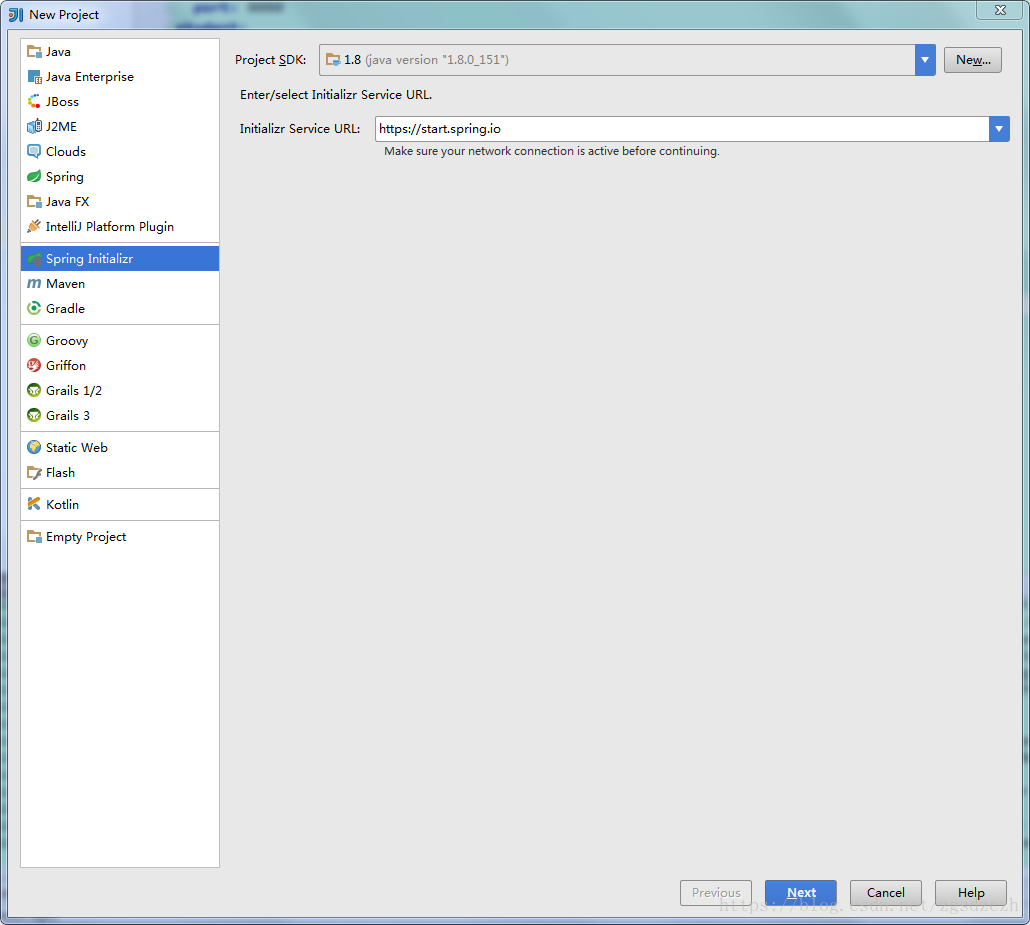
File-New-project 选择 Spring Initializr ,然后选择默认的 url 点击【Next】:
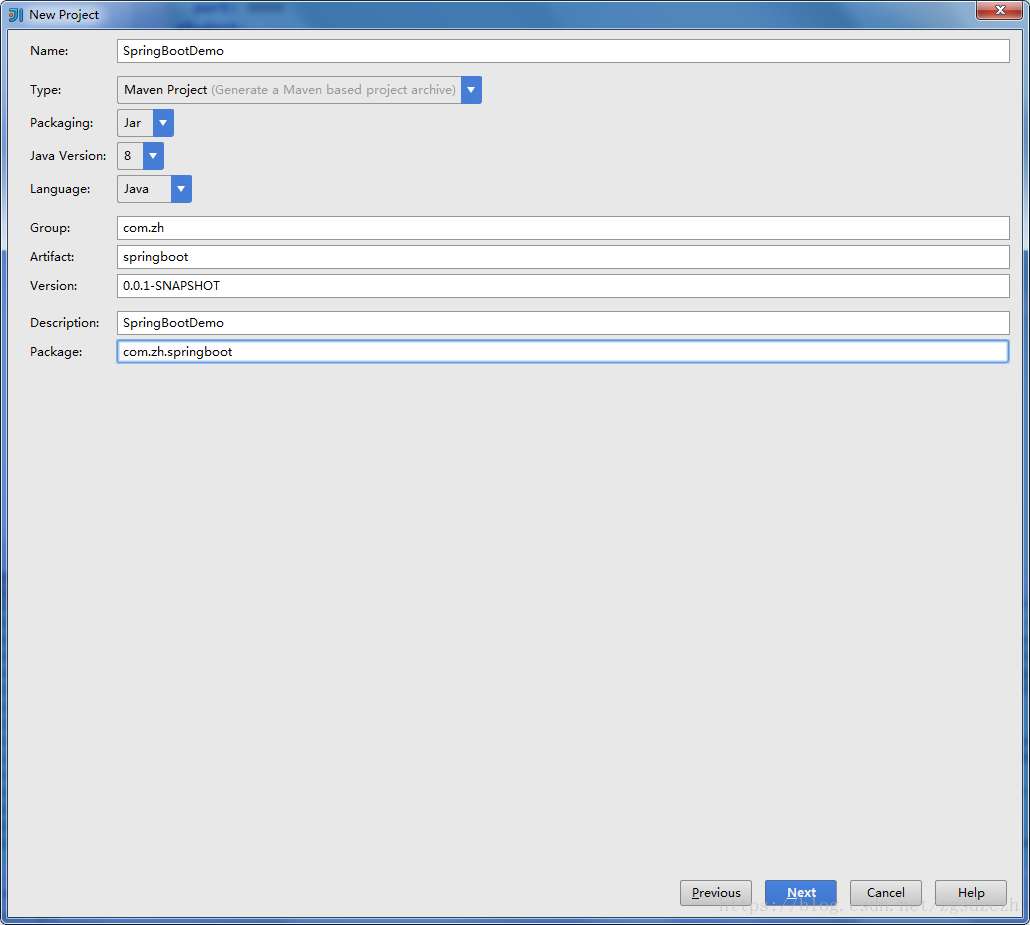
然后修改一下项目的信息:
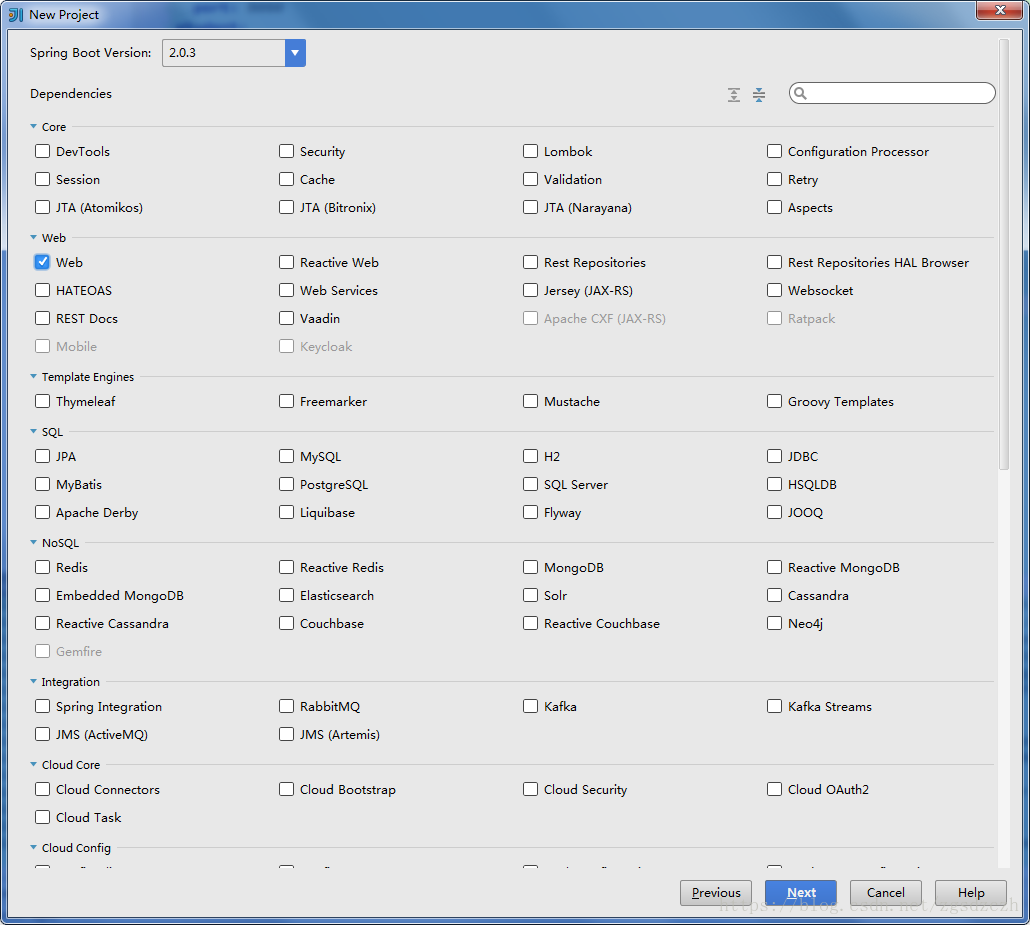
勾选上 Web 模板:
选择好项目的位置,点击【Finish】。
如果是第一次配置 Spring Boot 的话可能需要等待一会儿 IDEA 下载相应的 依赖包,默认创建好的项目结构如下:

项目结构还是看上去挺清爽的,少了很多配置文件,我们来了解一下默认生成的有什么:
- SpringbootApplication: 一个带有 main() 方法的类,用于启动应用程序
- SpringbootApplicationTests:一个空的 Junit 测试了,它加载了一个使用 Spring Boot 字典配置功能的 Spring 应用程序上下文
- application.properties:一个空的 properties 文件,可以根据需要添加配置属性
- pom.xml: Maven 构建说明文件
2、HelloController
在【cn.zh.springboot】包下新建一个【HelloController】:
package cn.zh.springboot;

import org.springframework.web.bind.annotation.RequestMapping;
import org.springframework.web.bind.annotation.RestController;

/**
 * 测试控制器
 *
 * @author: @代做毕设
 * @create: 2018年6月28日 17:27:58
 */
@RestController
public class HelloController {

    @RequestMapping("/hello")
    public String hello() {
        return "Hello Spring Boot!";
    }
}- **@RestController 注解:** 该注解是 @Controller 和 @ResponseBody 注解的合体版
3、启动
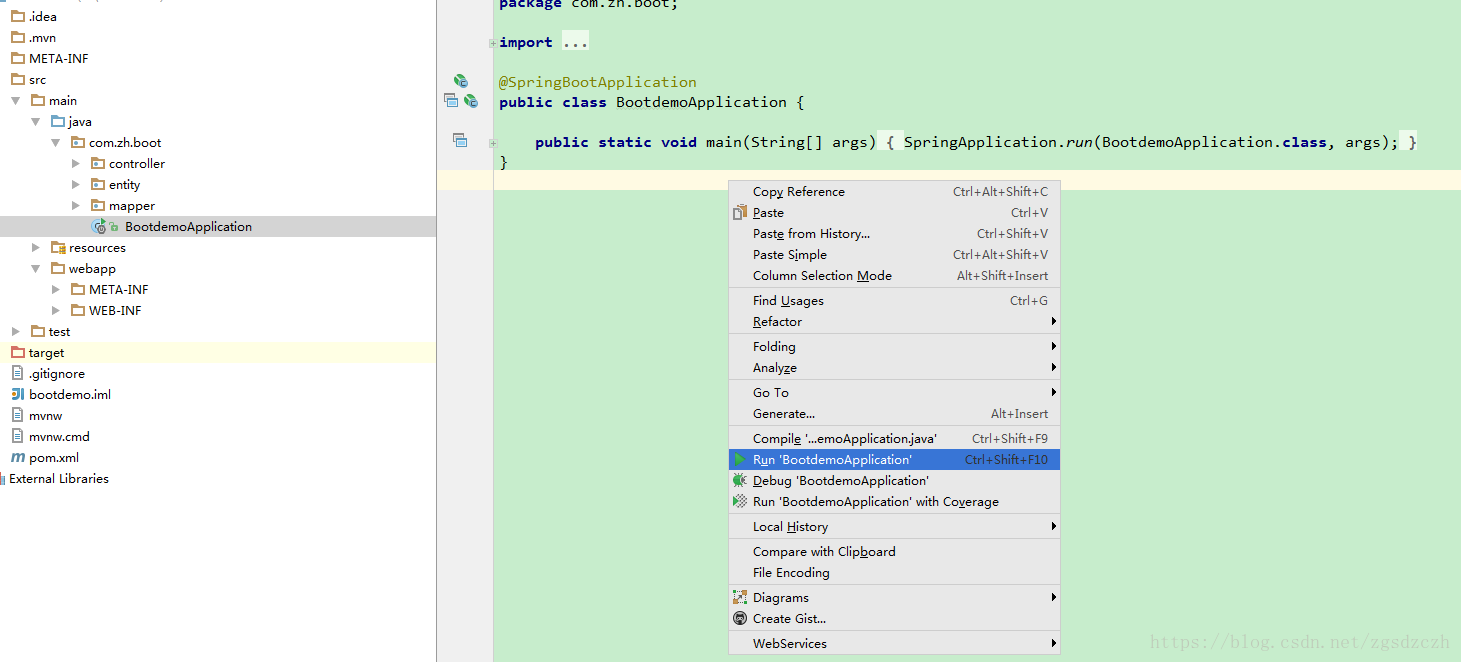
打开SpringbootApplication 这个类,然后右键点击运行:
- 注意:我们之所以在上面的项目中没有手动的去配置 Tomcat 服务器,是因为 Spring Boot 内置了 Tomcat
等待一会儿就会看到下方的成功运行的提示信息:

可以看到我们的 Tomcat 运行在 8080 端口,我们来访问 “/hello” 地址试一下:

可以看到页面成功显示出我们返回的信息。
二、集成MyBatis
- 第一步:修改 pom.xml 增加对 MySql和 MyBatis 的支持
<!-- mybatis -->
<dependency>
    <groupId>org.mybatis.spring.boot</groupId>
    <artifactId>mybatis-spring-boot-starter</artifactId>
    <version>1.1.1</version>
</dependency>
<!-- mysql -->
<dependency>
    <groupId>mysql</groupId>
    <artifactId>mysql-connector-java</artifactId>
    <version>5.1.21</version>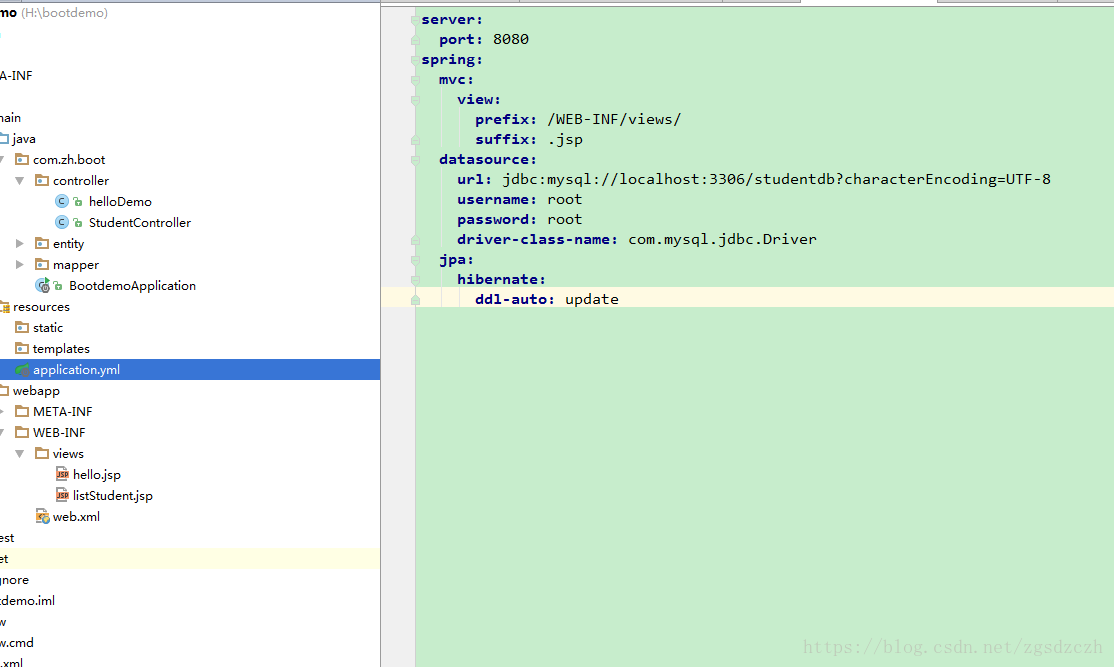
</dependency>- 第二步:新增数据库链接参数
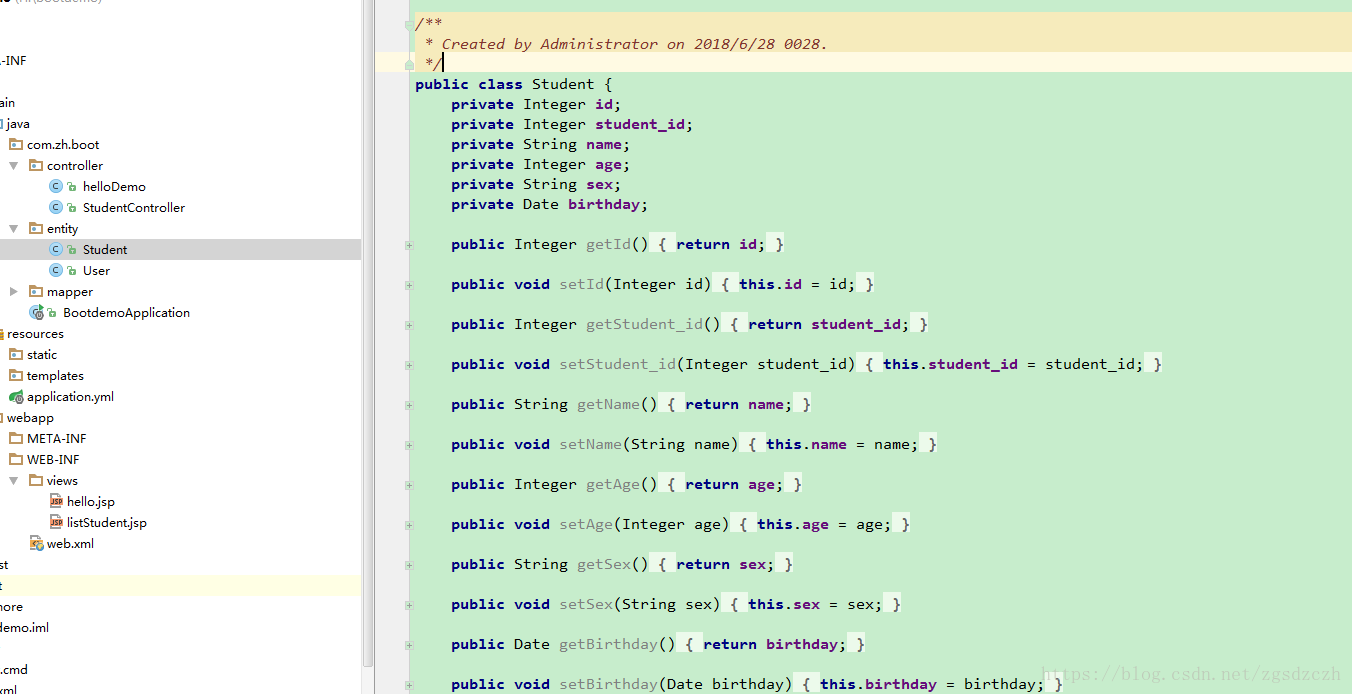
- 第三步:创建 Student 实体类和 StudentMapper 映射类
在【cn.zh.springboot】下新建一个【entity】包,然后在其下创建一个 Student 类:
在【cn.zh.springboot】下新建一个【mapper】包,然后在其下创建一个 StudentMapper 映射类:
package cn.zh.springboot.mapper;

import cn.wmyskxz.springboot.pojo.Student;
import org.apache.ibatis.annotations.Mapper;
import org.apache.ibatis.annotations.Select;

import java.util.List;

@Mapper
public interface StudentMapper {

    @Select("SELECT * FROM student")
    List<Student> findAll();
}- 第四步:编写 StudentController
在【cn.zh.springboot】下新建一个【controller】包,然后在其下创建一个 StudentController :
package cn.zh.springboot.controller;

import cn.wmyskxz.springboot.mapper.StudentMapper;
import cn.wmyskxz.springboot.pojo.Student;
import org.springframework.beans.factory.annotation.Autowired;
import org.springframework.stereotype.Controller;
import org.springframework.ui.Model;
import org.springframework.web.bind.annotation.RequestMapping;

import java.util.List;

/**
 * Student 控制器
 *
 * @author: @代做毕设
 * @create: 2018年6月28日 17:38:07
 */
@Controller
public class StudentController {

    @Autowired
    StudentMapper studentMapper;

    @RequestMapping("/listStudent")
    public String listStudent(Model model) {
        List<Student> students = studentMapper.findAll();
        model.addAttribute("students", students);
        return "listStudent";
    }
}
第五步:编写 listStudent.jsp 文件
我们简化一下 JSP 的文件,仅显示两个字段的数据:
<%@ page language="java" contentType="text/html; charset=UTF-8"
         pageEncoding="UTF-8"%>

<%@ taglib uri="http://java.sun.com/jsp/jstl/core" prefix="c"%>

<table align='center' border='1' cellspacing='0'>
    <tr>
        <td>id</td>
        <td>name</td>
    </tr>
    <c:forEach items="${students}" var="s" varStatus="st">
        <tr>
            <td>${s.id}</td>
            <td>${s.name}</td>
        </tr>
    </c:forEach>
</table>- 第六步:重启服务器运行
因为往 pom.xml 中新增加了依赖的包,所以自动重启服务器没有作用,我们需要手动重启一次,然后在地址输入:localhost:8080/listStudent 查看效果:
