centos 7.6——samba部署
文章目录
一、samba 原理
(1)什么是SAMBA
在早期,一般使用FTP来传文件; 不过使用 FTP 传输档案却有个小小的问题, 那就是你无法直接修改主机上面的档案数据!也就是说,你想要更改 Linux 主机上面的某个档案时,你必须要将该档案自服务器下载后才能修改。
NFS针对 Unix系统的机器间文档的分享;
CIFS针对windows系统间文档的分享;
SAMBA针对Unix系统和windows系统间文档的分享;
(2)Samba能做什么?
分享档案与打印机服务
可以提供用户登入Samba主机时的身份认证,以提供不同身份者的个别数据。
可以进行windows网络上的主机名解析
可以进行装置的分享
(3)Samba服务器的应用实例:
利用软件直接编修WWW主机上面的网页数据
    用FTP修改,后上传;不方便,很有可能传上去旧版本的。
    在线修改比较能迅速看到结果。
做成可直接联机的文件服务器
    因为每个人登陆的账户名不同,这样对目录的权限也不同,实现权限控制。
1. Samba服务器配置
[root@localhost ttyy]# mount /dev/cdrom /mnt
mount: /dev/sr0 写保护,将以只读方式挂载
[root@localhost ttyy]# df -Th
文件系统       类型      容量  已用  可用 已用% 挂载点
/dev/sda3      xfs       182G  5.5G  177G    3% /
devtmpfs       devtmpfs  2.0G     0  2.0G    0% /dev
tmpfs          tmpfs     2.0G     0  2.0G    0% /dev/shm
tmpfs          tmpfs     2.0G   11M  2.0G    1% /run
tmpfs          tmpfs     2.0G     0  2.0G    0% /sys/fs/cgroup
/dev/sda1      xfs      1014M  174M  841M   18% /boot
tmpfs          tmpfs     406M   28K  406M    1% /run/user/0
/dev/sr0       iso9660   4.3G  4.3G     0  100% /mnt
tmpfs          tmpfs     406M     0  406M    0% /run/user/1000

yum -y install samba

[root@localhost ttyy]# cd /etc/samba
[root@localhost samba]# ll
总用量 20
-rw-r--r--. 1 root root    20 5月  13 00:29 lmhosts
-rw-r--r--. 1 root root   706 5月  13 00:29 smb.conf
-rw-r--r--. 1 root root 11327 5月  13 00:29 smb.conf.example
[root@localhost samba]#
[root@localhost samba]# mv smb.conf smb.conf.bak  //配置文件重命名
[root@localhost samba]# ll
总用量 20
-rw-r--r--. 1 root root    20 5月  13 00:29 lmhosts
-rw-r--r--. 1 root root   706 5月  13 00:29 smb.conf.bak
-rw-r--r--. 1 root root 11327 5月  13 00:29 smb.conf.example
[root@localhost samba]# grep -v "#" smb.conf.bak > smb.conf  //将配置文件的#过滤到并生产新的配置文件

[root@localhost samba]# vim smb.conf
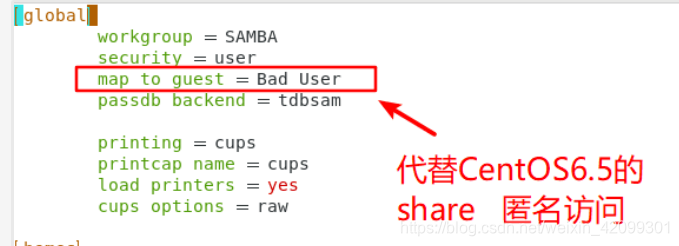
设置匿名访问
vim smb.conf
[root@localhost samba]# systemctl start smb
[root@localhost samba]# netstat -natp //查看samba端口
Active Internet connections (servers and established)
Proto Recv-Q Send-Q Local Address Foreign Address State
tcp 0 0 0.0.0.0:139 0.0.0.0:* LISTEN
tcp 0 0 0.0.0.0:111 0.0.0.0:* LISTEN
tcp 0 0 0.0.0.0:6000 0.0.0.0:* LISTEN
tcp 0 0 192.168.122.1:53 0.0.0.0:* LISTEN
tcp 0 0 0.0.0.0:22 0.0.0.0:* LISTEN
tcp 0 0 127.0.0.1:631 0.0.0.0:* LISTEN
tcp 0 0 127.0.0.1:25 0.0.0.0:* LISTEN
tcp 0 0 127.0.0.1:6010 0.0.0.0:* LISTEN
tcp 0 0 0.0.0.0:445 0.0.0.0:* LISTEN
tcp 0 0 192.168.75.134:22 192.168.75.5:60103 ESTABLISHED
tcp6 0 0 :::139 :::* LISTEN
tcp6 0 0 :::111 :::* LISTEN
tcp6 0 0 :::6000 :::* LISTEN
tcp6 0 0 :::80 :::* LISTEN
tcp6 0 0 :::22 :::* LISTEN
tcp6 0 0 ::1:631 :::* LISTEN
tcp6 0 0 ::1:25 :::* LISTEN
tcp6 0 0 ::1:6010 :::* LISTEN
tcp6 0 0 :::445 :::* LISTEN
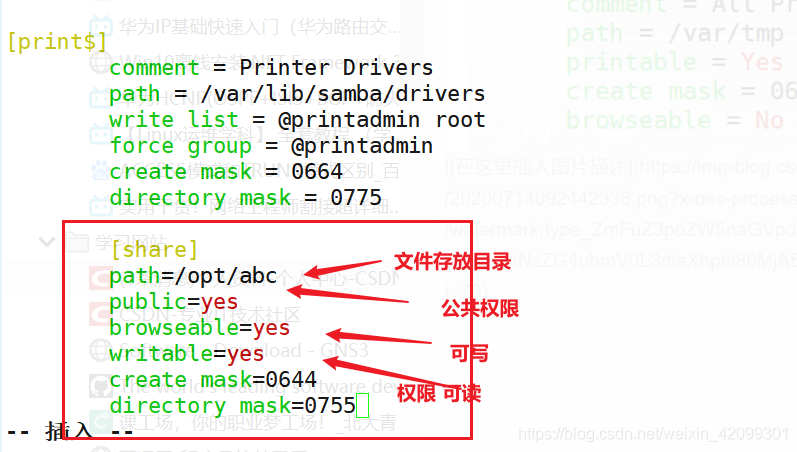
[root@localhost samba]# cd /opt/abc //在文件目录中添加文件
[root@localhost abc]# touch 11.txt
[root@localhost abc]# ll
总用量 0
-rw-r--r--. 1 root root 0 7月 14 09:46 11.txt
[root@localhost abc]# echo "12345" > 11.txt
[root@localhost abc]# cat 11.txt
12345
[root@localhost abc]# id nobody //添加权限
uid=99(nobody) gid=99(nobody) 组=99(nobody)
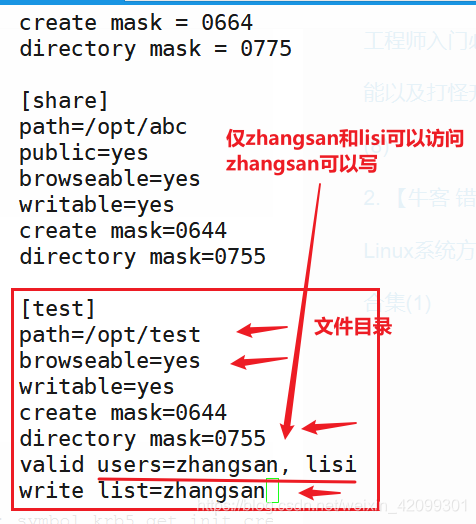
[root@localhost abc]# vi /etc/samba/smb.conf
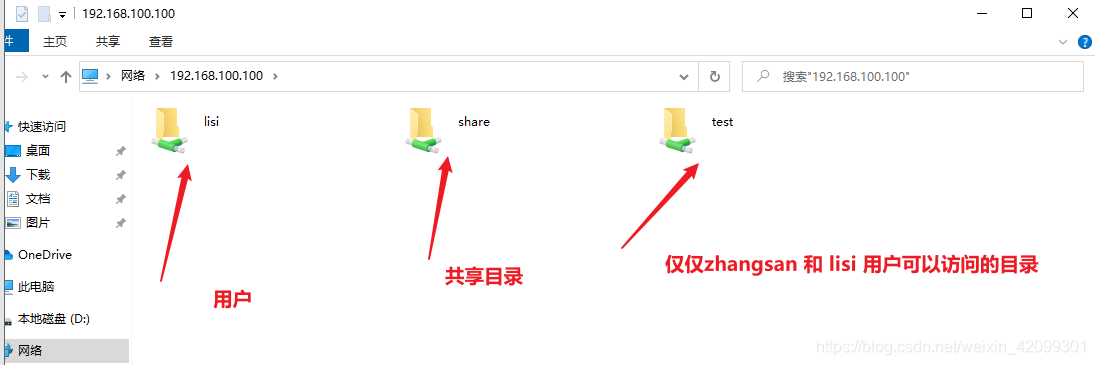
添加用户zhangsan 和 lisi,设置zhangsan 和lisi 可以访问但是zhangsan 可写。
[root@localhost abc]# systemctl restart smb   //启动smb服务

[root@localhost opt]# cd test/
[root@localhost test]# ll
总用量 0
[root@localhost test]# cd -
/opt
[root@localhost opt]# chmod 777 test/   //目录添加权限
[root@localhost opt]# ll
总用量 15404
drwxr-xr-x.  3 root root      120 6月  29 16:03 aa
drwxrwxrwx.  2 root root       20 7月  14 09:46 abc
-rw-r--r--.  1 root root  1093896 6月  30 19:08 apr-1.7.0.tar.gz
-rw-r--r--.  1 root root   554301 6月  30 19:06 apr-util-1.6.1.tar.gz
--w-r-----.  1 kgc  bdqn        0 6月  24 11:11 bdqn.txt
drwxr-xr-x.  2 root root       19 6月  29 19:55 data
-rw-r--r--.  1 root root    25552 6月  23 21:46 dump_sdb1
-rw-r--r--.  1 root root    25552 6月  23 19:38 dump_sdb5
-rw-r--r--.  1 root root    25552 6月  23 20:15 dump_sdc1
drwxr-xr-x.  3 ttyy ttyy     4096 6月  23 15:02 extundelete-0.2.4
-rw-r--r--.  1 root root   108472 1月   4 2013 extundelete-0.2.4.tar.bz2
drwxr-xr-x. 12  501 games    4096 7月   1 18:38 httpd-2.4.25
-rw-r--r--.  1 root root  8460433 6月  11 18:02 httpd-2.4.25.tar.gz
drwxr-xr-x.  3 root root       24 6月  22 19:45 john
-rw-r--r--.  1 root root  5450412 6月  22 19:26 john-1.8.0.tar.gz
drwxr-xr-x.  2 root root        6 10月 31 2018 rh
drwxrwxrwx.  2 root root        6 7月  14 10:02 test
drwxr-xr-x.  2 root root        6 6月  24 11:45 vg001

[root@localhost abc]# useradd zhangsan
[root@localhost abc]# passwd zhangsan
更改用户 zhangsan 的密码 。
新的 密码:
无效的密码: 密码少于 8 个字符
重新输入新的 密码:
passwd:所有的身份验证令牌已经成功更新。
[root@localhost home]# useradd lisi
正在创建信箱文件: 文件已存在
[root@localhost home]# smbpasswd -a lisi
New SMB password:
Retype new SMB password:
Added user lisi.
[root@localhost home]# pdbedit -L   //查看samba用户
lisi:1506:
2. 客户机
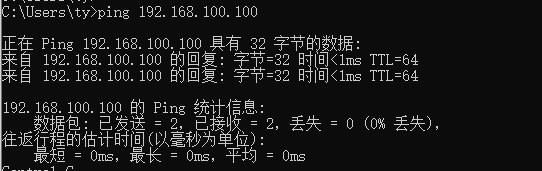
客户机与服务端相通
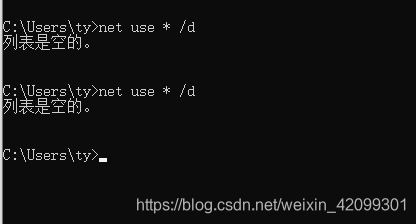
清空一下用户连接
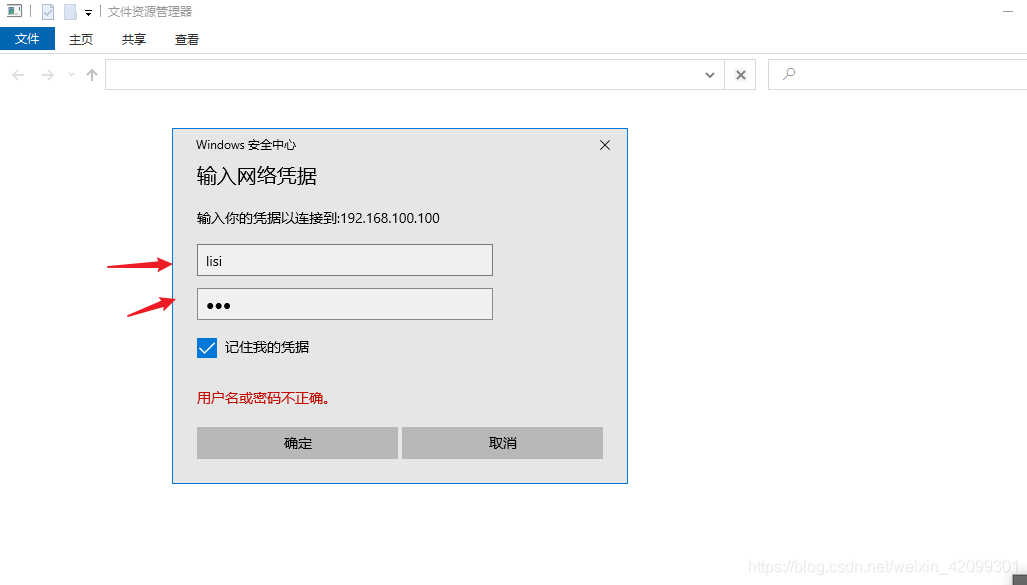
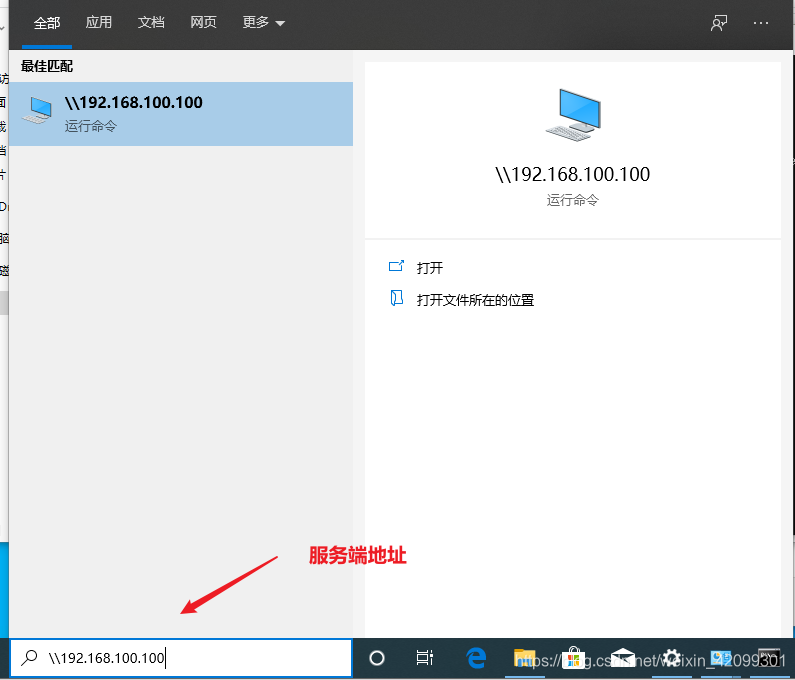
客户机输入服务端的ip地址进行连接
用户名lisi登录