1、flume 指定配置文件启动
bin/flume-ng agent -c conf -f conf/LogDetailExpose4KafkaFlume.conf -n aApacheFlume --classpath /home/dmpflume-jar-with-dependencies.jar -Dflume.root.logger=INFO,console
#注意:因为需要指定自己实现的flume source 和source 所以配置 -classpath 为自己开发的jar 包。
具体的flume-ng 的命令参数:
Usage: ./flume-ng <command> [options]...
commands:
  help                  display this help text
  agent                 run a Flume agent
  avro-client           run an avro Flume client
global options:
  --conf,-c <conf>      use configs in <conf> directory
  --classpath,-C <cp>   append to the classpath
  --dryrun,-d           do not actually start Flume, just print the command
  -Dproperty=value      sets a JDK system property value
agent options:
  --conf-file,-f        specify a config file (required)
  --name,-n             the name of this agent (required)
  --help,-h             display help text
avro-client options:
  --host,-H <host>      hostname to which events will be sent (required)
  --port,-p <port>      port of the avro source (required)
  --filename,-F <file>  text file to stream to avro source [default: std input]
  --headerFile,-R <file> headerFile containing headers as key/value pairs on each new line
  --help,-h             display help text
Note that if <conf> directory is specified, then it is always included first
in the classpath.
2、flume 执行的源码主流程
flume 包含 三大组件(source、channel、sink)
Source就是数据来源,例如Web Server产生日志后,可使用ExecSource执行tail -F命令后不断监听日志文件新生成的数据,然后传给Channel。
Channel就是一个缓存队列,由于读取数据和写入数据的速度可能不匹配,假如用同步完成的方式可能效率低下,所以Source把数据写到Channel这个队列里面,Sink再用另外的线程去读取。
Sink就是最终的存储,例如可以是HDFS或LOG文件输出等,Sink负责去Channel里面读取数据,并存储。

其中总体执行逻辑为:
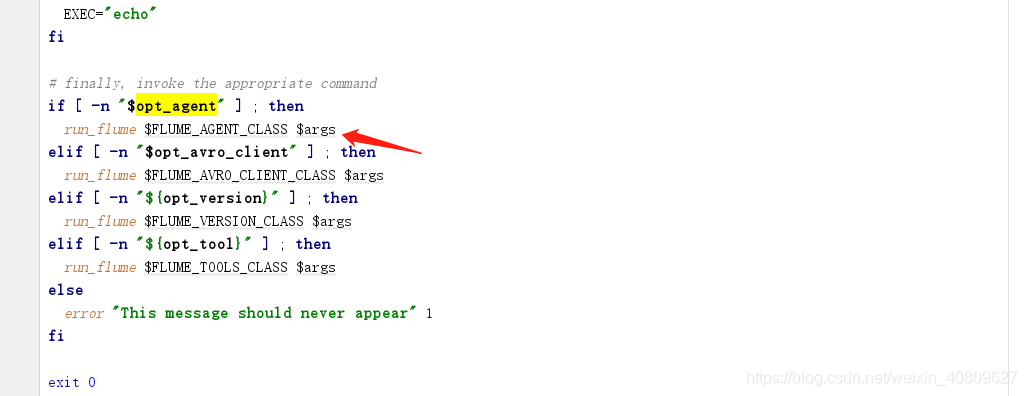
(1)、进入程序的主入口(通过 flume-ng )
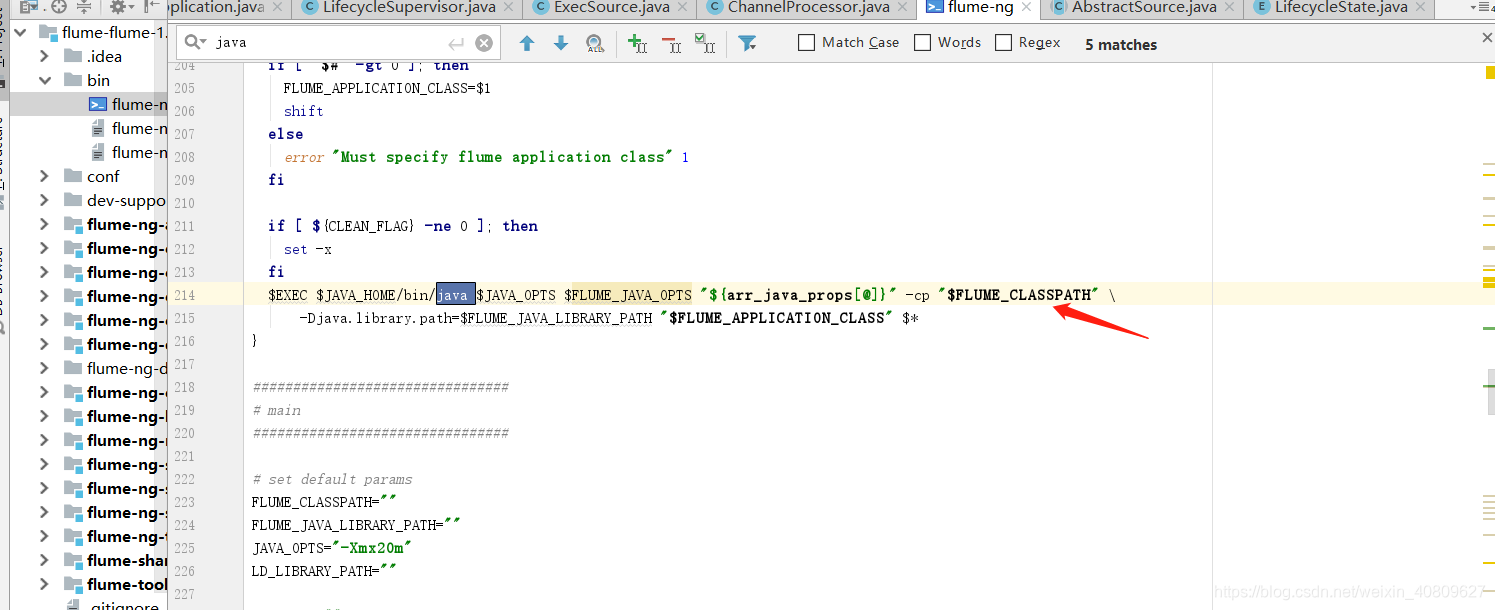
执行程序的入口 $FLUME_AGENT_CLASS 为:org.apache.flume.node.Application
找到对应的类启动 main 方法入口:主类中的 主要分为
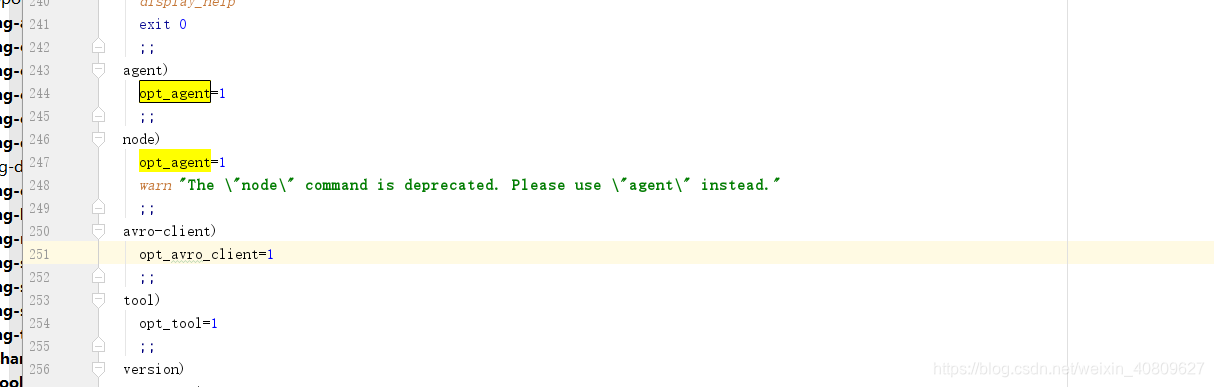
(1)、解析bin/flume-ng 的相关参数。

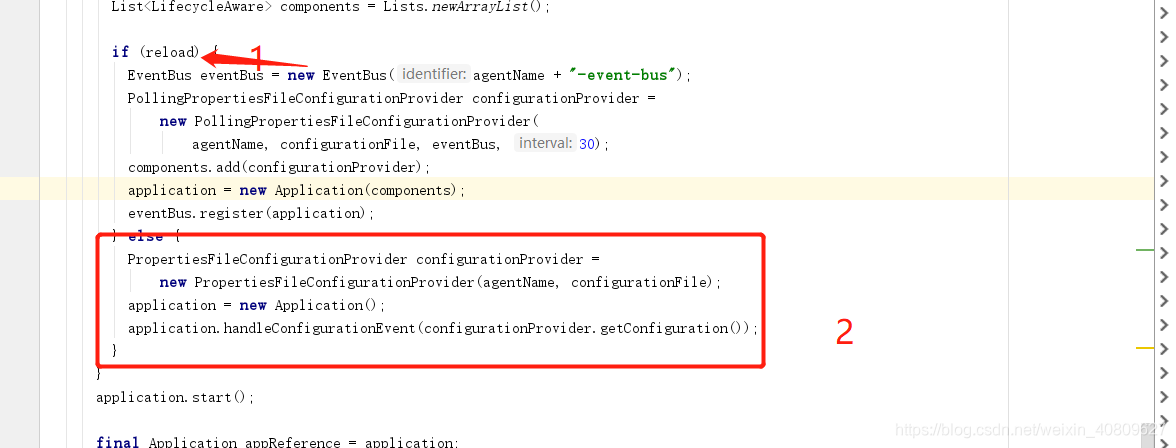
(2)、判断配置文件位置(是否存在zk 中)
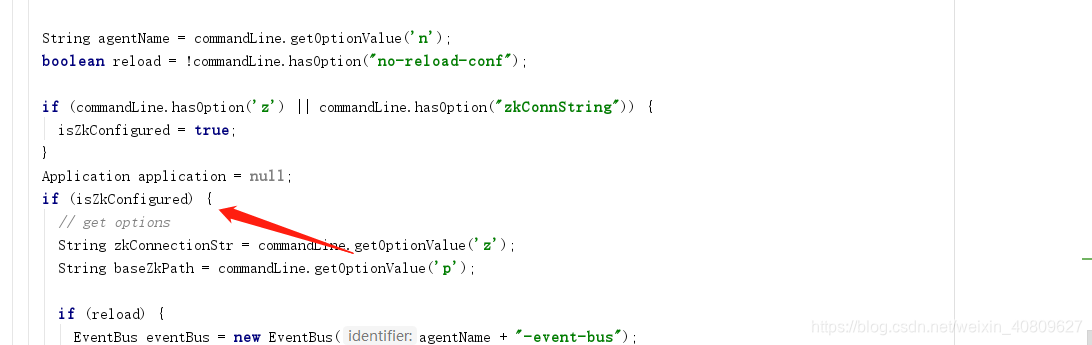
(3)、判断是否需要是否动态添加配置文件(间隔30秒)。如果设置为true 设计EventBus块的内容,详情见博文[Guava学习笔记:EventBus] :https://www.cnblogs.com/peida/p/EventBus.html
(4)、执行任务主体流程,其具体为:
在程序启动时,会启动所有的sourceRunner、channel 、sinkRunner。其中channel 的启动,没做什么特别的事情,就是初始化一下状态、创建一下计数器。算作一个被动角色。比较重要的是SourceRunner和SinkRunner。
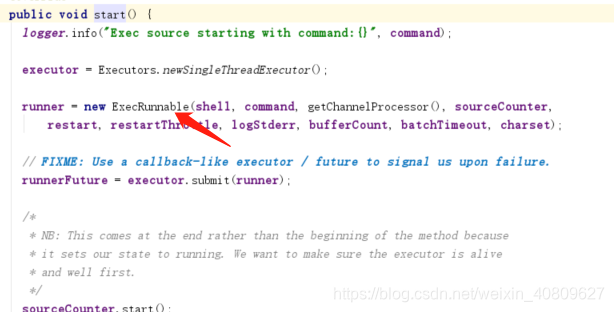
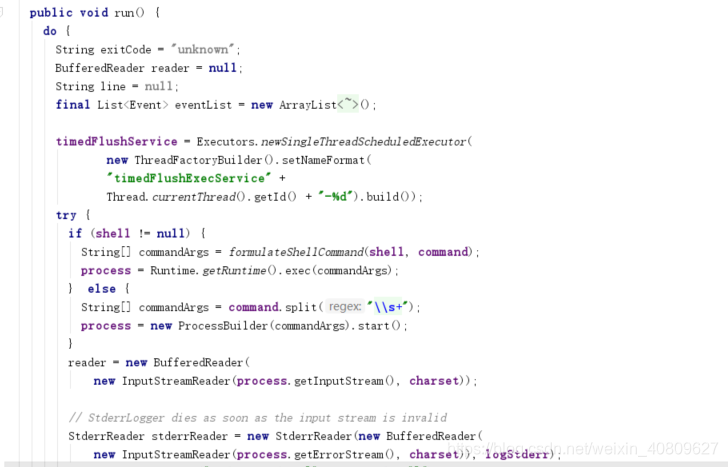
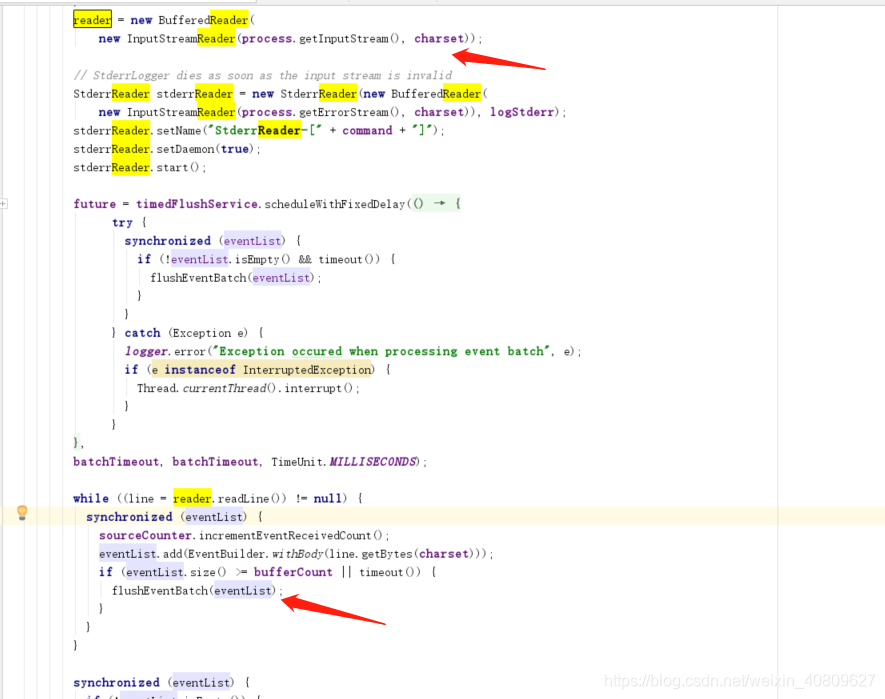
SourceRunner会调用source的start 方法。以ExecSource 为例子;其中start 方法就是启动一个线程,并且去不断获取标准输出流写入到一个列表 (evenList)。同时启动一个线程去定期批量的把列表中的数据往channel发。如下图表示;
sinkRunner 则是不断循环调用sinkProcess 的process的方法,sinkProcess 有几种类型,用于决定选择哪个sink进行存储(可以有多个sink)。选择好sink之后,调用其process 方法,sink 的process 方法,主要做的就是去channel中读取数据,并写入对应的存储,如下图所示。
(4.0)PropertiesFileConfigurationProvider 创建不同组件的默认工厂类
(4.1)具体分析为: 解析、验证、组件(source、sink、chennel )配置,并将不同的组件放到不同set 集合。

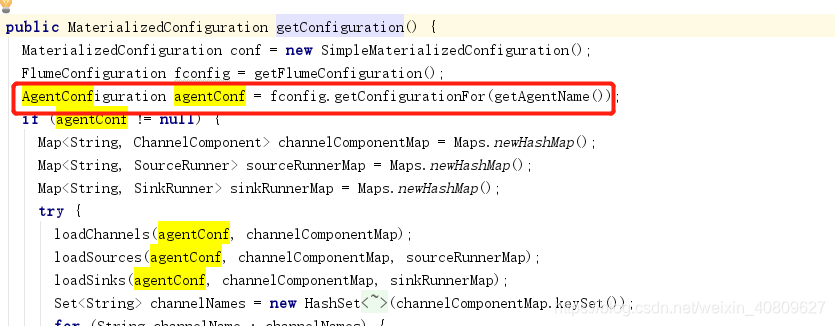
具体的可以深入fconfig.getConfigurationFor 查看。
(4.2)新建不同的组件(具体代码分析 todo )
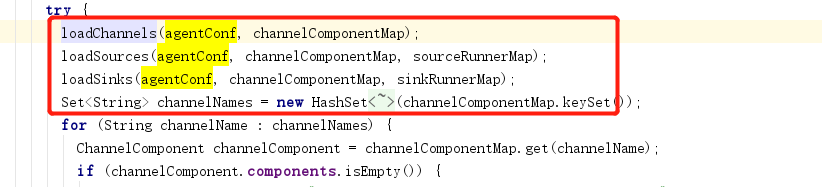
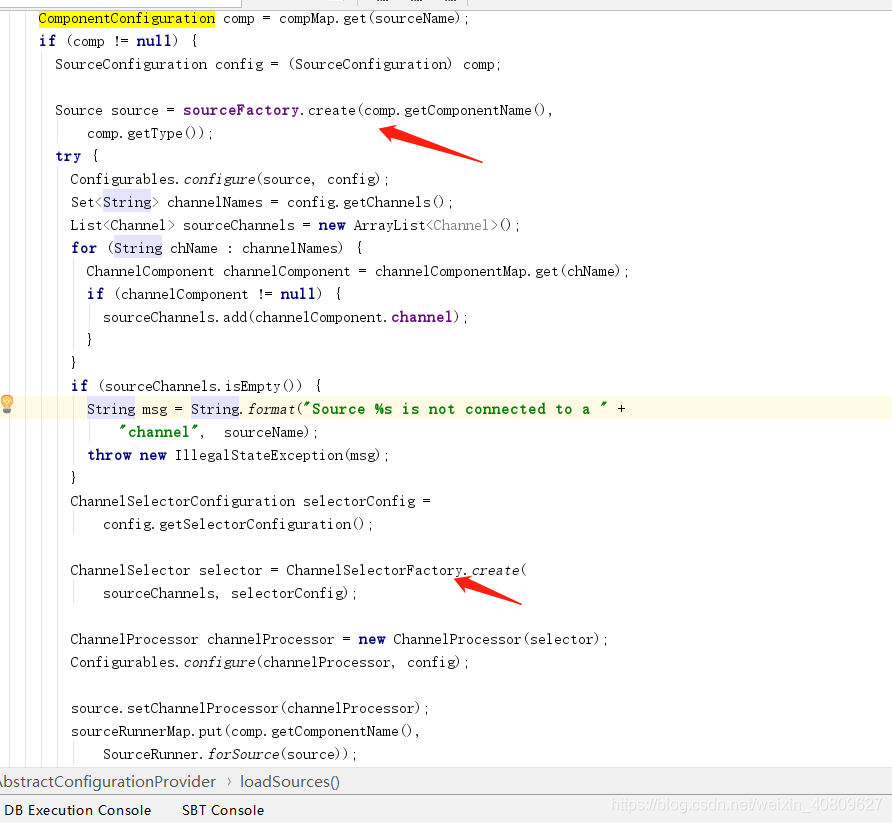
以loadsource 为例子(分为有ComponentConfiguration 和没有 去创建对象) 以有ComponentConfiguration 为例子
新建source 并选择出其要连接的channel 组件(指定哪个channel 处理source 并放到 set 中处理)
(4.3)会到 aplication 的 handleConfigurationEvent 方法中
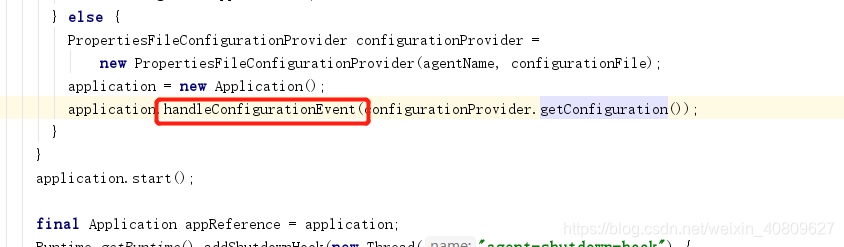
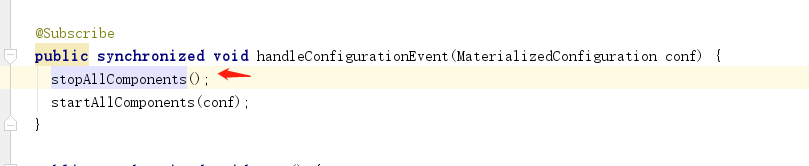
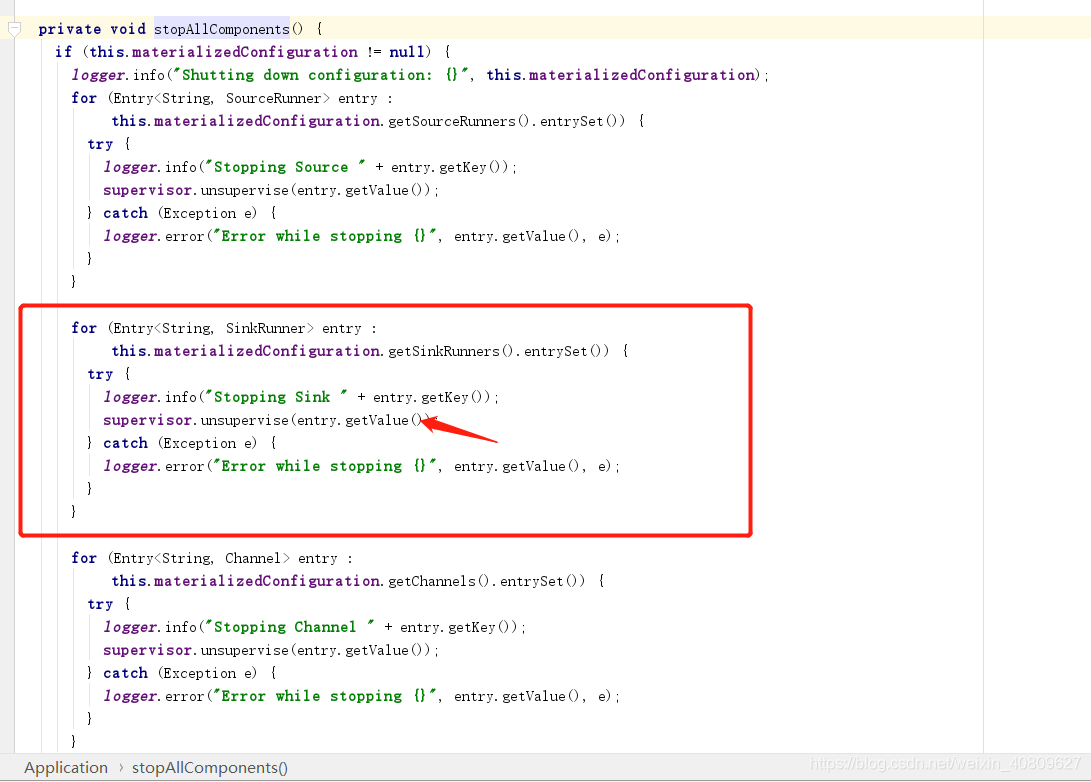
在startAllComponents方法中,会遍历组件列表(SourceRunners、SinkRunners、Channels),分别调用supervise方法。以source为例 转化为组件的期望状态,此方法是将 组件全部停止。。。。。为啥
然后 startAllComponents(conf); 组件。也是通过supervise 方法将组件状态变成LIfecycleState.START 状态。
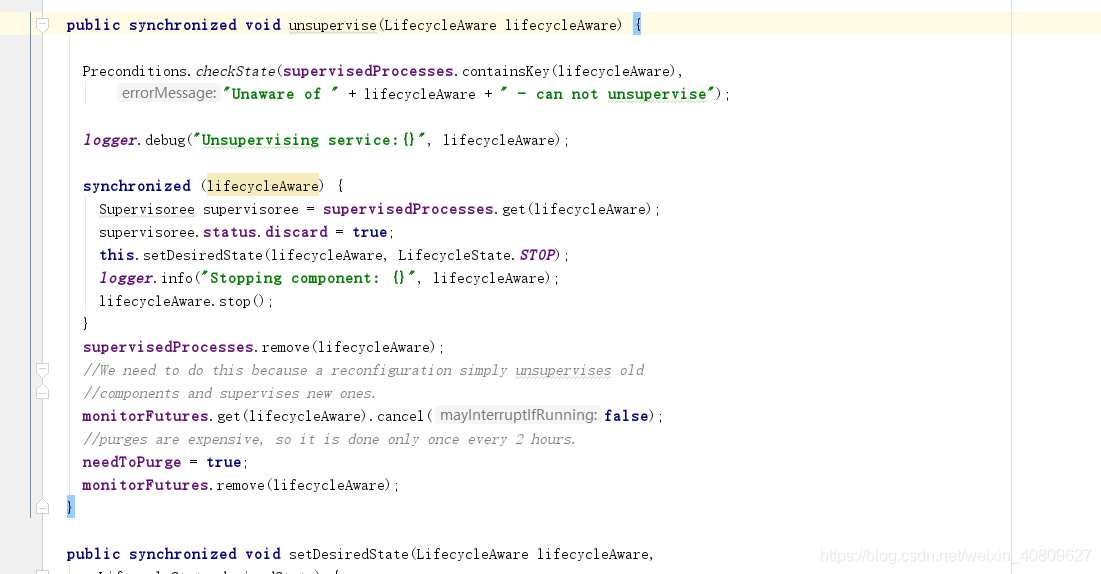
上节的supervisor是一个LifecycleSupervisor对象。前面有说到,在创建Application的时候初始化了一个LifecycleSupervisor对象,就是这里的supervisor。这个对象,我理解为各组件生命周期的管理者,用于实时监控所有组件的状态,如果不是期望的状态(desiredState),则进行状态转换。
上节的代码中调用了supervisor.supervise方法,接下来分析一下supervise这个方法:
public synchronized void supervise(LifecycleAware lifecycleAware,
    SupervisorPolicy policy, LifecycleState desiredState) {
  //省略状态检查的代码
Supervisoree process = new Supervisoree();
  process.status = new Status();
  process.policy = policy;
  process.status.desiredState = desiredState;
  process.status.error = false;
  MonitorRunnable monitorRunnable = new MonitorRunnable();
  monitorRunnable.lifecycleAware = lifecycleAware;
  monitorRunnable.supervisoree = process;
  monitorRunnable.monitorService = monitorService;
  supervisedProcesses.put(lifecycleAware, process);
  ScheduledFuture<?> future = monitorService.scheduleWithFixedDelay(
      monitorRunnable, 0, 3, TimeUnit.SECONDS);
  monitorFutures.put(lifecycleAware, future);
由于所有的组件都实现了LifecycleAware接口,所以这里的supervise方法传入的是LifecycleAware接口的对象。
可以看到创建了一个Supervisoree对象,顾名思义,就是被监控的的对象,该对象有以下几种状态:IDLE, START, STOP, ERROR。
scheduleWithFixedDelay每隔3秒触发一次监控任务(monitorRunnable)。
(4.5) MonitorRunnable
在MonitorRunnable中主要是检查组件的状态,并实现从lifecycleState到desiredState的转变。
switch (supervisoree.status.desiredState) {
  case START:
    try {
      lifecycleAware.start();
    } catch (Throwable e) {省略}
    break;
  case STOP:
    try {
      lifecycleAware.stop();
    } catch (Throwable e) {省略}
    break;
  default:
    logger.warn("I refuse to acknowledge {} as a desired state", supervisoree.status.desiredState);
到这里为止,可以看到监控的进程,调用了组件自己的start和stop方法来启动、停止。前面有提到有3种类型的组件,SourceRunner、Channel、SinkRunner,而Channel的start只做了初始化计数器,没什么实质内容,所以接下来从SourceRunner的启动(从Source写数据到Channel)和SinkRunner的启动(从Channel获取数据写入Sink)来展开说明。
最后:调用各个组件的 start 等方法 并调用线程启动
然后启动动相应的线程监控读取的数据,并将数据写入到channel 中去。整个步骤完成
参考:https://www.aboutyun.com/thread-21095-1-1.html