LSTM相关的网络层定义
keras.layers.LSTM( # 长短期记忆网络层

units : 正整数,输出空间的维度。

activation = 'tanh' : 要使用的激活函数。
recurrent_activation = 'hard_sigmoid' : 用于循环时间步的激活函数。

use_bias = True : 布尔值,该层是否使用偏置向量。
kernel_initializer = 'glorot_uniform'
recurrent_initializer = 'orthogonal'
bias_initializer = 'zeros', unit_forget_bias = True
kernel_regularizer = None, recurrent_regularizer = None
bias_regularizer = None, activity_regularizer = None
kernel_constraint = None, recurrent_constraint = None
bias_constraint = None

dropout = 0.0 : 0~1,单元的丢弃比例,用于输入的线性转换。
recurrent_dropout = 0.0 : 0~1,单元的丢弃比例,用于循环层状态的线性转换。

implementation = 1 : 实现模式,1 或 2。
    模式1:将把它的操作结构化为更多的小的点积和加法操作。
    模式2:将把它们分批到更少,更大的操作中。
return_sequences = False : 是返回输出序列中的最后一个输出,还是全部序列。

return_state = False : 除了输出之外是否返回最后一个状态(cell state)。
go_backwards = False : 是否向后处理输入序列并返回相反的序列。
stateful = False : 是否将批次中索引i样品的最后状态用作下一批次i样品初始状态。
unroll = False : 如果为True,网络将展开,否则将使用符号循环。
    展开可以加速RNN,但它往往会占用更多的内存。展开只适用于短序列。
)
其余LSTM函数:
LSTMCell : LSTM层的单元类。
ConvLSTM2D : 卷积LSTM,它类似于LSTM层,但输入变换和循环变换都是卷积的。
CuDNNLSTM : 由CuDNN支持的快速LSTM 实现,只能以TensorFlow后端运行在GPU上。
用LSTM拟合IMDB案例
from keras.models import Sequential
from keras.layers import Input, Dense, Embedding, LSTM,Dropout
from keras.models import Model

model = Sequential()
# LSTM层指定为32个神经元
model.add(Embedding(input_dim = 10000, output_dim = 64))
model.add(LSTM(32, activation = 'tanh')) # 注意设定适当的激活函数
model.add(Dropout(0.2)) # 抛弃20%的结果,防止过拟合
model.add(Dense(2, activation = 'softmax'))

model.summary()

model.compile(loss = 'categorical_crossentropy',
              optimizer = 'rmsprop',
              metrics = ['accuracy'])

from keras.datasets import imdb
# 首次使用时会在线进行数据集下载
# 只保留数据集中最常出现的前10000个词
(X_train, y_train), (X_test, y_test) = imdb.load_data(num_words = 10000)
from keras.preprocessing.sequence import pad_sequences
# 将所有的序列均补齐或截断为统一长度
max_word = 300
X_train = pad_sequences(X_train, maxlen = max_word)
X_test = pad_sequences(X_test, maxlen = max_word)
print(len(X_train[0]))
X_train[0][:100]
from keras.utils import to_categorical
# 将因变量转换为哑变量组
y_train = to_categorical(y_train)
y_test = to_categorical(y_test)

model.fit(X_train, y_train, batch_size = 200, epochs = 10)

score = model.evaluate(X_test, y_test, batch_size = 200, verbose = 1)
print("测试集损失函数:%f,预测准确率:%2.2f%%" % (score[0], score[1] * 100))
预测效果

用LSTM实现英文自动写作
文本预处理
# 载入所需工具包
import numpy as np
import pandas as pd
from keras.models import Sequential
from keras.layers import Dense
from keras.layers import Dropout
from keras.layers import LSTM
from keras.callbacks import ModelCheckpoint
from keras.utils import np_utils
rawtxt = pd.read_csv(r"F:\learning_kecheng\deenlearning\NEW\r&j.txt", sep = 'aaaaa',
names = ['txt'], engine = 'python')
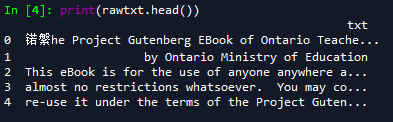
print(rawtxt.head())
rawtxt.txt[1]
原数据,这是文本原来的格式:前五行
这是第二行


用sun函数将所有字符连接在一起:
raw_txt = rawtxt.txt.agg("sum")
raw_txt

** 将字符转换为数值代码以便处理**
首先创建字典:其中chars 是文本中所有的字符类型。
chars = sorted(list(set(raw_txt))) # 生成字符list sorted排序
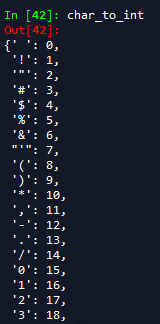
char_to_int = dict((c, i) for i, c in enumerate(chars)) # 字符-数值对应字典
int_to_char = dict((i, c) for i, c in enumerate(chars)) # 数值-字符对应字典
char_to_int
构造训练测试集
利用循环生成训练集测试集
seq_length = 100
x = []; y = []
for i in range(0, len(raw_txt) - seq_length):
    given = raw_txt[i:i + seq_length] # 将前seq_length个字符作为预测用变量
    predict = raw_txt[i + seq_length] # 将当前字符作为因变量
    x.append([char_to_int[char] for char in given])
    y.append(char_to_int[predict])
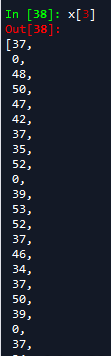
处理后的x:长度为设定的seq_length = 100
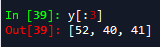
因变量
将文本的数值表达转换为LSTM需要的数组格式:[样本数,时间步伐,特征]
n_patterns = len(x)
n_vocab = len(chars)
# 把x变成LSTM需要的格式,reshape最后的1表示每个数值均为单独一个向量(代表一个字母输入)
x = np.reshape(x, (n_patterns, seq_length, 1))
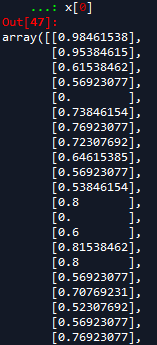
x = x / float(n_vocab) # 转换为0-1之间的数值以方便计算
x[0]
处理后的x:
# 将因变量的类型正确指定为类别
y = np_utils.to_categorical(y)
y[0]
处理后的y

扫描二维码关注公众号,回复:
11503577 查看本文章

建立LSTM模型
model = Sequential()
# LSTM层指定为128个神经元
model.add(LSTM(128, input_shape = (x.shape[1], x.shape[2])))
model.add(Dropout(0.2)) # 抛弃20%的结果,防止梯度饱和
model.add(Dense(y.shape[1], activation = 'softmax')) # 使用标准的NN作为内核
# 指定损失函数
model.compile(loss = 'categorical_crossentropy', optimizer = 'adam')

# batch_size为分批量将数据用于训练,以减小计算资源的需求
# epochs次数越多,模型训练效果越好,但所需时间也线性增加
model.fit(x, y, epochs = 2, batch_size = 64)
进行文本预测
def string_to_index(raw_input): # 将输入的字符转换为索引值
#    raw_input = in_string
    res = []
    for c in raw_input[(len(raw_input) - seq_length):]:
#        print(c)#长度为seq_length100
        res.append(char_to_int[c])
    return res


def predict_next(input_array): # 进行下一个字符的预测
#    input_array = res
    x = np.reshape([0 for i in range(seq_length - len(input_array))]
                   + input_array, (1, seq_length, 1)) # 生成预测用的x序列
    x = x / float(n_vocab)
    y = model.predict(x)
    return y


def y_to_char(y): # 将预测结果由索引值转换回字符
    largest_index = y.argmax() # 取最大数值对应的索引值
    c = int_to_char[largest_index]
    return c


def generate_article(init, rounds = 50): # 按照指定的字符长度进行预测
    in_string = init.lower()
    for i in range(rounds):
        n = y_to_char(predict_next(string_to_index(in_string)))
        in_string += n # 将预测到的新字符合并,用于下一步预测
    return in_string


# 进行字母预测
init = 'We produce about two million dollars for each hour we work. The fifty hours is one conservative estimate for how long'
article = generate_article(init)
article
从long后面的预测到的
