摘要
在目标检测中进入训练前,会有几种不同形式的准备数据,今天就具体的讲解几种常见的数据准备格式,当然,最常用的还是coco数据集形式进入训练。
voc coco数据集
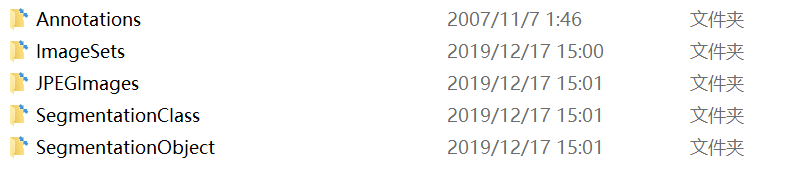
我们通常提到的voc是07年就有的,有照片和xml文件进行的标注信息,xml是labeling标注之后最原始的保存信息的文件,json是全部提取出来之后形式字典形式的信息,效率比xml快很多。imagesets存储的全部是照片,annotations是xml文件,其他的seg是语义分割里面的数据标出形式,这里先不用学习。
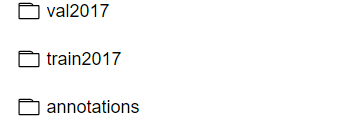
在最新的目标检测论文基本都是以coco数据集的map值来体现一个算法的好坏,这里可以先看一下coco数据集的形式,我处理好的对于目标检测只要val2017,和train2017,都是存储照片,annotations是json文件。
train2017下的文件,只需要是照片就可以

val2017下的照片

这里也只需要训练和验证二个json文件,现在打开val2017.json具体的来看下


看起来很乱,没错,因为记录照片的信息很详细,不光只有目标标检测用的需要记录下来,还有其他几种方向的标注,但是在我们使用生成coco数据集的时候不要这样,只需要生成images,annotations,categories三种,images记录照片,annotations记录box信息categories记录类别信息,利用我自己做的数据简单了解一下

images这个字典就记录照片的名字好高宽信息,在记录一个唯一的id。有点数据库的味道,也是记录数量的方式。

annotations是记录box的信息,同样需要知道对应哪一张照片,所以对应照片id就可以了,还有类别,框的面积。

categories就是记录不同的类别了,这里的name可以是中文也可以是这种压缩之后的方式。到这里应该对coco形式的数据理解很全面了。下面就要学习使用API进行快速的处理数据。
coco API讲解
coco API是专门处理json文件,对json处理十分方便,本身json以字典的形式储存图像的信息,我们需要自己写读取部分,比较麻烦。现在有了coco API极大的方便使用,只需要几个简单的操作便将数据轻松提取出来加载训练。
from pycocotools.coco import COCO

coco = COCO('./test/annotations.json')
ids = list(coco.imgs.keys())   #这种加载是比较特殊的
value = list(coco.imgs.values())
print(ids)
print(value)
[1, 2, 3, 4, 5, 6, 7, 8, 9, 10, 11, 12, 13, 14, 15, 16, 17, 18, 19]
[{'file_name': '20190816_095611.jpg', 'id': 1, 'height': 4032, 'width': 3024}, {'file_name': '20190816_095633.jpg', 'id': 2, 'height': 4032, 'width': 3024}, {'file_name': '81872f020e8ac5489c0c51cad67c435.jpg', 'id': 3, 'height': 1440, 'width': 1080}, {'file_name': '9d0ac700d8dafd5c568fd3d78224ffb.jpg', 'id': 4, 'height': 1440, 'width': 1080}, {'file_name': 'eed7d90379acd8c427b5b73f0a229e6.jpg', 'id': 5, 'height': 1440, 'width': 1080}, {'file_name': 'img_10.jpg', 'id': 6, 'height': 690, 'width': 750}, {'file_name': 'img_100.jpg', 'id': 7, 'height': 357, 'width': 688}, {'file_name': 'img_111.jpg', 'id': 8, 'height': 227, 'width': 287}, {'file_name': 'img_18.jpg', 'id': 9, 'height': 500, 'width': 375}, {'file_name': 'img_22.jpg', 'id': 10, 'height': 145, 'width': 210}, {'file_name': 'img_35.jpg', 'id': 11, 'height': 800, 'width': 800}, {'file_name': 'img_36.jpg', 'id': 12, 'height': 220, 'width': 293}, {'file_name': 'img_44.jpg', 'id': 13, 'height': 415, 'width': 475}, {'file_name': 'img_54.jpg', 'id': 14, 'height': 369, 'width': 429}, {'file_name': 'img_65.jpg', 'id': 15, 'height': 768, 'width': 1024}, {'file_name': 'img_78.jpg', 'id': 16, 'height': 645, 'width': 700}, {'file_name': 'img_83.jpg', 'id': 17, 'height': 736, 'width': 800}, {'file_name': 'img_92.jpg', 'id': 18, 'height': 210, 'width': 295}, {'file_name': 'img_97.jpg', 'id': 19, 'height': 768, 'width': 1024}]
这里是最简单的加载,然后使用提取出照片的id和value进行查看每个照片的images信息,在COCO使用的时候就已经全部读取好了,这里我们只需要提取对应的信息就可以了,接下来就讲解几个常用的函数,
三个get
getAnnIds,getCatIds,getImgIds顾名思义,coco里面的函数不是瞎起名字的,就是获得box信息的id,获得类别信息的id,获得照片的id,这是为了方便下一步的操作。
from pycocotools.coco import COCO

coco = COCO('./test/annotations.json')
ids1 = coco.getAnnIds()
print(ids1)
ids2 = coco.getImgIds()
print(ids2)
ids3 = coco.getCatIds()
print(ids3)
[1, 2, 3, 4, 5, 6, 7, 8, 9, 10, 11, 12, 13, 14, 15, 16, 17, 18, 19, 20, 21, 22, 23, 24, 25, 26, 27, 28, 29, 30, 31, 32, 33, 34]
[1, 2, 3, 4, 5, 6, 7, 8, 9, 10, 11, 12, 13, 14, 15, 16, 17, 18, 19]
[0, 1, 2, 3, 4, 5, 6, 7, 8, 9, 10, 11, 12, 13, 14, 15, 16, 17, 18, 19, 20, 21, 22, 23, 24, 25, 26, 27, 28, 29, 30, 31, 32, 33, 34, 35, 36, 37, 38, 39, 40, 41, 42, 43]
可以看出,就将各自当时记录的id加载进来了,这一步加载是必须的,这样才可以进行下一步的load操作
三个load
loadAnns,loadCats,loadImgs,这一步才是实质性的加载数据
from pycocotools.coco import COCO

coco = COCO('./test/annotations.json')
ids1 = coco.getAnnIds()
ids2 = coco.getImgIds()
ids3 = coco.getCatIds()
data1=coco.loadAnns(ids1[1])
print(data1)
data2=coco.loadImgs(ids3[1])
print(data2)
data3=coco.loadCats(ids3[1])
print(data3)
[{'id': 2, 'image_id': 2, 'bbox': [933, 88, 2178, 2559], 'category_id': 1, 'area': 5573502, 'iscrowd': 0}]
[{'file_name': '20190816_095611.jpg', 'id': 1, 'height': 4032, 'width': 3024}]
[{'id': 1, 'name': '书籍纸张'}]
学会这几个简单的操作就可以进行数据分析,统计json各种指标。
coco数据集json文件生成
import os
import cv2
import json
import xml.dom.minidom
import xml.etree.ElementTree as ET

data_dir = './data' #根目录文件,其中包含image文件夹和box文件夹(根据自己的情况修改这个路径)

image_file_dir = os.path.join(data_dir, 'image')
xml_file_dir = os.path.join(data_dir, 'box')

annotations_info = {'images': [], 'annotations': [], 'categories': []}

categories_map = {'holothurian': 1, 'echinus': 2, 'scallop': 3, 'starfish': 4}

for key in categories_map:
    categoriy_info = {"id":categories_map[key], "name":key}
    annotations_info['categories'].append(categoriy_info)

file_names = [image_file_name.split('.')[0]
              for image_file_name in os.listdir(image_file_dir)]
ann_id = 1
for i, file_name in enumerate(file_names):
    print(i)
    image_file_name = file_name + '.jpg'
    xml_file_name = file_name + '.xml'
    image_file_path = os.path.join(image_file_dir, image_file_name)
    xml_file_path = os.path.join(xml_file_dir, xml_file_name)

    image_info = dict()
    image = cv2.cvtColor(cv2.imread(image_file_path), cv2.COLOR_BGR2RGB)
    height, width, _ = image.shape
    image_info = {'file_name': image_file_name, 'id': i+1,
                  'height': height, 'width': width}
    annotations_info['images'].append(image_info)

    DOMTree = xml.dom.minidom.parse(xml_file_path)
    collection = DOMTree.documentElement

    names = collection.getElementsByTagName('name')
    names = [name.firstChild.data for name in names]

    xmins = collection.getElementsByTagName('xmin')
    xmins = [xmin.firstChild.data for xmin in xmins]
    ymins = collection.getElementsByTagName('ymin')
    ymins = [ymin.firstChild.data for ymin in ymins]
    xmaxs = collection.getElementsByTagName('xmax')
    xmaxs = [xmax.firstChild.data for xmax in xmaxs]
    ymaxs = collection.getElementsByTagName('ymax')
    ymaxs = [ymax.firstChild.data for ymax in ymaxs]

    object_num = len(names)

    for j in range(object_num):
        if names[j] in categories_map:
            image_id = i + 1
            x1,y1,x2,y2 = int(xmins[j]),int(ymins[j]),int(xmaxs[j]),int(ymaxs[j])
            x1,y1,x2,y2 = x1 - 1,y1 - 1,x2 - 1,y2 - 1

            if x2 == width:
                x2 -= 1
            if y2 == height:
                y2 -= 1

            x,y = x1,y1
            w,h = x2 - x1 + 1,y2 - y1 + 1
            category_id = categories_map[names[j]]
            area = w * h
            annotation_info = {"id": ann_id, "image_id":image_id, "bbox":[x, y, w, h], "category_id": category_id, "area": area,"iscrowd": 0}
            annotations_info['annotations'].append(annotation_info)
            ann_id += 1

with  open('./data/annotations.json', 'w')  as f:
    json.dump(annotations_info, f, indent=4)

print('---整理后的标注文件---')
print('所有图片的数量:',  len(annotations_info['images']))
print('所有标注的数量:',  len(annotations_info['annotations']))
print('所有类别的数量:',  len(annotations_info['categories']))
这里就生成json文件的代码,只需要修改文件位置和类别就可以,是xml文件存储信息转化json文件,仔细阅读下代码就很好理解。
总结
这一步学习能够理解各种目标检测进入训练的数据准备工作,学会之后就可以轻松应对比赛给出的各种形式都可以转化,配合之前我博客讲解的数据读取方面,目标检测这方面运用就可以了