上篇文章(.NET Core 微服务—API网关(Ocelot) 教程 [一])介绍了Ocelot 的相关介绍。
接下来就一起来看如何使用,让它运行起来。
环境准备
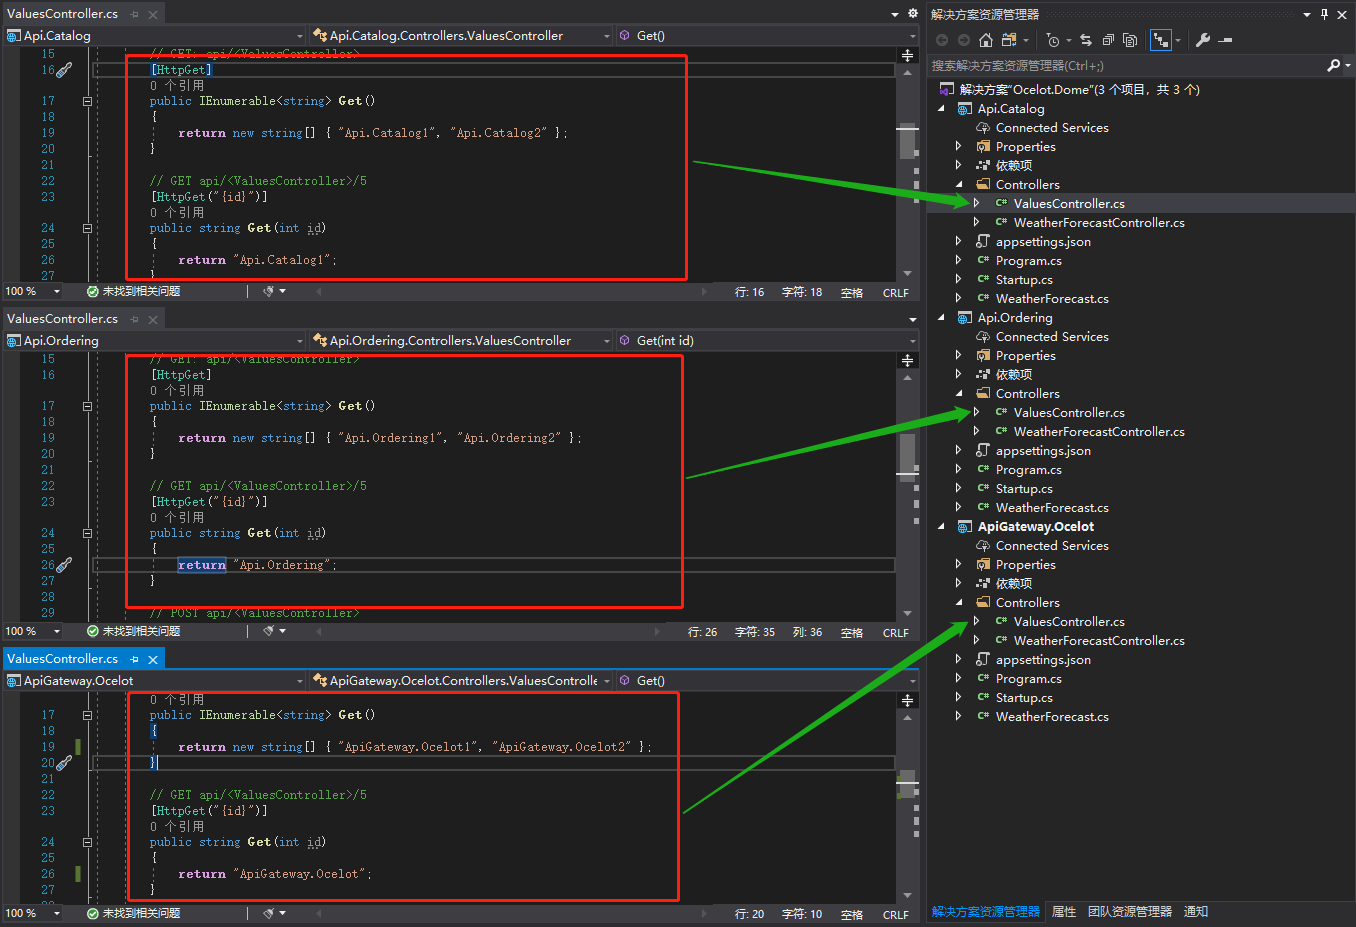
为了验证Ocelot 网关效果,我们先创建3个webapi项目:目录api(Api.Catalog)、订单api(Api.Ordering)、Ocelot网关(ApiGateway.Ocelot);并为每个WebApi项目添加Values控制器(ValuesController),用于区分最终调用效果
如下图:
Ocelot使用
1、添加Ocelot包依赖:
接下来使用Nuget包管理工具为ApiGateway.Ocelot项目添加Ocelot包引用:
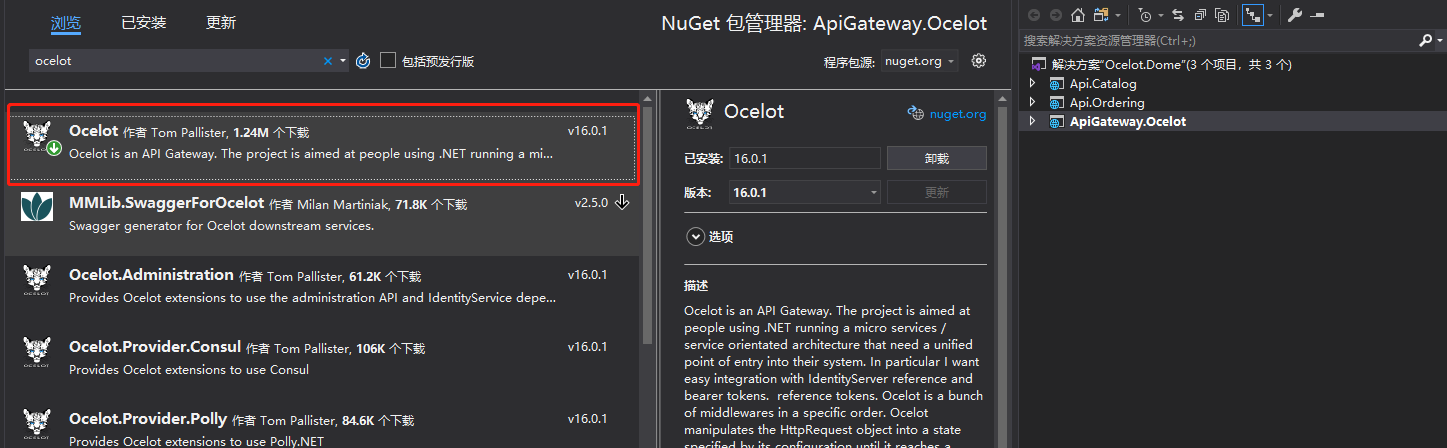
当然也可用使用命令方式添加Ocelot包:
Install-Package Ocelot
2、添加Ocelot配置文件:(重点)
向ApiGateway.Ocelot项目添加一个Ocelot.json配置文件,并修改配置文件为如下内容:


{
  "GlobalConfiguration": {

  },
  "Routes": [
    {
      "DownstreamPathTemplate": "/api/{everything}",
      "DownstreamScheme": "http",
      "DownstreamHostAndPorts": [
        {
          "Host": "localhost",
          "Port": 5331
        },
        {
          "Host": "localhost",
          "Port": 5332
        }
      ],
      "UpstreamPathTemplate": "/{everything}",
      "UpstreamHttpMethod": [ "Get", "Post" ],
      "LoadBalancerOptions": {
        "Type": "RoundRobin"
      }
    }
  ]
}
接下来简单介绍下相关配置节点意义。可以看出配置文件主要包含:Routes和GlobalConfiguration。完整的配置内容可以查看:官方文档
GlobalConfiguration:顾名思义就是全局配置,此节点的配置允许覆盖Routes里面的配置
Routes:告诉Ocelot如何处理上游的请求
  DownstreamPathTemplate:下游的路由模板,即真实处理请求的路径模板
  DownstreamScheme:请求的方式,如:http,https
  DownstreamHostAndPorts:下游的IP以及端口,可以有多个(如果使用负载均衡),方便实现负载均衡,当然你也可以使用服务发现,实现下游服务的自动注册与发现
  UpstreamPathTemplate:上游请求的模板,即用户真实请求的链接
  UpstreamHttpMethod:上游请求的http方法,是个数组,你可以写多个
  LoadBalancerOptions:负载均衡选项(DownstreamHostAndPorts有多个的时候才能看到效果),有三种方式
    LeastConnection : 将请求发往最空闲的那个服务器
    RoundRobin :轮流发送
    NoLoadBalance :不启用负载均衡,总是发往第一个请求或者服务发现的那个服务器
3、启用Ocelot中间件:
a) 首先在ApiGateway.Ocelot项目中的Program.cs中加载ocelot.json的配置文件,如下所示:
 public class Program
    {
        public static void Main(string[] args)
        {
            CreateHostBuilder(args).Build().Run();
        }

        public static IHostBuilder CreateHostBuilder(string[] args) =>
            Host.CreateDefaultBuilder(args)
                .ConfigureAppConfiguration((hostingContext, config) =>
                {
                    config.SetBasePath(hostingContext.HostingEnvironment.ContentRootPath)
                        .AddJsonFile("appsettings.json", true, true)
                        .AddJsonFile($"appsettings.{hostingContext.HostingEnvironment.EnvironmentName}.json", true, true)
                        .AddJsonFile("ocelot.json")
                        .AddEnvironmentVariables();
                })
                .ConfigureWebHostDefaults(webBuilder =>
                {
                    webBuilder.UseStartup<Startup>();
                });
    }
b) 接下来在Startup.cs文件中注册服务:
 public class Startup
    {
        public Startup(IConfiguration configuration)
        {
            Configuration = configuration;
        }

        public IConfiguration Configuration { get; }

        // This method gets called by the runtime. Use this method to add services to the container.
        public void ConfigureServices(IServiceCollection services)
        {
            services.AddOcelot();//注入Ocelot服务

            services.AddControllers();
        }

        // This method gets called by the runtime. Use this method to configure the HTTP request pipeline.
        public void Configure(IApplicationBuilder app, IWebHostEnvironment env)
        {
            if (env.IsDevelopment())
            {
                app.UseDeveloperExceptionPage();
            }

            app.UseOcelot().Wait();//使用Ocelot中间件

            app.UseRouting();

            app.UseAuthorization();

            app.UseEndpoints(endpoints =>
            {
                endpoints.MapControllers();
            });
        }
    }
c) 最后:
把目录api(Api.Catalog)、订单api(Api.Ordering)、Ocelot网关(ApiGateway.Ocelot)分别设置启动设置为:http://localhost:5332、http://localhost:5331、http://localhost:5330。
到此Ocelot基本使用完成,接下来验证下效果
效果验证:
通过ocelot.json设置可以得到:
- Ocelot网关设置生效,上游路由模板"/{everything}"对应下游路由模板"/api/{everything}"(也就是通过http://localhost:5330/values访问,最终访问的是http://localhost:5331/api/values或http://localhost:5332/api/values)
- 负载均衡选项设置的是:轮询(http://localhost:5330/values访问,刷新后两次结果不相同)
接着验证运行效果是不是这样:
1、打开http://localhost:5330/values 如下图:最终得到是: Api.Catalog 的结果

2、接着我们刷新下当前界面:得到如下结果:负载均衡轮询选项生效成功

总结:
通过上面的示例,非常简单的就成功的运行了Ocelot网关的路由效果和负载均衡的简单效果。
接下来我就要进一步详细了解Ocelot的配置内容和其他使用方式(如:认证服务方式、服务自动发现注册)