引言
VPF代表视频处理框架。它是一组C ++库和Python绑定,可为视频处理任务提供完整的硬件加速,例如解码,编码,转码以及GPU加速的色彩空间和像素格式转换。
VPF还支持将诸如解码视频帧之类的GPU内存对象导出到PyTorch张量,而无需“主机到设备”副本。
这是VPF的简介,可以看出,它是python中能进行硬解码的模块,相比于opencv来讲,它可以将解码的步骤全部交给GPU继而能让CPU更加的高效。但目前因为比较新不够成熟,所以有些函数依然会有很多的bug,下面介绍搭建过程和测试demo:
VPF搭建
这个搭建过程相比于opencv,坑少了太多太多,但一定需要注意的是cuda、ffmpeg以及video_sdk的版本问题。我也是实验了一两天,在版本方面上采坑无数,才成功编译。
版本环境
- Video_Codec_SDK_10.0.26
- ffmpeg-4.2.3
- cuda 10.2
- python 没有明确版本限制,但最好不低于3.6.5,我的版本是3.6.9
cuda问题总结
如果cuda是10.2并能在/usr/lib/目录下找到libnvcuvid.so并且不飘红,那么可以跳过这节。上面版本中,ffmpeg和video_sdk可以有版本变动,但最好用latest,cuda一定要选用10.2,因为cuda 10和cuda 11在我实验情况下都有编译问题,结果浪费了很多时间。下面是我的踩坑之旅。
cuda 10的问题:
不知道nvidia在10到10.2的版本变动间改了多少行数的使用和含义,但低于10.2是一定编译不会过的。上图来自GitHub和我犯过同样错误的一张图。
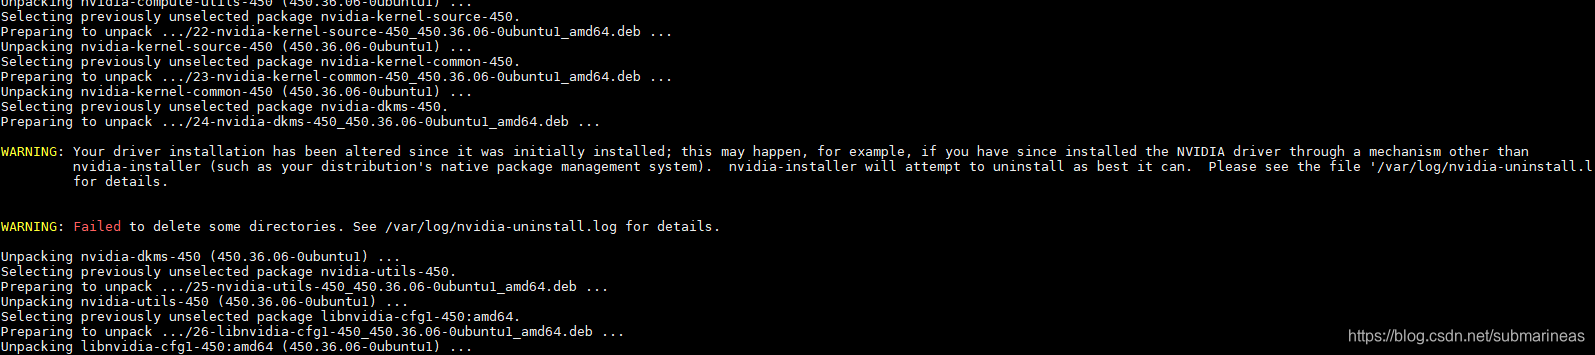
另外cuda 11的错误就可能是我的问题了,因为我本来是安装的cuda 10.2的deb包,但不知道为什么按照官网步骤,强行给我整成了11并且升级了驱动。。。我也很懵逼:
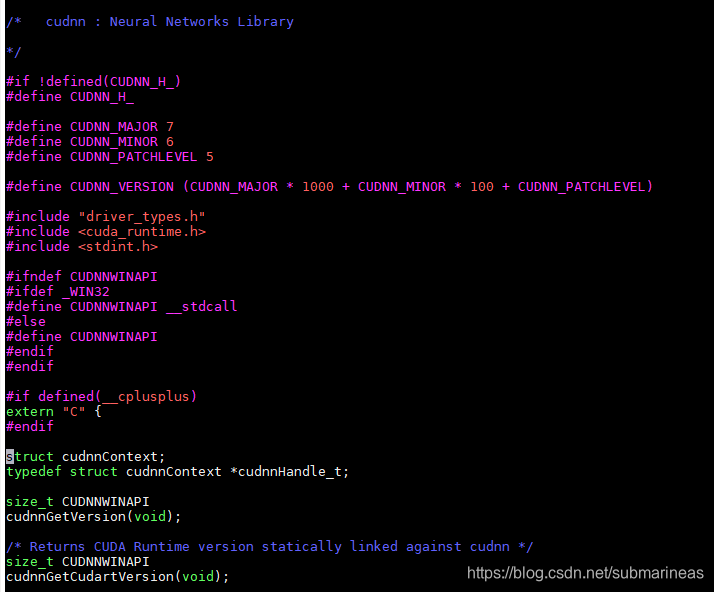
刚开始我想着是,升级就升级吧,那再彻底一点,然后去找了cudnn 8.0.1的版本,发现不太行,因为在8以下的版本,cudnn解压后的include文件夹下,只会有一个cudnn.h,进去后可以看到它会提示相应的版本号,也为之后能用cat /usr/local/cuda/include/cudnn.h | grep CUDNN_MAJOR -A 2命令埋下伏笔:
但cuda 8.0.1的cudnn.h是这样的:
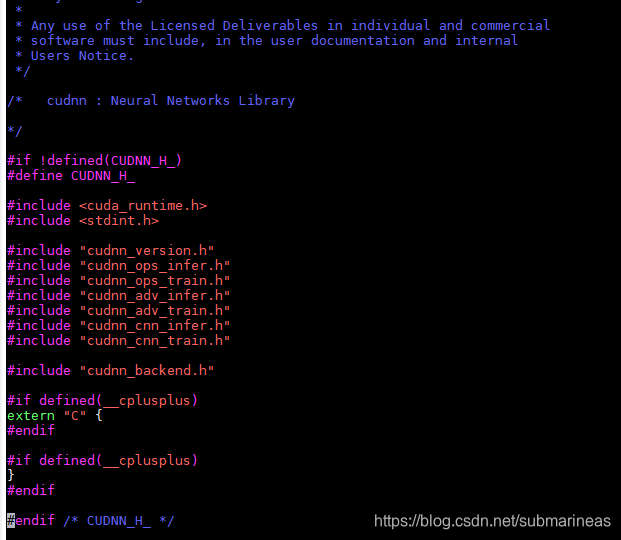
cudnn的include同级目录下h文件很多,而在cudnn_adv_train.h文件中反而能看到版本。emm…这个不太清楚转到usr/local/cuda/include后,cudnn怎么测,但后面在VPF编译的时候会出现错误,下面即是搭建过程。
搭建过程
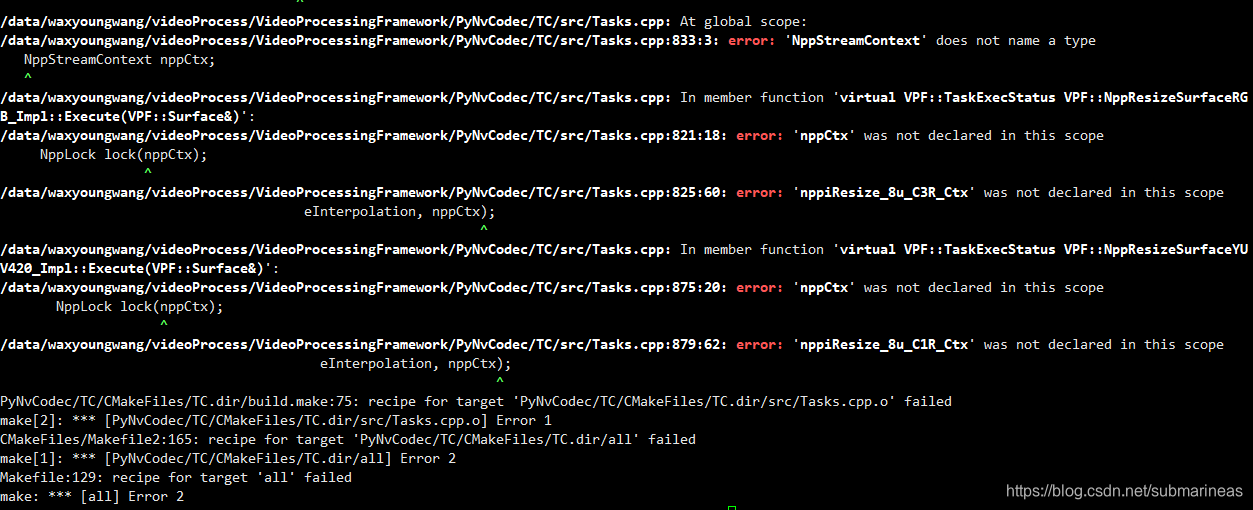
首先需要确定/usr/lib下的子目录里是否有libnvcuvid.so和libcuda.so文件,这是硬解码的关键,如果没有,请重新安装cuda,不然在编译过程中会出现如下错误:

另外也请确保ffmpeg已经用nvidia编译成功并用ldd ffmpeg检查是否都能找到动态库,这个的编译可以看我上一篇ffmpeg利用NVIDIA硬件加速编译
然后去NVIDIA官网下载最新版的video_sdk,解压在任意路径下。VPF用户用CMake通过find_library定位ffmpeg,如果bashrc有加那后面make的时候可以不用指定路径用shell命令都能找到,cuda和video_sdk同理:
$ vim ~/.bashrc

# 先设置环境变量
$ export PATH_TO_SDK=你的路径/Video_Codec_SDK_10.0.26
$ export PATH_TO_FFMPEG=/usr/local/ffmpeg	# 上一篇的绝对路径

$ git clone https://github.com/NVIDIA/VideoProcessingFramework.git

# 进入VideoProcessingFramework设置当前路径下的install为安装路径
$ export INSTALL_PREFIX=$(pwd)/install

$ mkdir -p install
$ mkdir -p build

# 开始编译
$ cd build
$ cmake .. \
  -DFFMPEG_DIR:PATH="$PATH_TO_FFMPEG" \
  -DVIDEO_CODEC_SDK_DIR:PATH="$PATH_TO_SDK" \
  -DGENERATE_PYTHON_BINDINGS:BOOL="1" \
  -DPYTHON_LIBRARY=/root/bin/anaconda3/lib/libpython3.7m.so \
  -DCMAKE_INSTALL_PREFIX:PATH="$INSTALL_PREFIX"

$ make && make install
如果版本对应,相应环境都启动了,基本不会有opencv那么多坑。。。opencv的安装难度比这个大得多,也可能是我先装的opencv,把环境搞得差不多了,它才没有遇到其它坑了,除了cuda版本。下面是检验:
$ ldd PyNvCodec.cpython-36m-x86_64-linux-gnu.so

$ cd ~/VideoProcessingFramework/install
python ./SampleDecode.py  0 rtmp://xxxx/xx/xx out.nv12
sampledecode代码如下:
import PyNvCodec as nvc
import numpy as np
import sys

def decode(gpuID, encFilePath, decFilePath):
    decFile = open(decFilePath, "wb")
    nvDec = nvc.PyNvDecoder(encFilePath, gpuID)

    #Amount of memory in RAM we need to store decoded frame
    frameSize = nvDec.Framesize()
    rawFrameNV12 = np.ndarray(shape=(frameSize), dtype=np.uint8)

    while True:
        try:
            success = nvDec.DecodeSingleFrame(rawFrameNV12)
            if not (success):
                print('No more video frames.')
                break

            bits = bytearray(rawFrameNV12)
            decFile.write(bits)

        except nvc.HwResetException:
            print('Continue after HW decoder was reset')
            continue

if __name__ == "__main__":

    print("This sample decodes input video to raw NV12 file on given GPU.")
    print("Usage: SampleDecode.py $gpu_id $input_file $output_file.")

    if(len(sys.argv) < 4):
        print("Provide gpu ID, path to input and output files")
        exit(1)

    gpuID = int(sys.argv[1])
    encFilePath = sys.argv[2]
    decFilePath = sys.argv[3]

    decode(gpuID, encFilePath, decFilePath)
这个都非常好理解,产生一个等值的容器去获取解码后的流,已经有点C++的内味了,并且避免了内存泄漏的问题,因为python调C++的东西,如果C没有自动释放,我用这个框架的目的也是为了避免内存泄漏,将解码到获取图片都交给GPU去做提升效率,但最后结果可能还是有点差强人意吧。
import PyNvCodec as nvc
import numpy as np
import sys
from threading import Thread
class Worker(Thread):
def __init__(self, gpuID, encFile):
Thread.__init__(self)
self.nvDec = nvc.PyNvDecoder(encFile, gpuID, {'rtsp_transport': 'tcp', 'max_delay': '5000000', 'bufsize': '30000k'})
width, height = self.nvDec.Width(), self.nvDec.Height()
hwidth, hheight = int(width / 2), int(height / 2)
self.nvCvt = nvc.PySurfaceConverter(width, height, self.nvDec.Format(), nvc.PixelFormat.YUV420, gpuID)
self.nvRes = nvc.PySurfaceResizer(hwidth, hheight, self.nvCvt.Format(), gpuID)
self.nvDwn = nvc.PySurfaceDownloader(hwidth, hheight, self.nvRes.Format(), gpuID)
self.num_frame = 0
def run(self):
try:
while True:
try:
rawSurface = self.nvDec.DecodeSingleSurface()
if (rawSurface.Empty()):
print('No more video frames')
break
except nvc.HwResetException:
print('Continue after HW decoder was reset')
continue
cvtSurface = self.nvCvt.Execute(rawSurface)
if (cvtSurface.Empty()):
print('Failed to do color conversion')
break
resSurface = self.nvRes.Execute(cvtSurface)
if (resSurface.Empty()):
print('Failed to resize surface')
break
rawFrame = np.ndarray(shape=(resSurface.HostSize()), dtype=np.uint8)
success = self.nvDwn.DownloadSingleSurface(resSurface, rawFrame)
if not (success):
print('Failed to download surface')
break
self.num_frame += 1
if( 0 == self.num_frame % self.nvDec.Framerate() ):
print(self.num_frame)
except Exception as e:
print(getattr(e, 'message', str(e)))
decFile.close()
def create_threads(gpu_id1, input_file1, gpu_id2, input_file2):
th1 = Worker(gpu_id1, input_file1)
th2 = Worker(gpu_id1, input_file1)
th1.start()
th2.start()
th1.join()
th2.join()
if __name__ == "__main__":
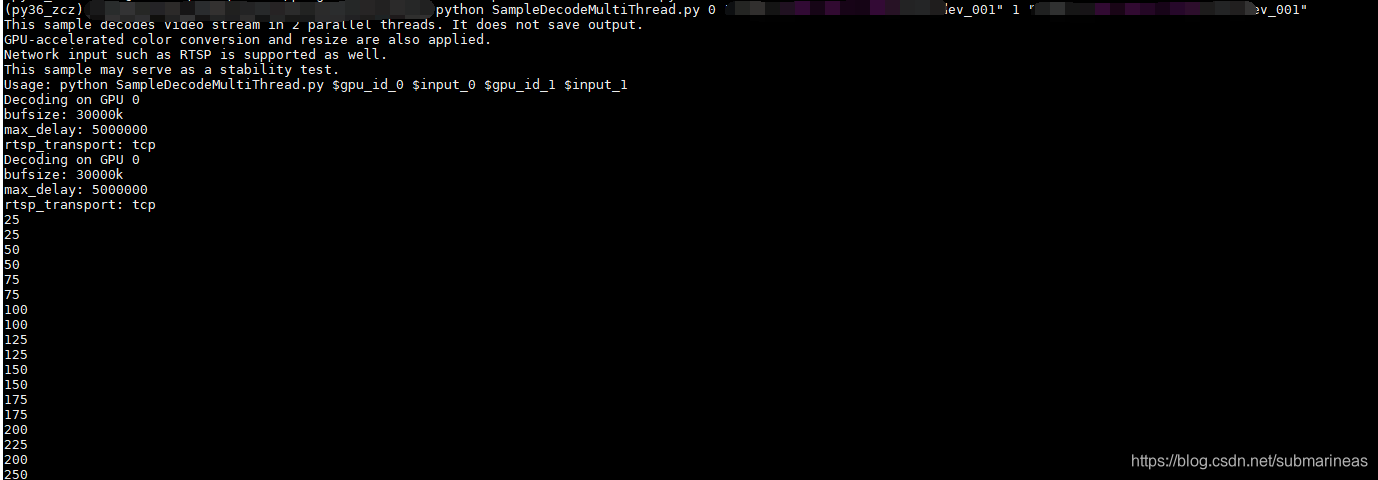
print('This sample decodes video stream in 2 parallel threads. It does not save output.')
print('GPU-accelerated color conversion and resize are also applied.')
print('Network input such as RTSP is supported as well.')
print('This sample may serve as a stability test.')
print('Usage: python SampleDecodeMultiThread.py $gpu_id_0 $input_0 $gpu_id_1 $input_1')
if(len(sys.argv) < 5):
print("Provide input CLI arguments as shown above")
exit(1)
gpu_1 = int(sys.argv[1])
input_1 = sys.argv[2]
gpu_2 = int(sys.argv[3])
input_2 = sys.argv[4]
create_threads(gpu_1, input_1, gpu_2, input_2)
这个我们可以用python ./SampleDecodeMultiThread.py 0 rtmp://xxxx/xx/xx 1 rtmp://xxx/xx的方式使用双卡GPU进行编译,需要注意的是如果要使用resize函数,还需要一个Converter转换器,根据该模块作者的意思,目前NVIDIA是靠NPP库来进行大小调整,但目前只支持YUV420和RGB,如果不知道自己的视频流是什么格式,最好加个转换器。
哈哈,上图为我提问的时候截的,因为提的问题有点偏,就不贴链接献丑了。